

In Dynamics 365 Finance and Operations creating a product can be a tedious time consuming process simply because there are so many options for configuring the product. However, there is a product template feature that is intended to automate part of the product setup. The product template allows a user to set a template that will copy field values to certain fields on the released product form eliminating the need to manually populate them.
In this post we will go through how to set up and use a product template, what the best strategies are to use the product template, and some limitations to the feature.
Create a Product Template
Before we get into creating a product template let’s first discuss the best way to use product templates. The biggest limitation to the product template is that the fields that are copied from the template are limited to the fields on the released products form. This means that related tables like default order settings, item coverage, barcodes, etc. are not included in the data that gets copied from the template. Those will still need to be entered manually as part of the product creation process.
The strategy I would recommend is to create a product template by item group. Typically items in an item group are set up in a very similar way and item group is a required field and that is obviously specific to the item group falls into. So, unless you have a large number of item groups I would create a product template for each item group. The fields that should be included in the product template should also be fields that would not change from item to item within an item group. So, for example you would not include a base purchase price in the template where you would want to include the storage dimension field.
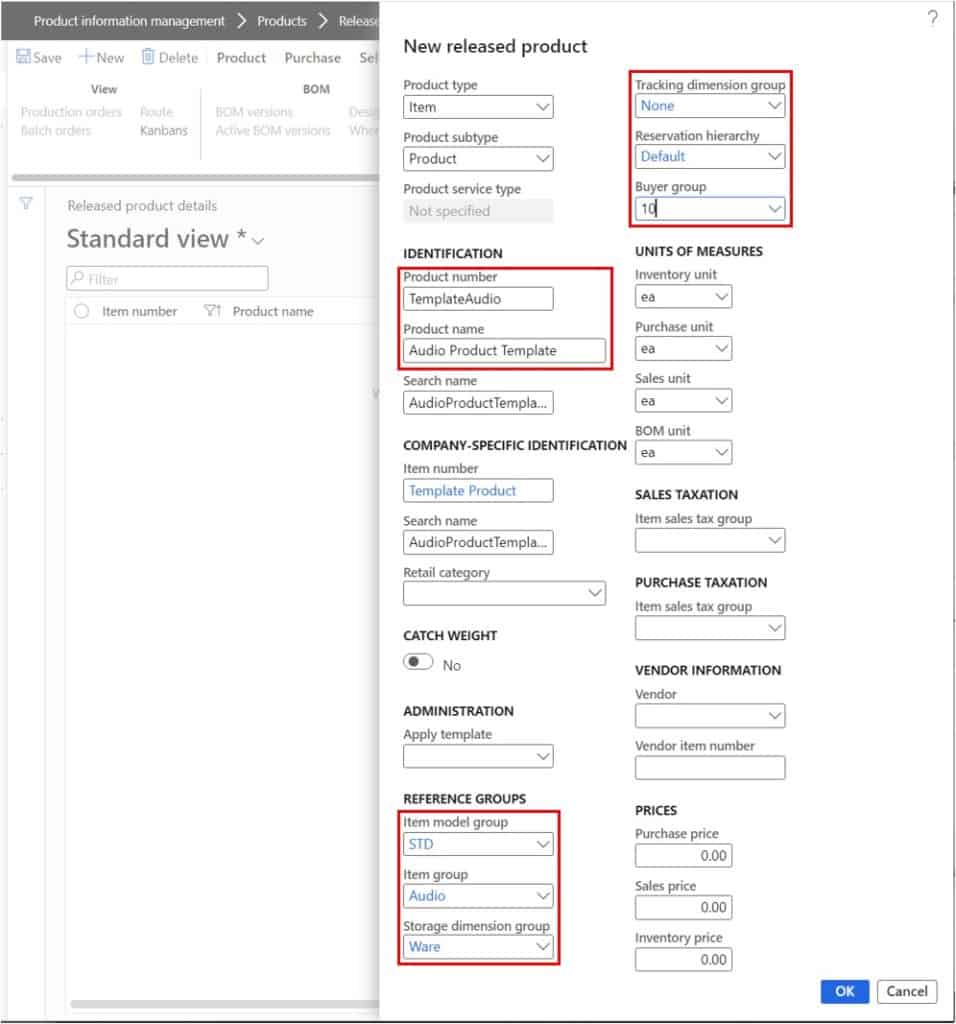
Now that we are clear on the strategy let’s go though how to create a template. In this example I am going to create a product template for the “Audio” item group. Navigate to Product information management > Products > Released products. Click the “New” button to create a new product. For the “Product number” field you can enter whatever you want because after we create the template, we will be deleting this product anyway. For the product name just put in a descriptive name that indicates that this is only a product template product.
Next fill in the following fields with the correct values according to your setup and your items group.
- Item model group
- Item group
- Storage dimension group
- Tracking dimension group
- Reservation hierarchy (If applicable)
- Buyer group (if applicable)
Then click the “Ok” button to create the product.
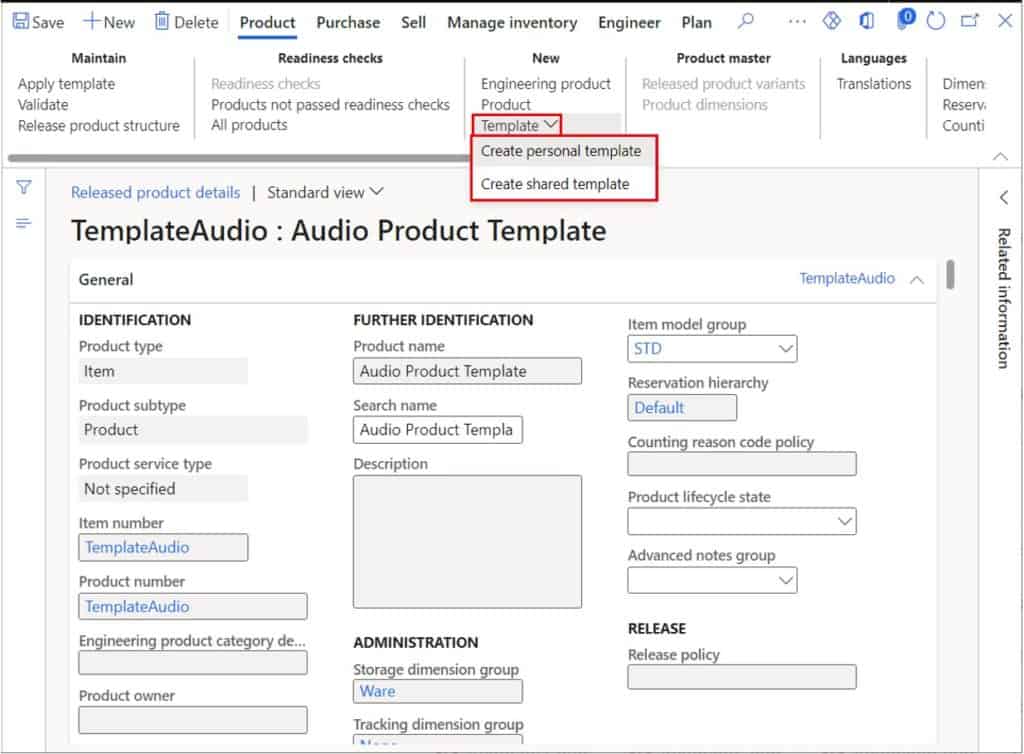
This will create the product. The next step is to only fill in fields on the released product form that would apply to all items in this item group. So, if a field does not apply to all items within an item group leave it blank.
After you have filled in all the fields you want to be defaulted for items in this item group click the “Template” button in the “Product” tab in the ribbon and select either “Create personal template” or “Create shared template”. A personal template is a template that only you can see and a shared template is one that everyone can see. In my case I will select “Create a personal template” because I want to limit this template to only me.
Next, in the “Name” field enter the name of the template and if necessary, enter a “Description” and then click the “Ok” button.
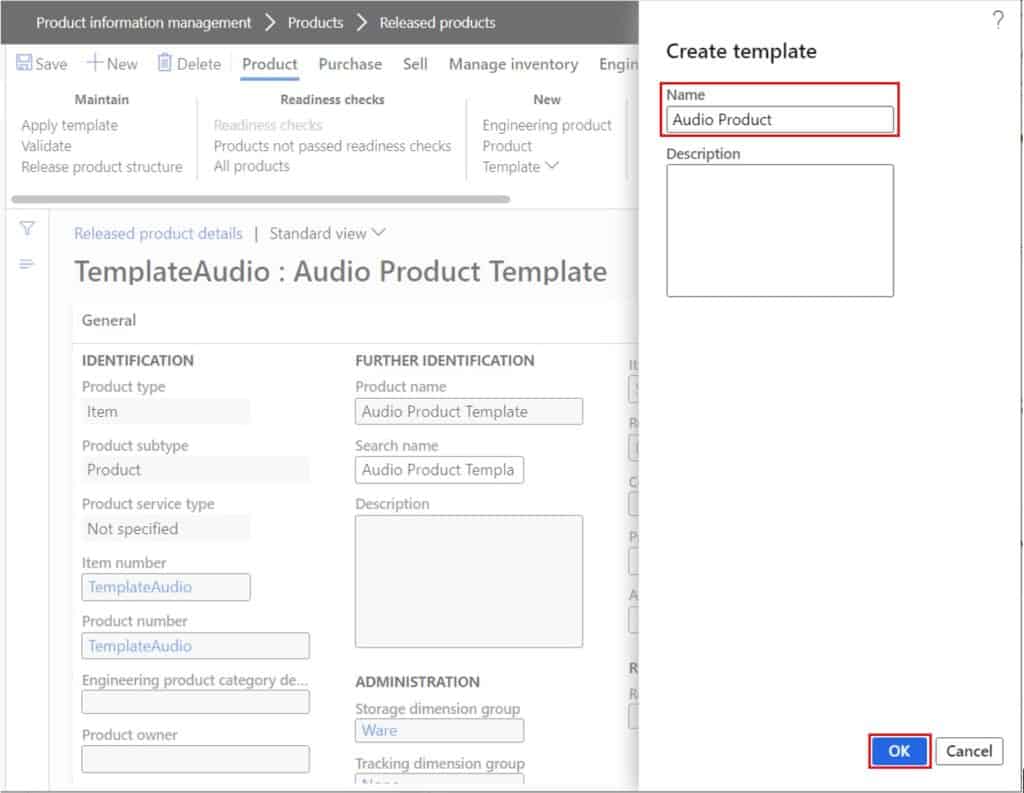
Now what you can do is delete this product that we used to create the template. You will want to make sure you delete this item from the released products form as well as the products form.
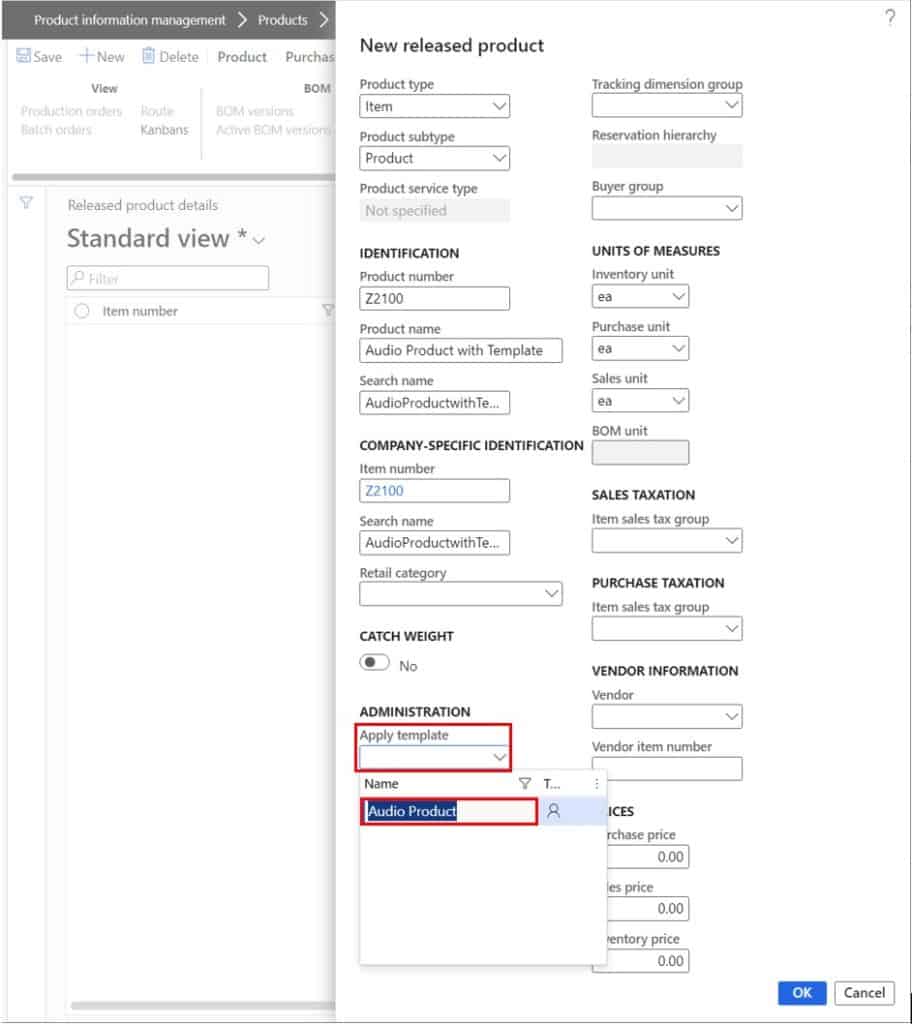
Apply a Product Template
Now we can create a real item and apply our template. This will copy over all the fields that were set on our template at the time we created the template. Click the “New” button to create a new product and enter the product number as well as the product name just like you would to create a new product. Then in the “Apply template” field we can select the template we want to apply. This will copy over the fields for us. From here all we need to do is complete the remainder of the product set up which includes any fields that might be different from product to product or data in related tables like default order settings, item coverage, etc.
Takeaways
Product creation in D365 Finance and Operations can be a tedious task and prone to error if users are not diligent entering the fields required for the proper behavior of that item. However, the product template as you have seen here is a really good way to not only expedite the process but also ensure that fields that need to be filled out are not missed during product creation.