

In D365 Finance and Operations sales category hierarchies are used for products and services classification or hierarchical reporting and analysis purposes.
Microsoft Dynamics 365 allows you to create multilevel category hierarchies depending on the products and services structure and requirement of the sales team. You can create the Sales category hierarchy to process sales documents such as sales quotations and sales orders without the overhead of creating new items. This is extremely useful when companies do not want to use the warehouse picking processes or when selling the non-tangible products and services.
In this article we shall learn how to:
- Set up a category hierarchy
- Inactivate and activate a category
- Associate hierarchy type/role to the category
- Set the revenue posting profile for a sales category
- Create and process a sales order for a sales category
- Associate a sales category to a released product
Set Up Sales Category Hierarchy
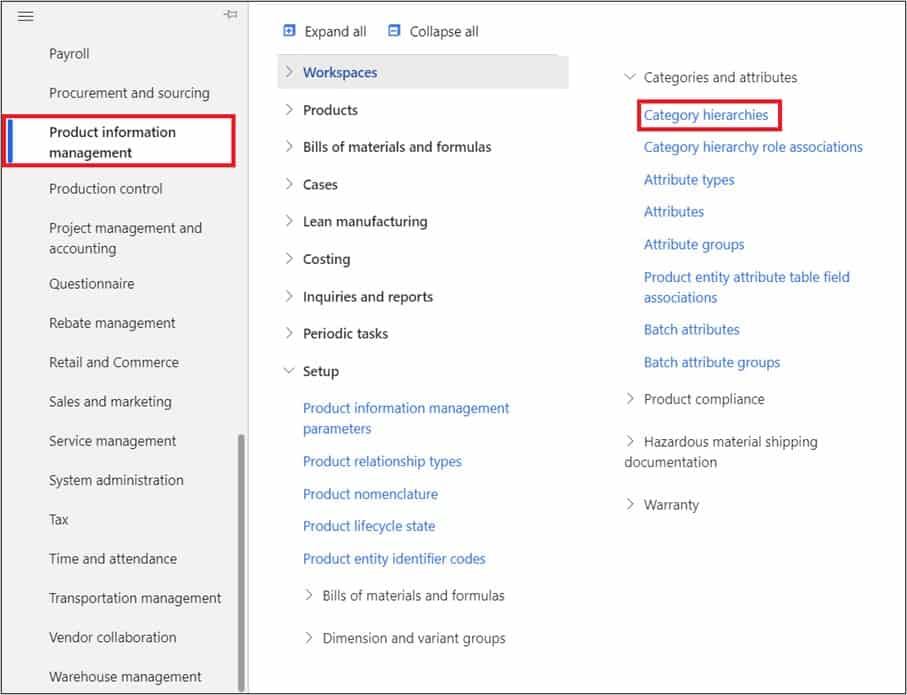
To set up a sales category hierarchy navigate to Production information management > Setup > Categories and attributes > Category hierarchies.
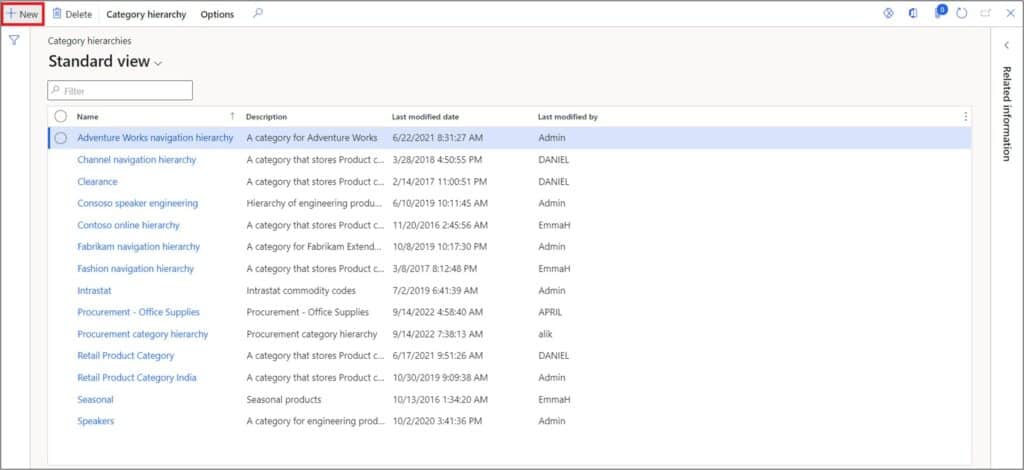
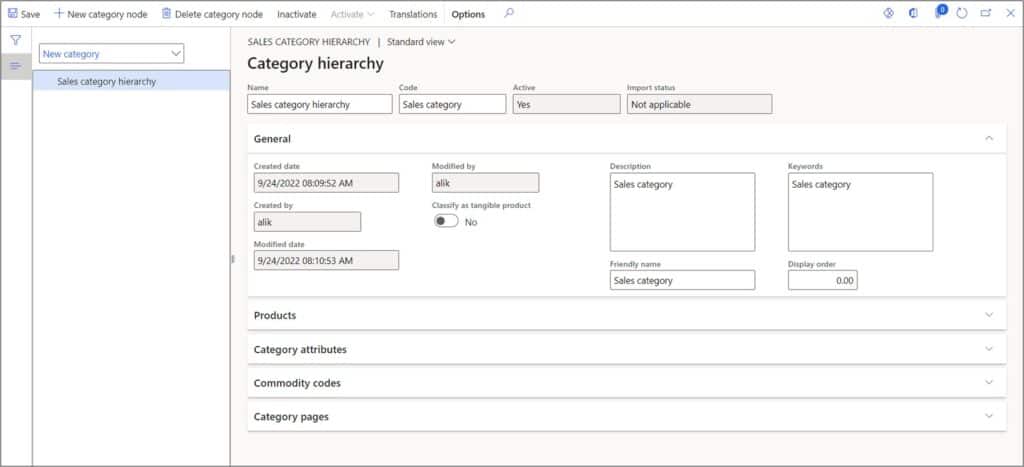
On the Category hierarchies page, click the New button.
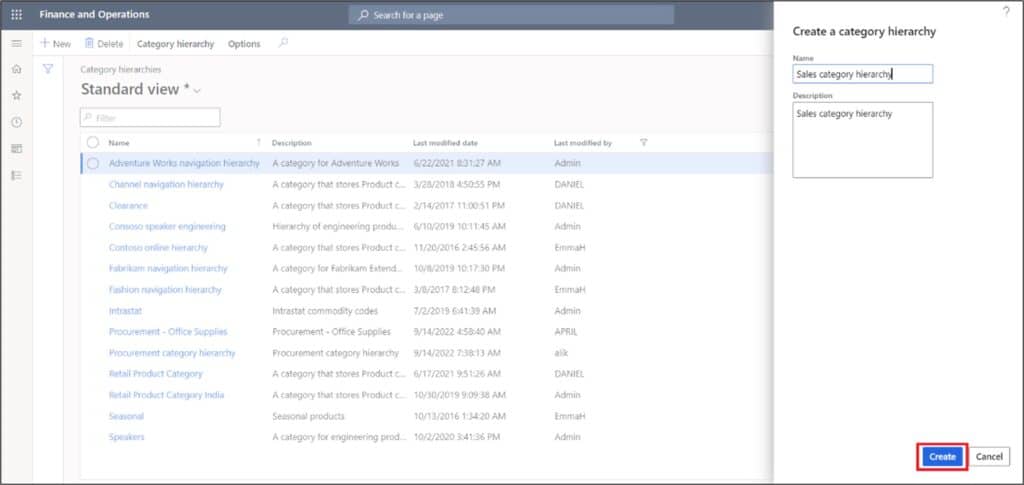
Enter the Category hierarchy name in the name field. Enter the Category hierarchy Description in the Description field. Click the Create button.
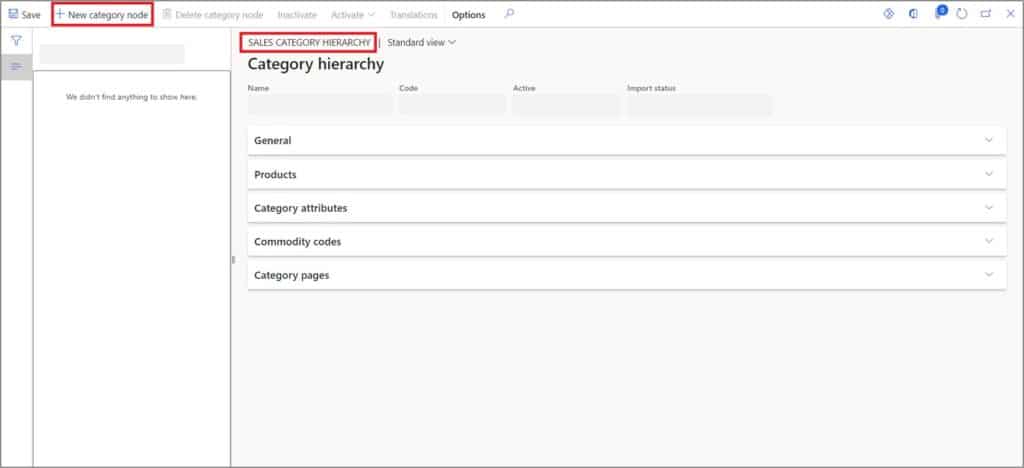
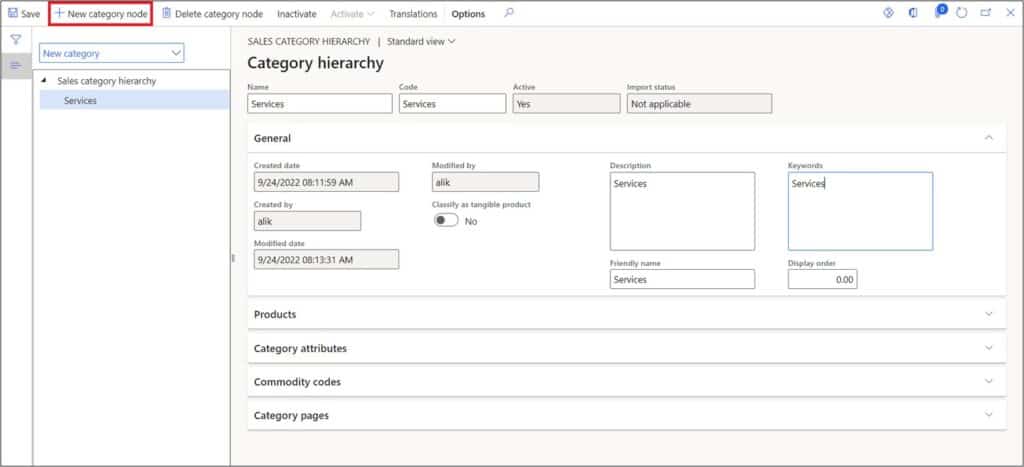
After clicking the create button, the Category hierarchy page opens where you can create multilevel hierarchy for your sales categories. We will create a three-level category hierarchy as an example. On the Category hierarchy page, click the New category node button.
Enter the Category hierarchy name in the Name field. Enter the Category hierarchy code in the Code column. You can also add the commodity code in this column.
General Tab
Select No in ‘Classify as tangible product.’ If you select Yes, the products which will be associate to this category will be considered tangible items only, not services. Enter the Category hierarchy Description, Friendly name, and Keywords. Enter the Display order to see the Category hierarchy in the order set here. Click the Save button.
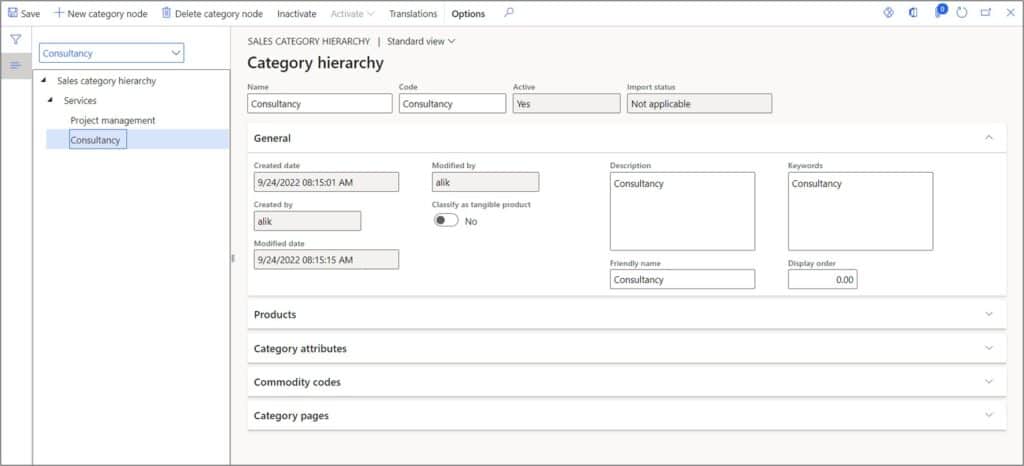
Select the Category hierarchy which was just created and click the New category node button. This will create the sub-category of selected category. Enter the details for the sub-category and click the Save button.
Select the Sub-category hierarchy which was just created and click the New category node button. This will create the sub-category of selected sub-category. Enter the details for the sub-category and click the Save button. Now we have three level Category hierarchy.
Products Tab
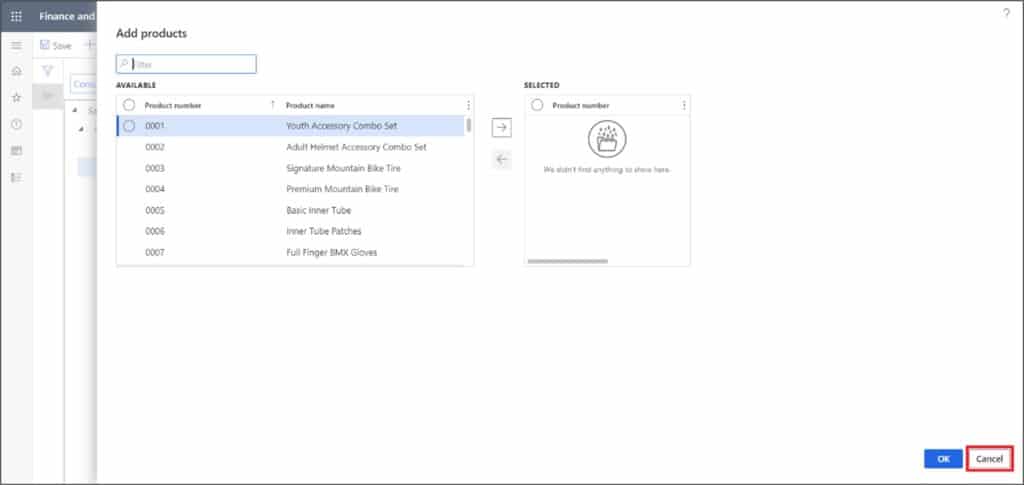
Click the Add button to associate existing Products to the selected Category.
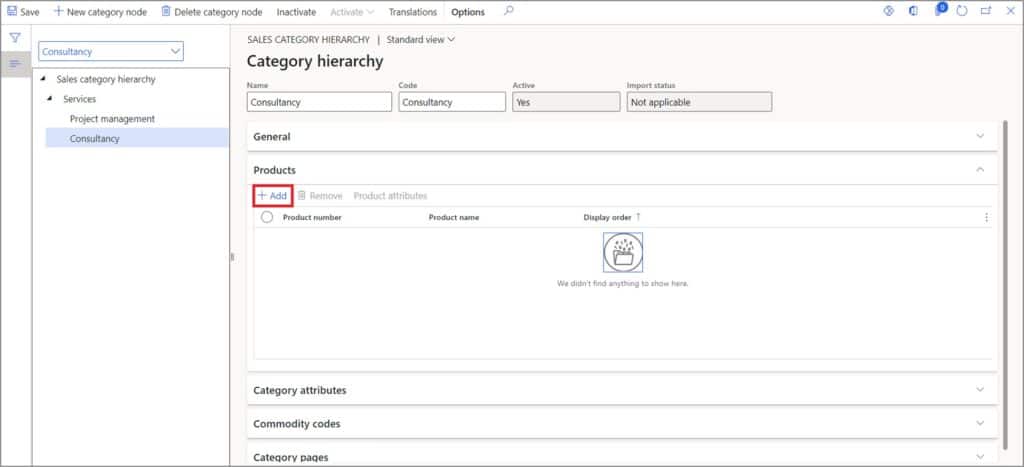
Add products page shows all the products. To associate the Category to the products, select the products and click the add button. For now, we will not associate this category to the Products. Click the Cancel button to exit.
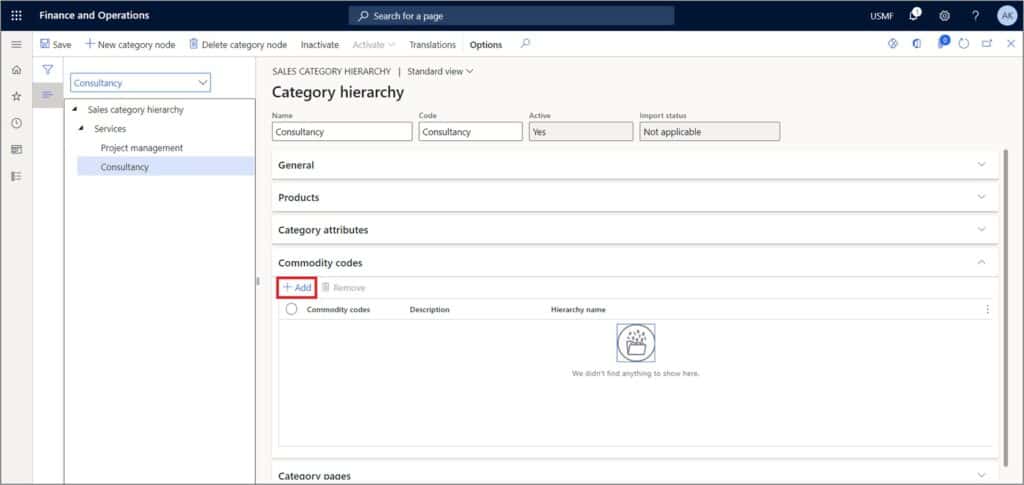
Commodity Codes Tab
Commodity codes are internationally recognized reference numbers for products and services. You can add multiple commodity codes for the Category hierarchy. We will add Commodity code as an example. Click the Add button.
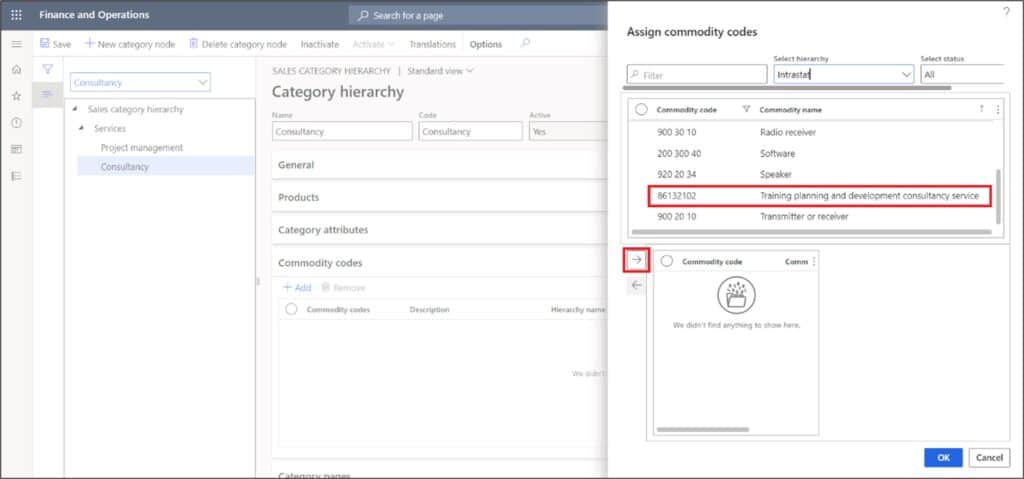
Select and add the commodity code from available list.
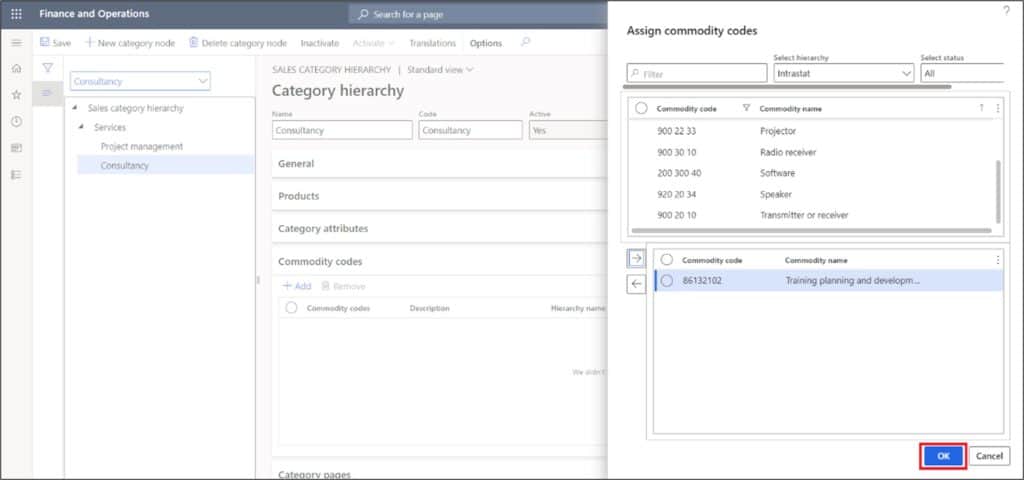
Click the Ok button.
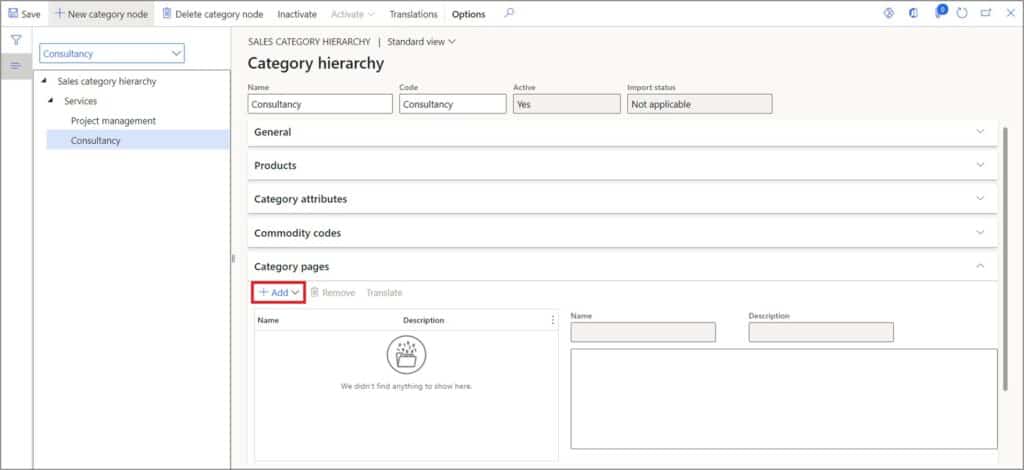
Category Pages Tab
Category pages tab serves the purpose to add detailed information in a customizable manner. To add the Category pages, click the Add button.
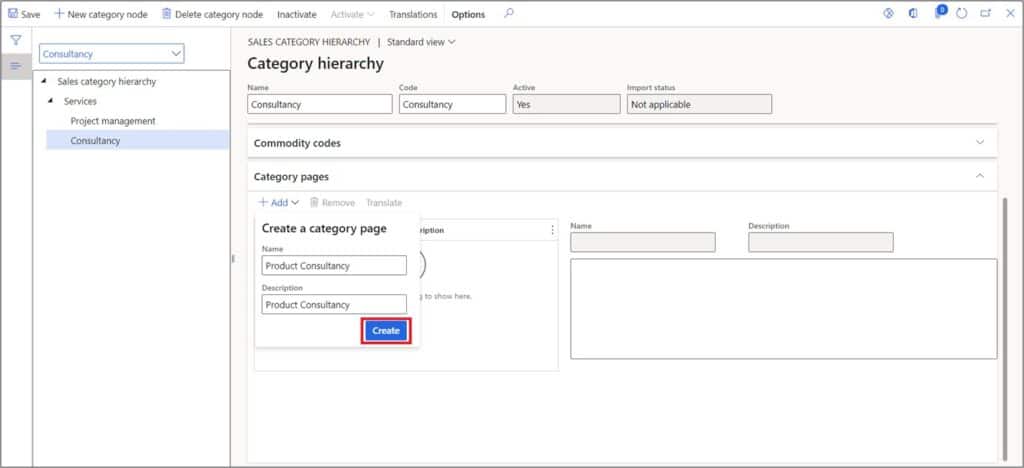
Enter the Category page name in the Name field. Enter the Category page description in the Description field. Click the Create button.
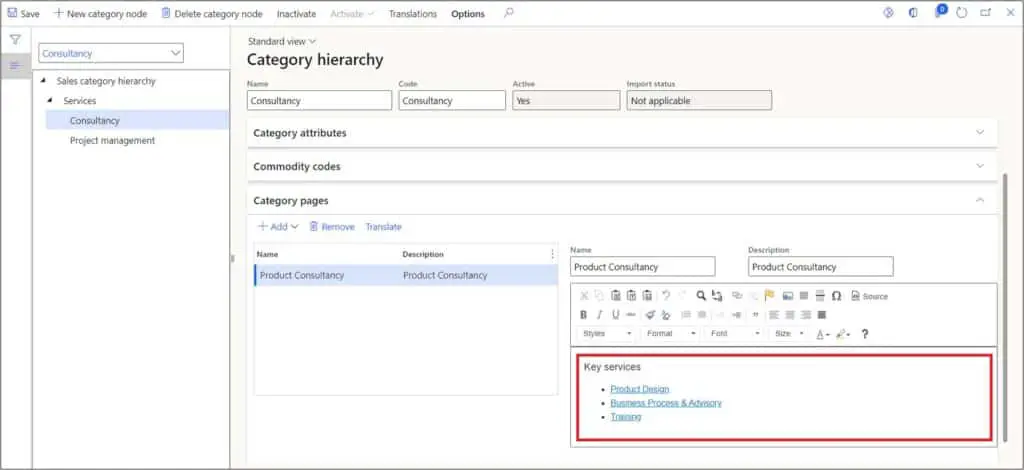
Enter the Category page details. Click the Save button.
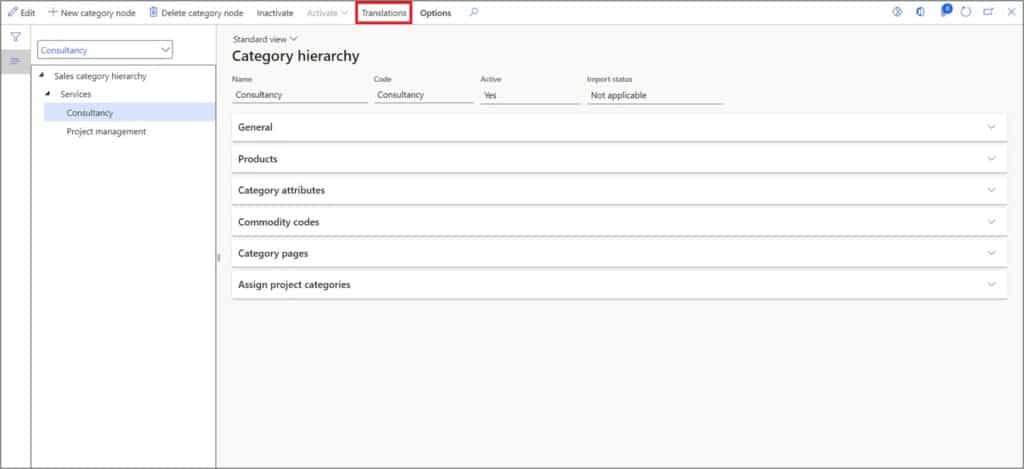
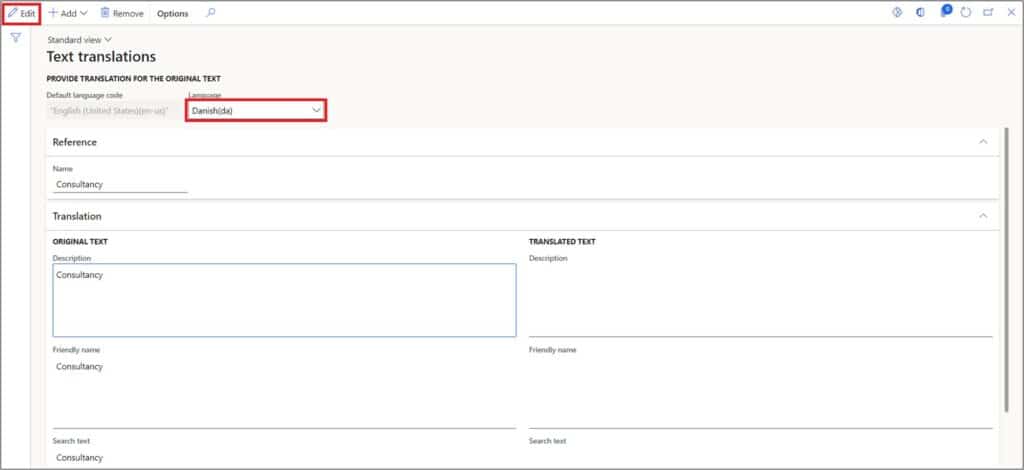
Once you have created all the levels of the Category hierarchy, you can enter the translation for the Category names. On the Category hierarchy, Click the Translation button.
Select the language in which you want to enter the Translation. You can add the missing languages by clicking on the Add button. Click the Edit button.
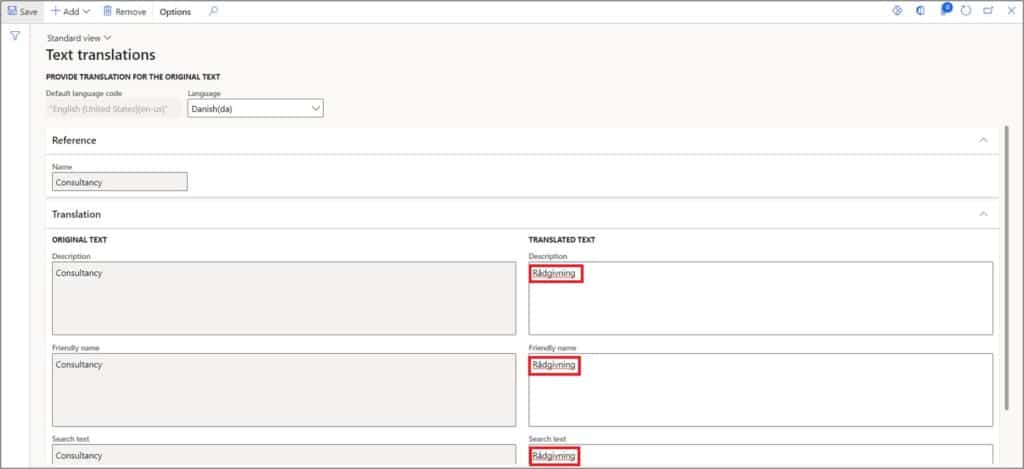
Enter the Translation in the Description, Friendly name, and Search text field. Click the Save button.
Activate and Inactivate a Category
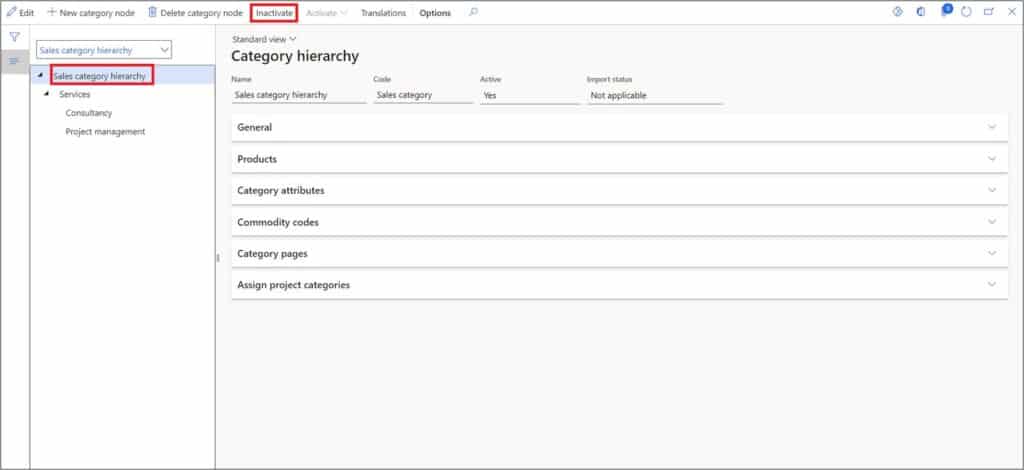
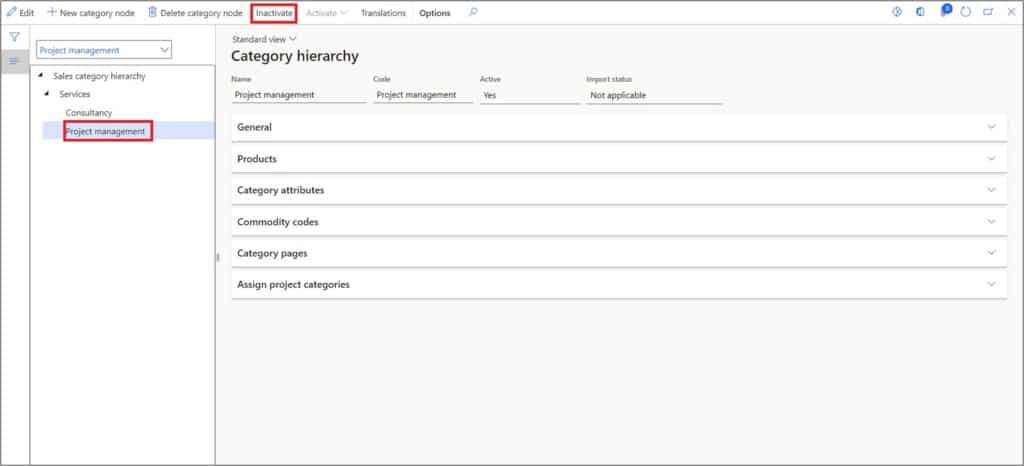
You can inactivate and activate the Category hierarchy whenever you want. To inactivate, select the parent Category in the hierarchy and click the Inactivate button.
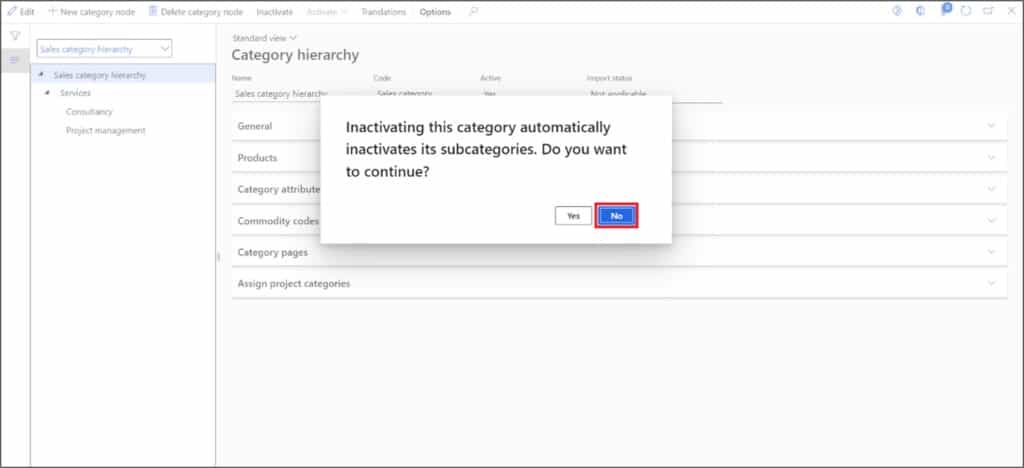
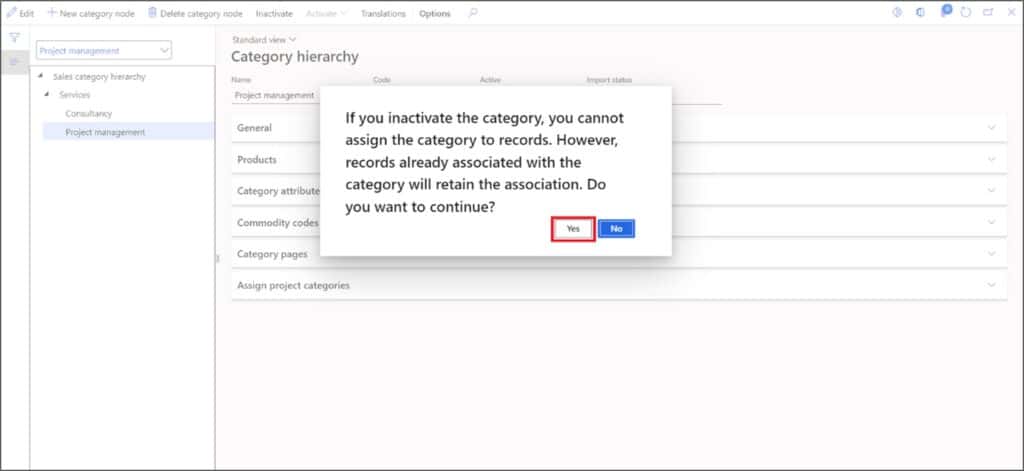
On clicking the Inactivate button, the confirmation alert appears. If you select Yes, all the sub-categories will also be inactivated. Select No to cancel the Inactivation.
In case of a last level Category in the hierarchy, the behavior will be different. Select the Category on the las level. Click the Inactivate button.
On clicking the Inactivate button, the confirmation alert appears. If you select Yes, only the selected Category will be inactivated. Select Yes to Inactivate.
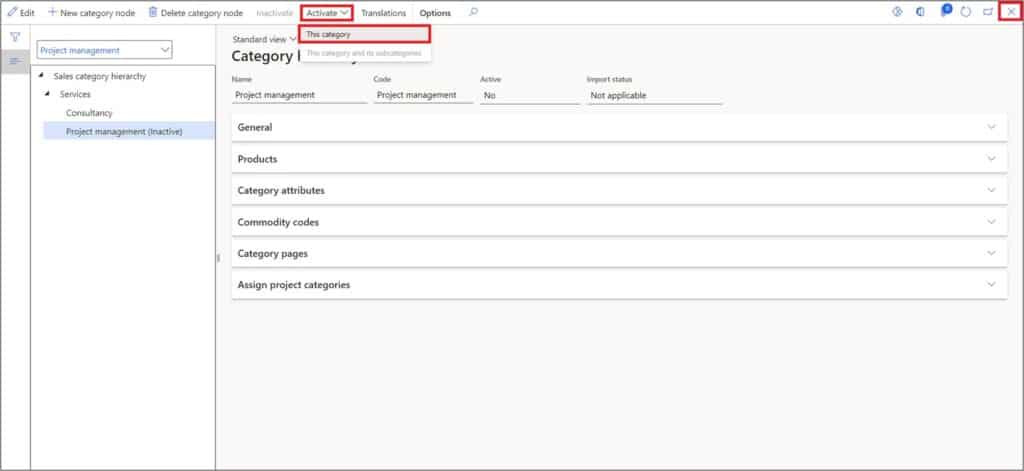
To activate the Category, select the inactivated Category. Click the Activate > This category button.
Associate Hierarchy Type/Role
Associating the hierarchy Category type is the most important part. The category hierarchy that we have just created will be available for use after we associate the hierarchy type.
The type that you associate, determines how and where the category hierarchy appears in Microsoft Dynamics 365. For example, in our case we will assign the ‘Sales category hierarchy’ to the Category hierarchy that we have created.
Note: If you do not associate the ‘Sales category hierarchy,’ you will not be able to access the Sales category page in Sales and marketing and you will face the following error:
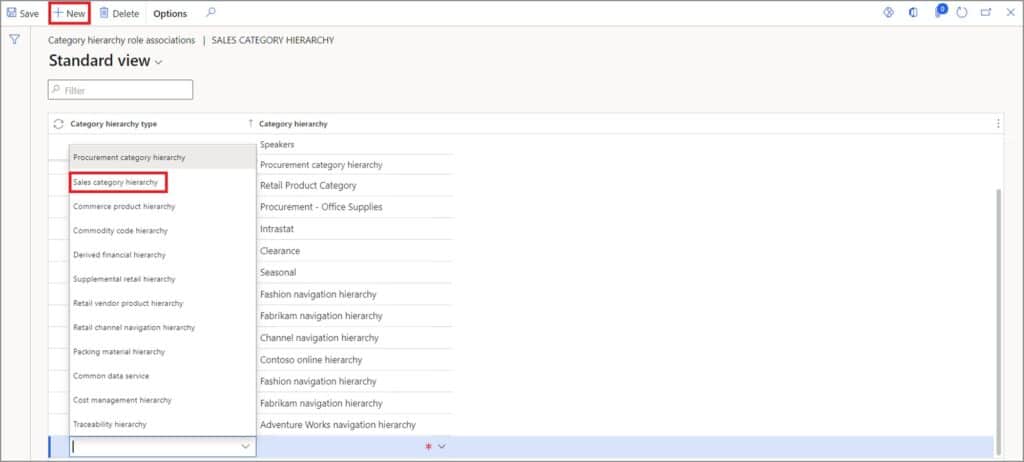
‘Your organization does not have a sales category hierarchy. Set up a sales category hierarchy in the Product information management module.’ On the Category hierarchies page, select the Category hierarchy. Click the Associate hierarchy type button.
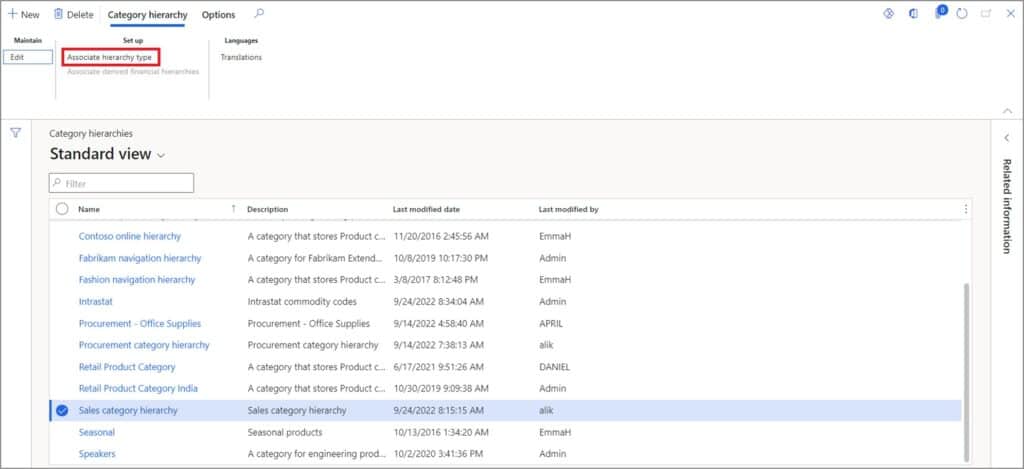
On the Category hierarchy role associations page, click the New button. Select the ‘Sales category hierarchy’ in the Category hierarchy type field.
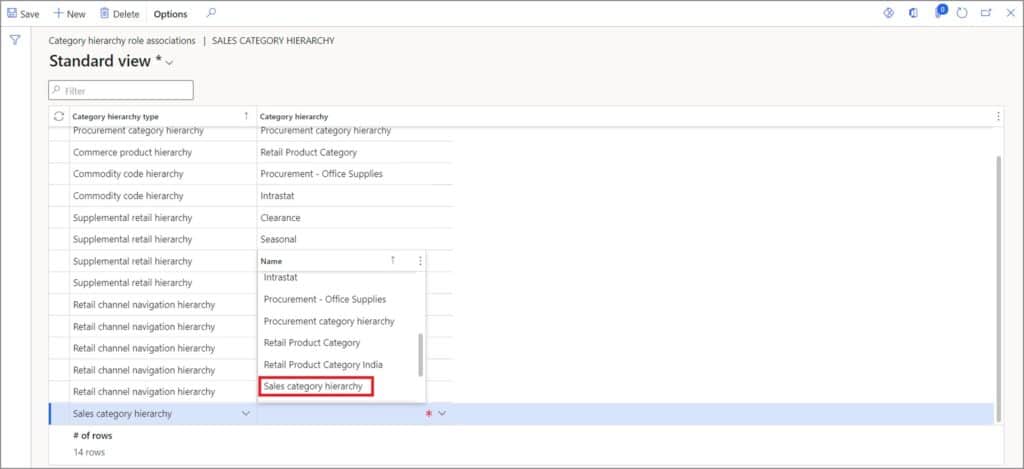
In the Category hierarchy field, select the Category hierarchy that we created. Click the Save button.
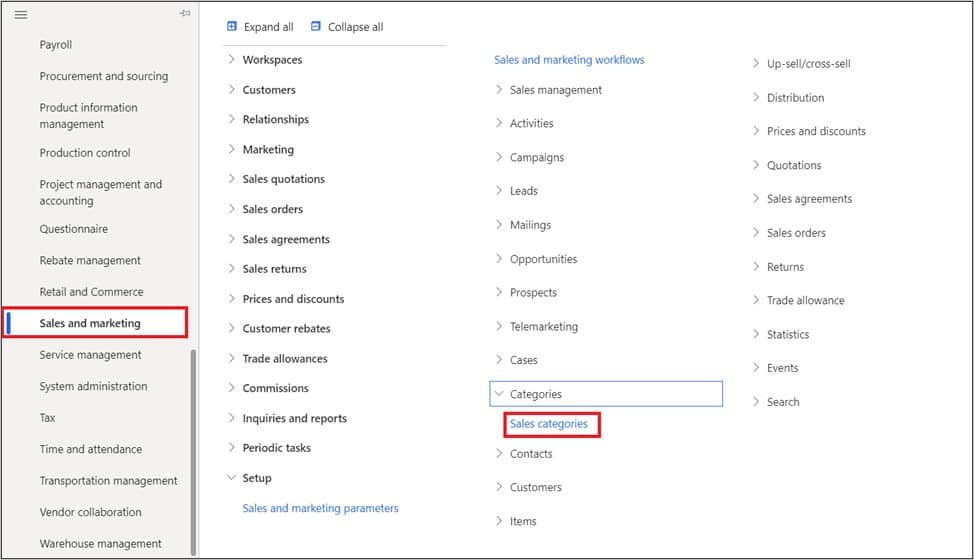
Once the hierarchy type is associated to the Category hierarchy, you can access the Sales categories page. Navigate to Sales and marketing > Setup > Categories > Sales categories.
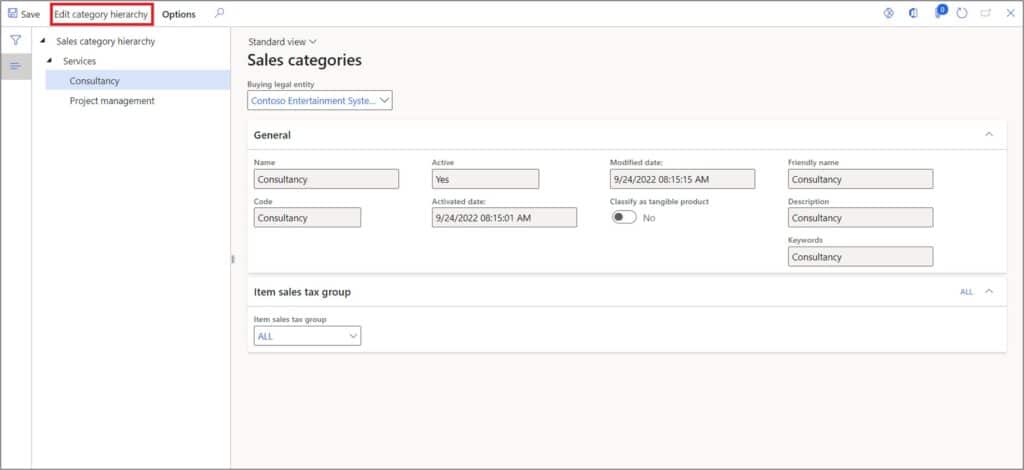
The Sales category page shows the category hierarchy that has the type ‘Sales category hierarchy’ associated to it.
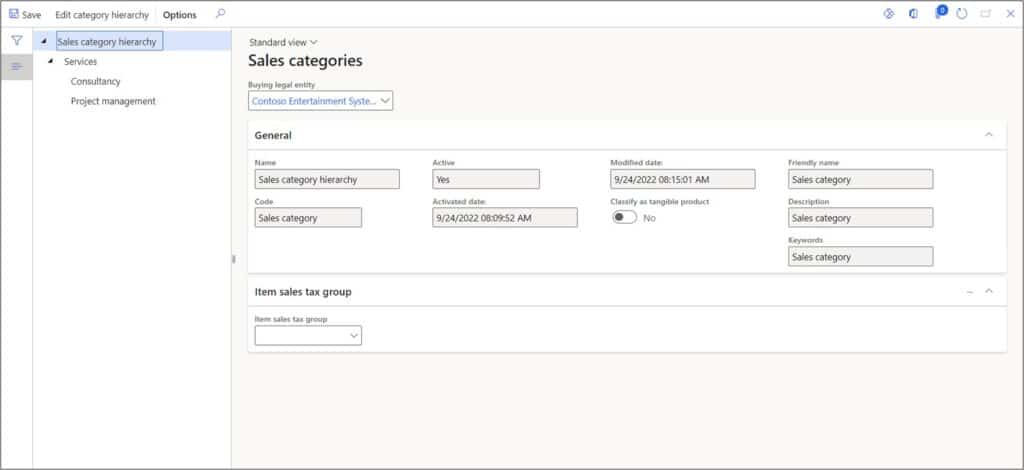
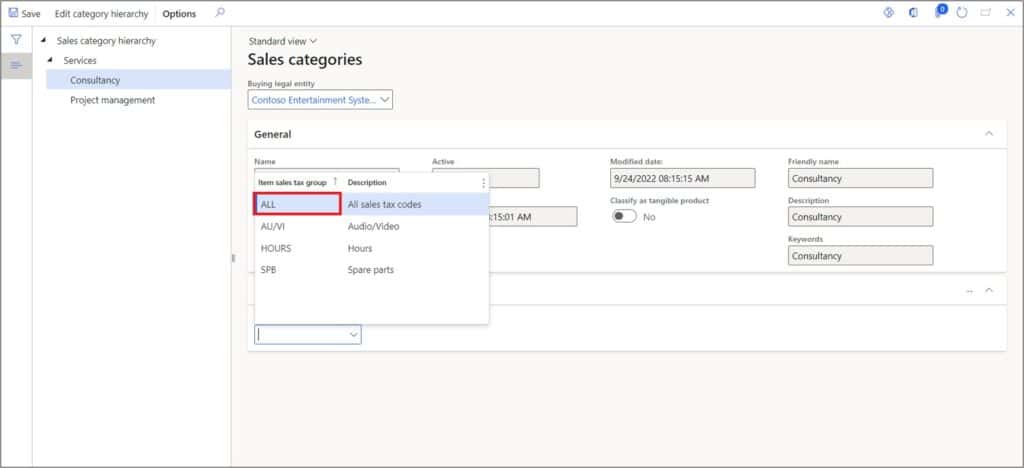
To assign an Item sales tax group, select the Item sales tax group. This Item sales tax group will be defaulted to the sales order line, or quotation.
Edit category hierarchy button directs you to the Category hierarchy page where you can make add, delete, or amend the Category hierarchy.
Set Up Posting for Sales Categories
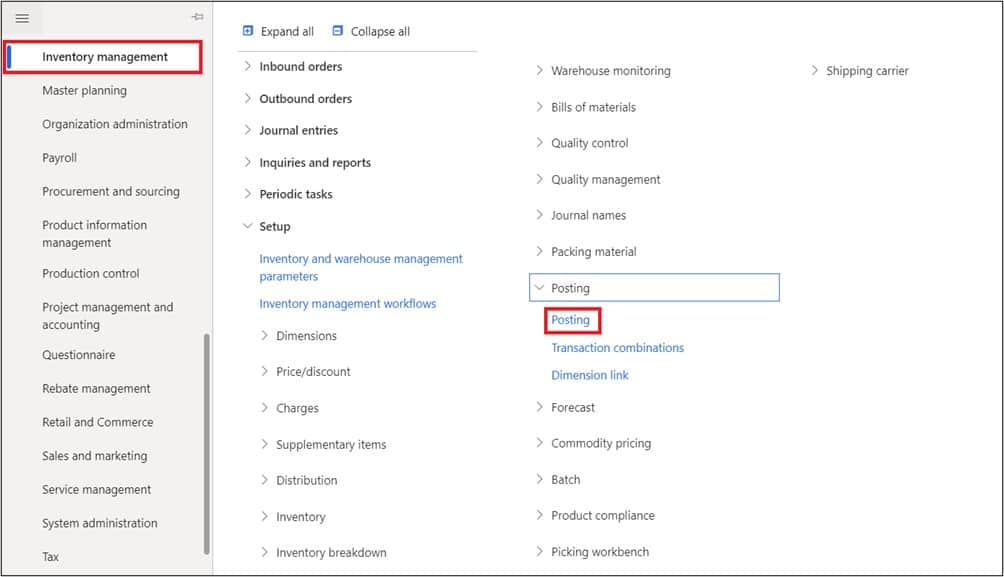
Before creating and processing a Sales order for the Sales category, we need to set the posting profile for selling against a sales category. Navigate to Inventory management > Setup > Posting > Posting.
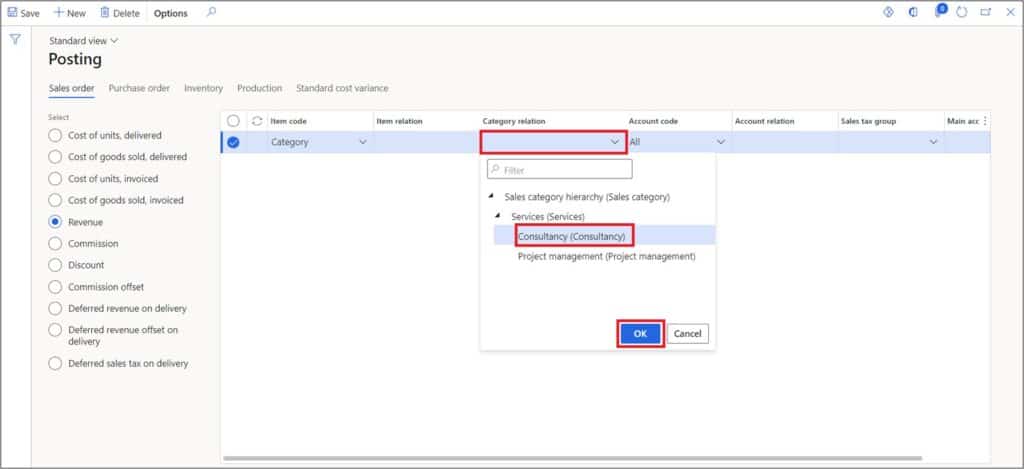
On the Posting page, select the Revenue tab. Click the New button. Select ‘Category’ in the Item code field.
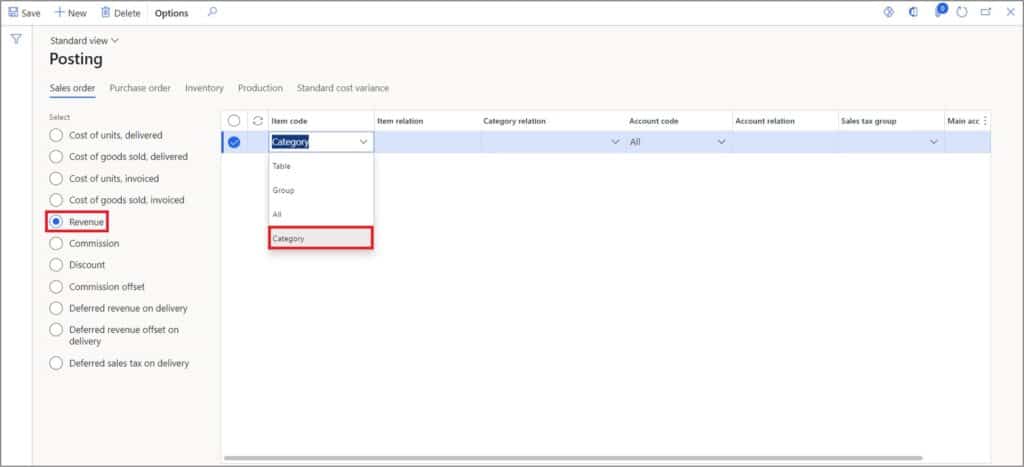
Select the Category in the Category relation tab. Click the Ok button.
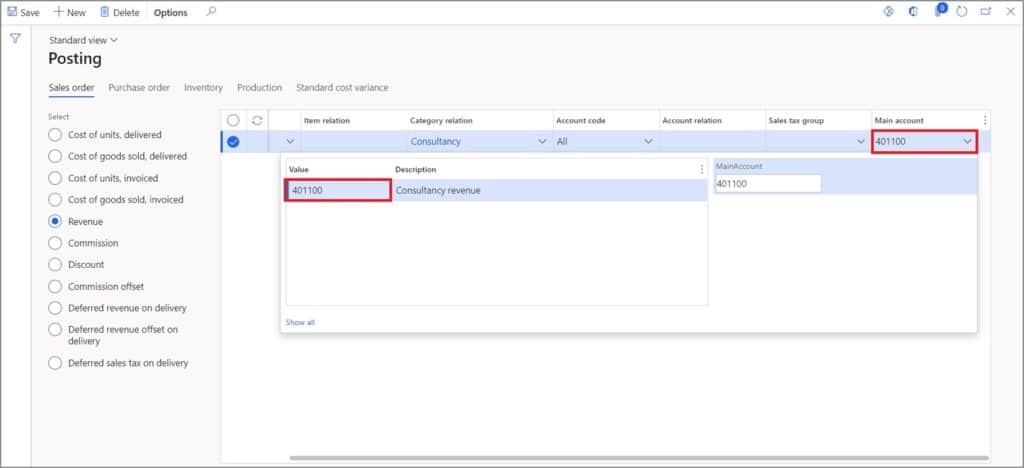
Select the Account in the Main account tab. Click the Save button.
Process a Sales Order with a Sales Category
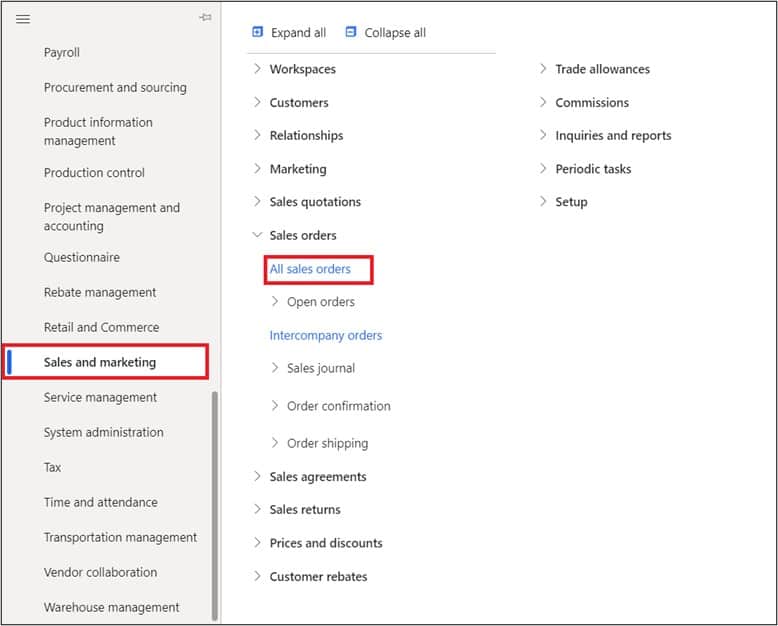
Microsoft Dynamics 365 allows you to create and process a sales order for the sales category without creating a product. This is normally used when you do not wish to create the released products for services or non-tangible items. Now let’s create and process a sales order for the sales category. Navigate to Sales and marketing > Sales orders > All sales orders.
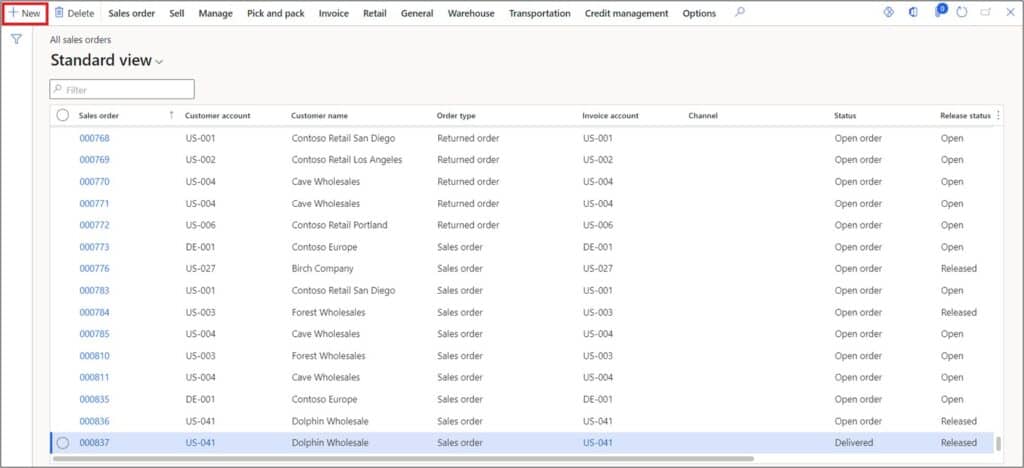
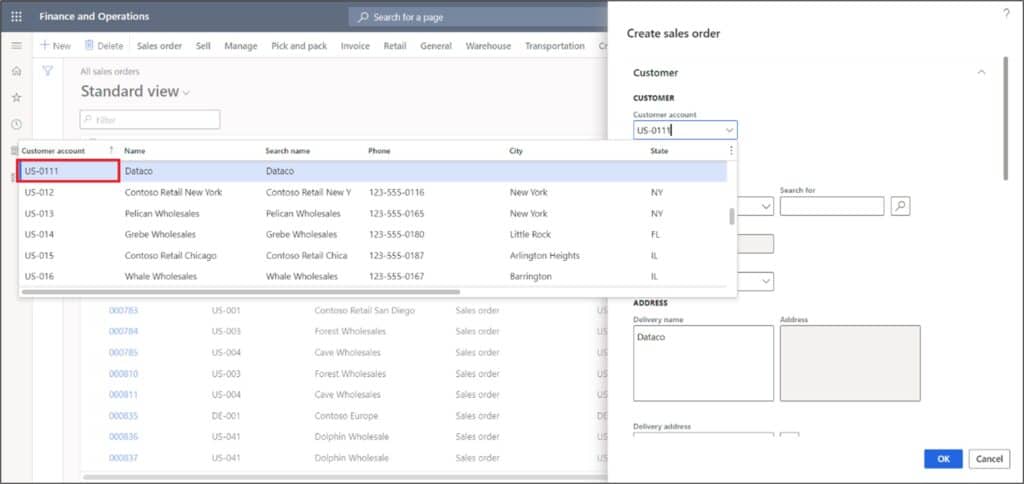
On the ‘All sales order’ page, click the New button.
Select the Customer.
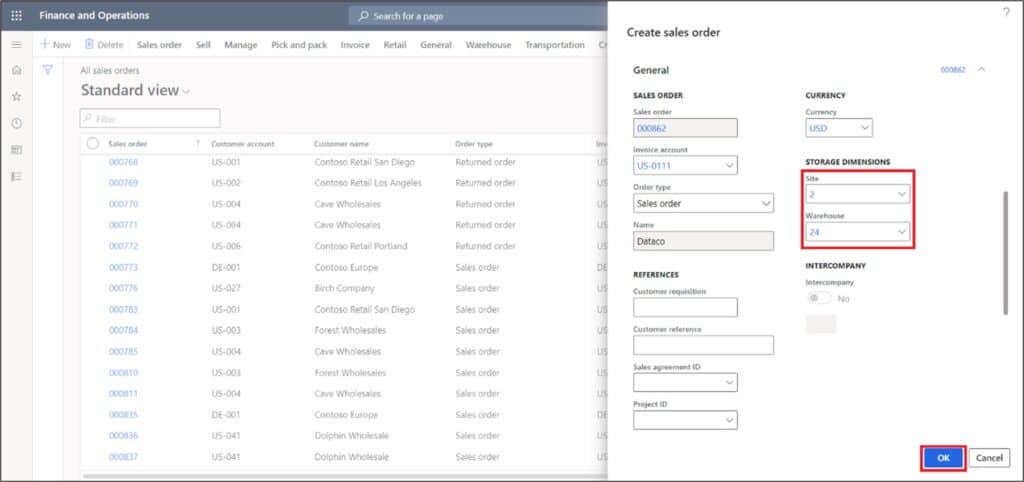
Select the Site and Warehouse. Click the Ok button.
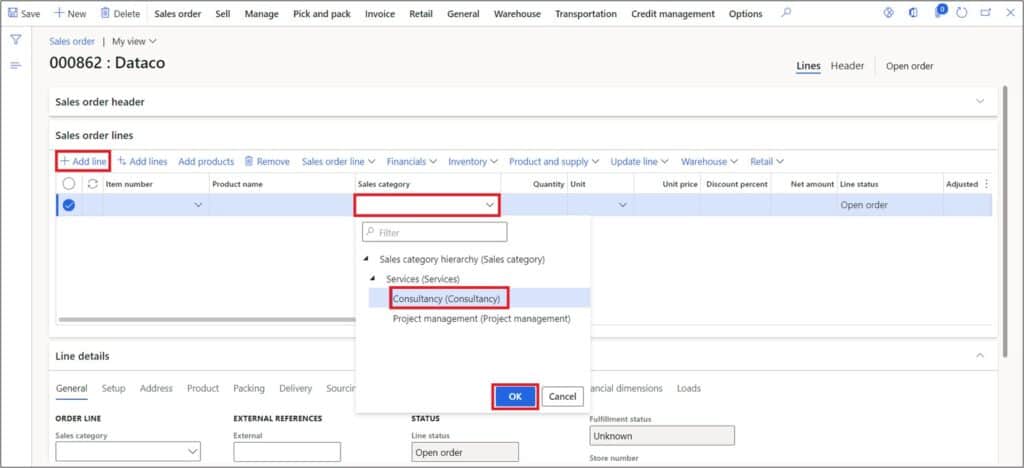
In the Sales order lines tab, click the Add line button. Select the Sales category in the Sales category field. Click the Ok button.
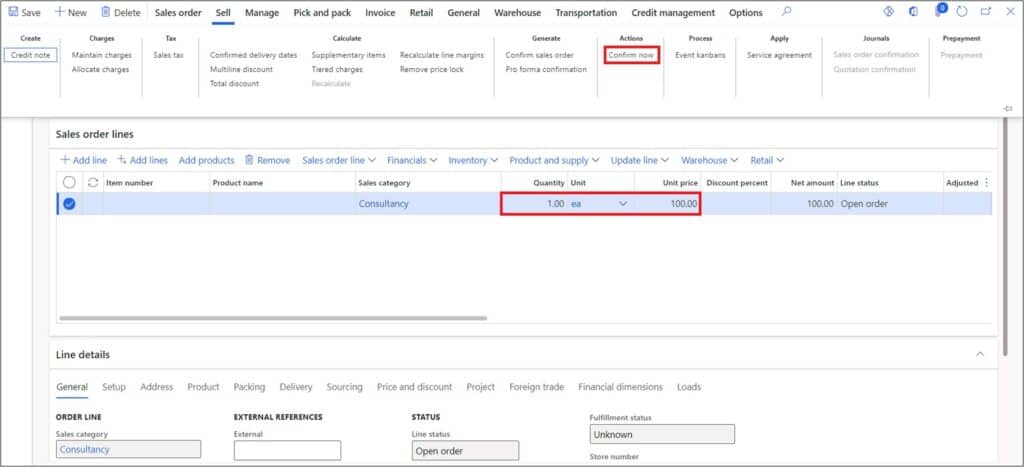
Enter the Quantity. Select the Unit. Enter the Unit price. Click the Save button. After clicking the Save button, click the Confirm now button in the Sell tab.
Now you can post the packing slip. On the Sales order, click on the Post packing slip button in the Pick and pack tab.
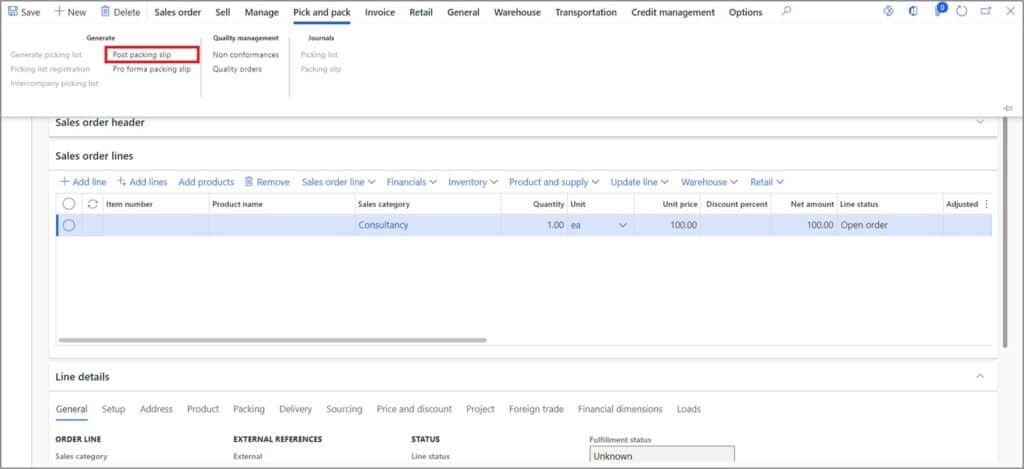
Note: There is no inventory picking involved in case of a Sales category. So, select ‘All’ in the Quantity field in the parameters tab.
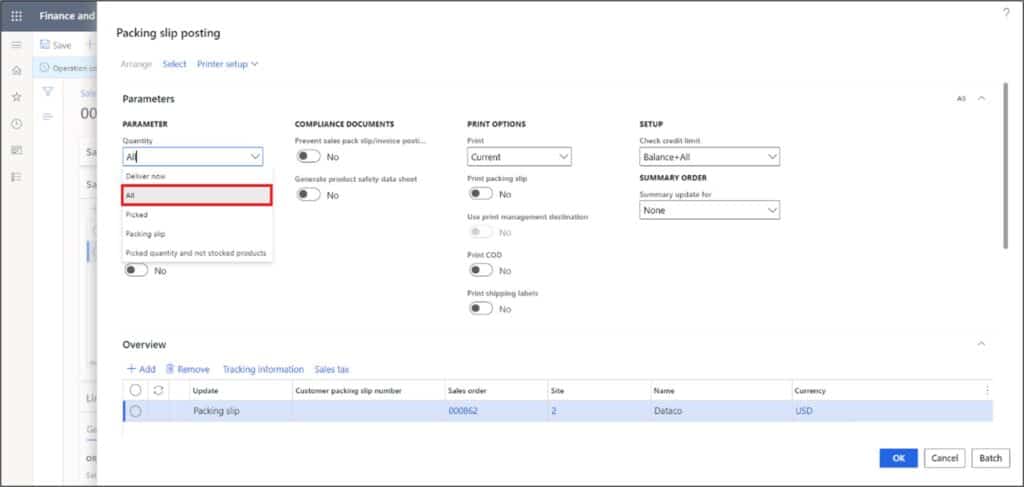
Review the Category, Quantity, Unit price and Amount. Click the Ok button to post the packing slip.
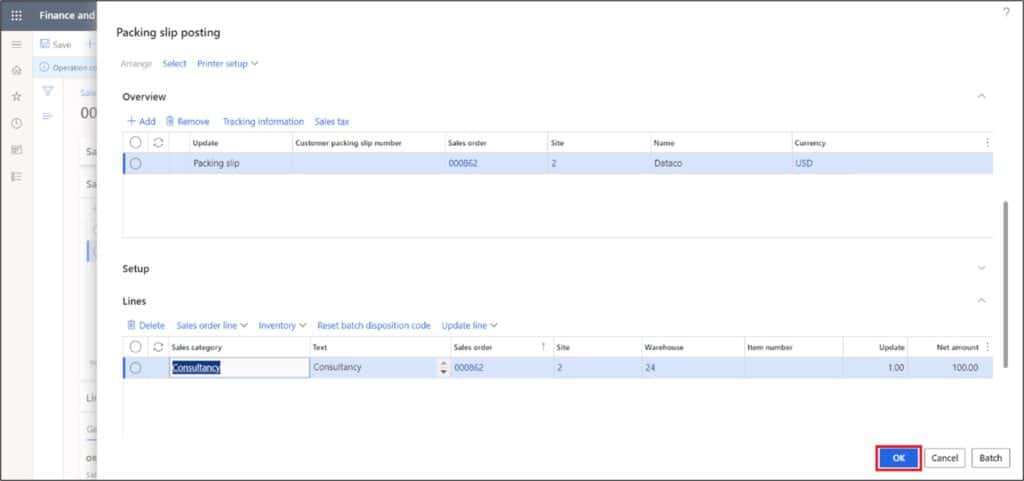
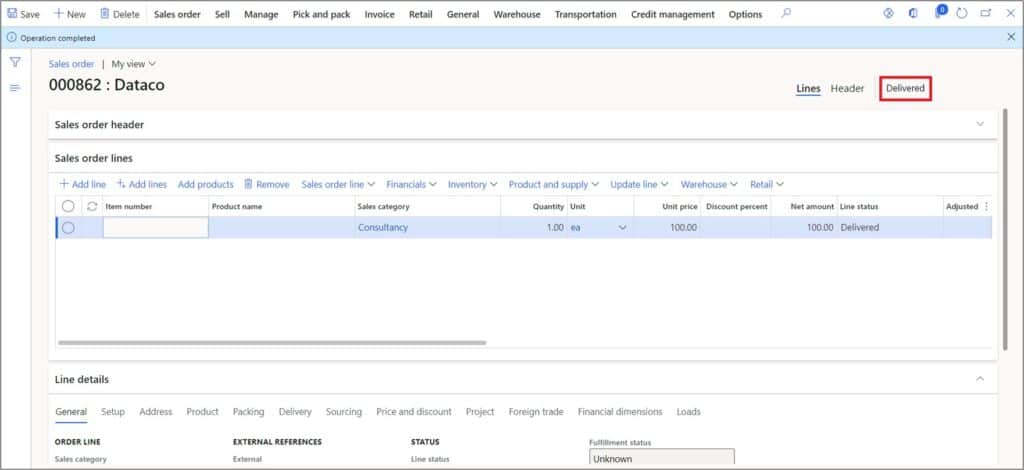
Click the Ok button to confirm the posing. The Packing slip has been posted and the Sales order status has been updated to ‘Delivered.’
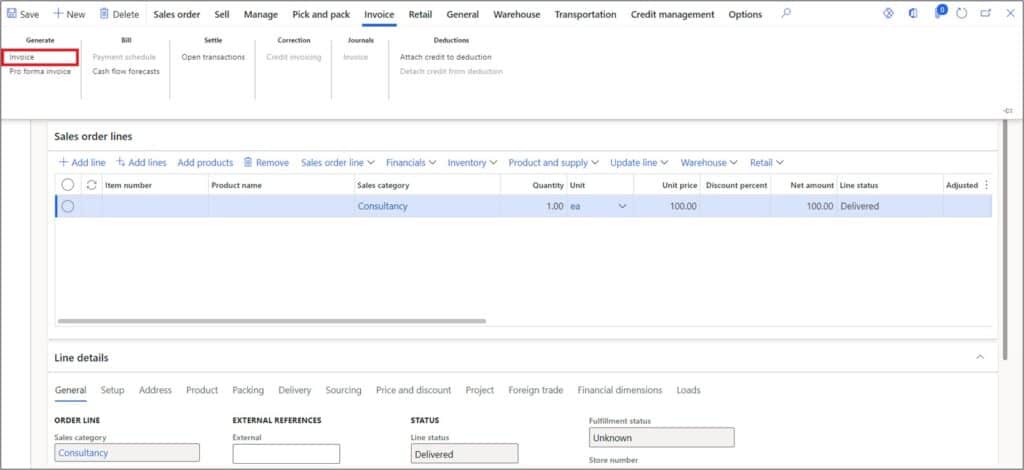
Now let us post the sales order invoice. To post the sales order invoice, click on the Invoice button in the Invoice tab.
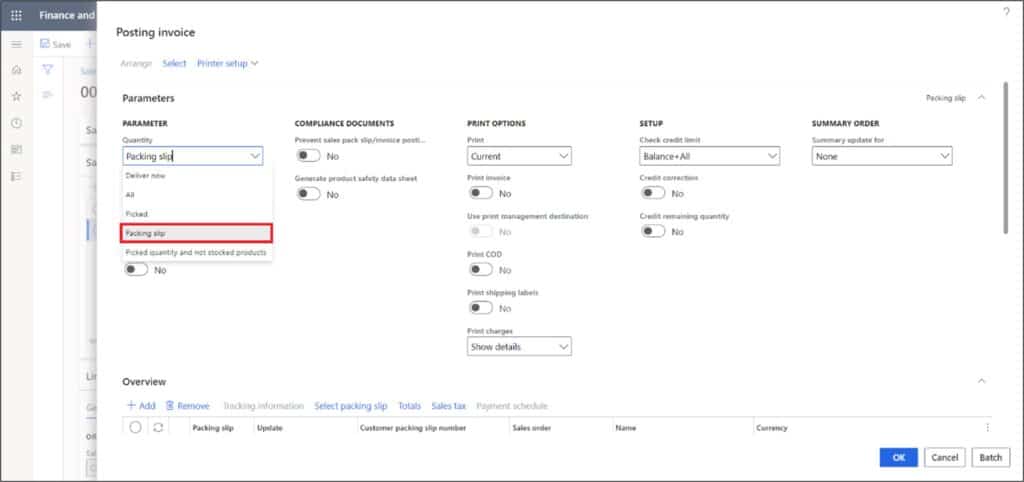
Select ‘Packing skip’ in the Quantity field in the parameters tab.
Review the Category, Quantity and Amount. Click the Ok button to post the Invoice.
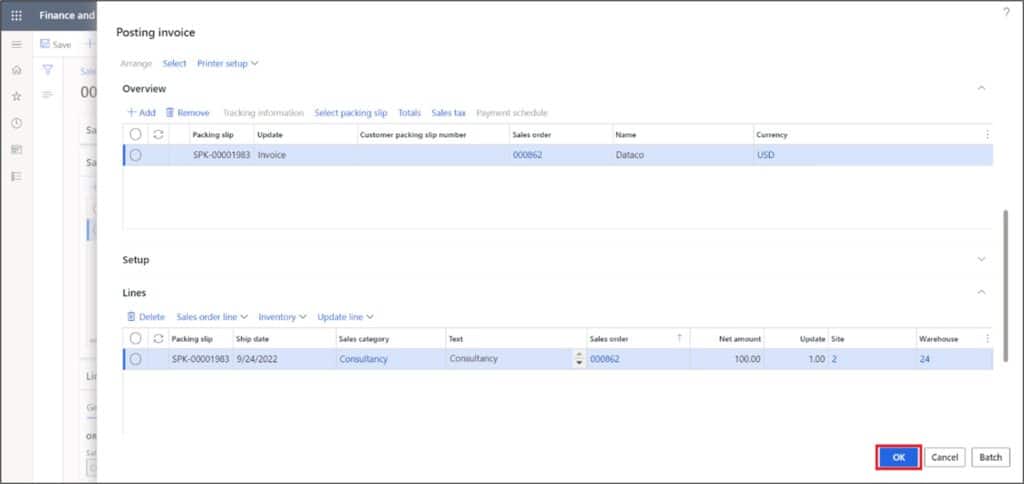
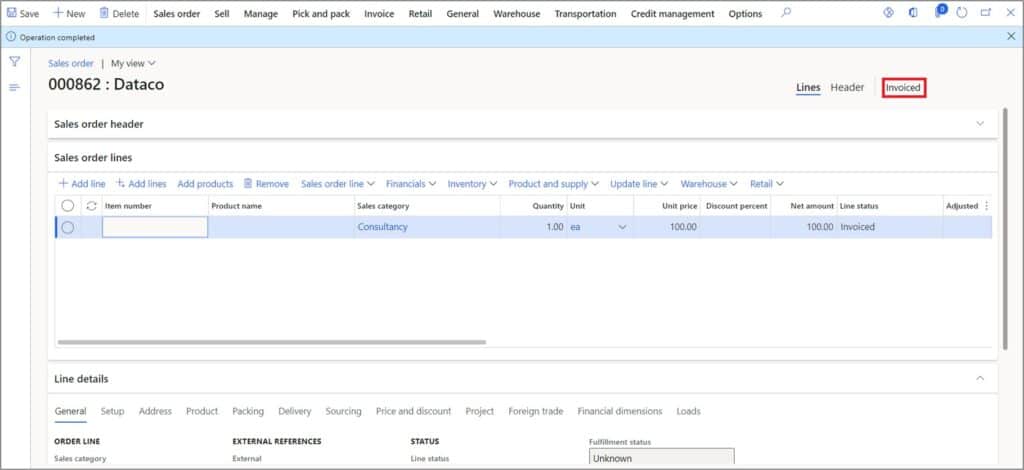
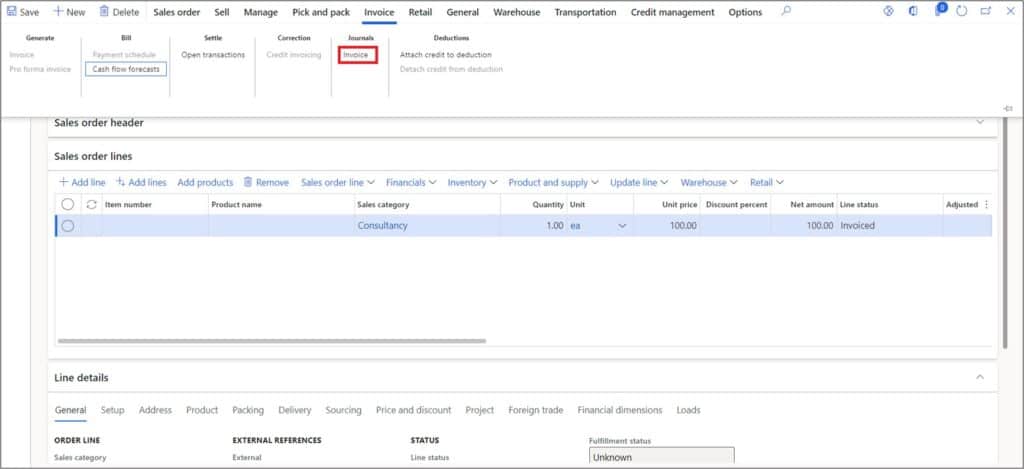
Click the Ok button to confirm the posing. The Invoice has been posted and the Sales order status has been updated to ‘Invoiced’.
To see the Invoice journal, click on the ‘Invoice’ in the Invoice tab under the journal group.
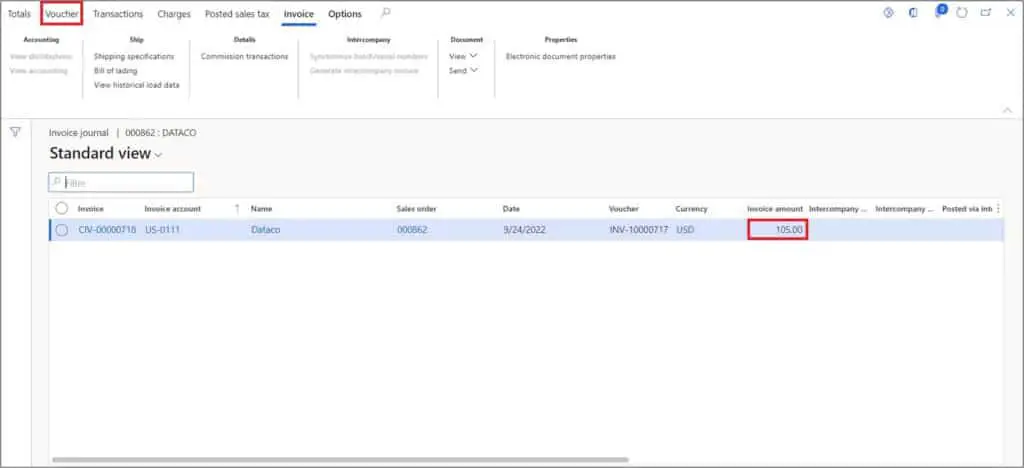
The invoice amount shows the total amount including the Sales tax. Select the invoice journal line and click on Voucher button to see the voucher.
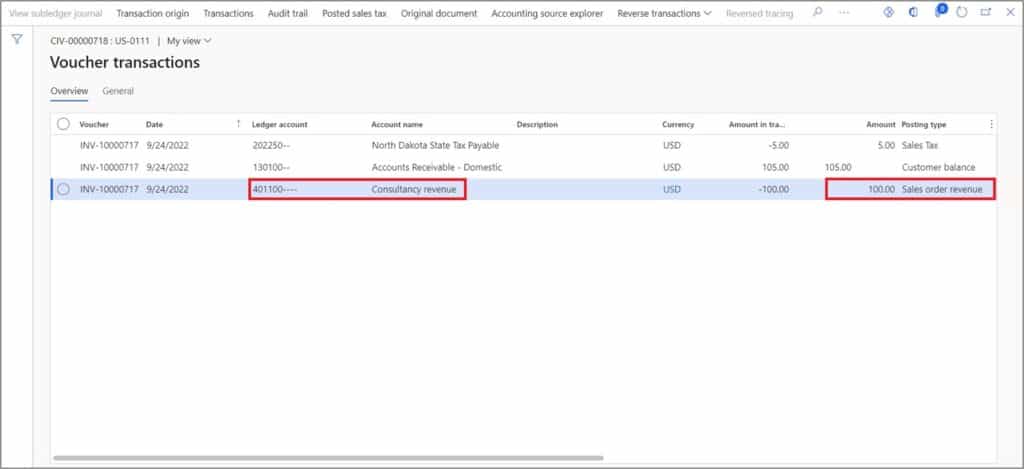
The Voucher transactions shows the revenue account that has been associated with the Sales category in the Revenue posting profile.
Takeaways
The sales category can be associated to the products as well. The association can be done on the Category hierarchy page (as seen above) and Released products page as well. Associate the Sales category to Product, navigate to Product information management > Products > Released products.