
Cross-docking is a warehouse operation in which the items required to fulfil an outbound order are automatically directed to the outbound bay-door or staging area from the receiving location of the inbound order.
The inbound orders for the Cross-docking can be Purchase orders, Transfer Orders or Production Orders. When these orders are received at the receiving area of the warehouse, Cross-docking ensures that you move those items from the receiving area and put to the shipping location or staging area as per the Cross-docking template without storing those items.
Put simply, Cross-docking is a logistical strategy that moves inbound products, or production items to outbound staging areas with no storage in between.
In this article, we will learn how to work with Cross-docking in Dynamics 365 Finance and Operations. Here are few important things to setup before creating and completing the Cross-docking work in the warehouse that has advanced warehouse management enabled.
- Cross-docking template
- Work class
- Work template
- Cross-docking location
- Location directive
- Mobile device menu items
- Mobile device menu
- Workers
Cross-docking Setup
Cross-docking Template
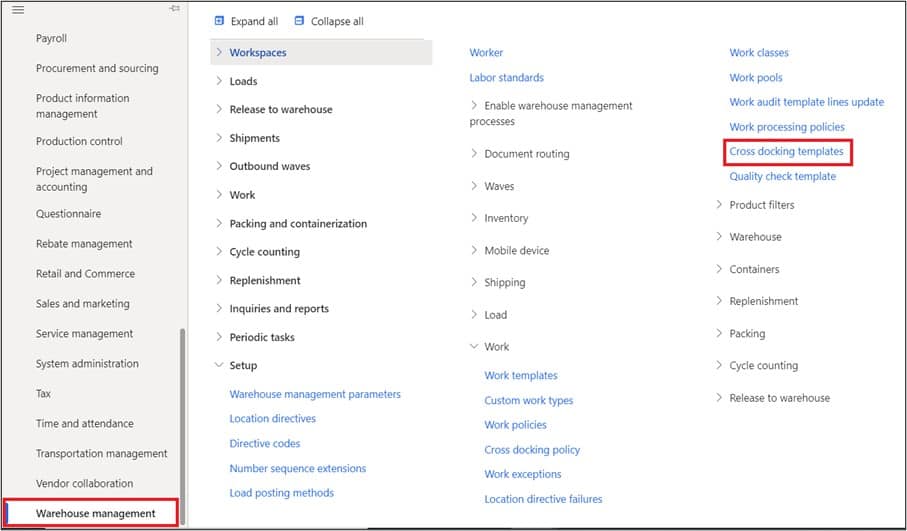
The Cross-docking template contains the set of rules applicable for Cross-docking. You can define multiple Cross-docking templates depending on the requirement. To define the Cross-docking template, navigate to Warehouse management > Setup > Work > Cross-docking templates.
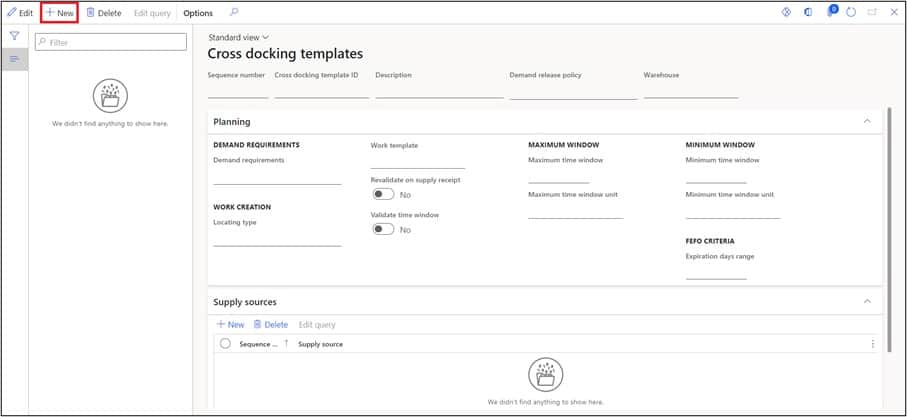
On the Cross-docking templates page, click the New button.
Enter the sequence in the Sequence number field. (This sequence defines the order that templates are evaluated in). Enter the template ID in the Cross-docking template ID field. Enter the template Description in the Description field. Select ‘Before supply receipt’ in the Demand release policy field. Select the Warehouse in the Warehouse field.
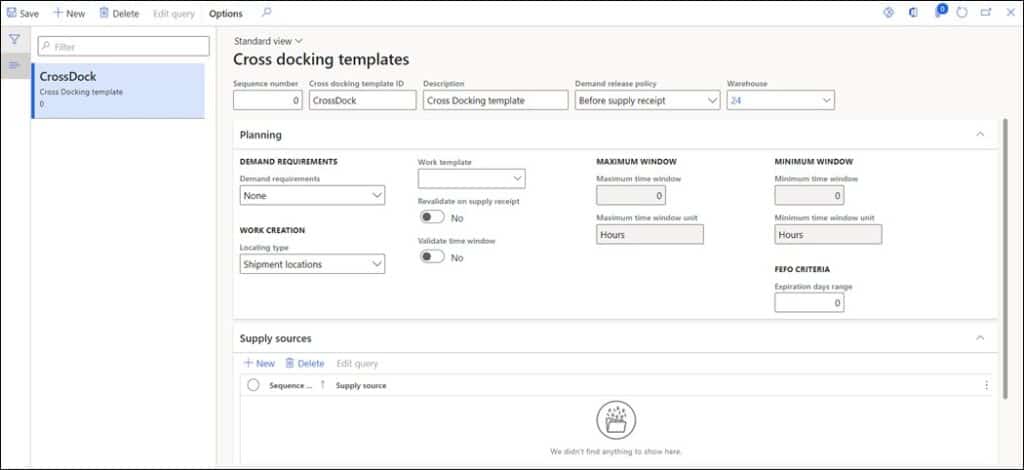
The configuration in the Planning Tab controls how the template works.
Select the ‘Marking’ in the Demand requirements field. (This will enforce the required quantity for the Cross-docking to be marked with the supply order. If you select the Order reservation, the required quantity must be order-reserved against the supply order. If you select None, there will be no link between supply source and Outbound order and Outbound order will fulfil the demand from any supply source of the item).
Select Location directive in the Location type field. (The Cross-docking work will suggest the put location as per the Location directive. If you select ‘Shipment location,’ the Cross-docking work will suggest the put location as per the shipment location on the Outbound order.
Select the Work template if you want to fix it for the template. (This field defines the work template that should be used while creating the Cross-docking work). For now, we will keep it blank so that this template could work without any condition for the selected Warehouse.
Select No in the ‘Validate time window’ field. If you select Yes, you will have to set the maximum and minimum time window. Maximum and minimum time window will limit will be enforced. Which means, the delivery date of the Supply order/Purchase order and Outbound/Sales order should be within the time window set here. If the delivery dates are not within the time window, you will get the following error on releasing the Outbound/Sales order: ‘The marked supply source was not within the valid time window.’
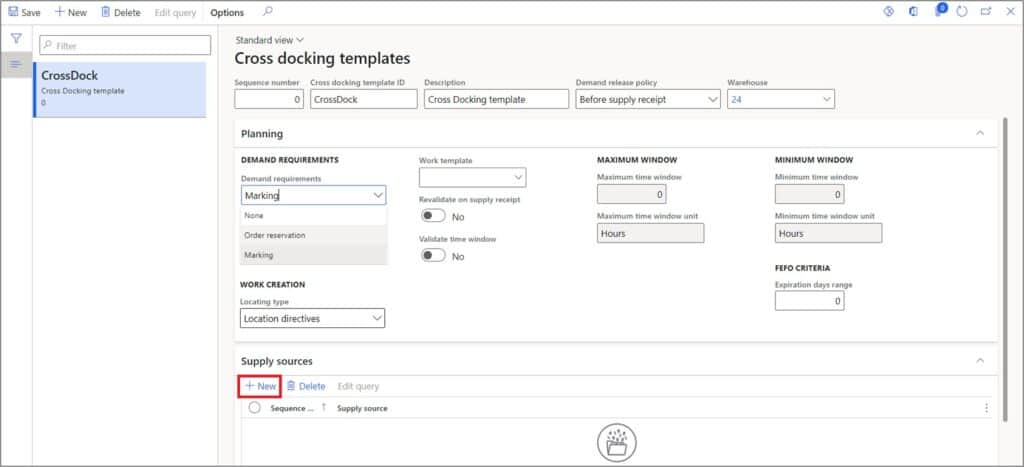
In the Supply sources tab, click the New button.
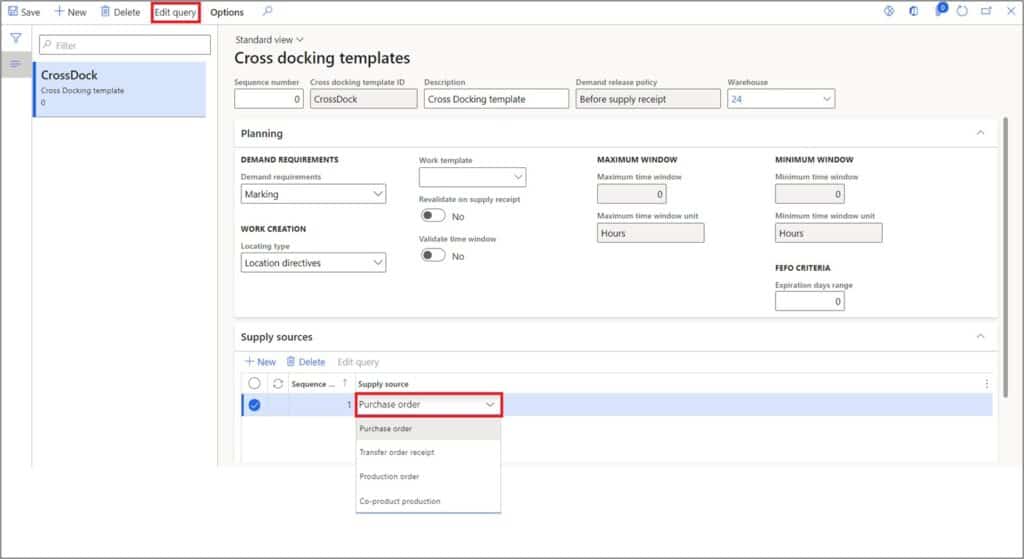
Select the Purchase Order as a Supply source. (This will create the Cross-docking work on the Purchase Orders receiving in the Warehouse. If you select the Transfer Order receipt, this will create the Cross-docking work on the Transfer Orders receiving in the Warehouse.
If you select the Production Order or Co-product production, this will create the Cross-docking work while reporting those items as finished on the Production orders). If you want the Cross-docking template to be available on specific conditions, you can set up a query. Click the Edit query button.
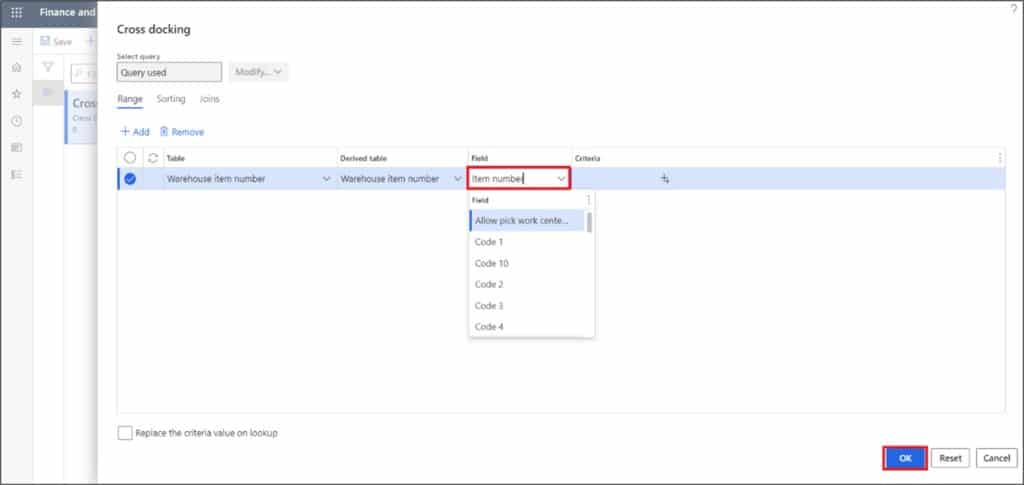
Set the required query filters and click the Ok button. For now, we will keep it blank so that this template could work without any condition for the selected Warehouse.
Cross-docking Work Class
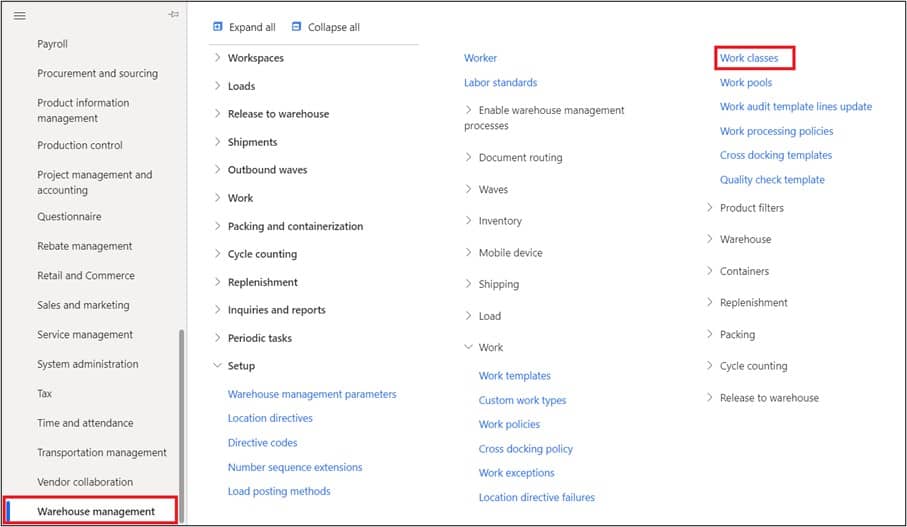
Next, we will create a work class that we will use for this cross-docking type of work. Work classes are used to segregate work among mobile device menu items. To set up the work class navigate to Warehouse management > Setup > Work > Work classes.
On the Work classes page, click New button.
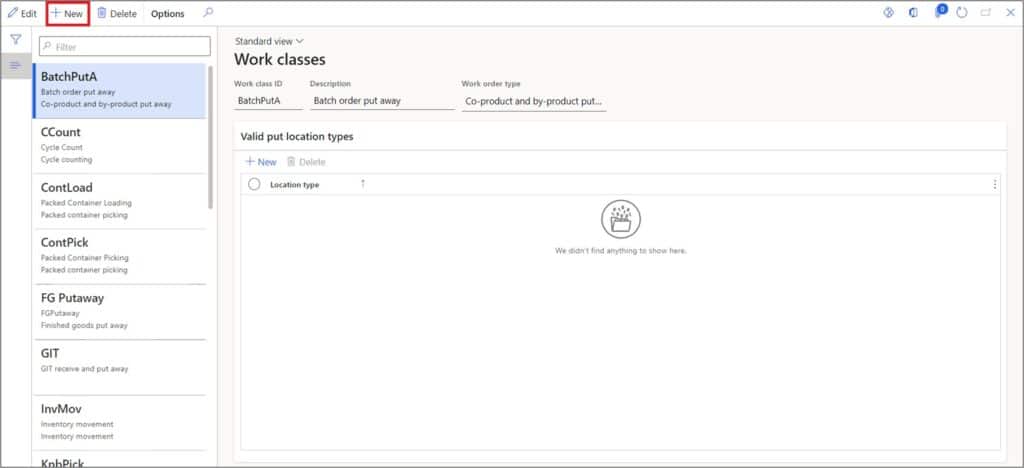
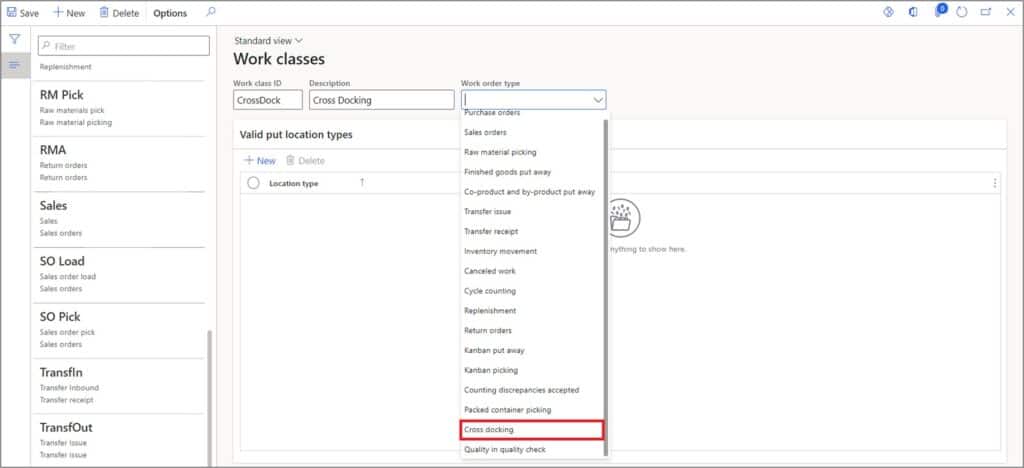
Enter the Work class id in the Work class id field. Enter the Work class name in the Description field. Select ‘Cross-docking’ in the Work order type field. Click Save button.
Cross-docking Work Template
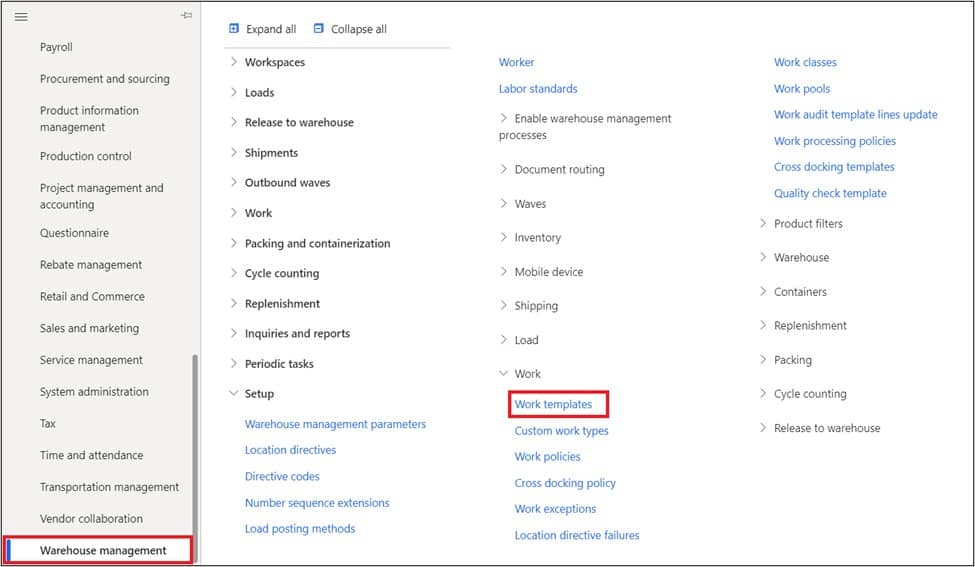
Work templates are used to create and process the warehouse work. The cross-docking work consists of ‘Pick’ from the receiving location and ‘Put’ to the cross-docking bay door location. For more on location directives and work templates please see this post. To set up the work template navigate to Warehouse management > Setup > Work > Work templates.
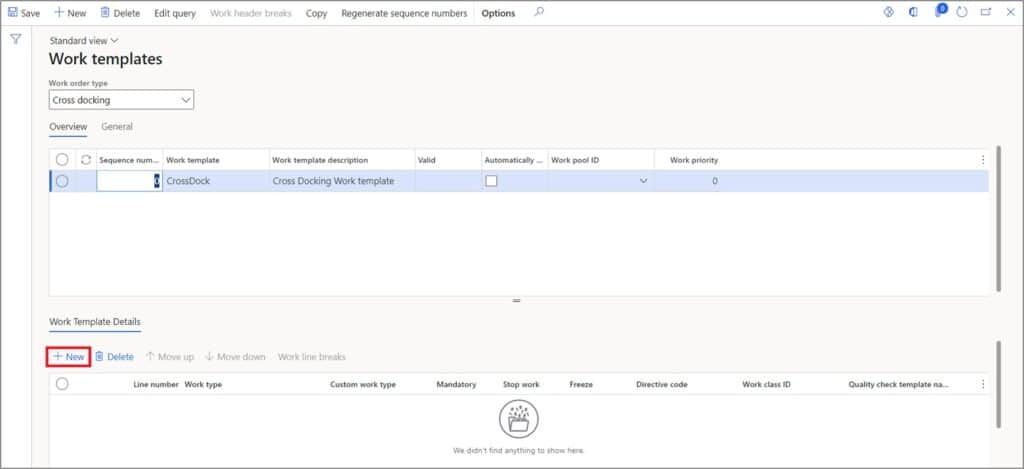
On the work templates page, select the Cross-docking option in the Work order type field. Click the New button.
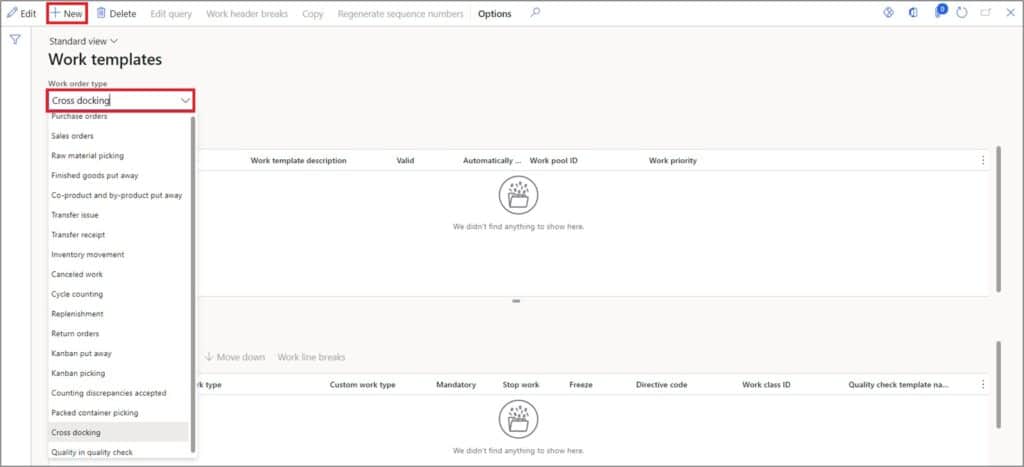
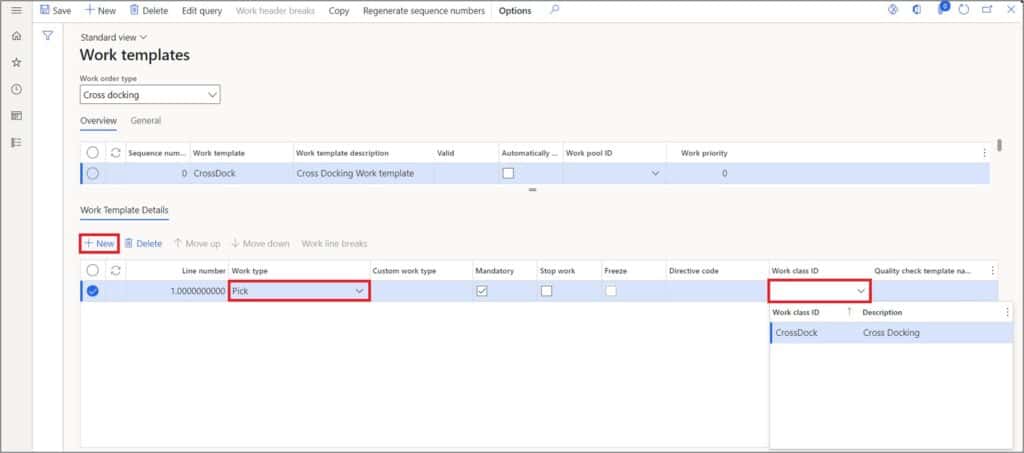
Enter the Work template id in the Work template field. Enter the Work template name in the Work template description field. Click the Save button. After clicking the Save button, click the New button in the Work template details.
Select ‘Pick’ in the Work type and select the Work class ID (this will create the Cross-docking pick work under the selected Work class id). Click the Save button.
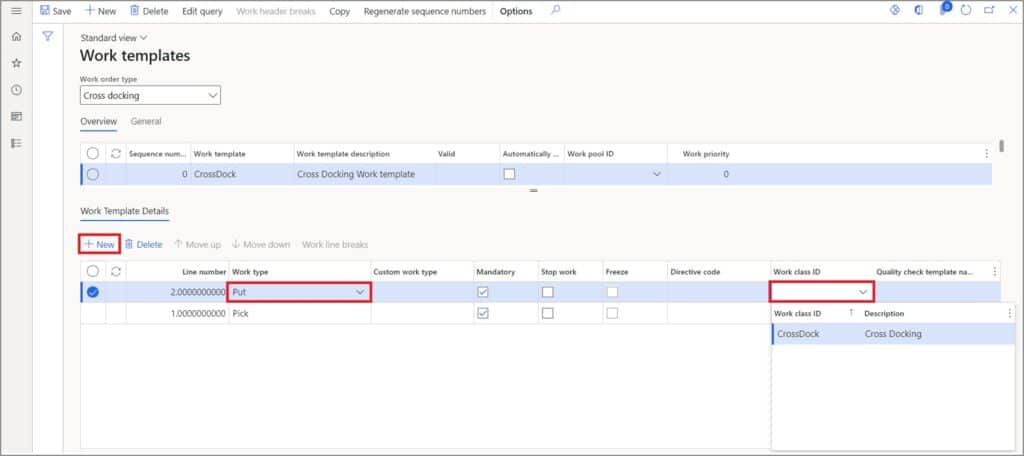
Click the New button in the Work template details. Select ‘Put’ in the Work type and select the Work class ID (this will create the Cross-docking put work under the selected Work class id).
Cross-docking Location Directive
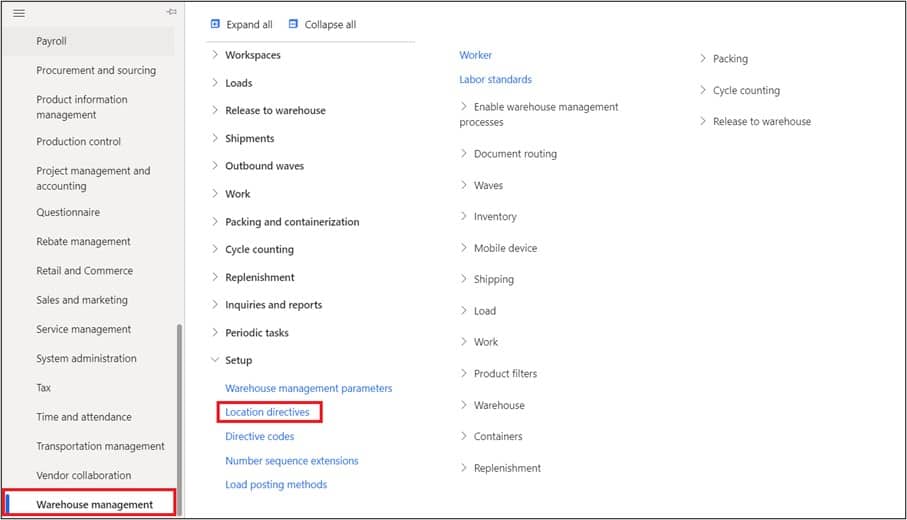
If you use the ‘Location directives’ in the Cross-docking template, you can configure the Location directives which will suggest the put location for the cross-docking work. Navigate to Warehouse management > Setup > Location directives.
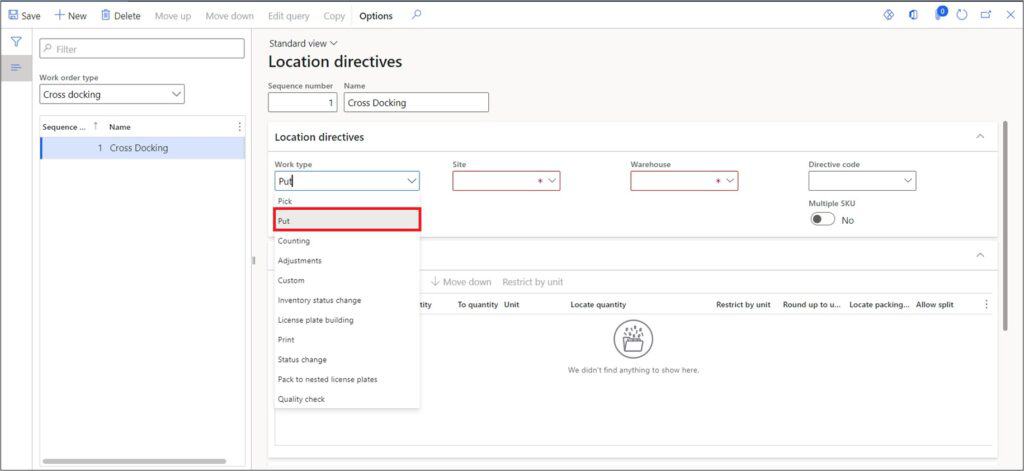
On the Location directives page, select the ‘Cross-docking’ option in the Work order type field. Click the New button.

Enter the Cross-docking name in the Name field. Select ‘Put’ in the Work type field. Select the Site. Select the Warehouse. Click the Save button.
Note: The location directive for ‘Pick’ is not required as the Pick location will be suggested by the supply source (i.e., Purchase order, Transfer order receipt, Production order or Co-product production).
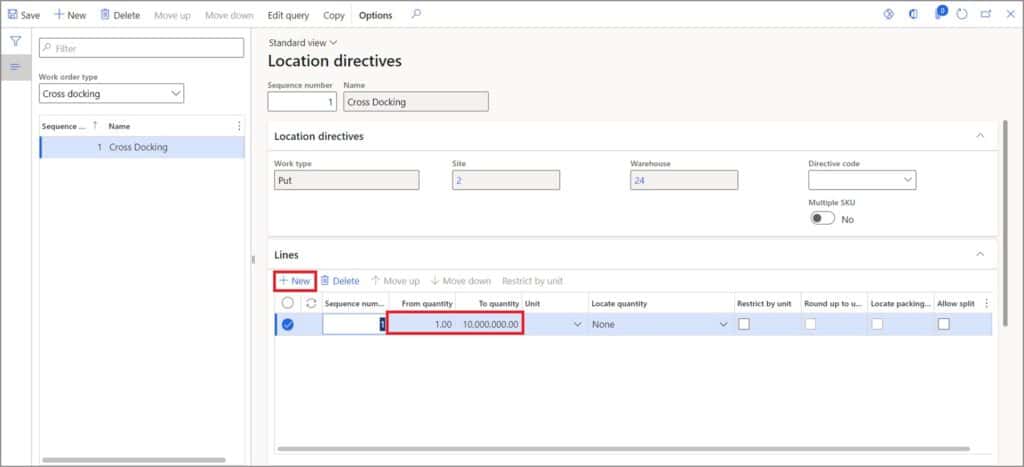
On the location directives page, click the New button in the Lines tab. In the ‘From quantity’ and ‘To quantity,’ enter the ‘From’ and ‘To’ quantity range for which the Location directive line action should be applicable. Click the Save button.
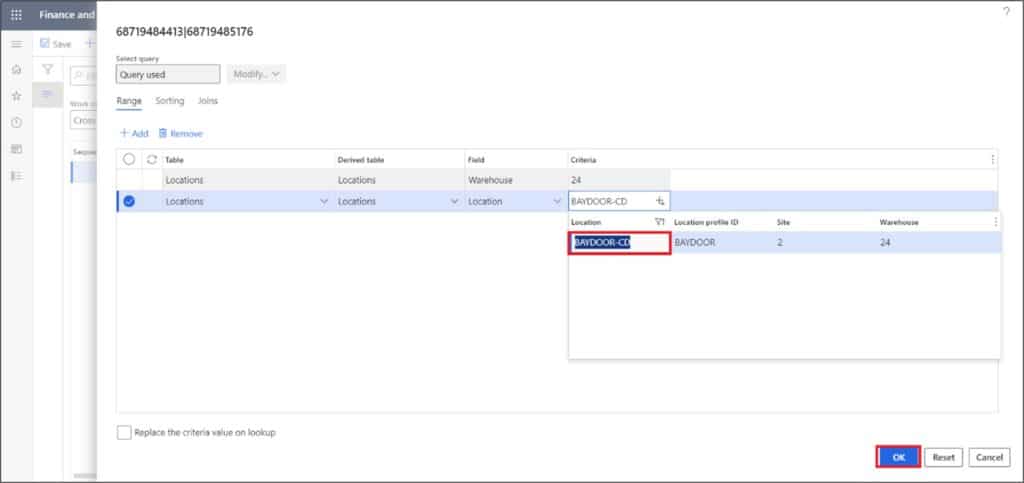
On the location directives page, scroll down and click the New button in the Location directive actions tab. Enter the action description in the Name field. Click the Save button. Click the Edit query.

On the Location directive edit query page, select the Cross-docking location. Click the Ok button.
Mobile Device Menu Items
Mobile device menus are used to perform the activities on the warehouse mobile app. In the process of cross-docking, warehouse workers can use these menu items to complete the following:
- Purchase order receiving
- Cross-docking
- Purchase order put-away
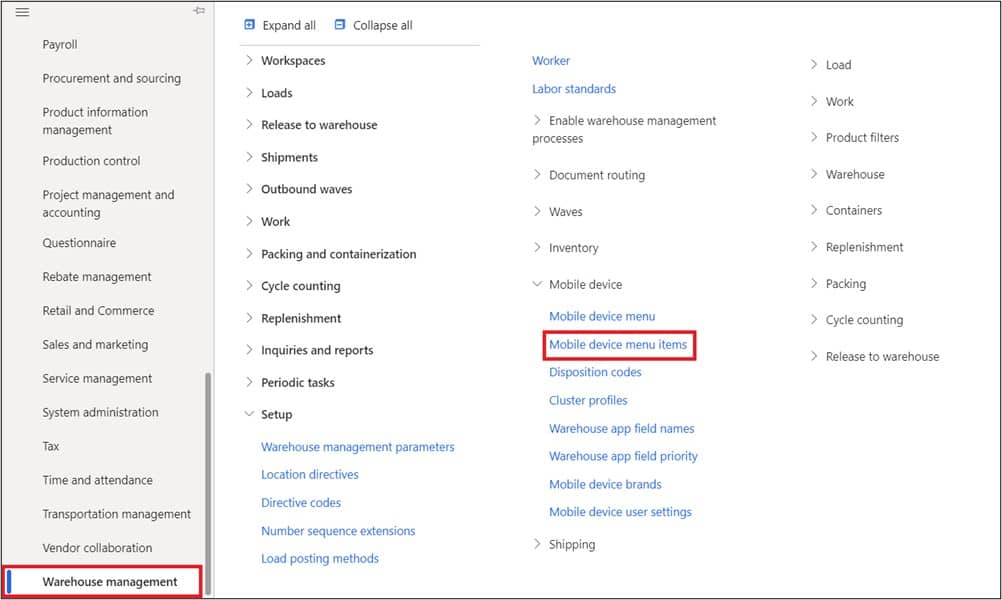
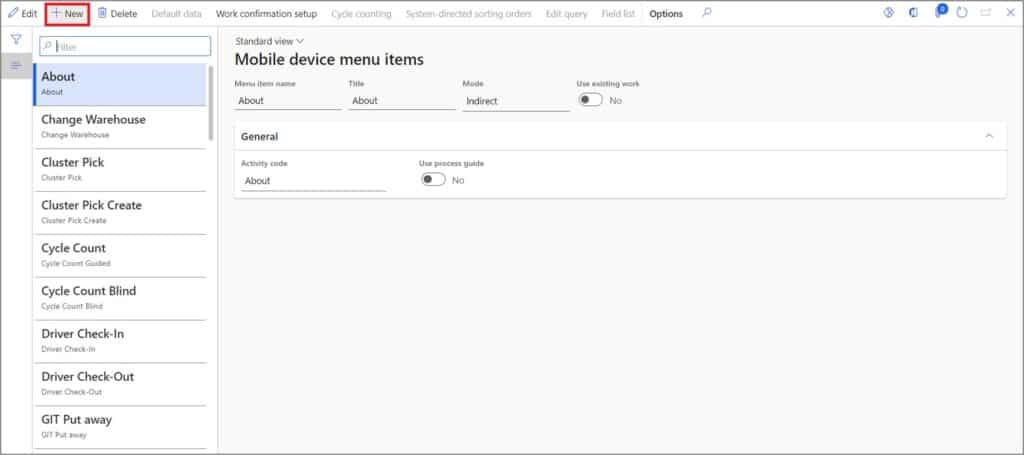
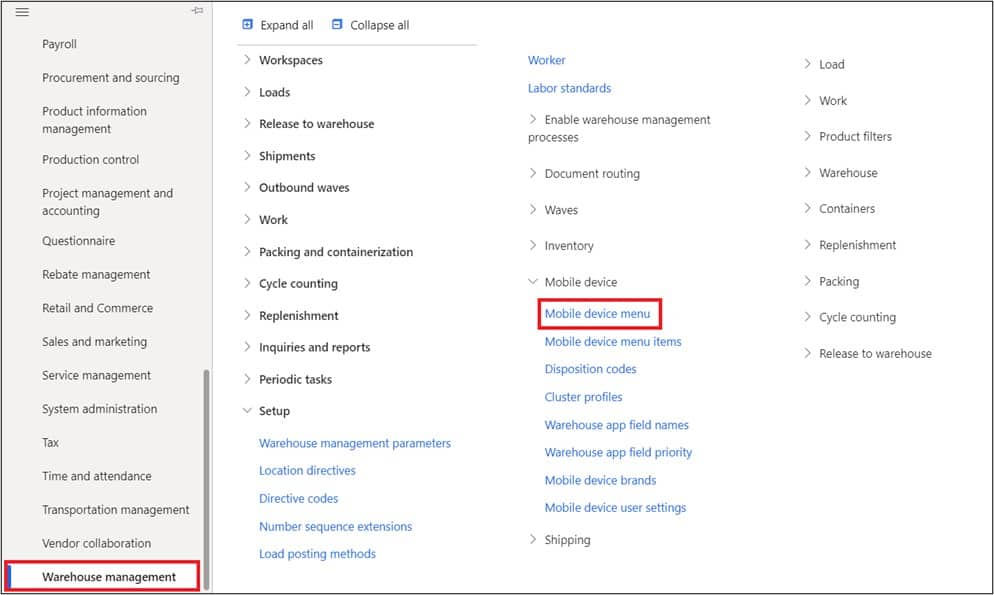
To set up the mobile application meu item navigate to Warehouse management > Setup > Mobile device > Mobile device menu items.
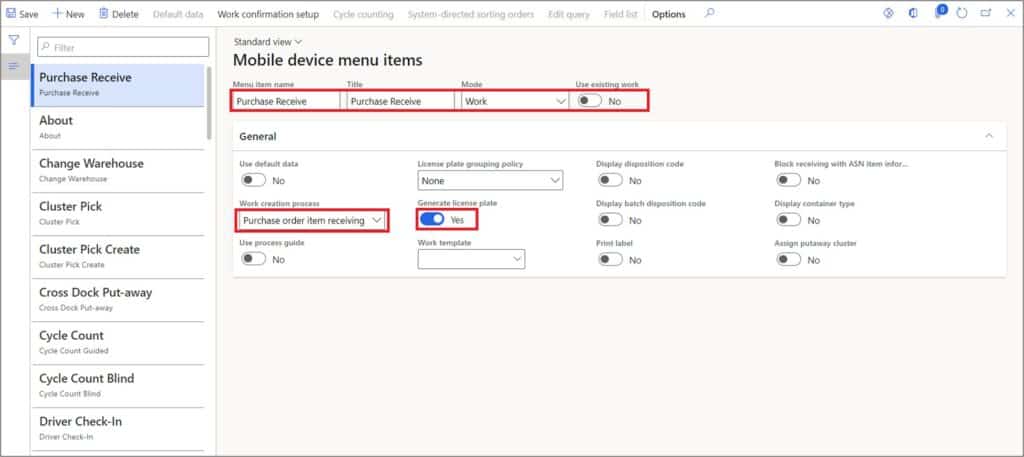
The Purchase order receiving menu item is used to receive the Purchase orders in the warehouse. To create the Purchase order receiving menu item, click the New button.
Enter the menu item name in the menu item name field. Enter the menu item title in the Title field. Select the ‘Work’ in the Mode field. Select ‘Purchase order item receiving’ in the Work creation process field. Select Yes in the Generate license plate field. Click the Save button.
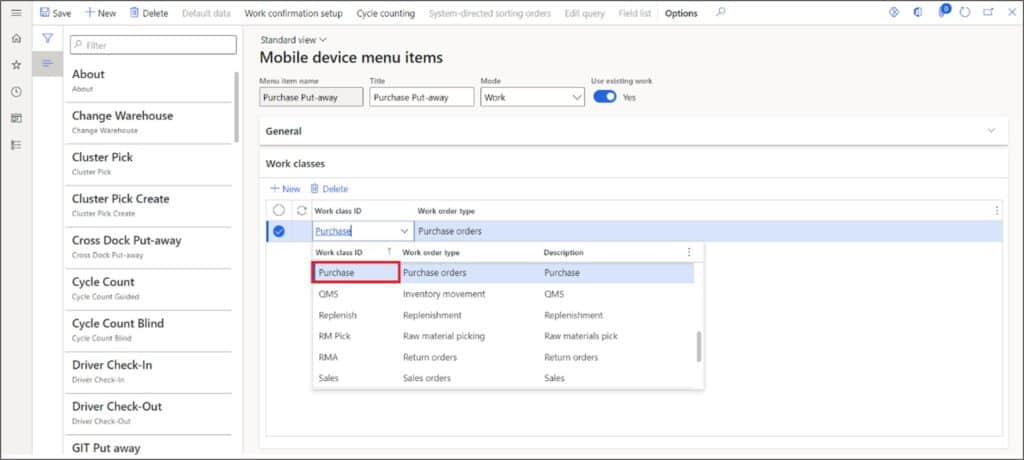
The Cross-docking menu item is used to move the items to the right dock or bay-door area that are received through any supply source e.g., Purchase orders in the warehouse. To create the Cross-docking menu item, click the New button. Enter the menu item name in the menu item name field.
Enter the menu item title in the Title field. Select the ‘Work’ in the Mode field. Select Yes in the Use existing work field. Select ‘User directed’ in the Directed by field. Select Yes in the Generate license plate field. Click the Save button. In the Work classes tab, click on the New button.
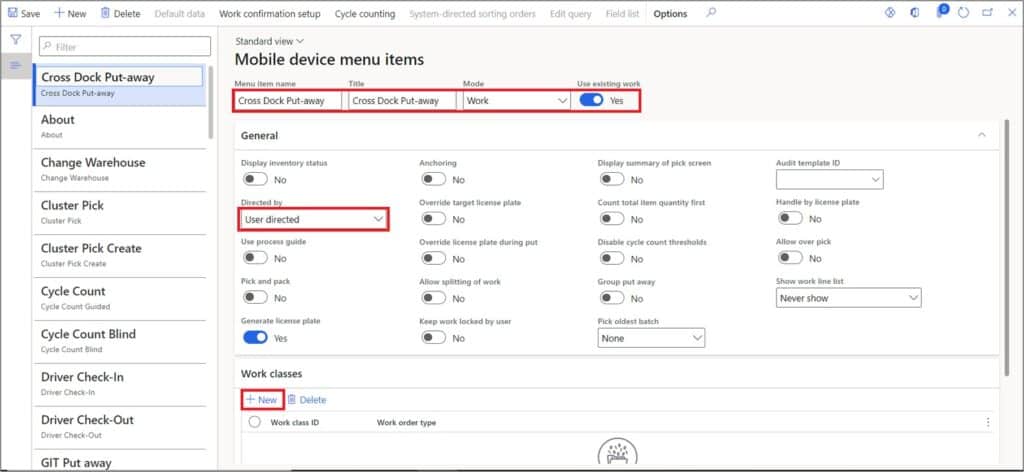
Select the Cross-dock Work class in the Work class ID field. Click the Save button.

The quantity that is left on the receiving area after fulfilment of the Cross-docking requirement, must be put to the storage location. The Purchase order put-away menu item is used to move those items to their storage locations as per the Location directives.
To create the purchase order put-away menu item, click the New button. Enter the menu item name in the menu item name field. Enter the menu item title in the Title field. Select the ‘Work’ in the Mode field. Select Yes in the Use existing work field. Select ‘User directed’ in the Directed by field. Select Yes in the Generate license plate field. Click the Save button. In the Work classes tab, click on the New button.
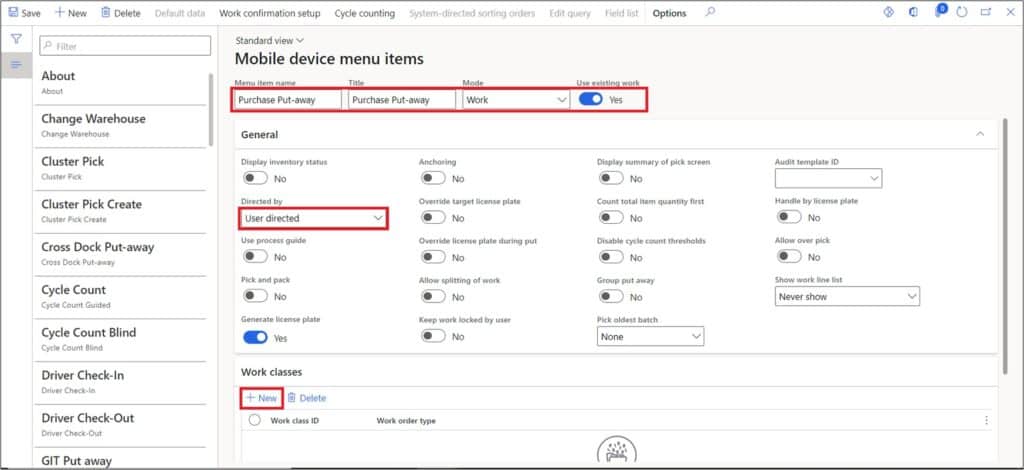
Select the Purchase Work class in the Work class ID field. Click the Save button.
Add Mobile Device Menu Items to a Menu
Mobile device menus are the way menu items and navigation are structured and appear to the user on the mobile application. Mobile device menu items are added to Menus on the warehouse mobile app which will is how the menu item will display the user. Navigate to Warehouse management > Setup > Mobile device > Mobile device menu.
To create the Mobile device menu for purchase order receiving team, click the New button on the Mobile device menu page.
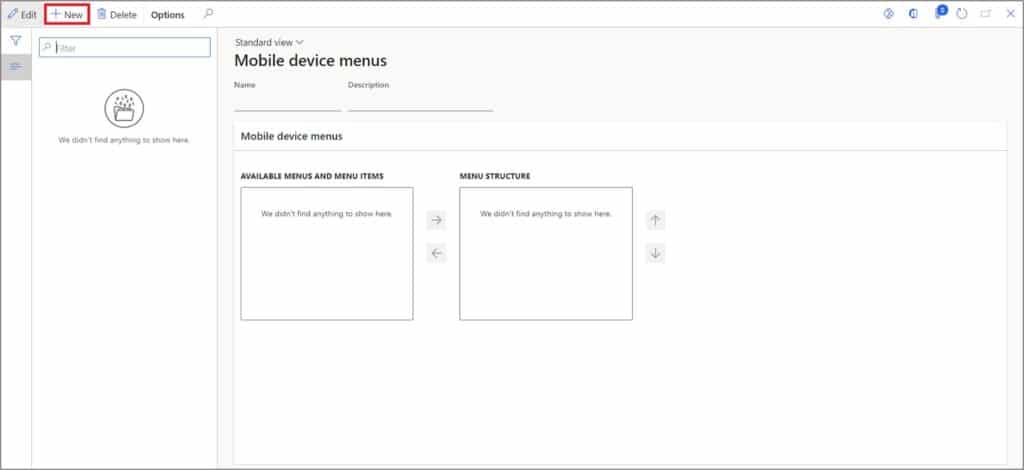
Enter the menu name in the Name field. Enter the menu description in the Description field.

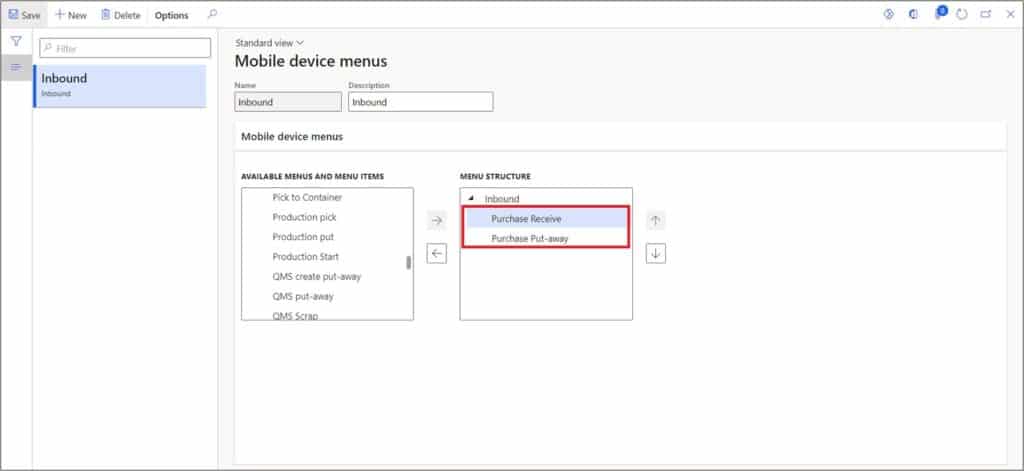
Select the Purchase receive and Purchase Put-away Mobile device menu items from available menus and add them to menu structure.
To create the Mobile device menu for Cross-docking team, click the New button on the Mobile device menu page. Enter the menu name in the Name field. Enter the menu description in the Description field. Click the Save button.
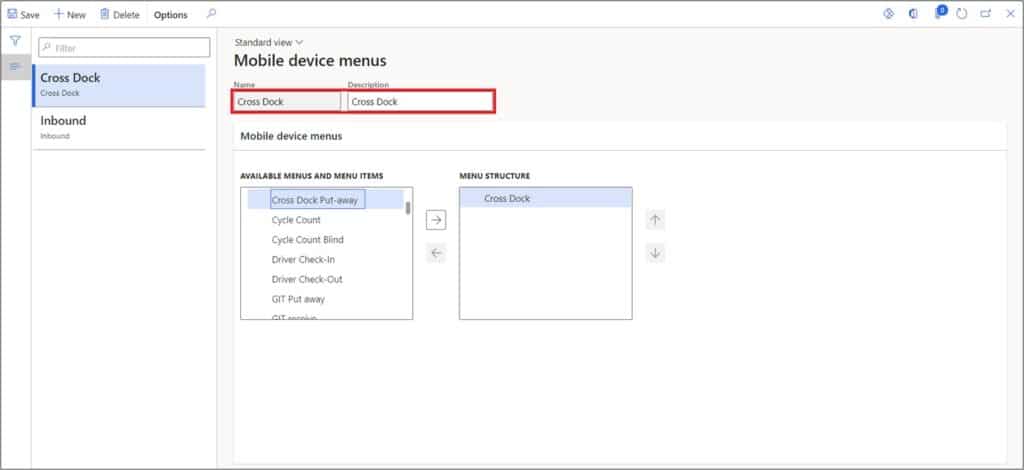
Select the Cross-docking Mobile device menu items from available menus and add it to the menu structure. Click the Save button.
Process Cross-docking
The Cross-docking starts when the Warehouse receiving team receives a supply order e.g., a Purchase order. To process the Cross-docking, we need a Purchase order and a Sales order. So, let us create these orders first. If you are not sure how to create a purchase order check out this post. Here is our purchase order we will use in the Cross-docking process.
After creating the supply source i.e., Purchase order, let’s create the Sales order. To create the sales order, navigate to Sales and marketing > Sales orders > All sales orders.
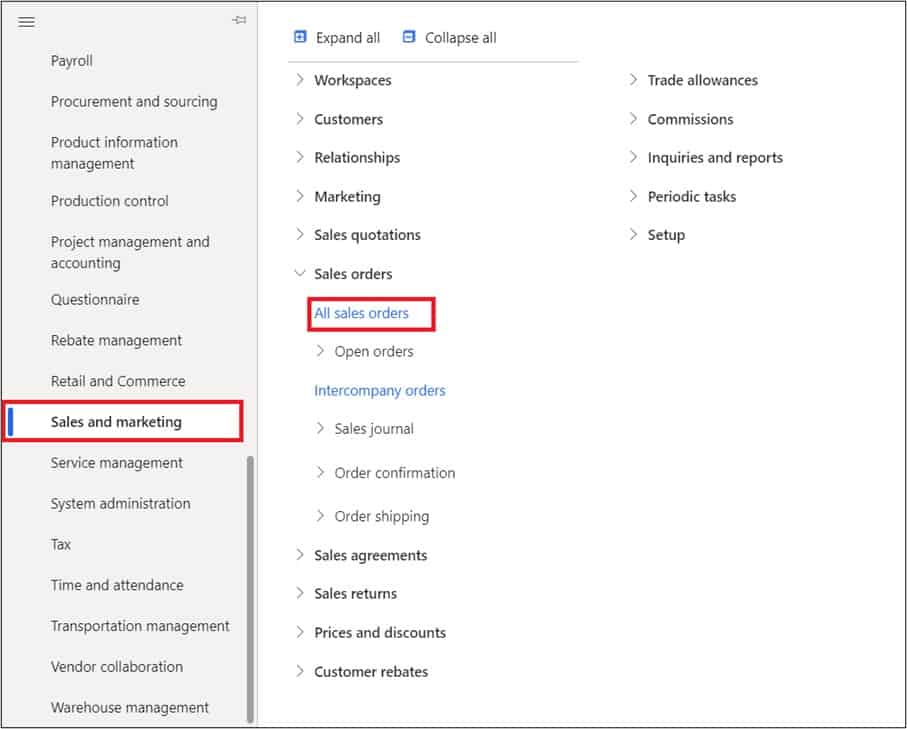
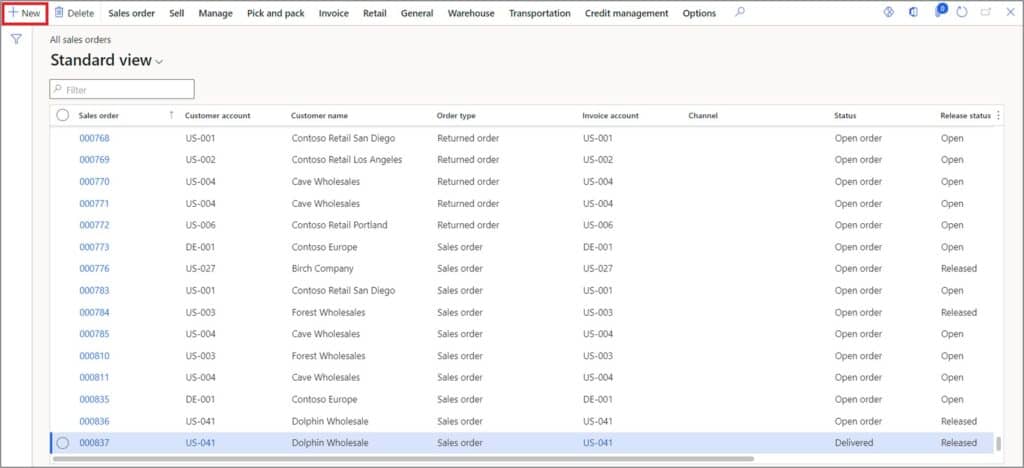
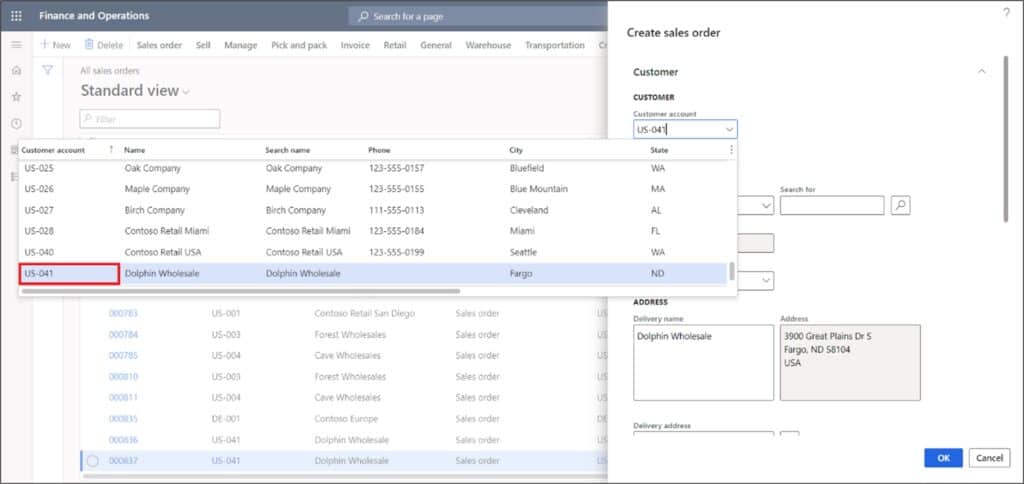
On the Sales orders page, click the New button.
Select the Customer in Customer account field.
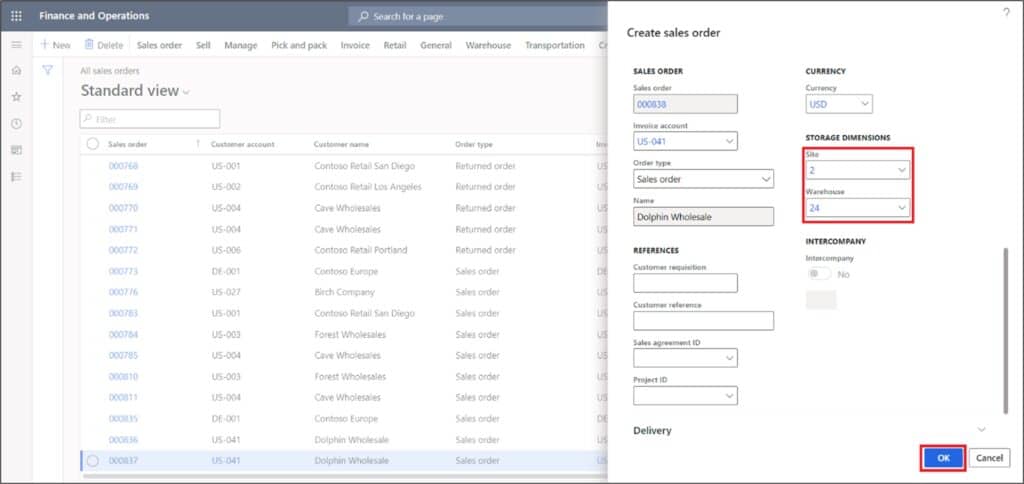
Select the Site and Warehouse. Click the Ok button.
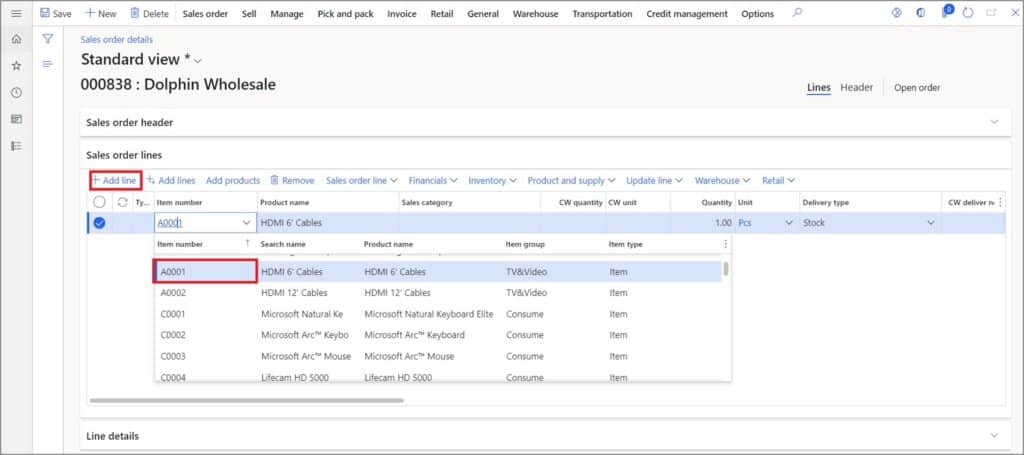
In the Sales order lines tab, click the New button. Select the Item in the Item number field. Note: this item will be used to perform the Cross-docking and it is the same as the item on the purchase order.
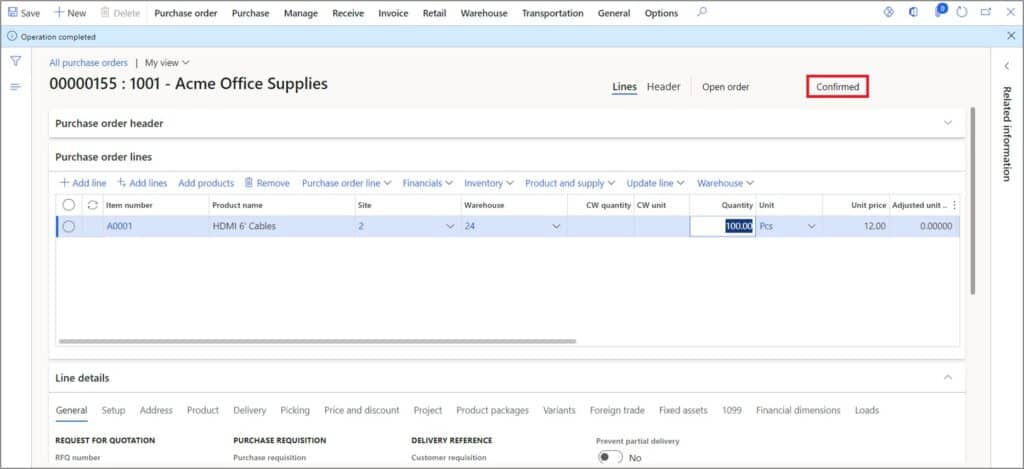
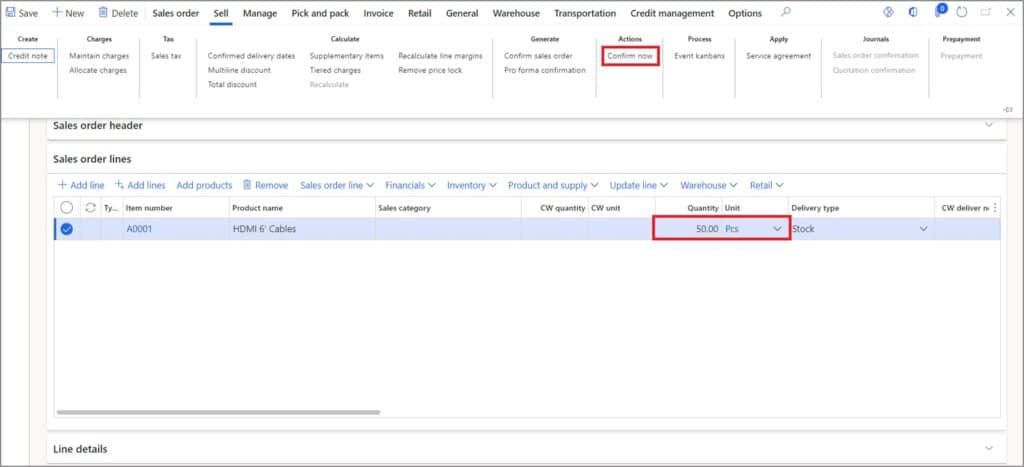
Enter the Quantity and select the Unit. Click the Save button. After clicking the Save button, click the Confirm now button in the Sell tab under action group.
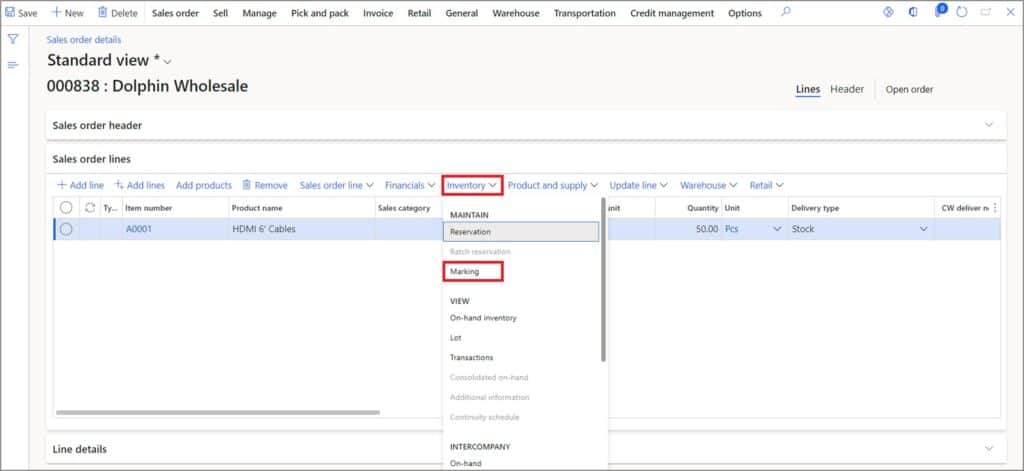
Since we have set the ‘Marking’ as a demand requirement (in the Cross-docking template), we have to mark the same item against the Supply source. (This will link the Purchase order as a supply source of this Sales order which means, the Item on this Purchase order once received, will be shipped against this Sales order). In the Sales order lines tab, click the Inventory menu and then click the Marking button.
In the Marked transactions tab, select the Purchase order of the selected item.
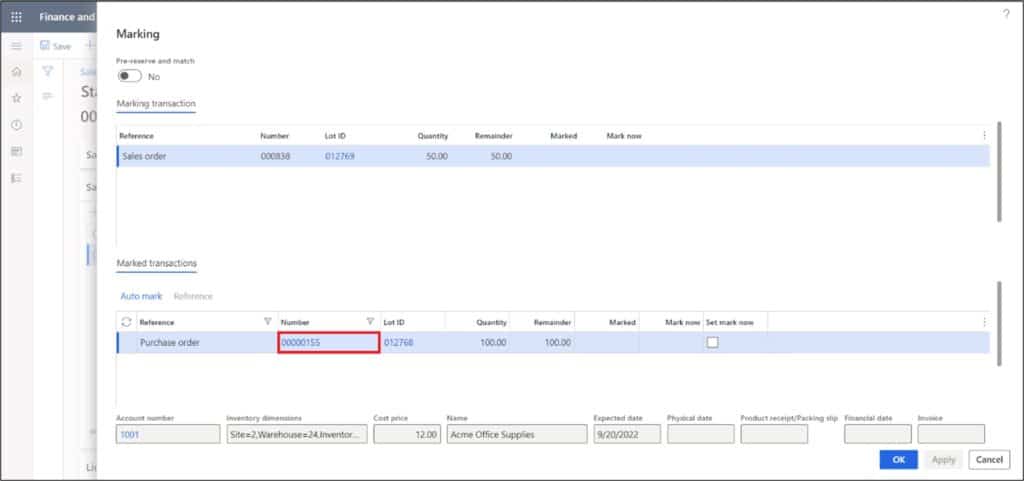
Select Yes in the Set mark now field. Click the Apply button.

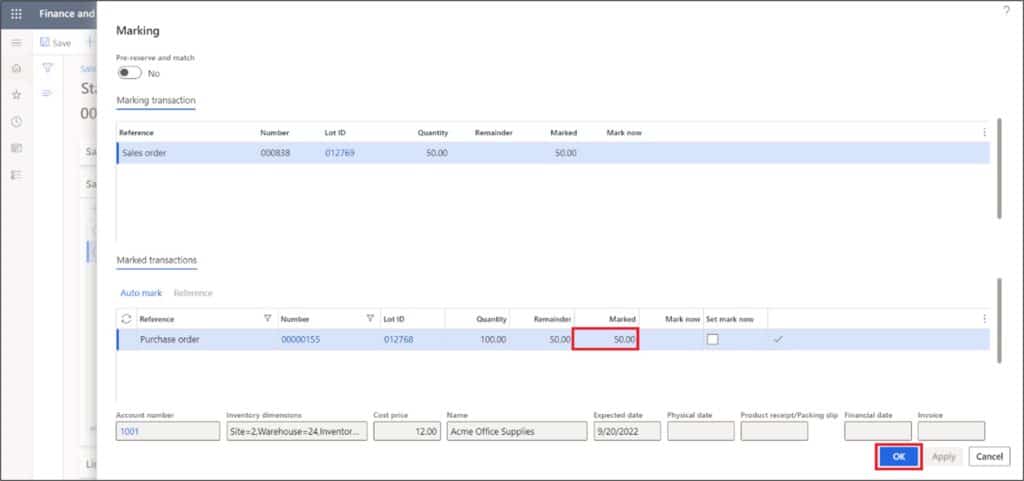
After applying the marking, you can see the marked quantity in the Marked field. Click the Ok button to exit the Marking page.
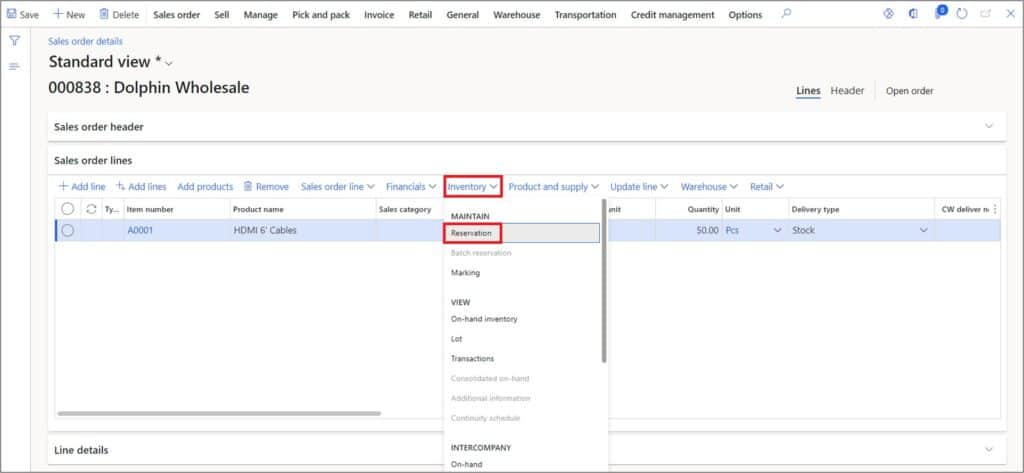
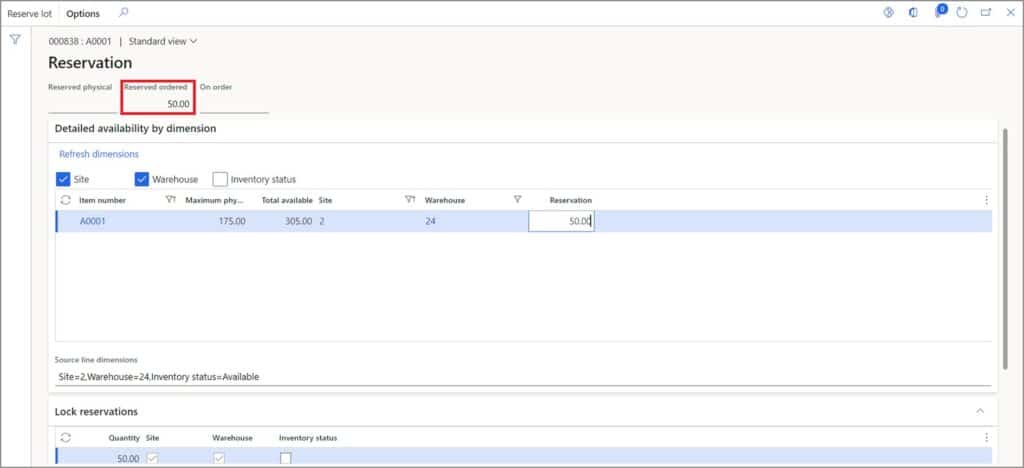
Once marked, the Sales order reserves the quantity on that is on the Purchase order. To verify, click the Inventory menu and then click the Reservation button.
You can see the reserved quantity in the Ordered-reserved field. The item is not yet received, so it can be reserved ordered only.
Since we have set the Demand release policy to ‘Before supply receipt’ in the Cross-docking template, we have to release the Sales order before the Purchase order is received. This will create the Sales order shipment but not the picking work because the Items must be Cross-docked on Purchase order receiving. In the Warehouse tab, click the Release to warehouse button.
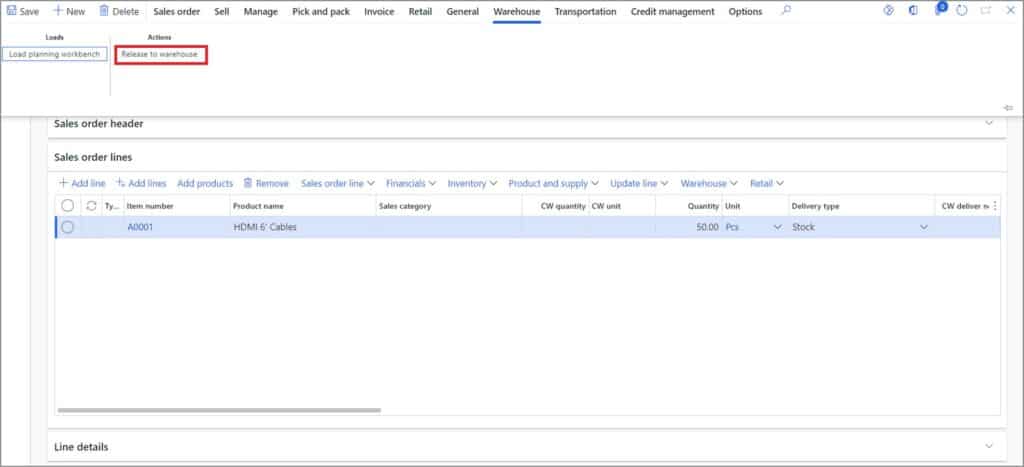
The Sales order has been released and the shipment has been created but the picking work is not created as the item has to picked under Cross-docking work.
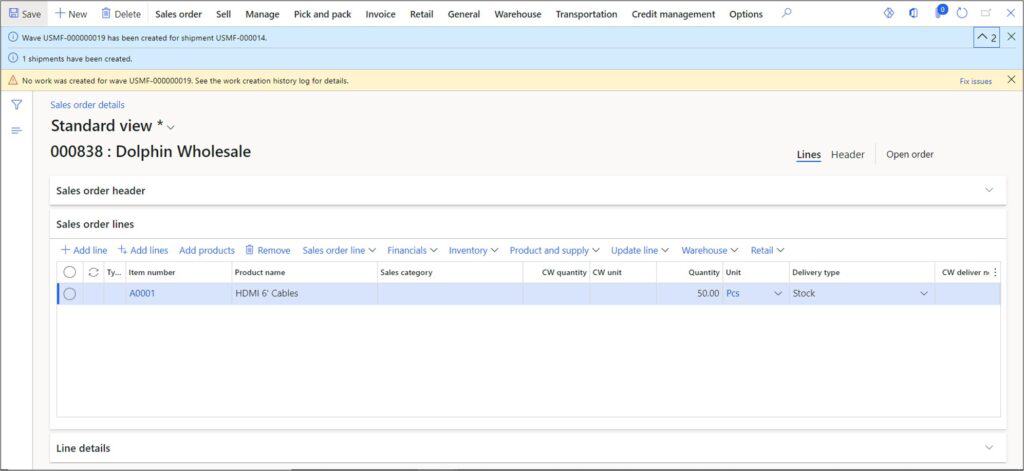
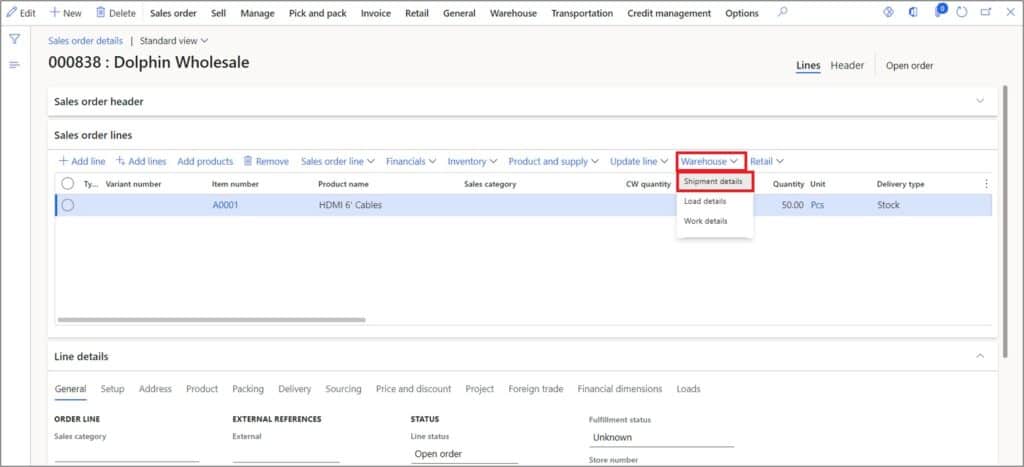
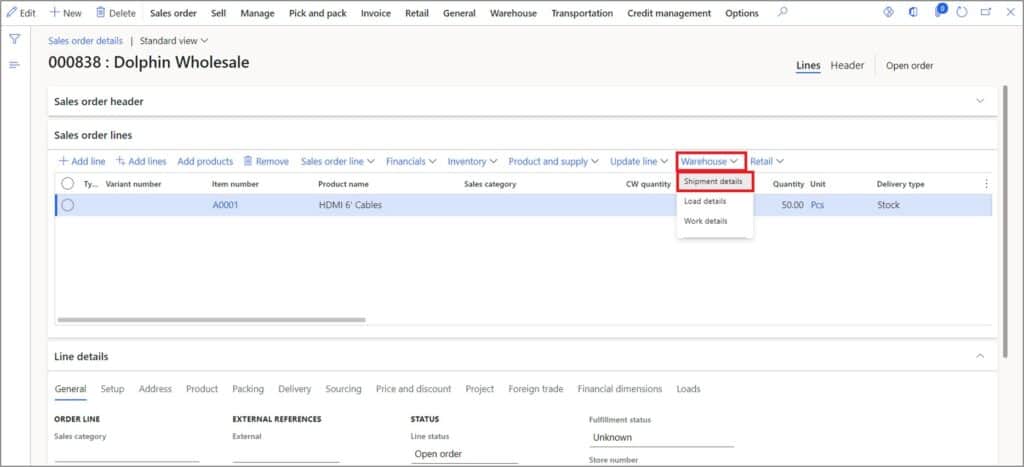
To see the shipment and the planned Cross-docking on the Sales order, click on the Warehouse option and click the Shipment details.

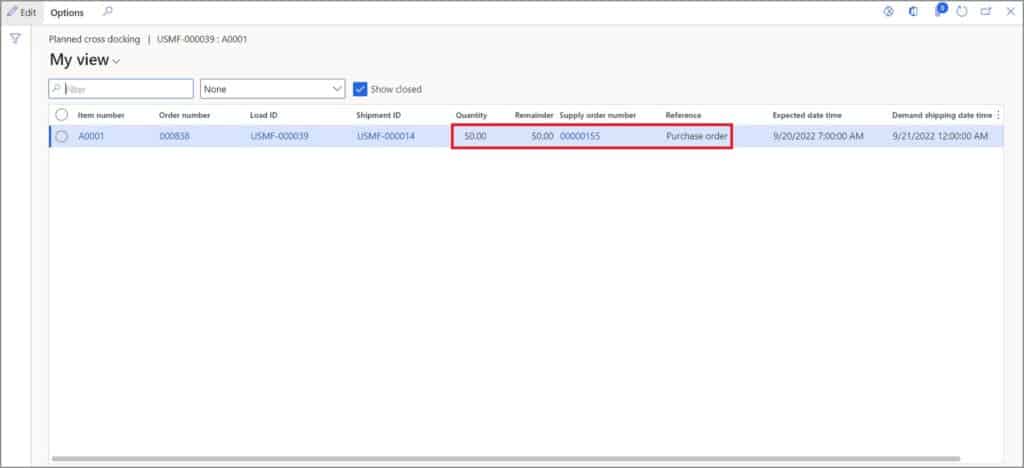
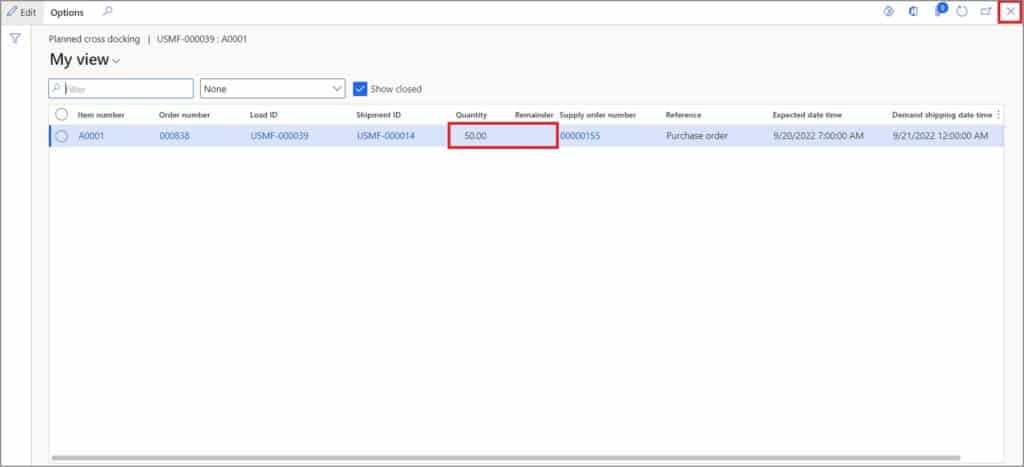
On the Shipment details page, click the Planned cross-docking button.
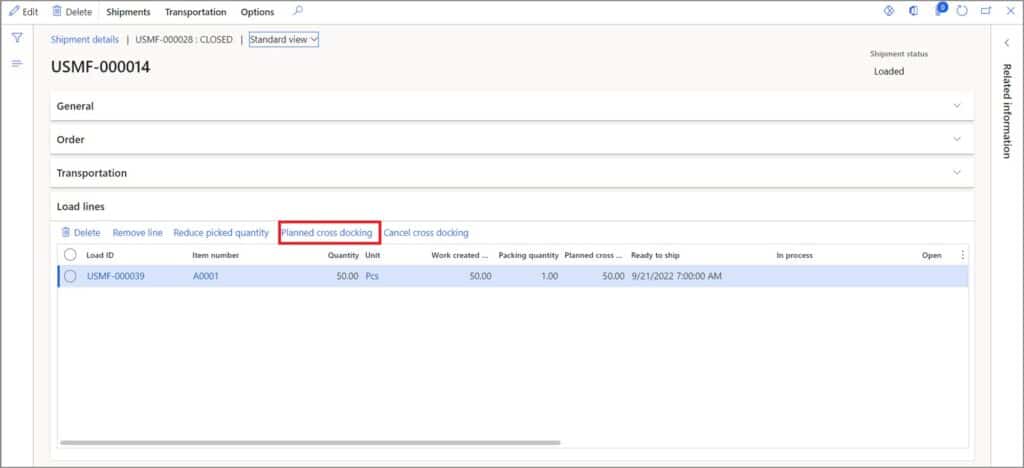
The Planned cross-docking page shows the Cross-dock quantity, the remaining quantity to be cross-docked and the Supply source.
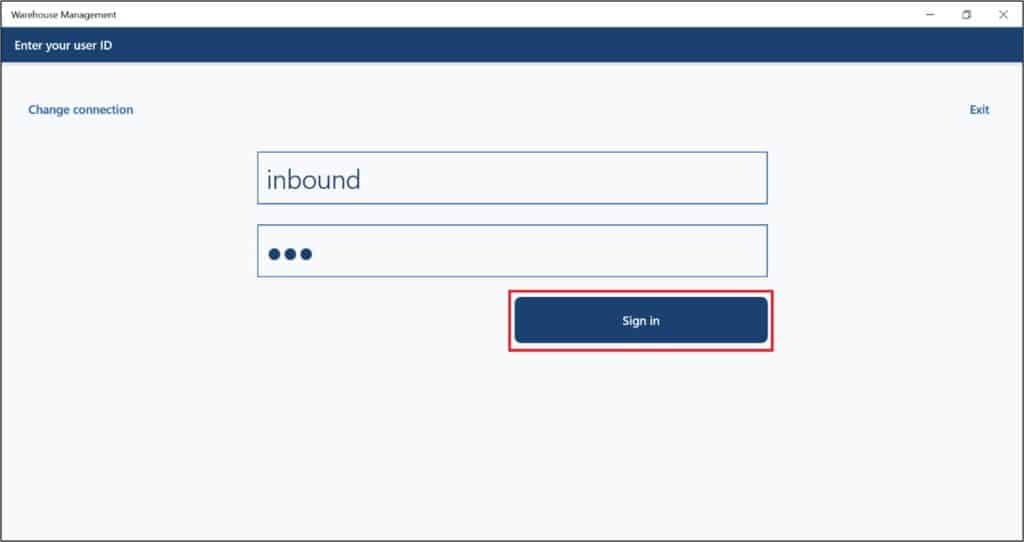
Now let’s receive the Purchase order. Once the Purchase order is delivered, we will receive the Purchase order using the warehouse management mobile application. To receive the Purchase order, open the warehouse management application. Enter the user ID and password of the warehouse receiving user. Click the Sign in button.
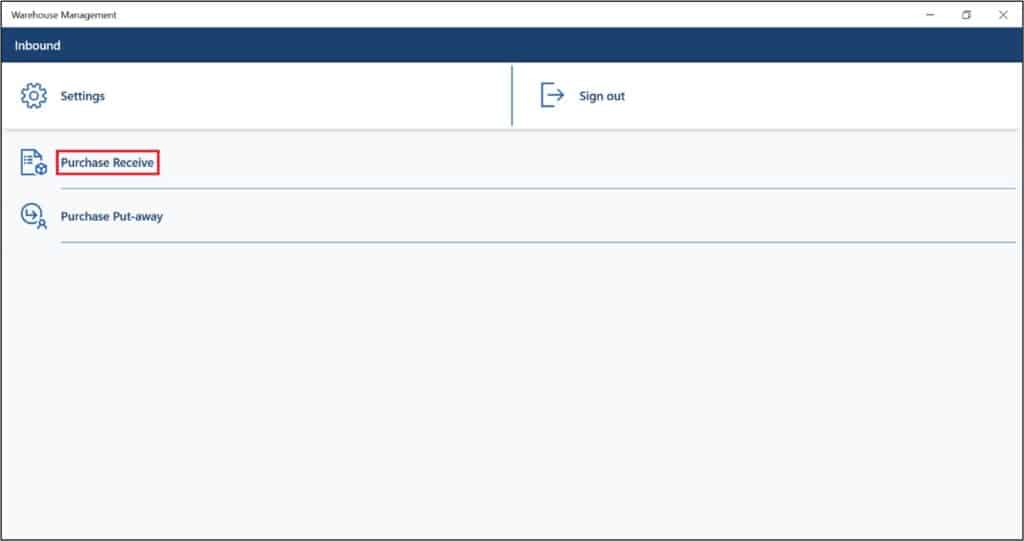
After signing in, you can see the menu that is associated with the user ID of the Worker. Click the Purchase receive menu.
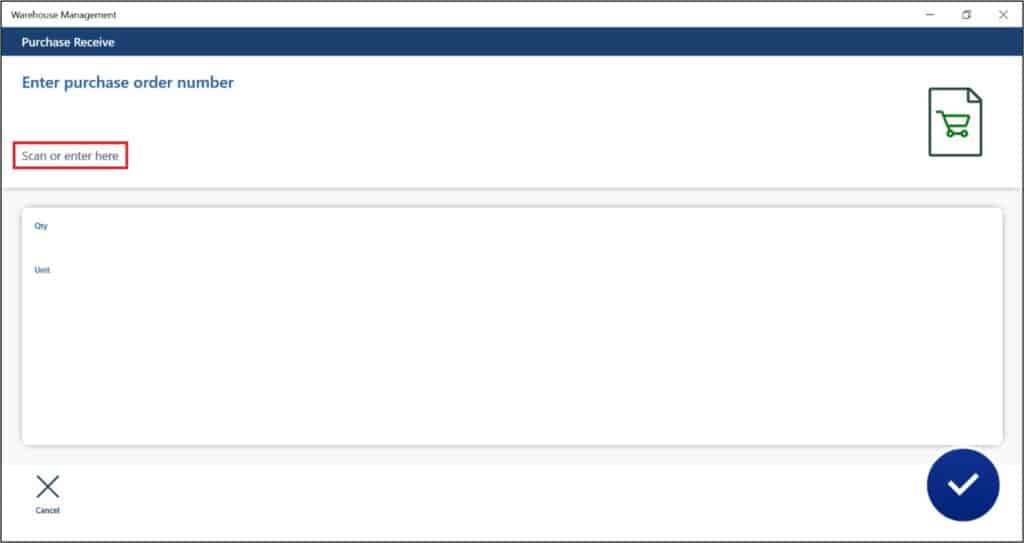
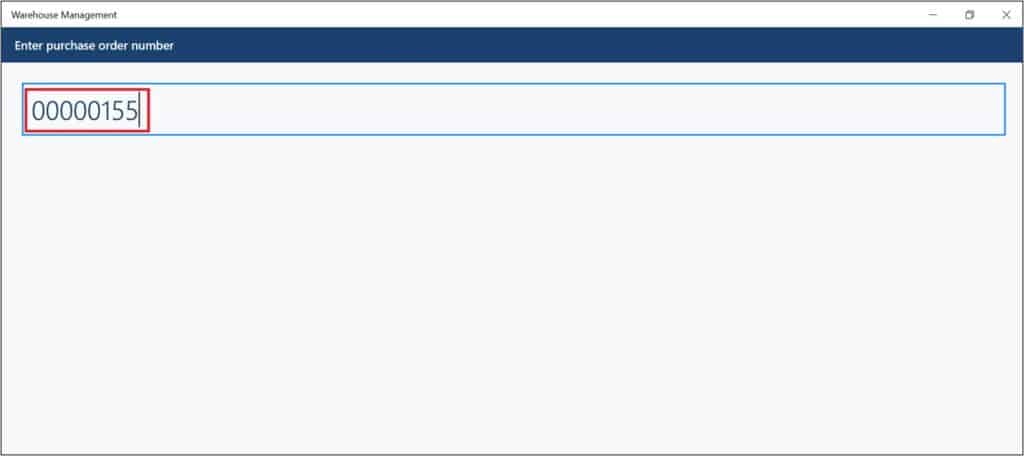
Scan or enter the Purchase order number from the purchase order we created and click the check mark.
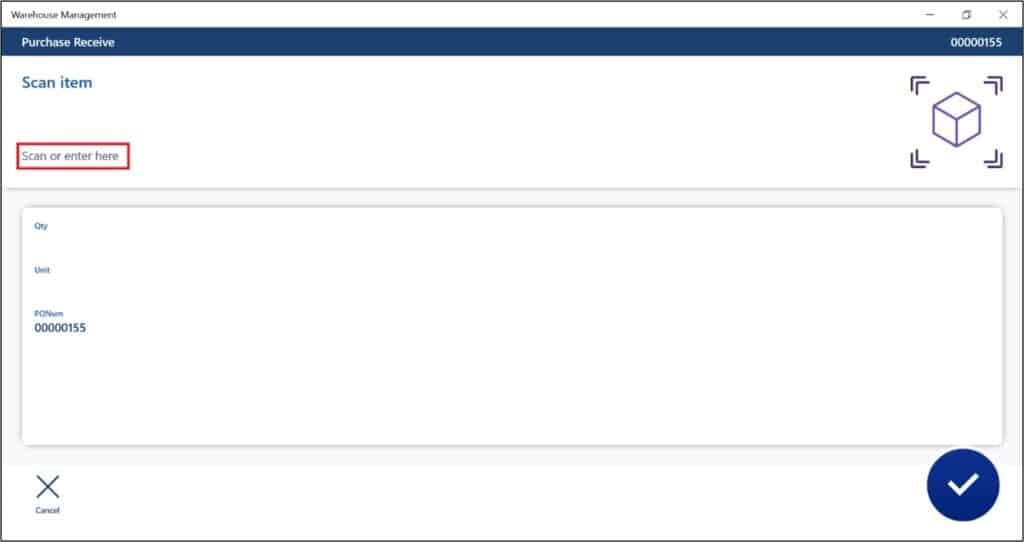
After entering the Purchase order number, Scan or enter the Item number.
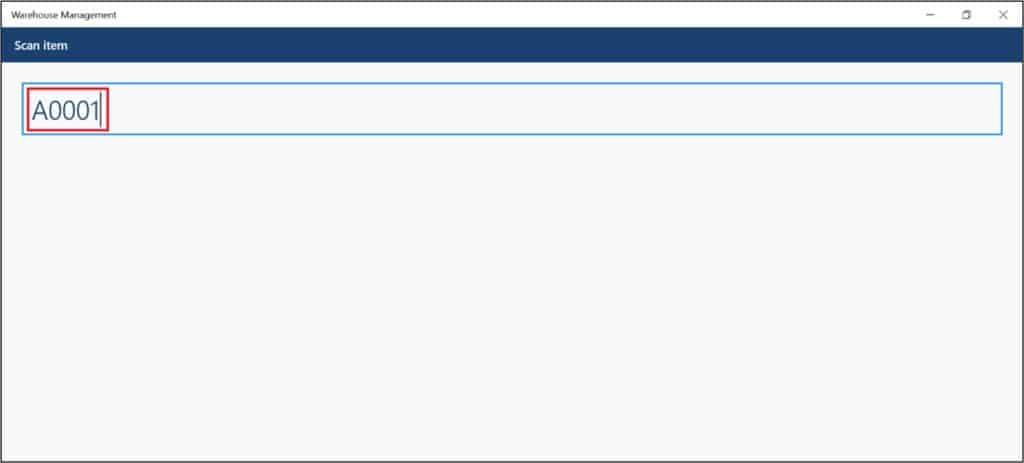
Enter the Item number and press the enter button.
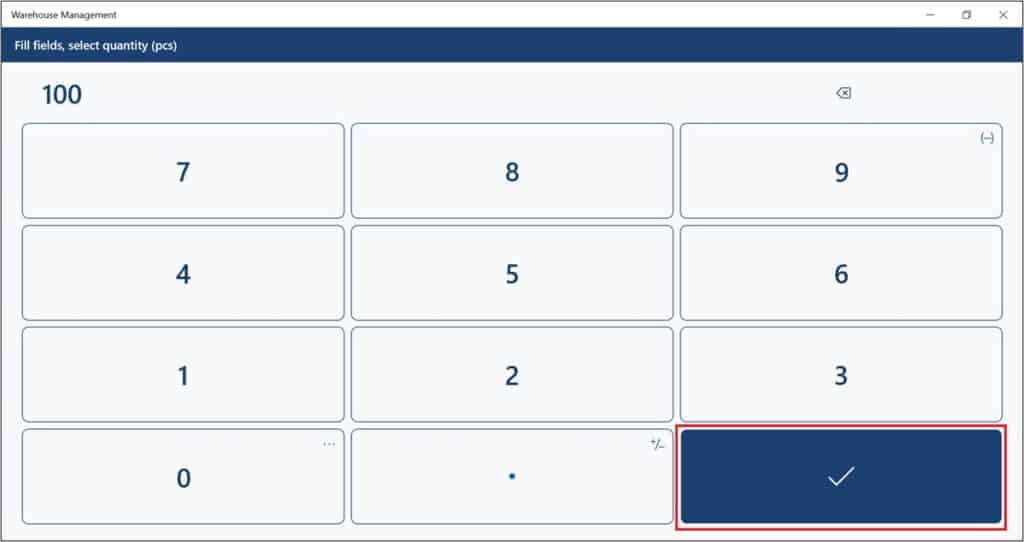
Now enter the quantity that has been received. To enter the quantity, click on the numbers.
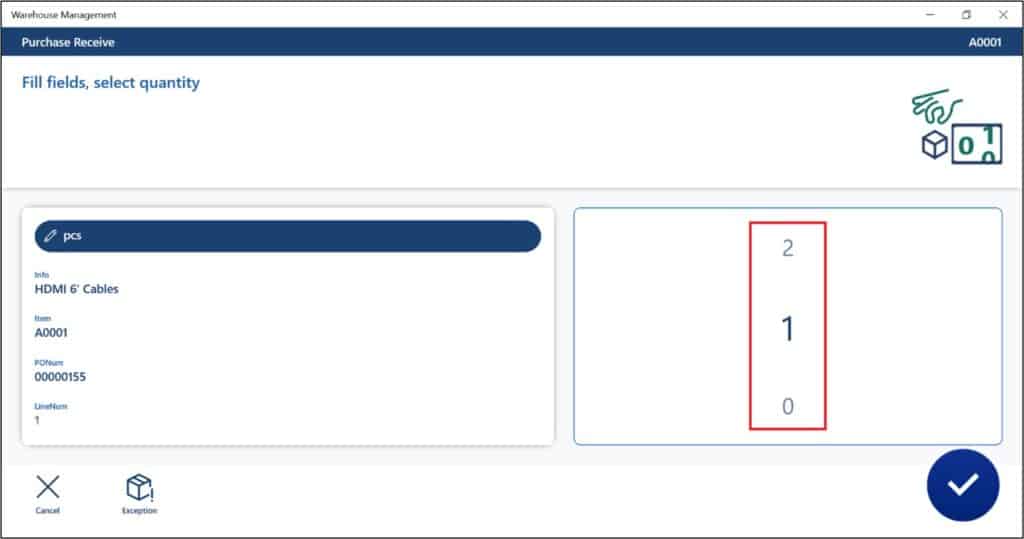
Enter the quantity and press the enter button.
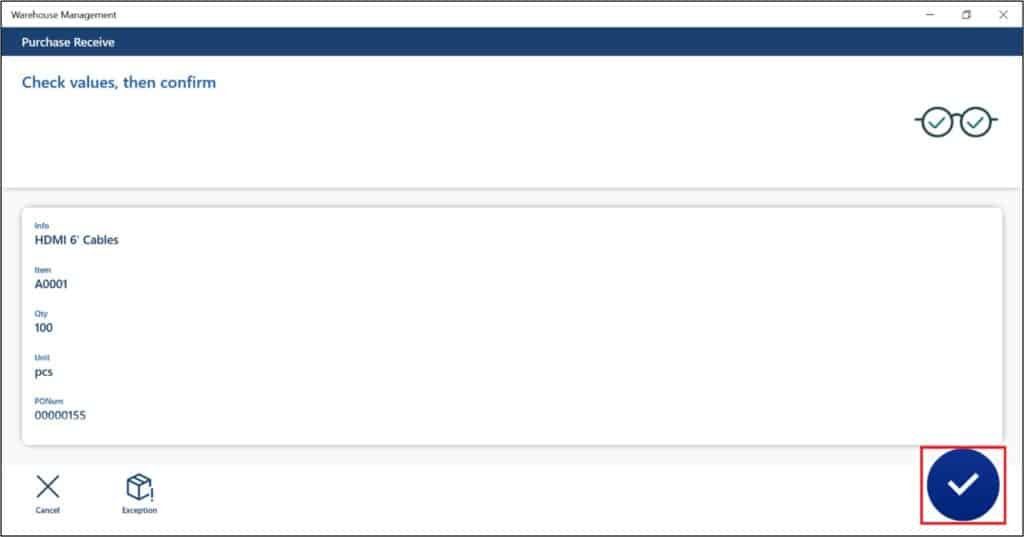
Confirm the item, quantity, unit and Purchase order number and press the enter button. Now the item has been received.
Once the Item is received, the Cross-docking and Purchase put-away work is created.
Note: The Cross-docking work has the priority over the purchase put-away work which means the Cross-docking work is created first to fulfil the Sales order and if there is any leftover quantity, would be allocated to the purchase put-away work.
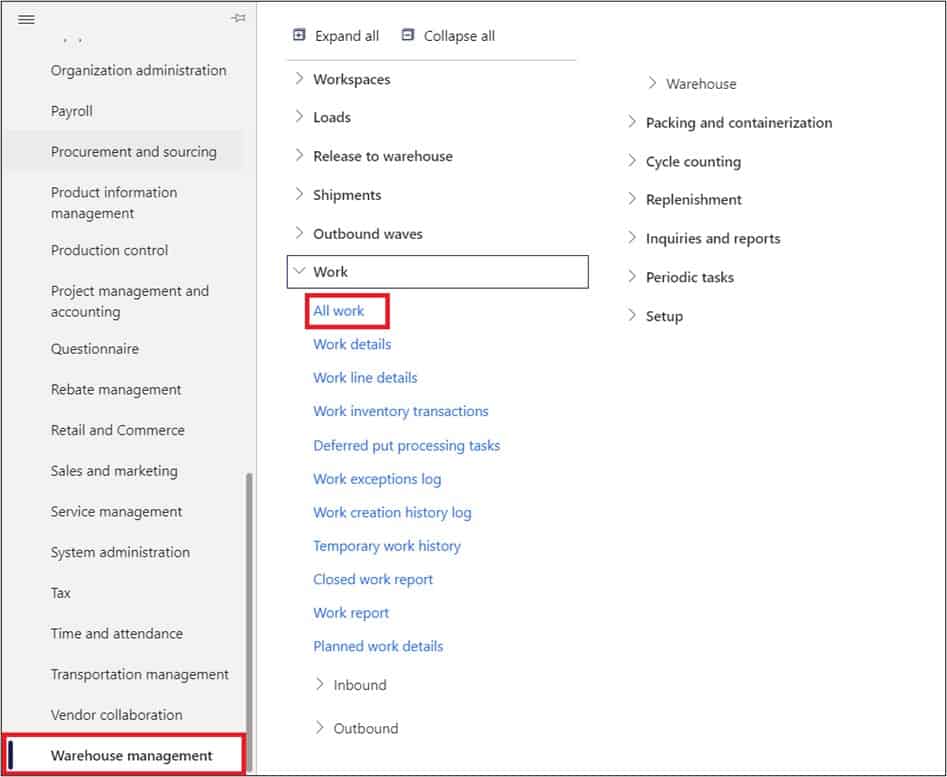
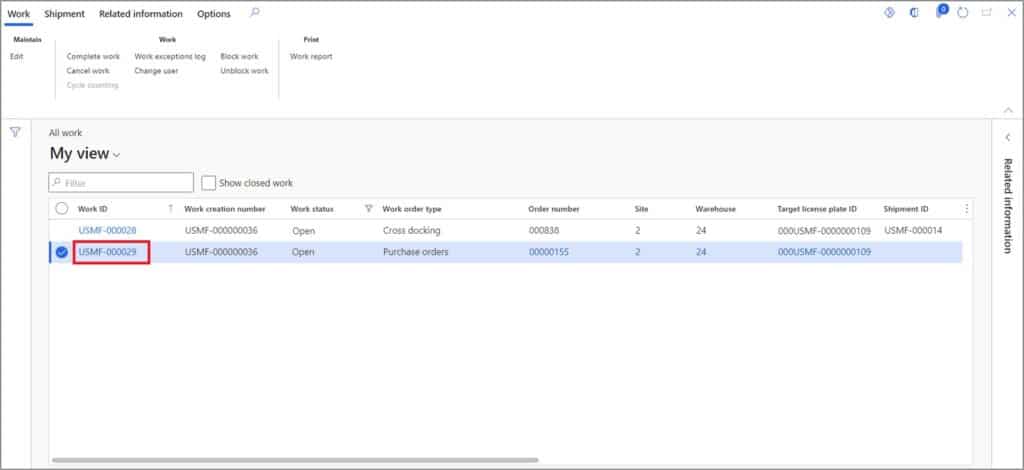
To see the work created after the Purchase order receiving, navigate to Warehouse management > Work > All work.
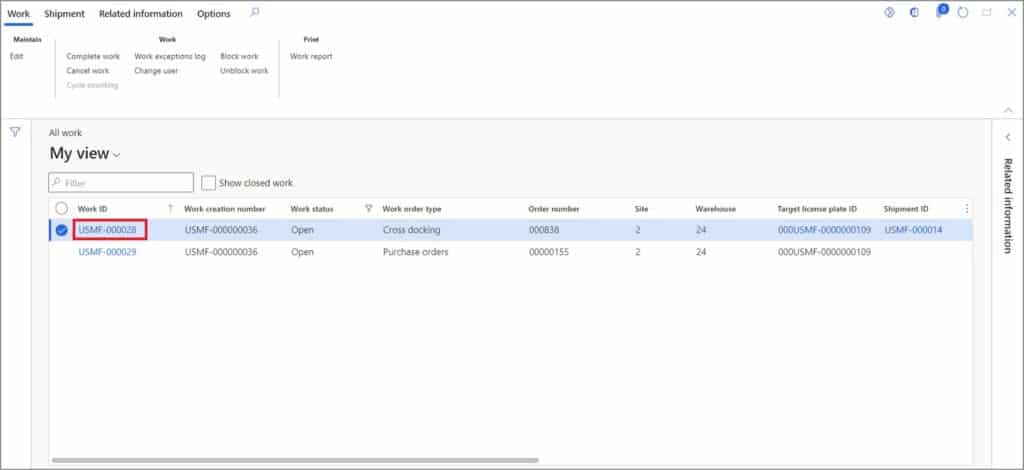
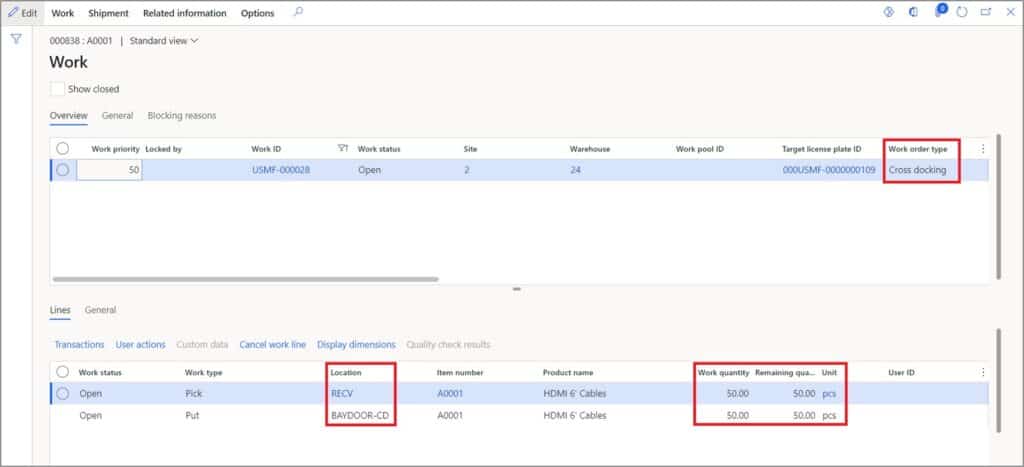
On the All work page, you can see the Cross-docking and Purchase order work. The License plate number is auto generated and is same for both of the Works records. This License plate number will be used to complete both of these work records. Click on the Cross-docking work ID.
The Cross-docking work has the suggested the Picking location where the Item has been originally received and the Put location that is set on the location directive because we are using the Location type ‘Location directives.’
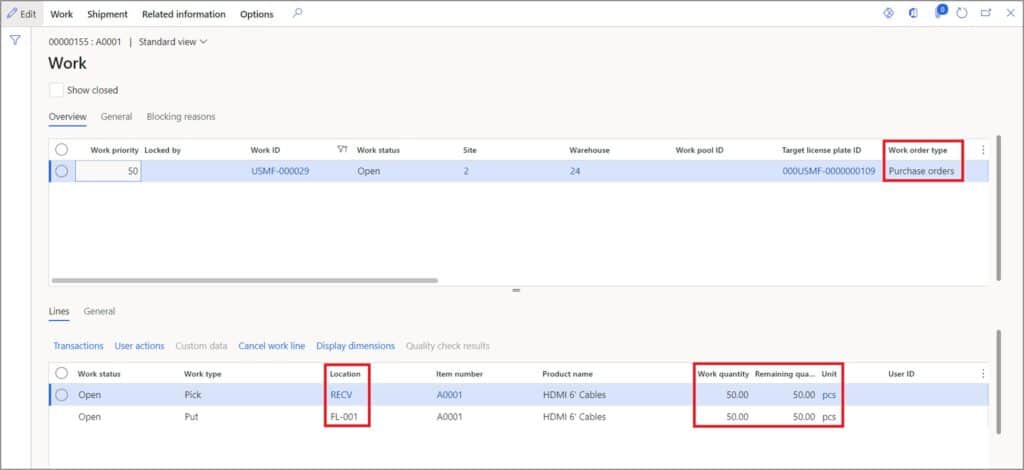
On the All work page, Click on the Purchase order work ID.
The Purchase order work has the suggested the Picking location where the Item has been originally received and the Put location that is set on the location directive. The quantity to put is the leftover quantity after fulfilling the Sales order requirement.
Once the Purchase order is received, the remaining quantity on the cross-docking gets updated. To see the Cross-docking status, on the Sales order, click on the Warehouse option and click the Shipment details.
On the Shipment details page, click the Planned cross-docking button.

The Planned cross-docking page shows the Cross-dock quantity and there is no remaining quantity because the Supply source/Purchase order has fulfilled the demand of the Sales order.
Note: At this point, the status of inventory transaction line updates from ‘Reserved ordered’ to ‘Reserved physical.’ The Reserved physical ensures that the item that has been received is allocated to the Sales order.
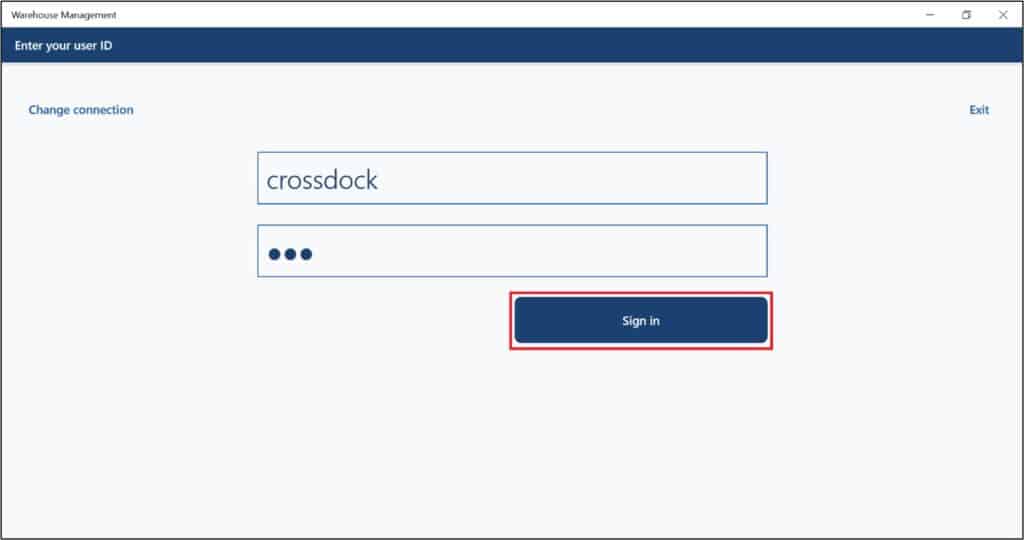
Now let us complete the Cross-docking work using the warehouse management mobile application to move the item to Cross-dock location. To complete the Cross-dock work, open the warehouse management application. Enter the user ID and password of the cross-dock user. Click the Sign in button.
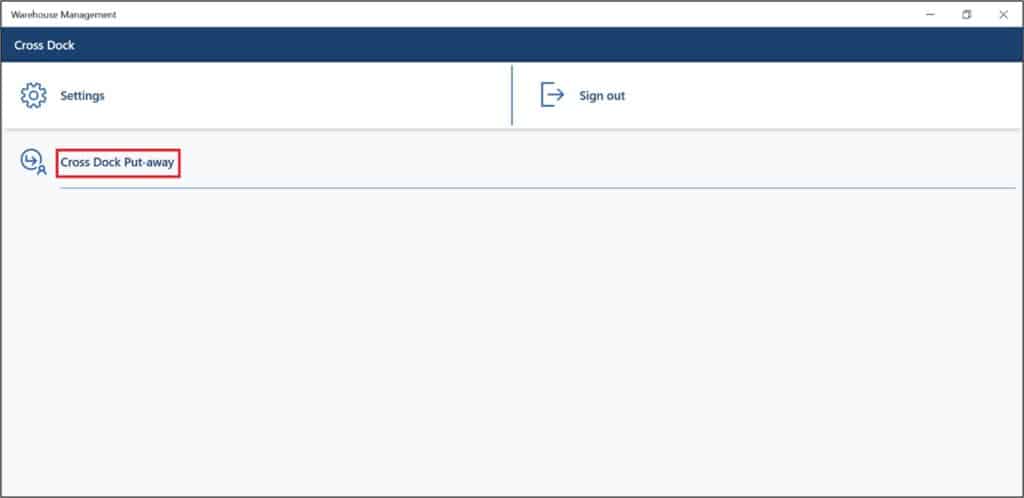
After signing in, you can see the menu that is associated with the user ID of the Worker. Click the Cross-dock Put-away menu.
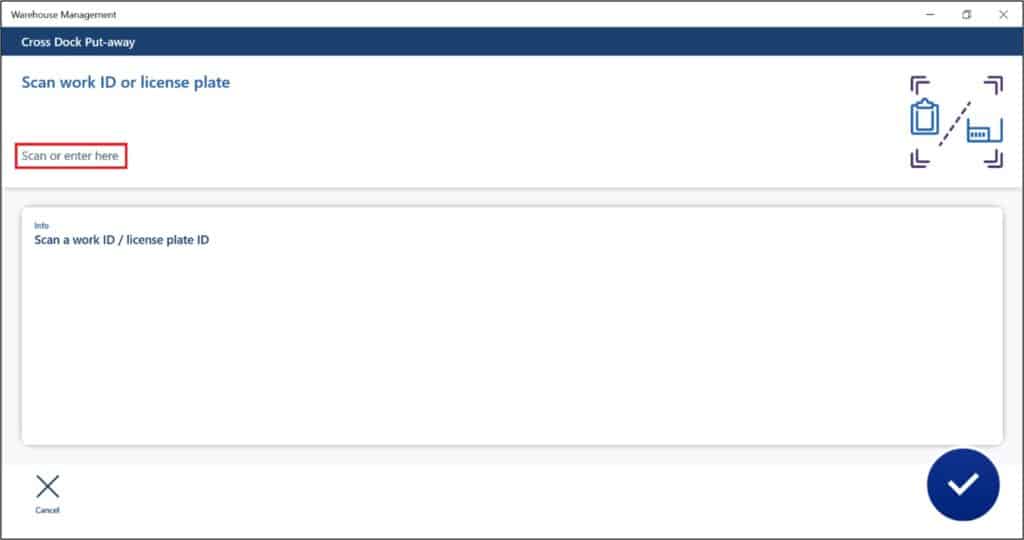
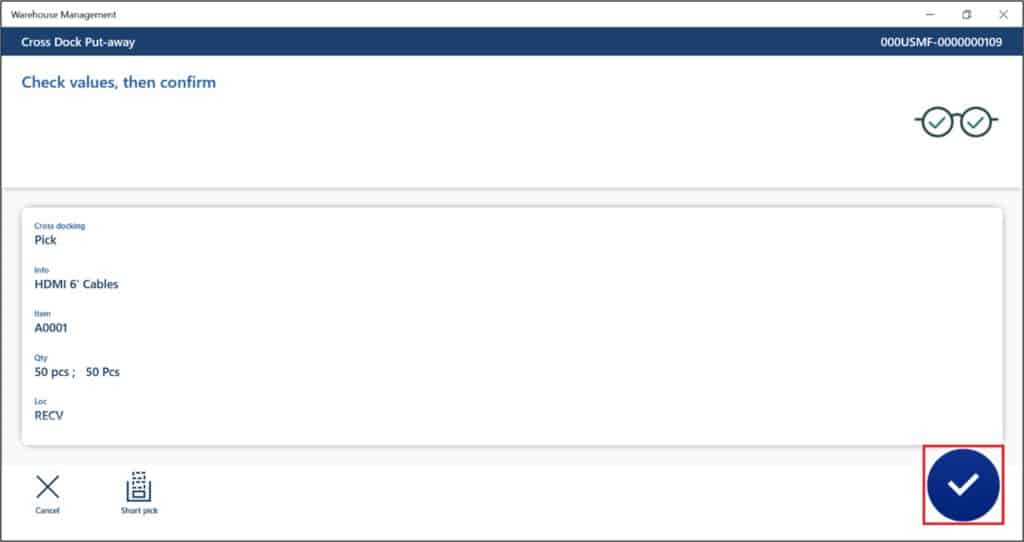
Scan or enter the License plate number of the Cross-dock work. The cross-dock work shows the work details. Confirm the details and press the enter button.
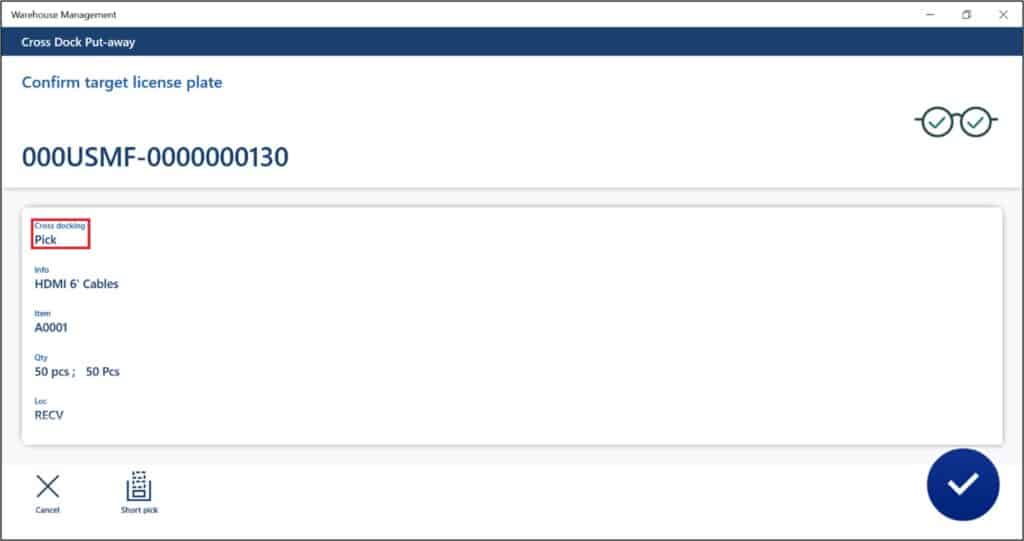
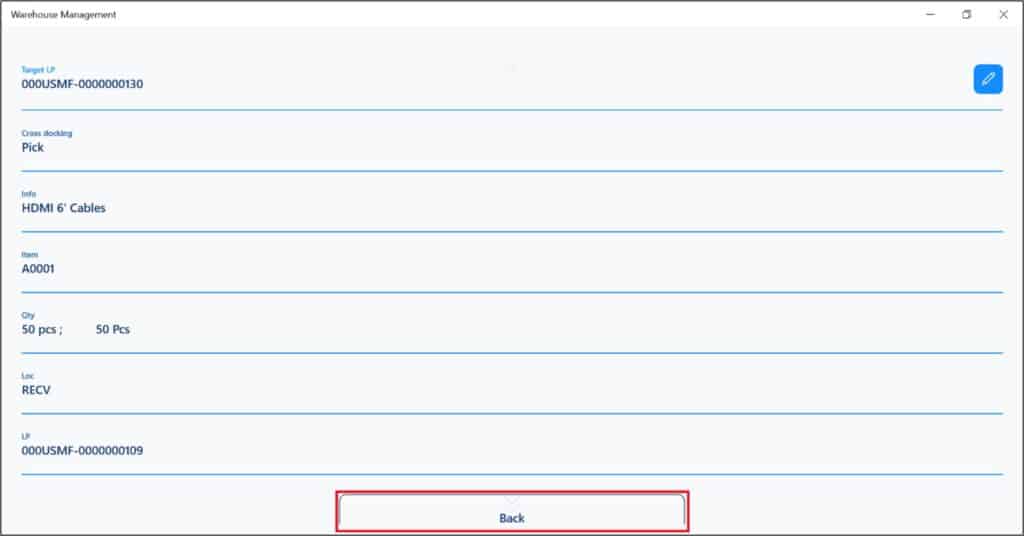
Upon confirmation, the new Target License plate number is generated automatically. Click on details area to see both the source and target license plate numbers.
Click the Back button to go to details page.
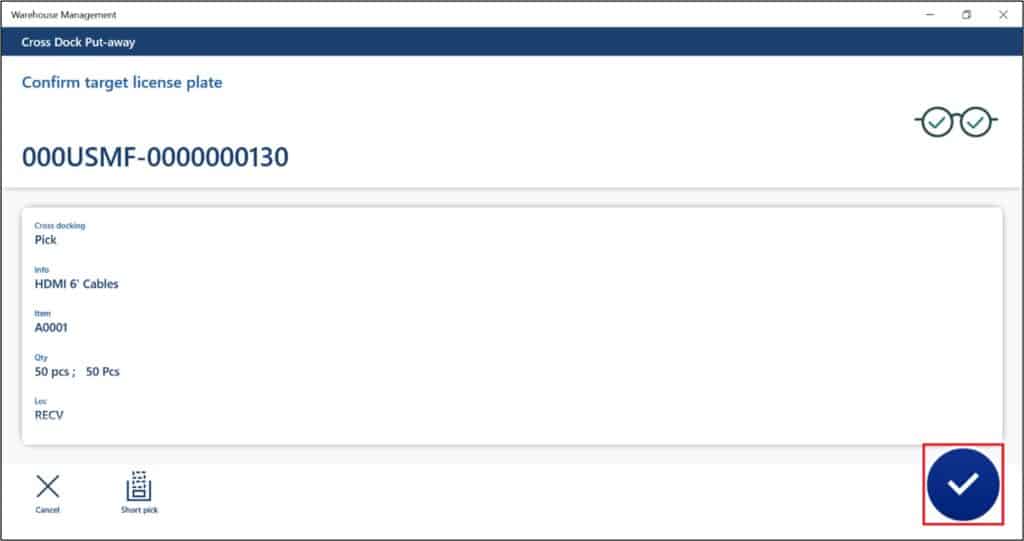
Press the enter to confirm the Target License plate number.
On the deliver to put location page, you can see the Cross-dock put location. Press the enter to complete the put-away.
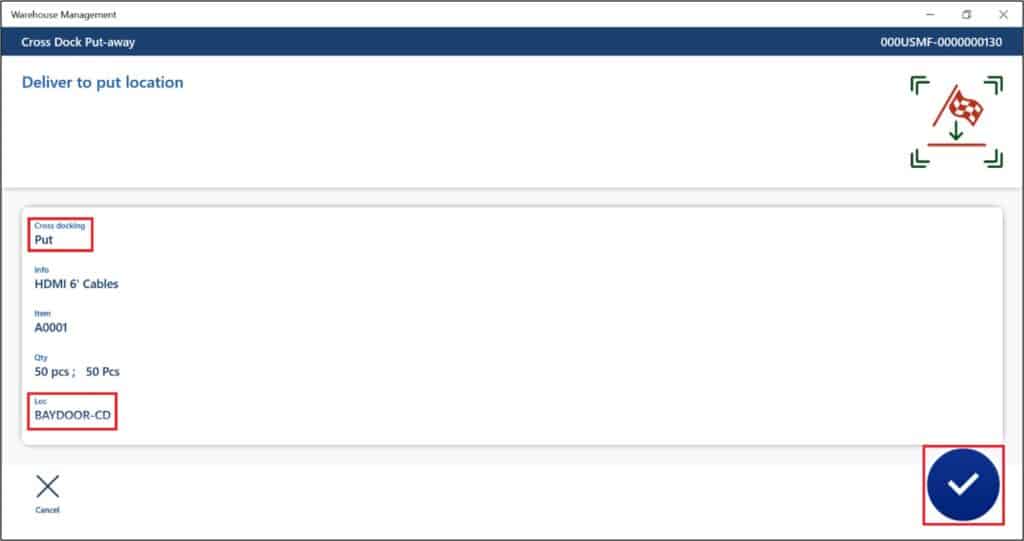
The cross-docking put-away work has been completed.
Note: At this point, the status of inventory transaction line updates from ‘Reserved physical’ to ‘Picked’ and the status of Shipment updates from ‘in process’ to ‘Loaded.’
Shipment Confirmation
After completing the Cross-docking work, you can confirm the Sales order shipment because the Item is already Picked. To confirm the Shipment, on the Sales order, click on the Warehouse option and click the Shipment details.
On the Shipment details page, click on the Shipment confirmation button in Shipments tab.
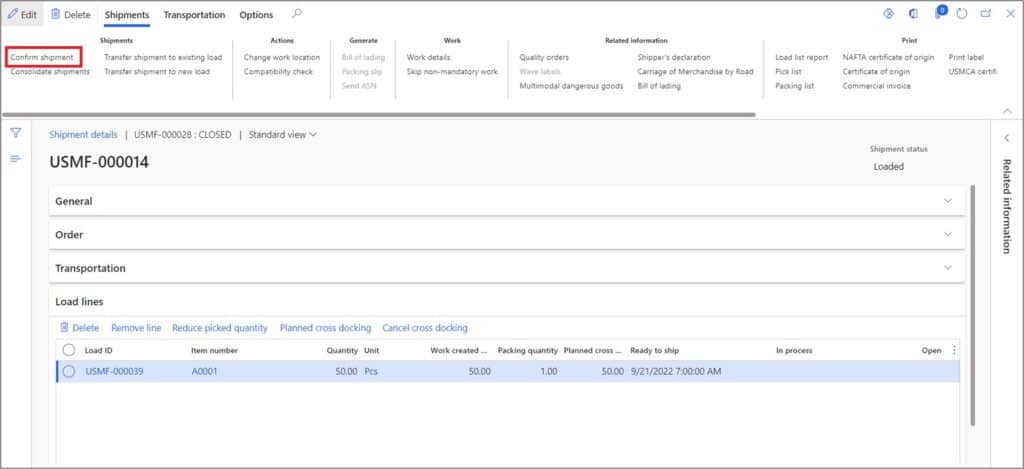
The Shipment is posted and the status gets updated to ‘Shipped.’
Now you can post the packing slip. On the Sales order, click on the Post packing slip button in the Pick and pack tab. Validate the quantity and click the Ok button.
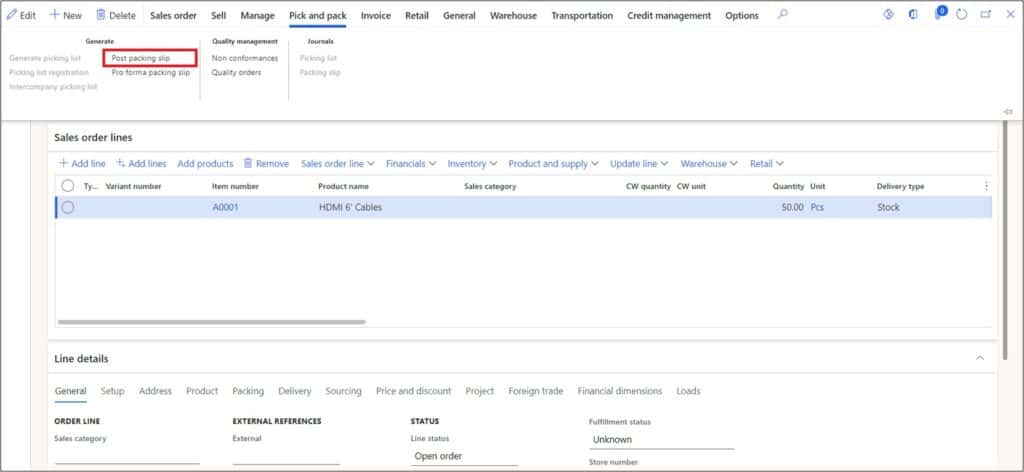
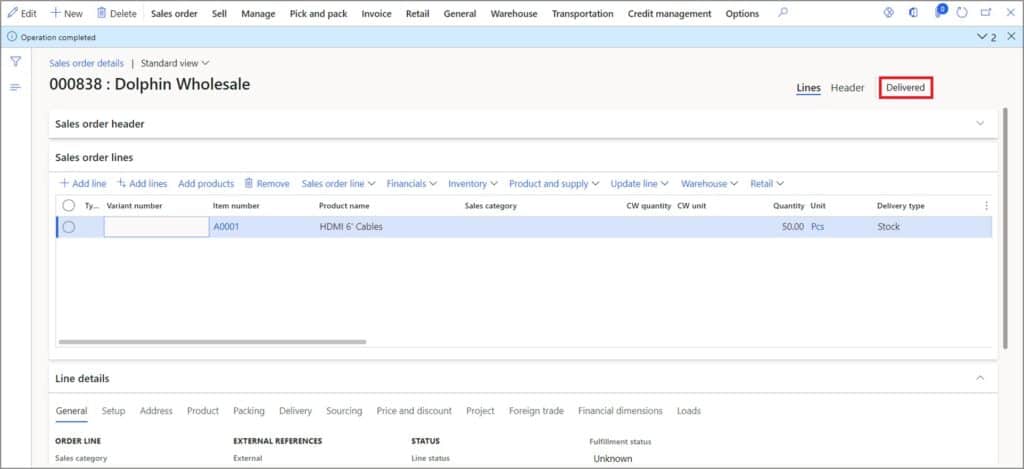
Note: At this point, the status of inventory transaction line updates from ‘Picked’ to ‘Deducted’ and the status of Sales order updates from ‘Open order’ to ‘Delivered.’
Put Away Remaining Received PO Items
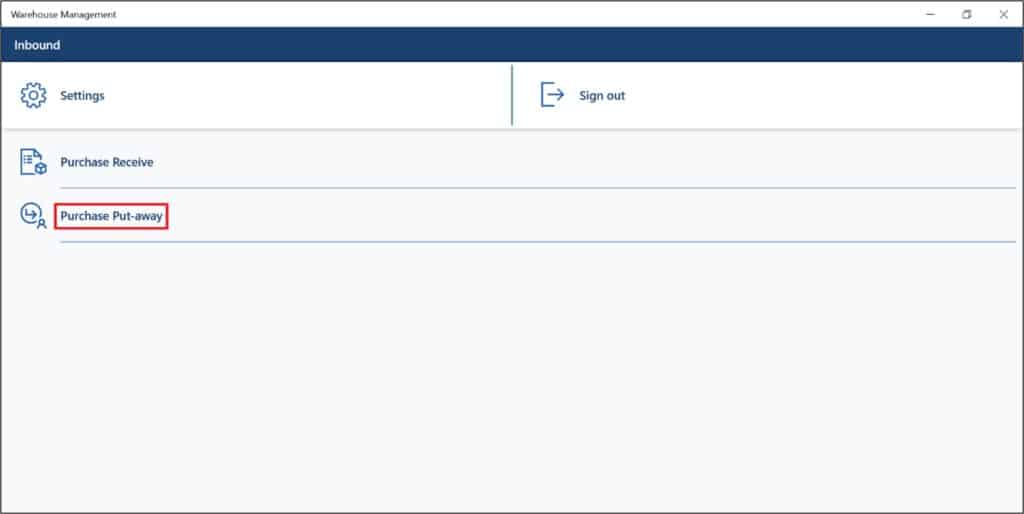
The Purchase order item put-away can also be completed in parallel or after completing the Cross-docking. To put-away the Purchase order item, open the warehouse management application. Enter the user ID and password of the warehouse receiving user. Click the Sign in button.
After signing in, you can see the menu that is associated with the user ID of the Worker. Click the Purchase receive menu.
Scan or enter the License plate number of the Purchase order work. Enter the License plate number and press the enter button.

The purchase order put-away work shows the work details. Confirm the details and press the enter button.
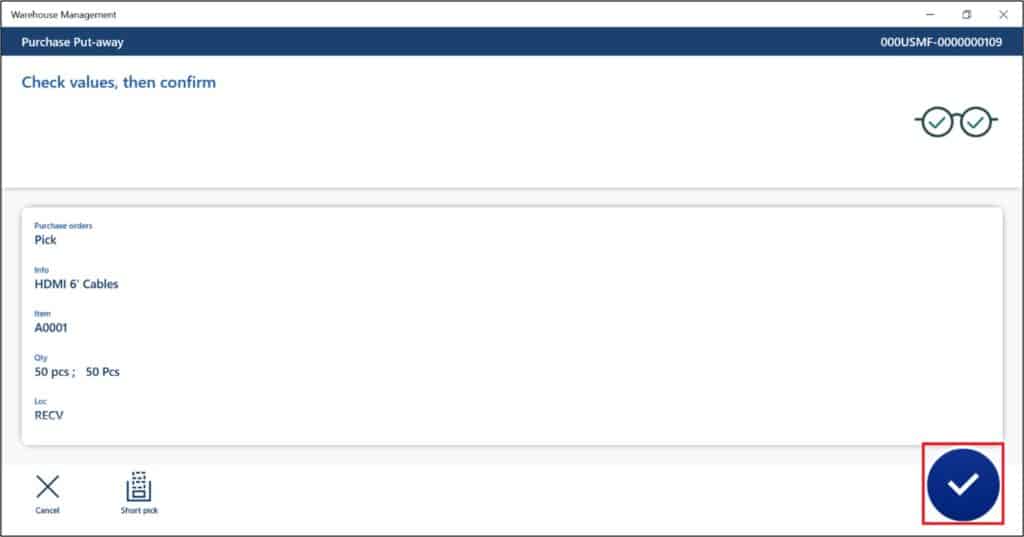
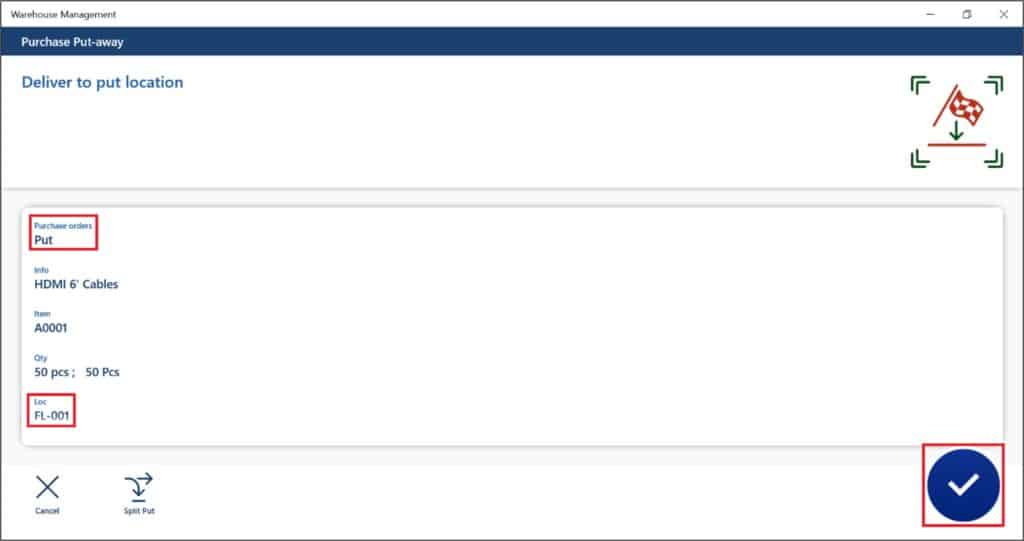
On the Purchase order put-away page, you can see the Item’s main storage location as the put location because this leftover quantity has to be stored on its location suggested by Location directives. Press the enter to complete the put-away. The Purchase order put-away work has been completed.
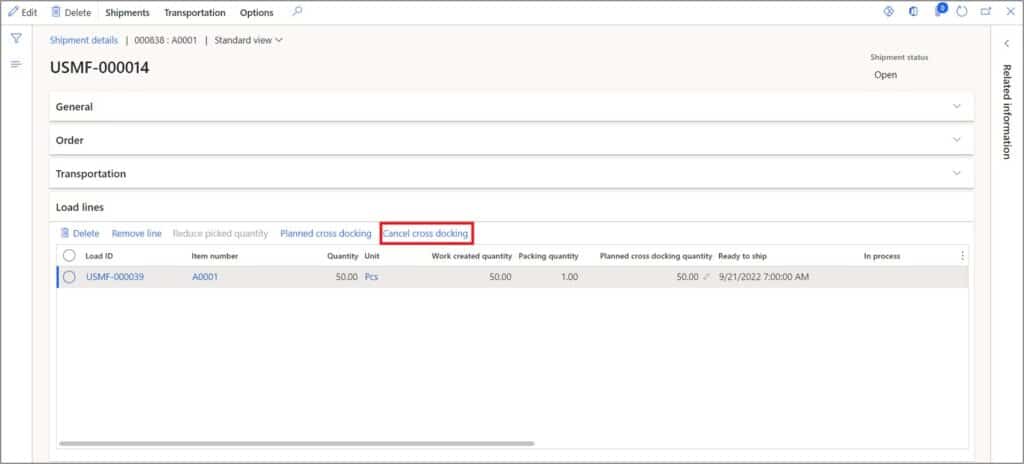
Cancel Cross-docking
If you cancel the planned cross-docking before the Supply order/Purchase order, the Purchase order receiving will not create the cross-docking work. To cancel the planned cross-docking, got to shipment details. On the shipment details page, click the Cancel cross-docking button.
The planned cross-docking gets cancelled and the Planned cross-docking quantity removes the quantity.
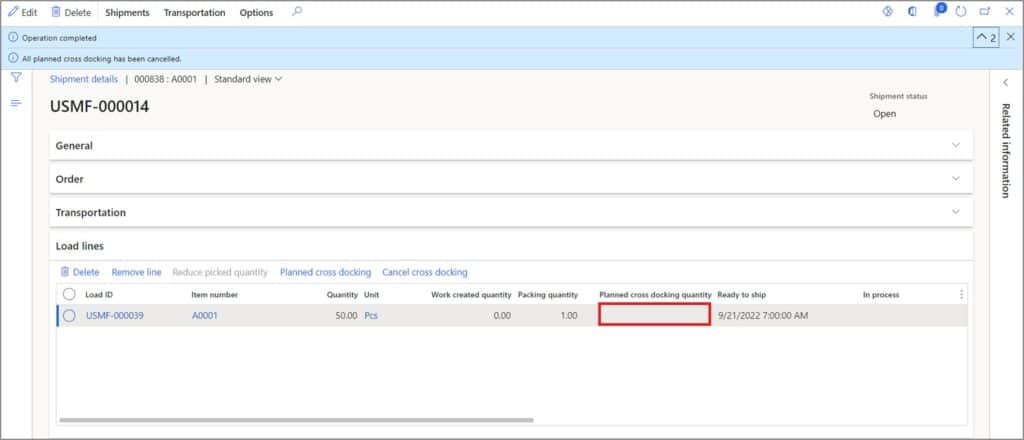
The planned cross-docking page also shows nothing remaining.
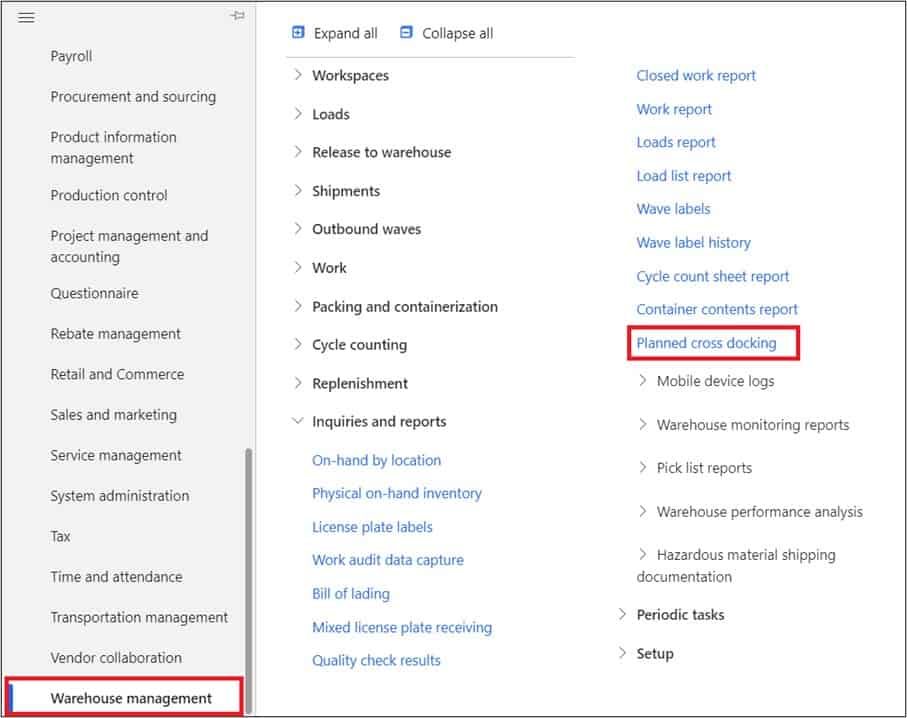
Planned Cross-docking Inquiry
To see all the planned cross-docking, go to Planned cross-docking inquiry by navigating to Warehouse management > Inquiries and reports > Planned cross-docking.

Takeaways
The Cross-docking functionality helps to skip the step of putting away the items to storage locations if those items are required for outbound order(s). In this way, the warehouse team can minimize the unnecessary stock movement on the warehouse floor.