

There are some business processes that require certain people to sign off on a change, procedure, operation, test etc. to ensure that the process has accountability, traceability, and accords with regulatory or industry standards. In Dynamics 365 Finance and Operations electronic signature is an out of the box feature that allows you to capture a digital signature and complete audit of the data being updated, created, or deleted.
The electronic signature is equivalent to a physical signature because the signature can only be given by the person that knows the password associated to the certificate issued by the system. This provides full traceability around sensitive data and data that must fully audited.
In this article I am going to use a real-life example to illustrate how to configure and use electronic signatures. For this example, lets imagine that a company has a policy where any update to sensitive data, like vendor bank account information, must be signed to comply with auditing standards and best practices. For this we will enable and require digital signature for any update to vendor bank account information.
Setup
Get Certificate
The first step is to get the unique certificate that verifies that the person providing the signature is authentic. When you create the certificate there will be a public key and a private encrypted key generated. The public key is the password they you will enter and is known only by the person creating the certificate.
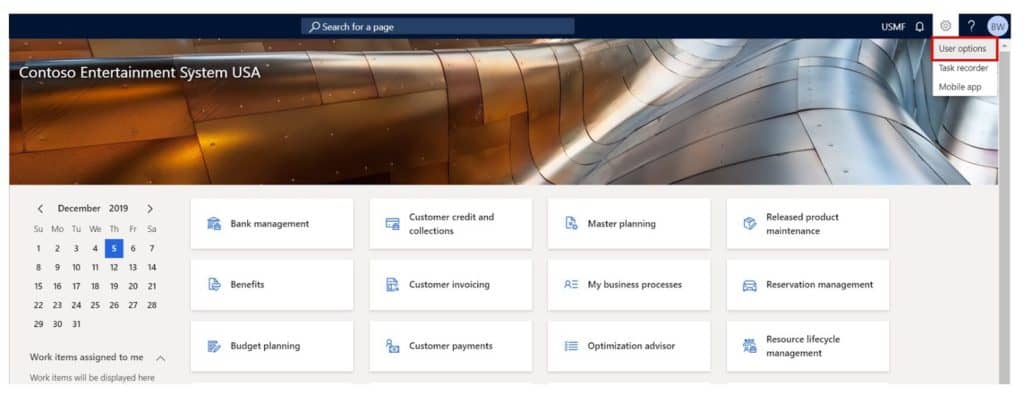
To activate the certificate, click on the settings button (gear icon in the top right corner) and click “User options”.
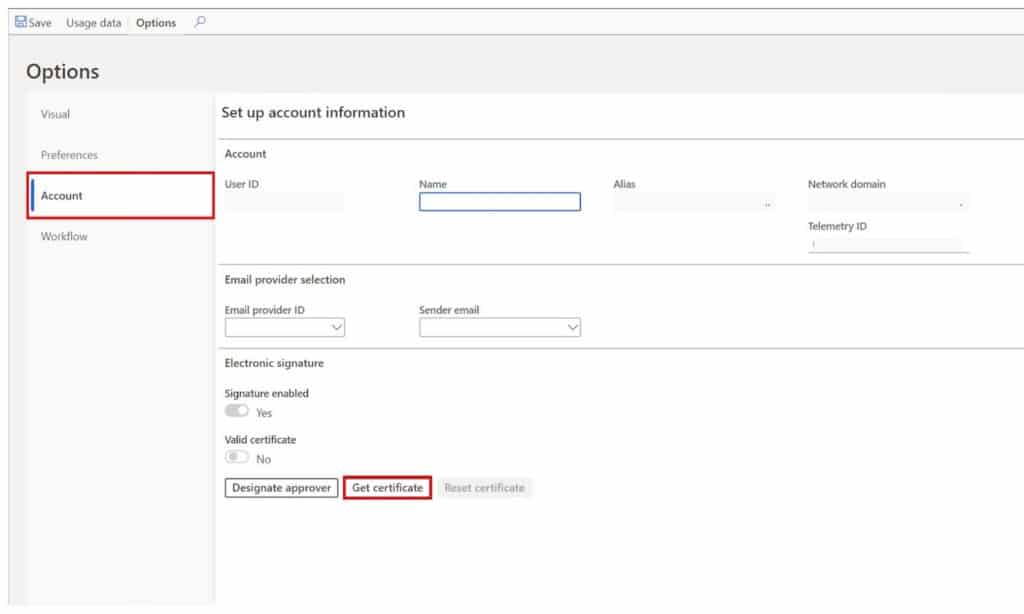
Click the “Account” tab. In the account tab, in the “Electronic signature” tab click the “Get certificate” button.
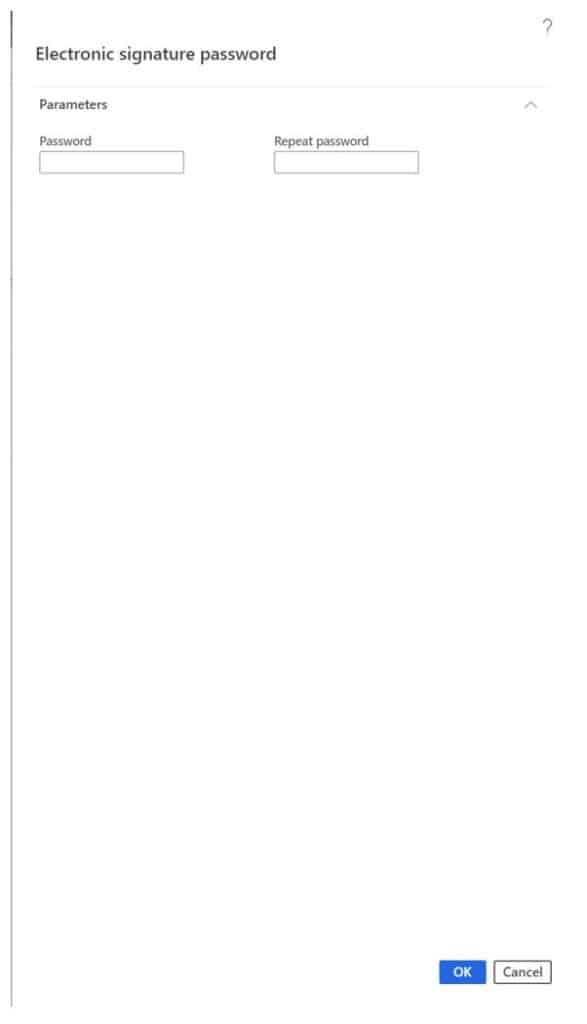
This will open a pane where you will enter a password that only you know. D365 will ask us for this password when we update the vendor bank account information later in the example.
Click “OK” to save your password and confirm your certificate.
Set Electronic Signature Parameters
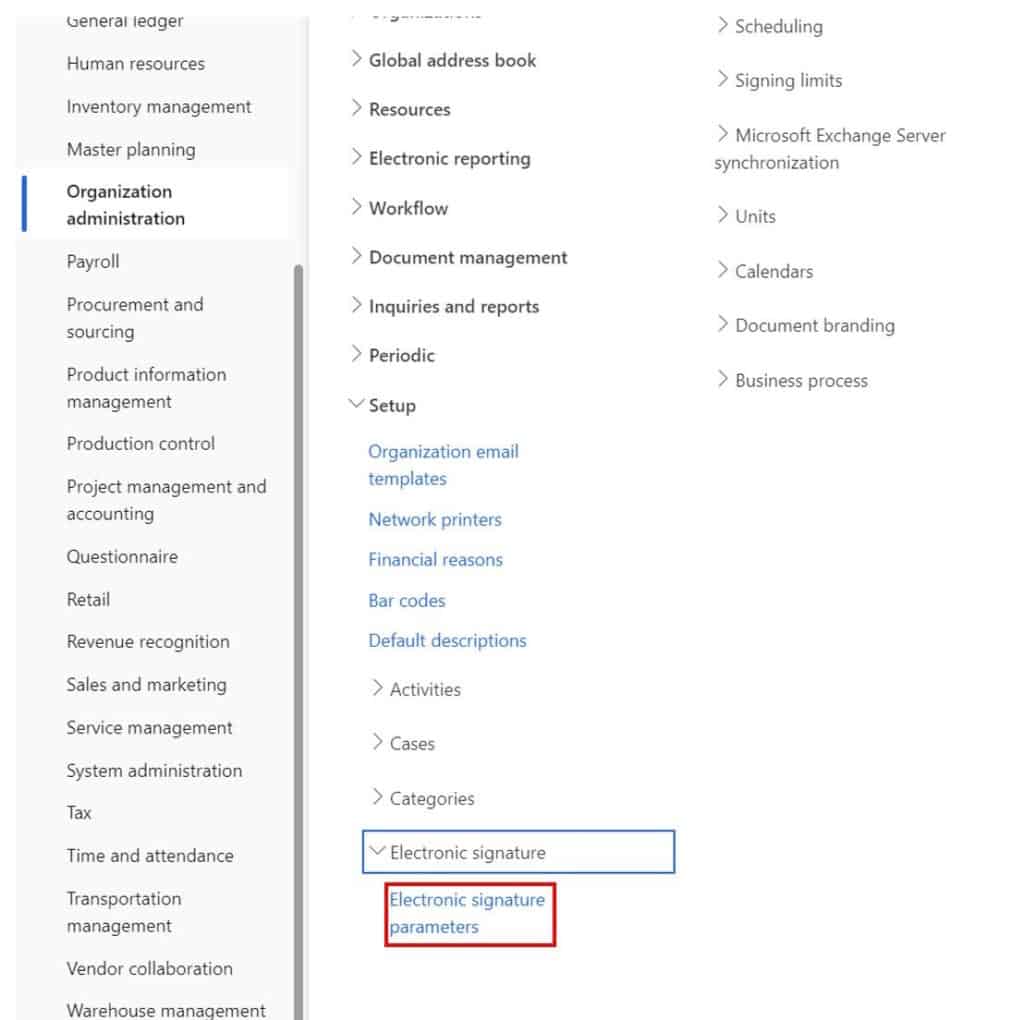
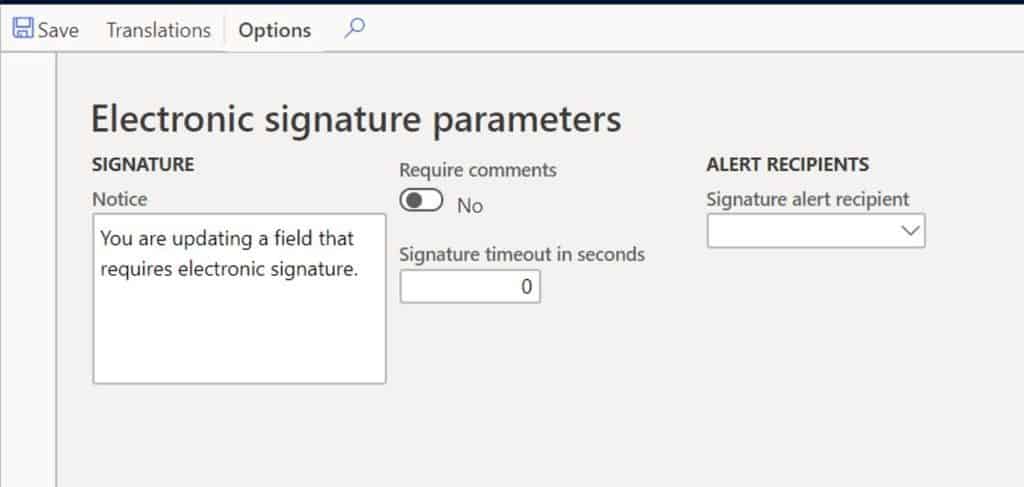
The next thing we need to set is the electronic signature parameters. To do this navigate to Organization administration > Setup > Electronic signature parameters.
Here you can write an electronic signature statement explaining that an electronic signature is required, why it is required, and what it means to provide a signature.
If you enable the “Require comments” flag the user will be required to enter a comment on the electronic signature form when prompted.
The “Signature timeout in seconds” lets you timeout the signature in a specified number of seconds. So if the amount of seconds pass without confirming the signature the electronic signature will timeout.
There is also an option to send an email alert to a certain recipient to flag any potential fraudulent signatures.
Configure Electronic Signature Requirements
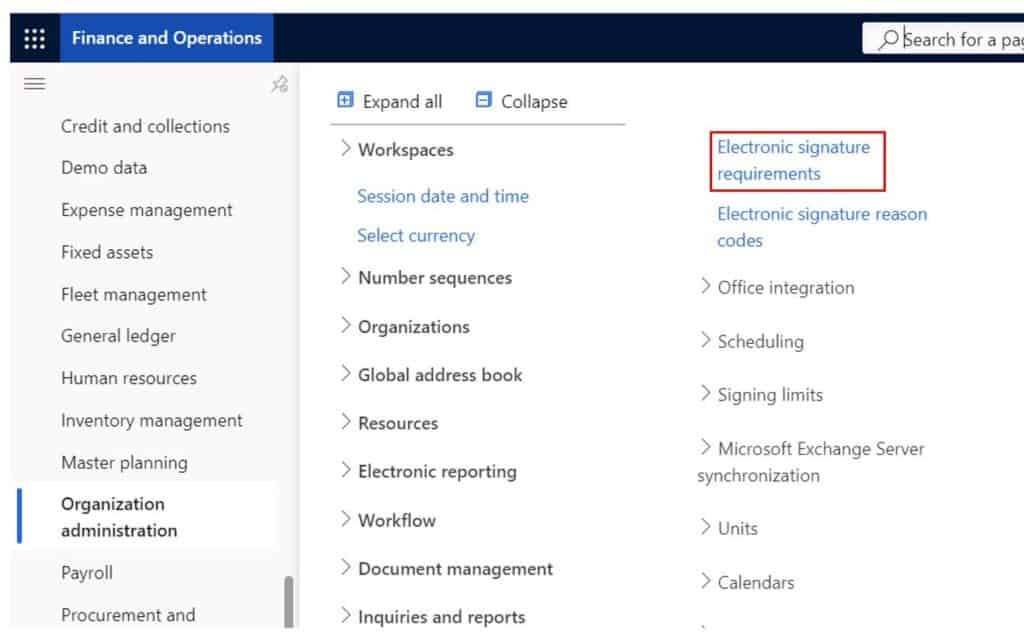
The electronic signature requirements are how you trigger the electronic signature. To configure the electronic signature requirements, navigate to Organization administration > Electronic signature > Electronic signature requirements.
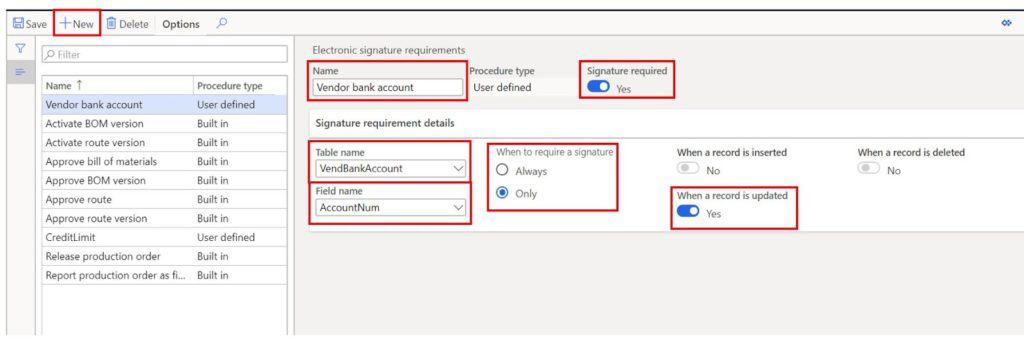
There are some pre-built electronic signature requirements that are all off by default. If you want to use any of them, you can set the “Signature required” flag to “Yes”.
In our example we want to require an electronic signature for an update to a vendor’s bank account number in the vendor bank accounts form.
- To do this click the “New” button.
- In the “Name” field type a descriptive name for the requirement.
- Set the “Signature required” flag to “Yes”.
- In the “Table name” field we need to select the name of the table where our field is that we want to secure with an electronic signature. In this case it is “VendBankAccount”.
- In the “Field name” field we need to select the account number field that contain the vendor bank account data.
- We will set the “When to require a signature” option to “Only” and the “When record is updated” flag to “Yes” to indicate that we only want to require a signature when this specific field is changed. Click “Save” to save the changes.
Electronic Signature Reason Codes
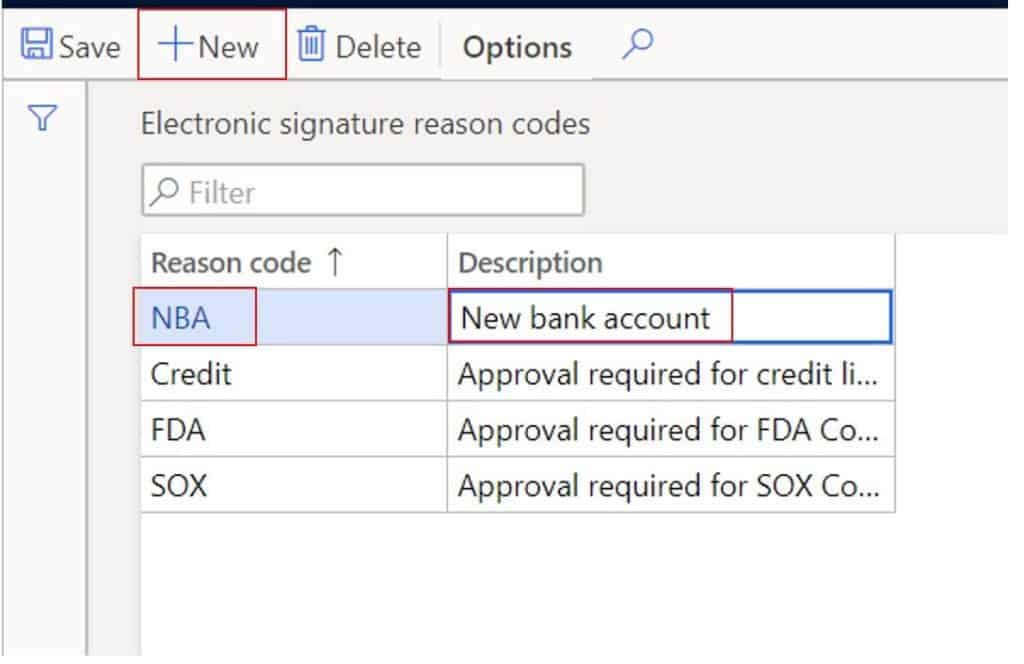
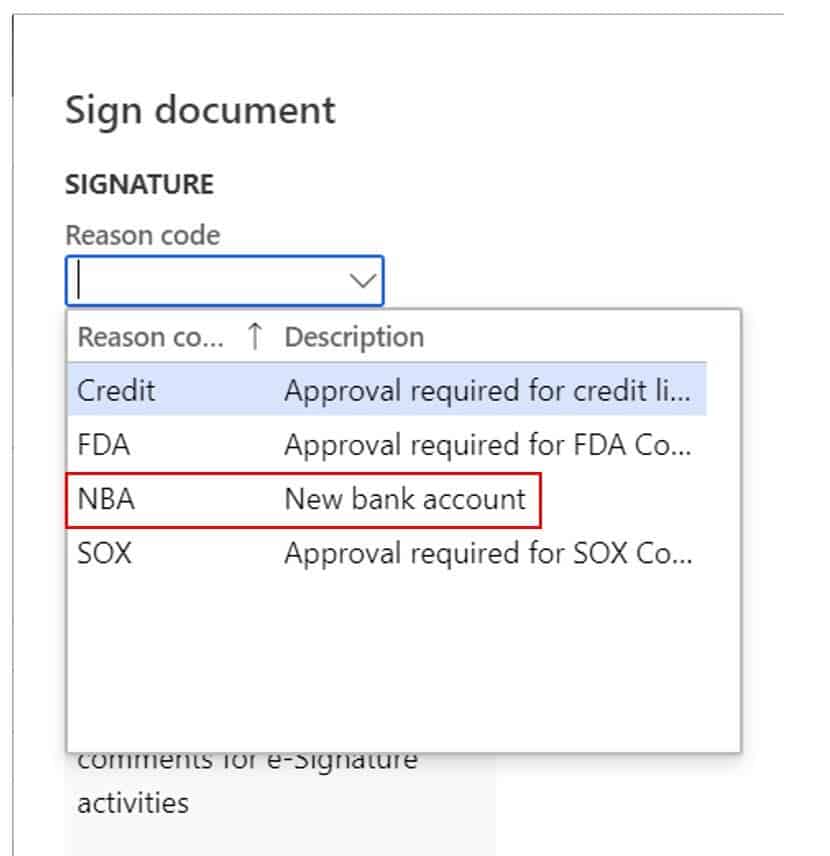
Electronic reason codes can be set to classify different reasons for changes. In our example we may have a reason code called “NBA” for “New bank account”. Then when we electronically sign we choose that reason code as the reason for the change.
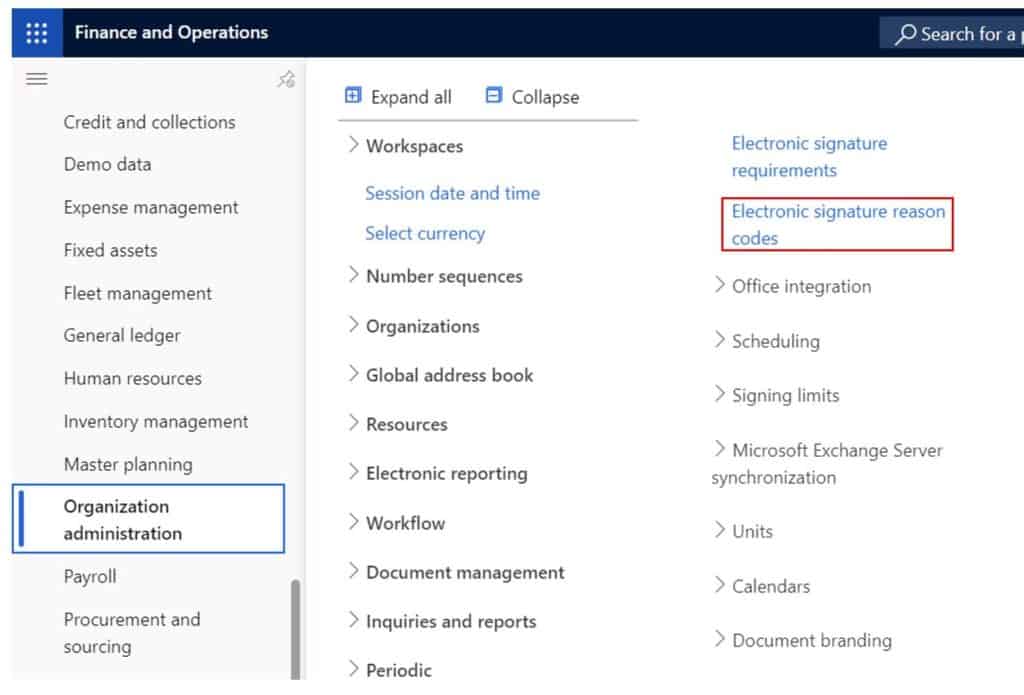
- To create a new electronic reason code, navigate to Organization administration > Setup > Electronic signature > Electronic signature reason codes.
- Click the “New” button and enter a code for the reason code.
- Enter a description for the reason code and click the “Save” button.
Capture Signature
Now that we’ve got the setup in place, we can test our setup and capture the electronic signature. To do this we will go and make a change to a vendor bank account.
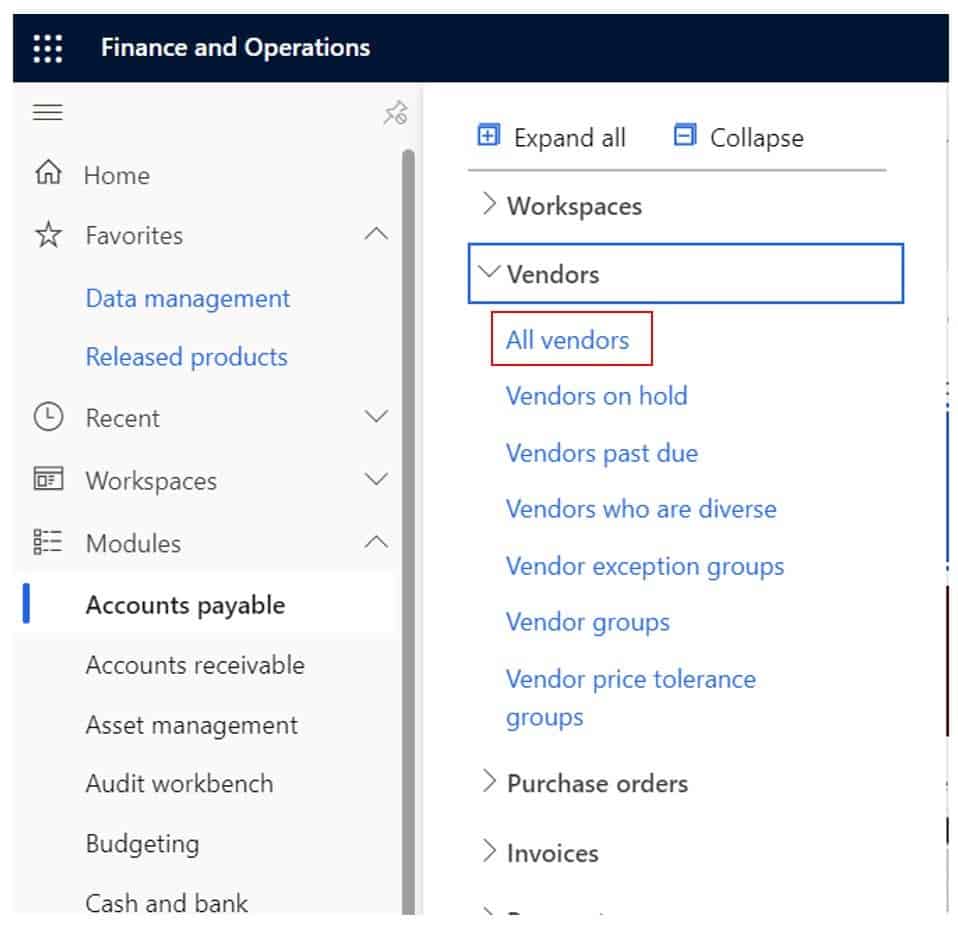
- Navigate to Accounts payable > Vendors > All vendors.
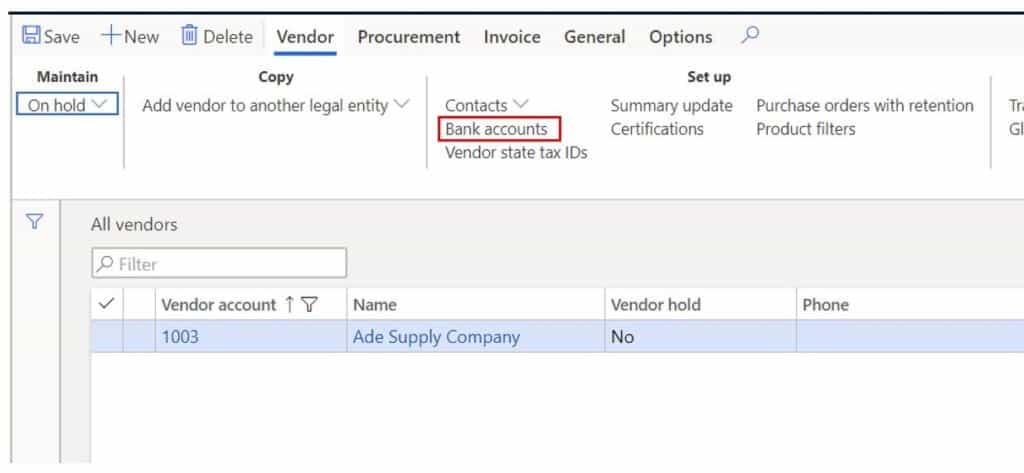
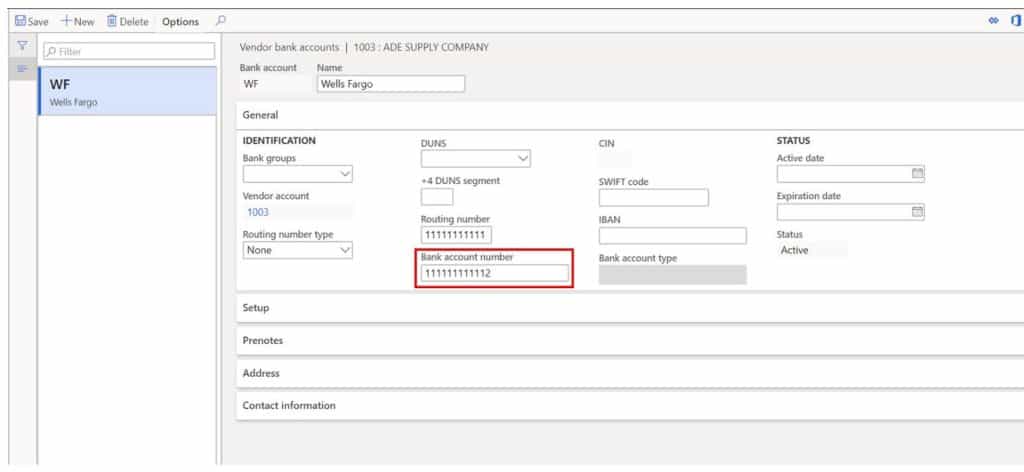
Click on a vendor and click the “Bank accounts” button. If there is not one you can just create one by clicking the “New” button and filling in the details.
Next we will make a change the account number. In this case we will change “111111111111” to “111111111112”.
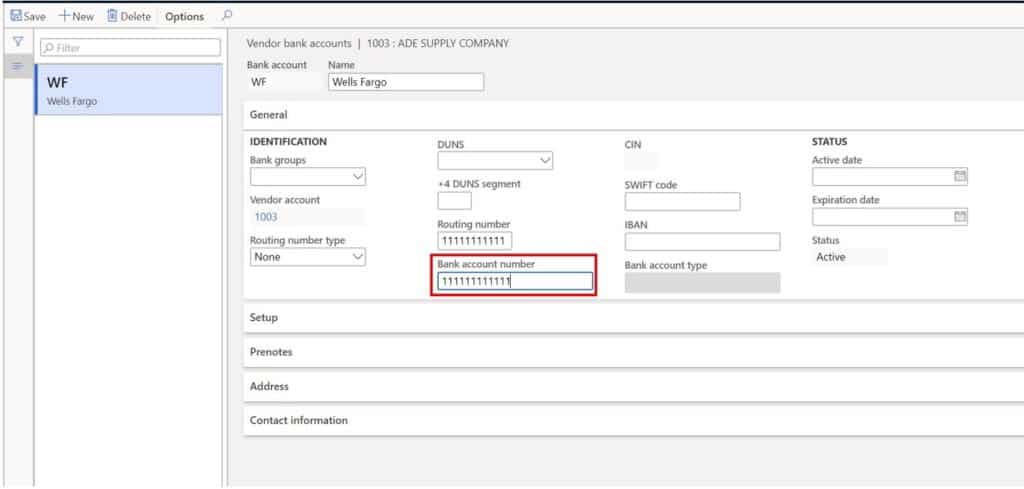
Click the “Save” button and the electronic signature form will open.
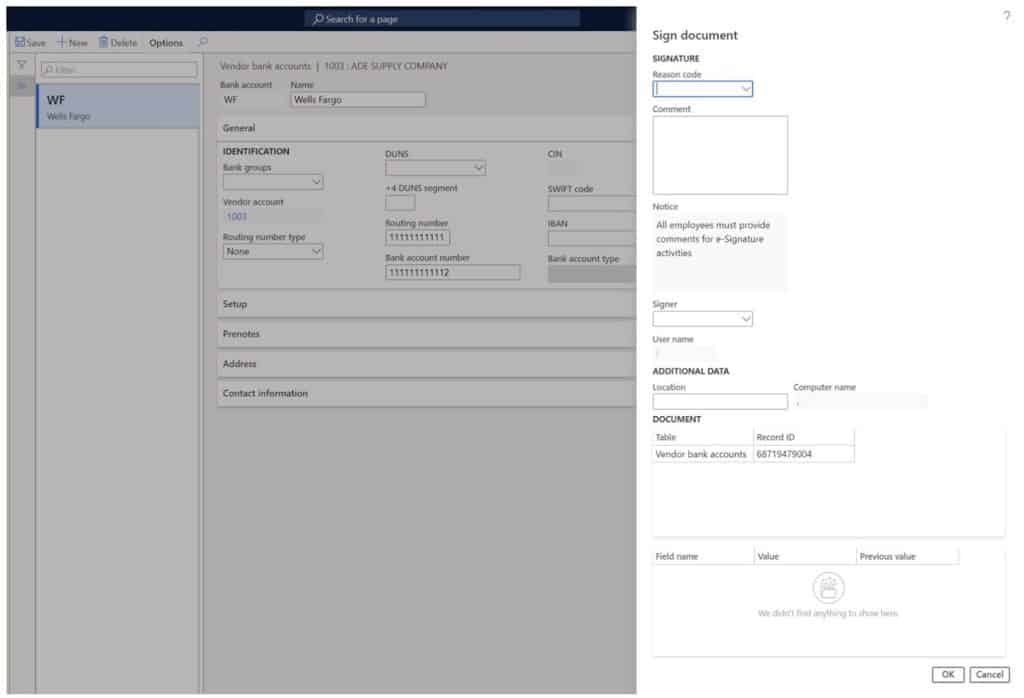
Select the “NBA” reason code we created earlier.
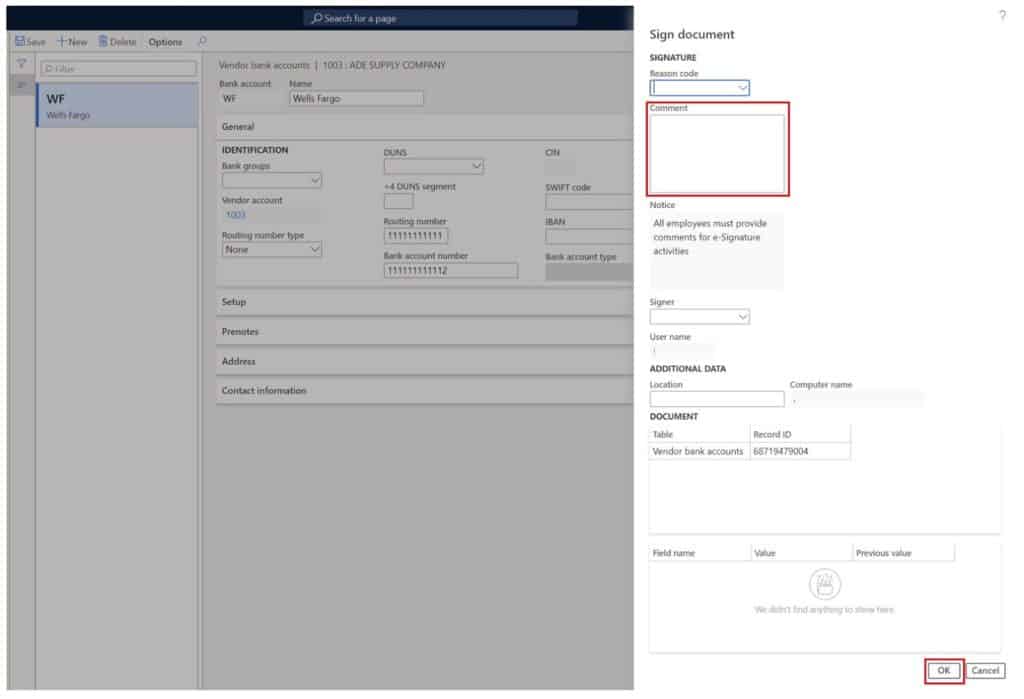
- Enter a comment explaining the reason for the change.
- Then click “OK” to complete the change.
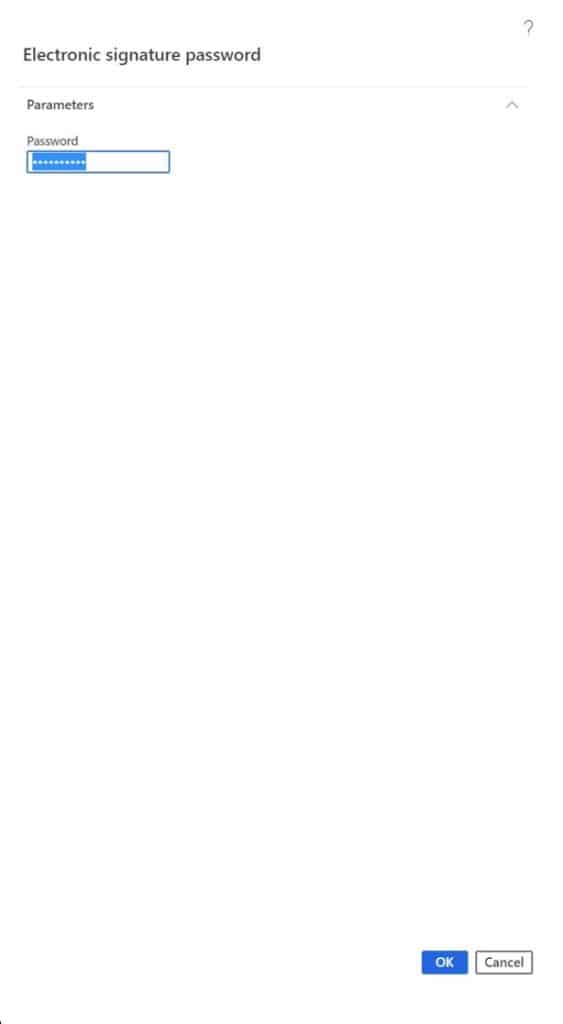
The electronic signature form will now ask you for your password. This will be the password you entered earlier when you requested the certificate. This password should be only known by you so that no one can fraudulently sign for a change.
Click the “OK” button and this will allow the change to the record to be committed to the database. If you are unable to provide the correct password the change will not be made.
Audit
Now that we have captured this signature how do we use it? When you provided your signature for the change the application captured data about the change in a database log. That log can be viewed by an auditor, system administrator, compliance officer, or anyone else that has security access to it. For a more detailed look at how database logging works and how to configure it see my article Database Logging for Dynamics 365 Finance and Operations.
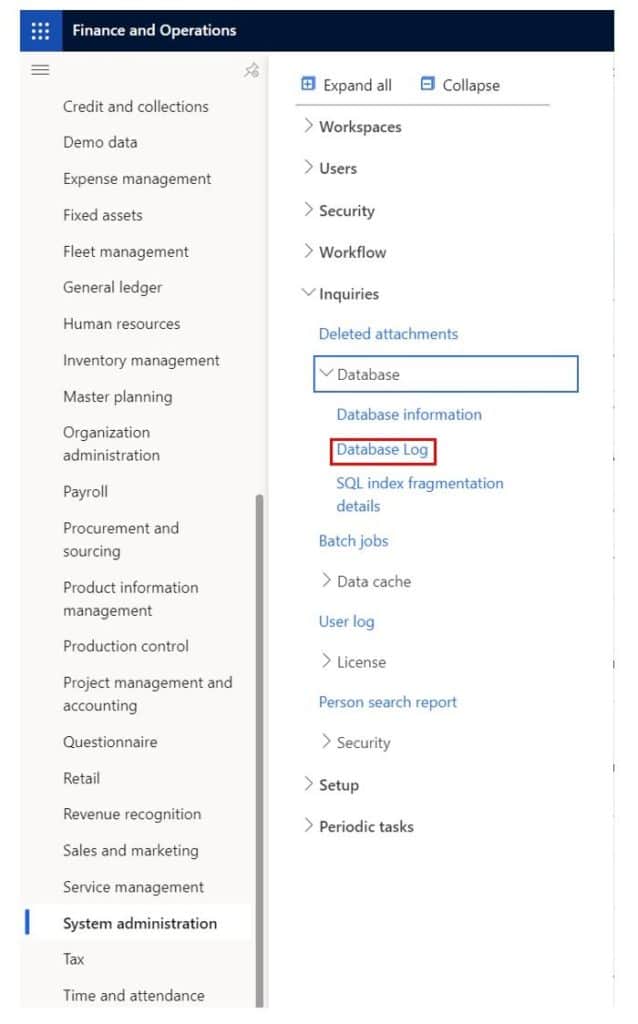
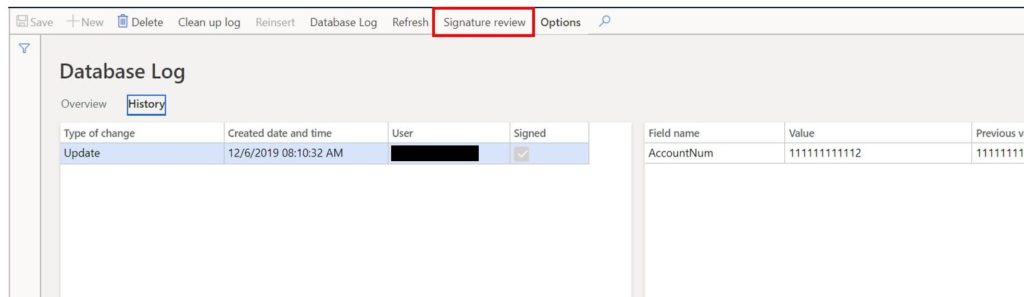
To view the database log, navigate to System administration > Inquiries > Data base > Database log.
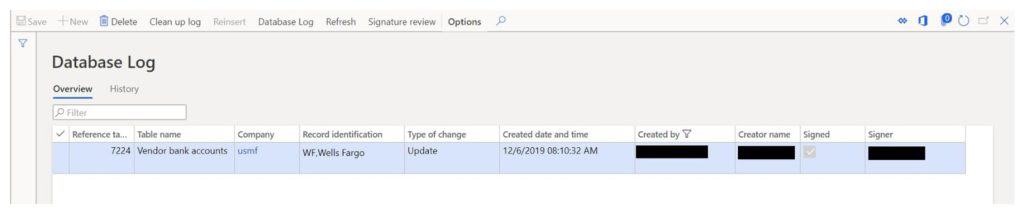
The log record tells us several things:
- The table that was updated.
- The company.
- The record identification.
- The type of change that occurred.
- The date and time the change occurred.
- The signer.
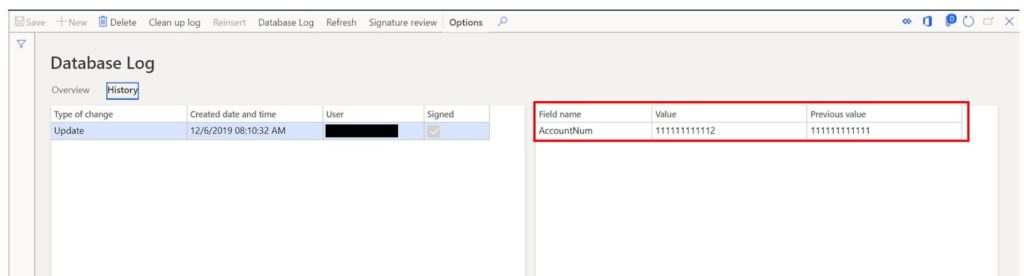
If you need more detail you can also click the “History” tab. This tab will show you the above information and also exactly what fields changed, what they were before the change, and what they changed to after.
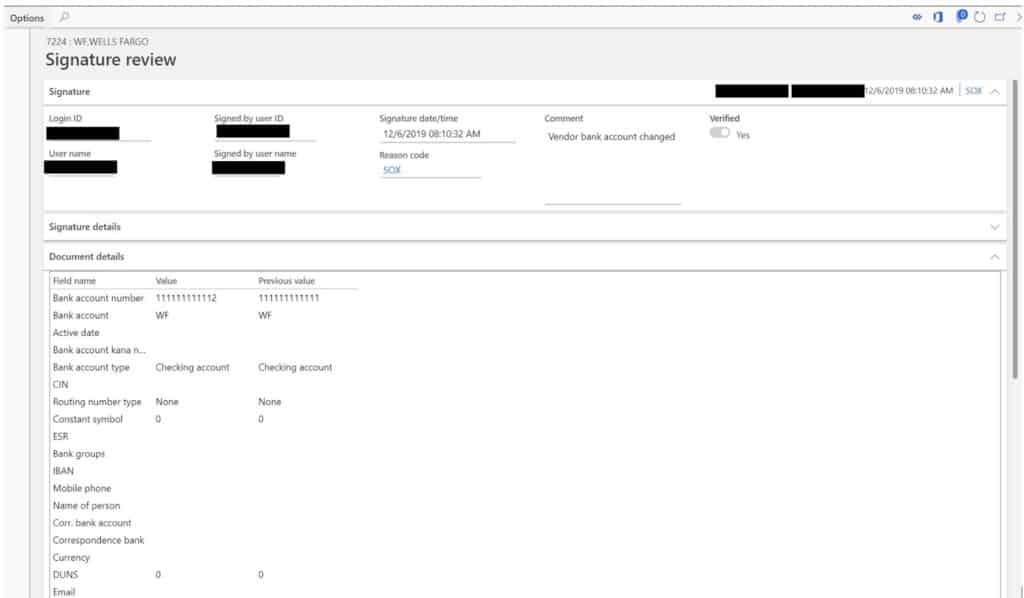
If you need even more details about the record and the other fields on the record and more detail about the signature you can click the “Signature” button.
Note: Electronic signature database log records cannot be deleted so be cautious of the types of records you are monitoring with electronic signature.
Takeaways
Electronic signature is a powerful audit tool in Dynamics 365 Finance and Operations and can be implemented very flexibly and easily. The electronic signature can help business commit to their digital transformation goals by removing physical signatures and ensuring traceability and oversight throughout the ERP application.