

In D365 Finance and Operations email templates help administrators design what gets sent to a user during events that trigger an email like a workflow or an alert.
In this article we will learn how to design dynamic email templates and send an email using that email template. For this example, will configure the email template for the inventory transfer journal workflow that will send an email to the approver with the dynamic content designed in the email template.
Here are few important things to note before sending an email from Microsoft Dynamics 365 Finance and Operations using email templates.
- Email parameters and connection with the email service provider.
- Email distributor batch.
- Enable users to receive notifications via email.
- Email template setup and basics.
Email Prameters
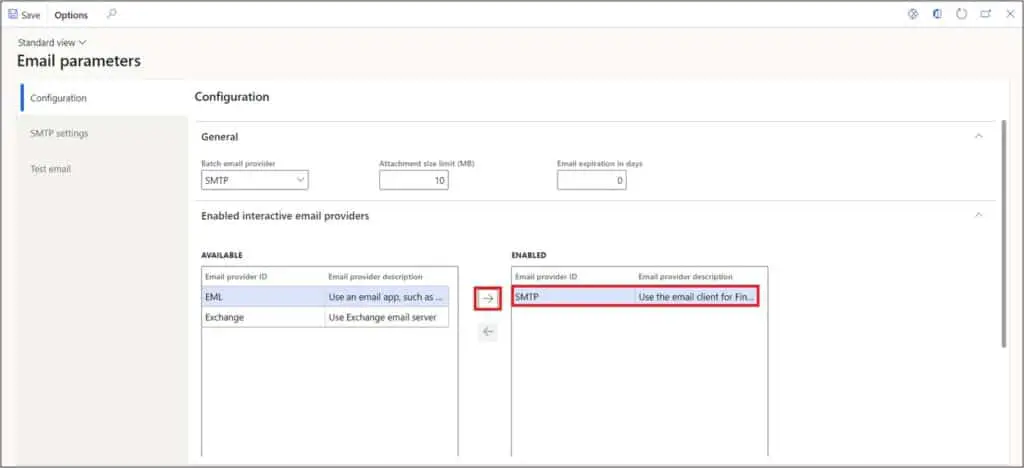
Email parameters are simply the credentials for the email service provider. The emails sent from Microsoft Dynamics 365 Finance and Operations use the credentials set in this parameter (if you are using SMTP).
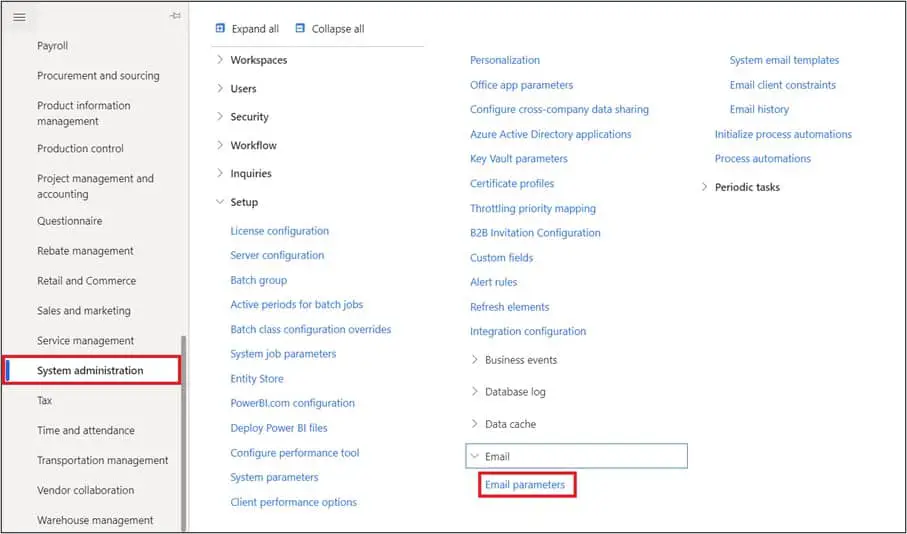
To set these parameters navigate to System administration > Setup > Email > Email parameters.
Select the email service provider from the available list and click on arrow button to enable as an email service.
The SMTP email server does not support controlling the email sending limits. So, there are chances of errors while sending the emails if you try to send more emails than the email service provider allows.
The exchange email provider is useful in this case because it has its own throttling mechanism that manages the emails sending limits and sends the email sequentially. The exchange mail provider can also use the user’s own exchange account to send emails.
Note: The exchange mail provider cannot be used for external users that do not have Exchange accounts.
Click on the “SMTP settings” tab. Enter the “Outgoing mail server”, “SMTP port number”, “Username” and “Password”.
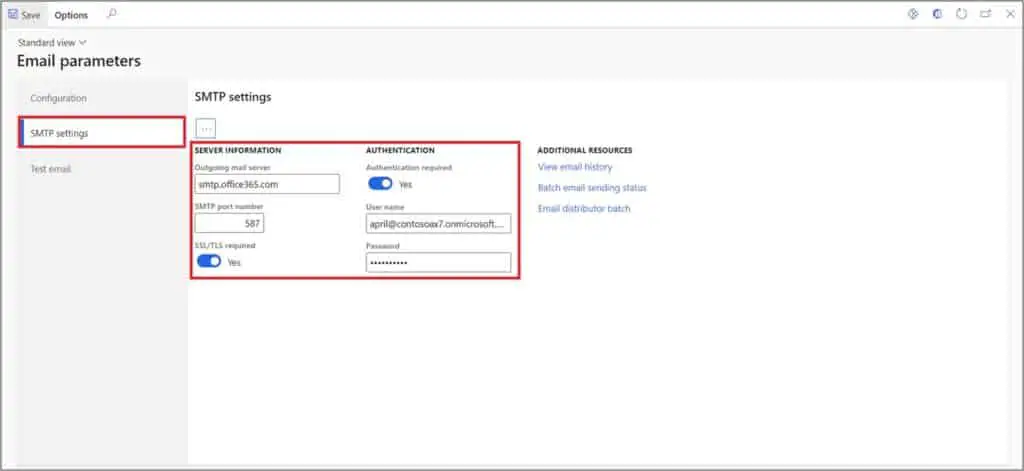
After entering the credentials, click on the triple dots and click “Test connection”. You will be able to see the success if the credentials are correct.

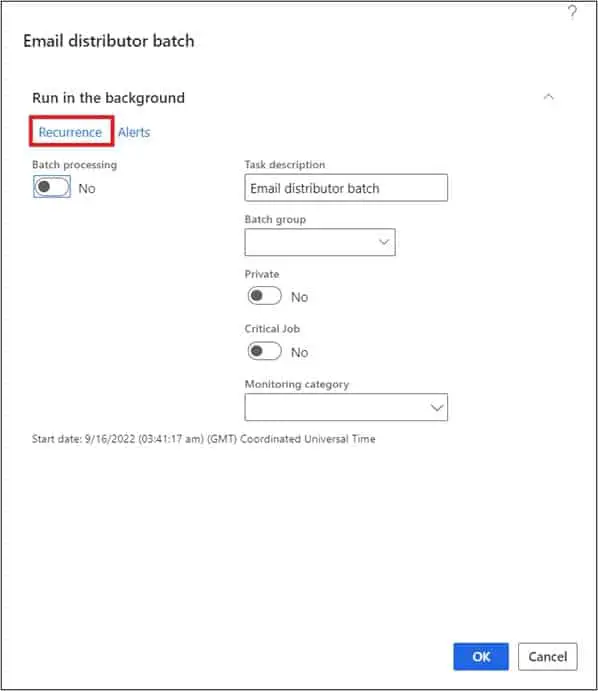
Email Distributed
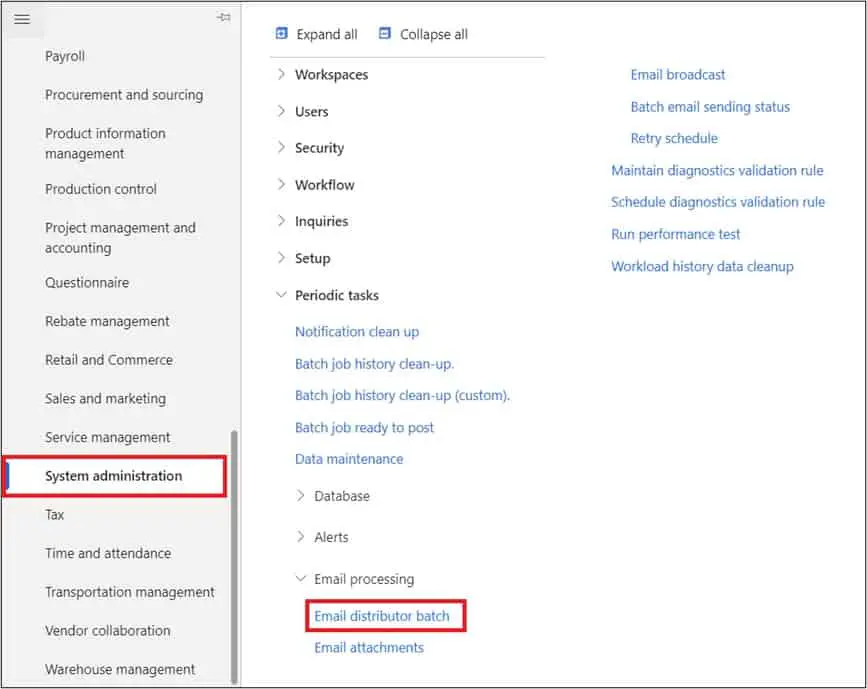
Email distributor batch is the batch job that keeps running on a recurring basis and forwards the email as soon as the task for email sending is created through any source.
To run this batch job, navigate to System administration > Periodic tasks > Email processing > Email distributor batch.
Click on the “Recurrence” button to set this job to keep running for a set time period.
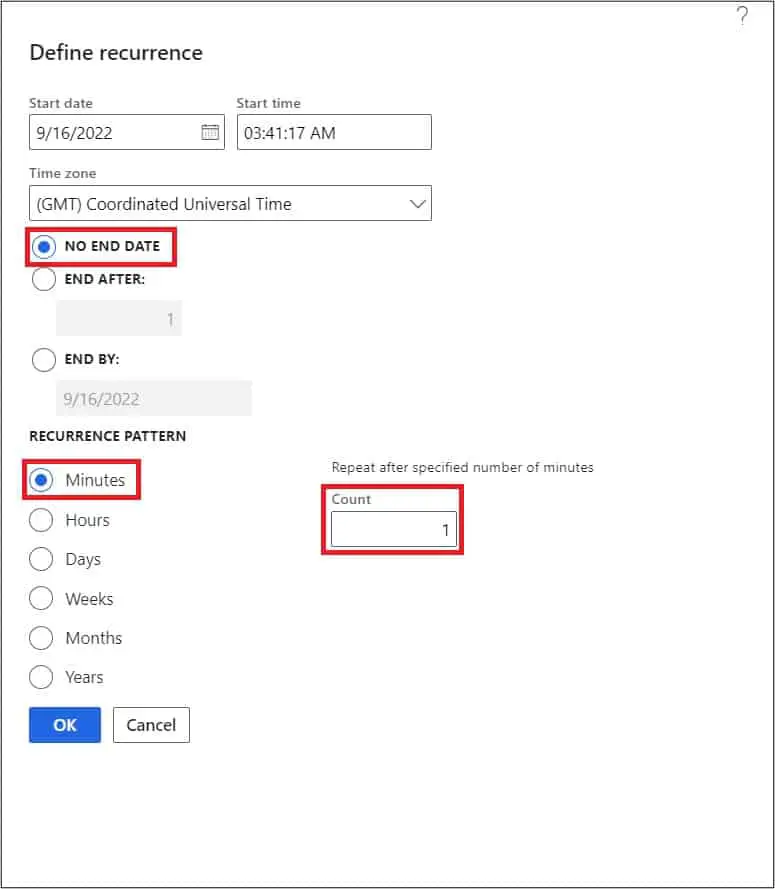
Select No end date, then select Minutes under the Recurrence pattern. Enter 1 in the Repeat after specified number of minutes and click the Ok button.
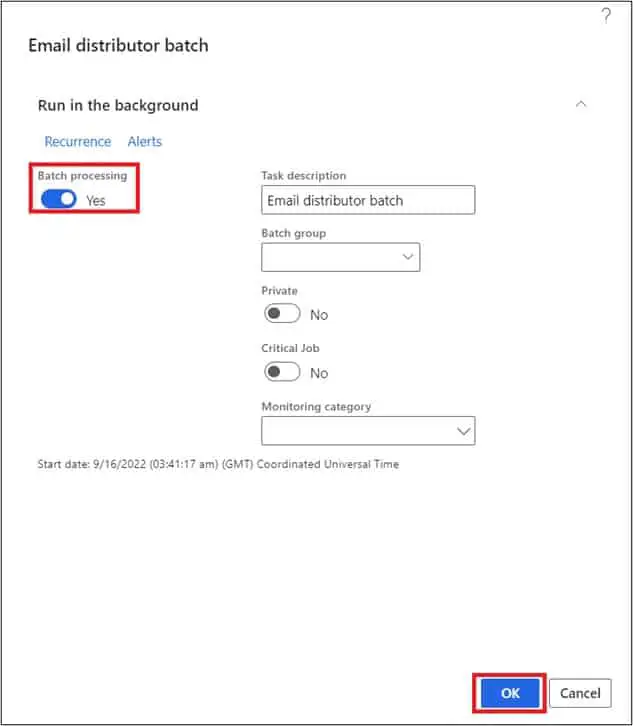
Select Batch processing and the Ok button. The email distributor batch job will be added to batch the queue in Waiting status and will keep executing after every one minute.
Enable Users to Receive Emails
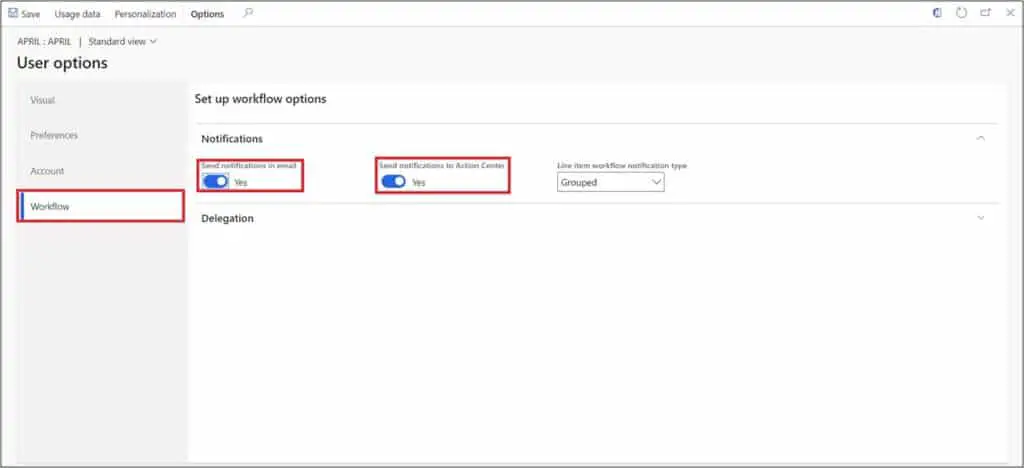
For users that are set as approvers in the workflow and that want to receive the emails for the approval notification, you must enable the email notifications on their user id.
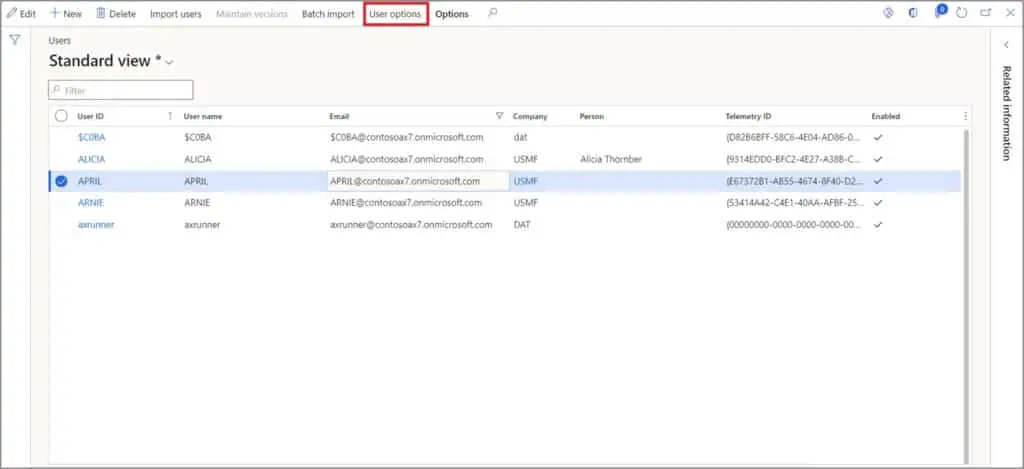
Navigate to System administration > Users > Users.
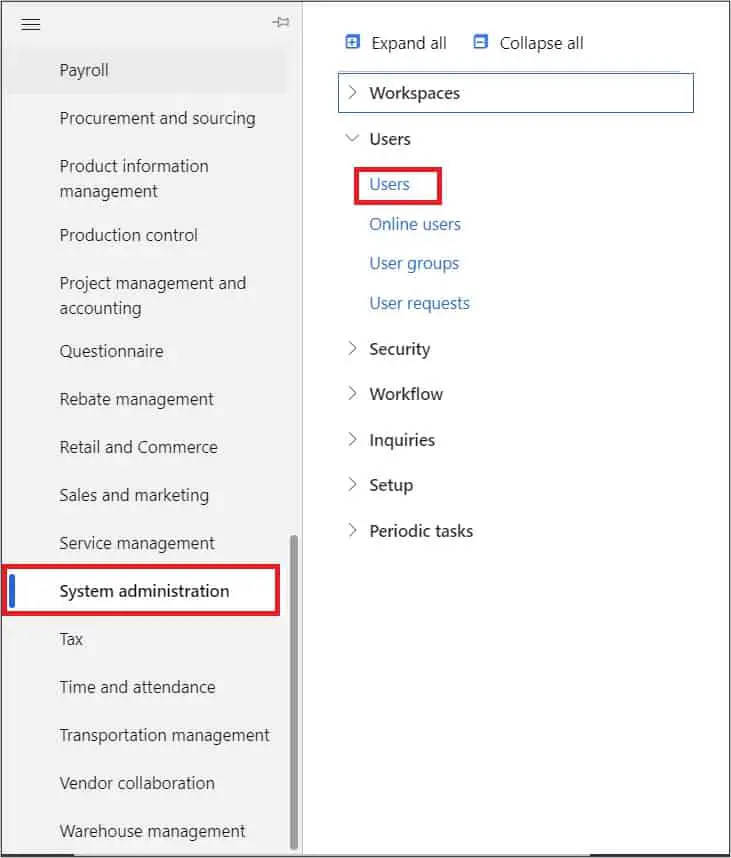
On the Users list page, click on the User options button.
In the Workflow tab, select Send notifications in email and select Send notifications to action center.
Email Template
Now let’s jump to email templates and configure and email template that will send dynamic data to the recipients in the emails.
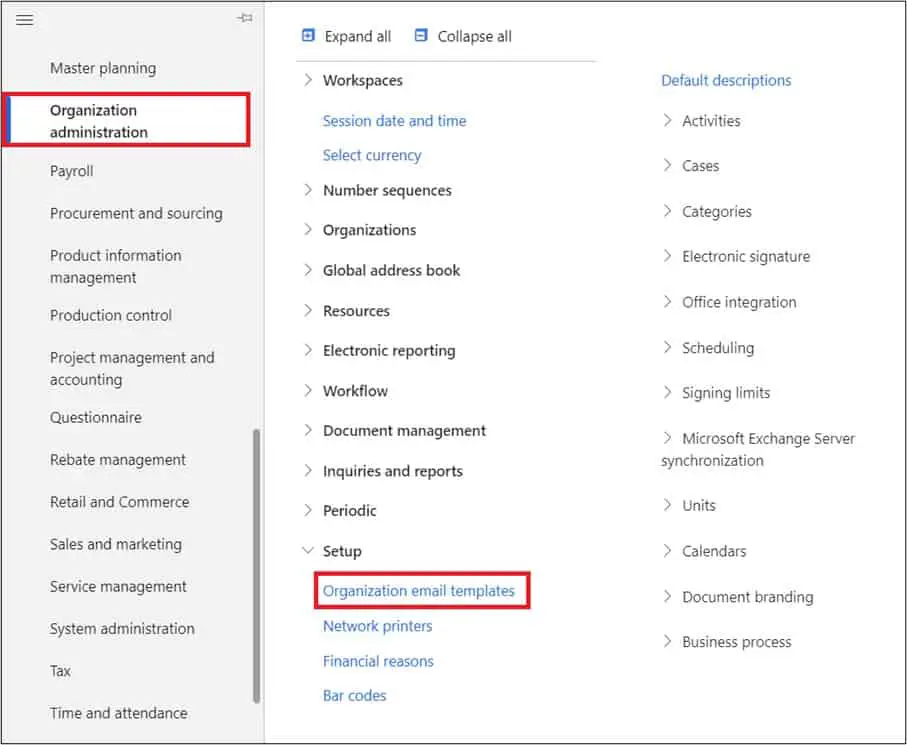
To do this navigate to Organization administration > Setup > Organization email templates.
On the email templates page, click the New button.
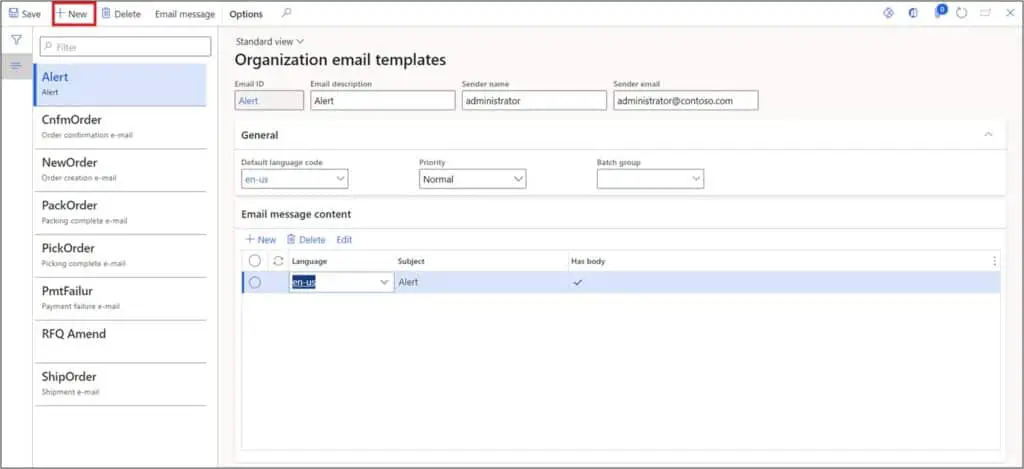
Enter the email template id in the email id field. Enter the email template name in the email description.
Enter the sender name in the sender name field. This name will appear with the email as a sender that we shall see later in this article.
Enter the sender email in the sender email field. The email for this email template will be sent from this email id then select the Language. Select the Priority for the email template. (Upon submitting the document for approval, the email tasks that are created in the batch email sending status table, have the priority as per their email templates. So, the emails that have the Priority “High” will be sent first and the emails that have priority “Low” will be sent after the emails with High priority).

Next let’s move on to the two most important things about the email setup.
- Subject of the email
- Message body of the email
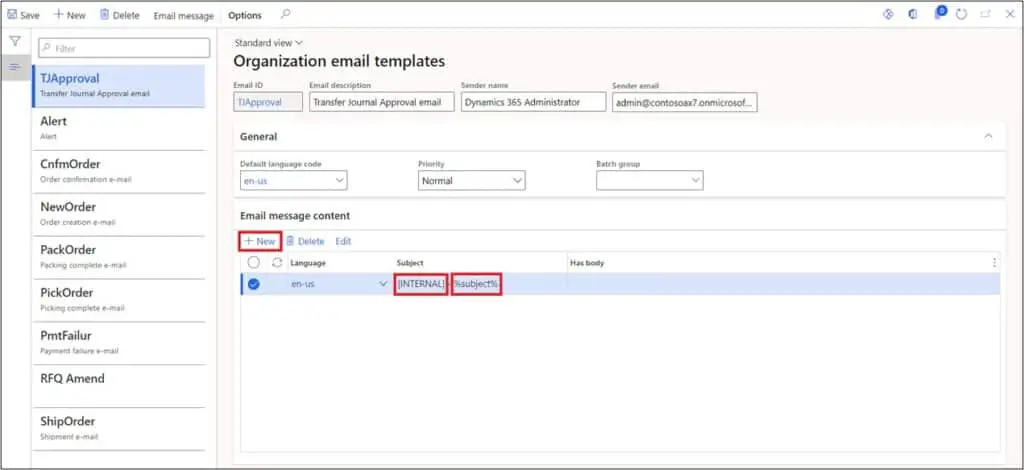
Click New button in the Email message content section. Then select the language. You can enter the static text (e.g. [INTERNAL]) and for the dynamic information in the subject, just enter %subject% which will fetch the dynamic information and prepare the dynamic email subject according to the placeholders set the work item subject filed in the workflow.
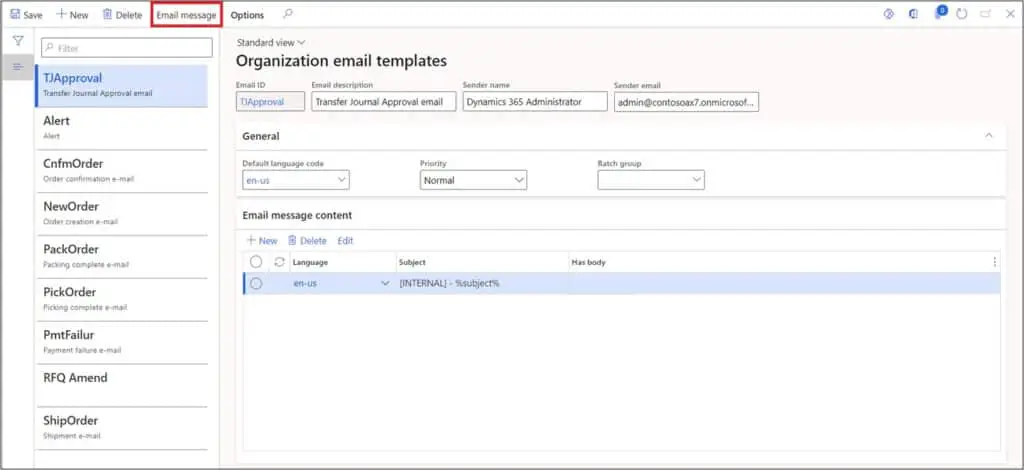
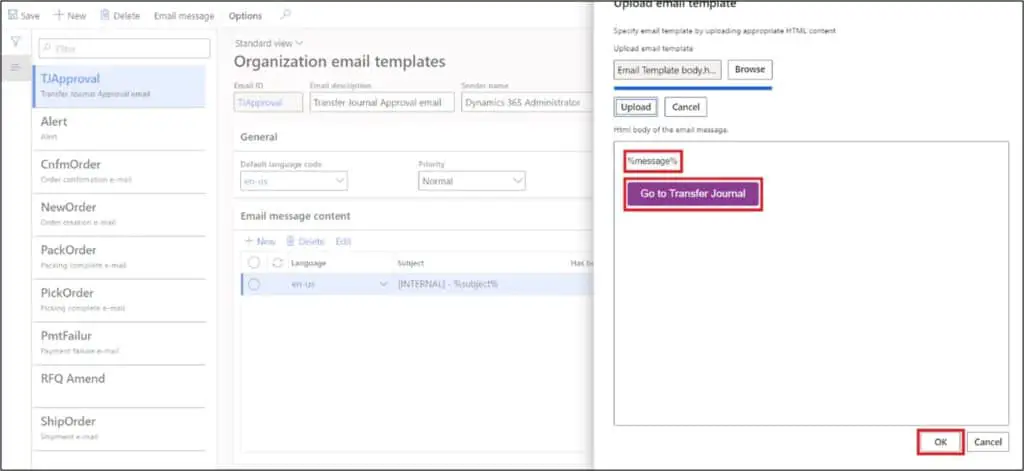
After entering the subject, click on the Email message button to upload the HTML file that contains the HTML code.
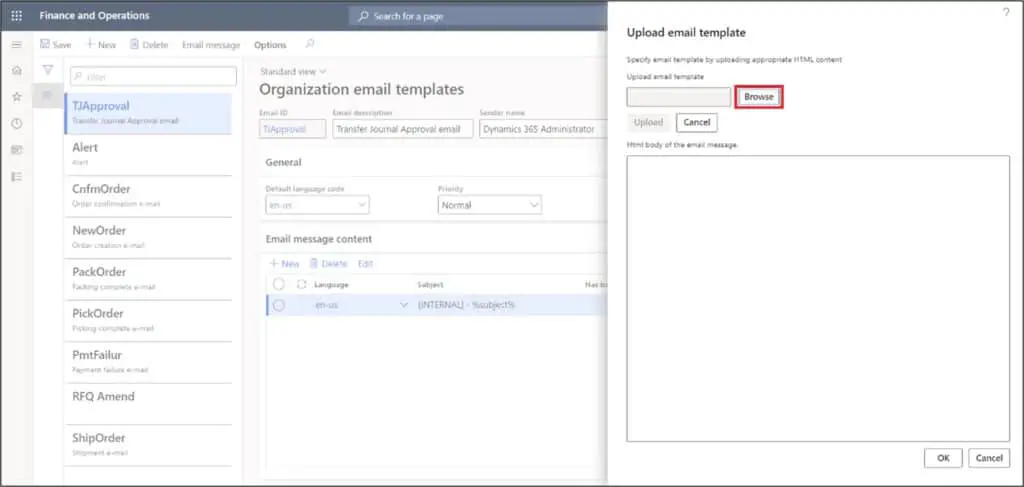
Click on Browse button to upload the HTML file that contains the code which will fetch the information from the relevant document.
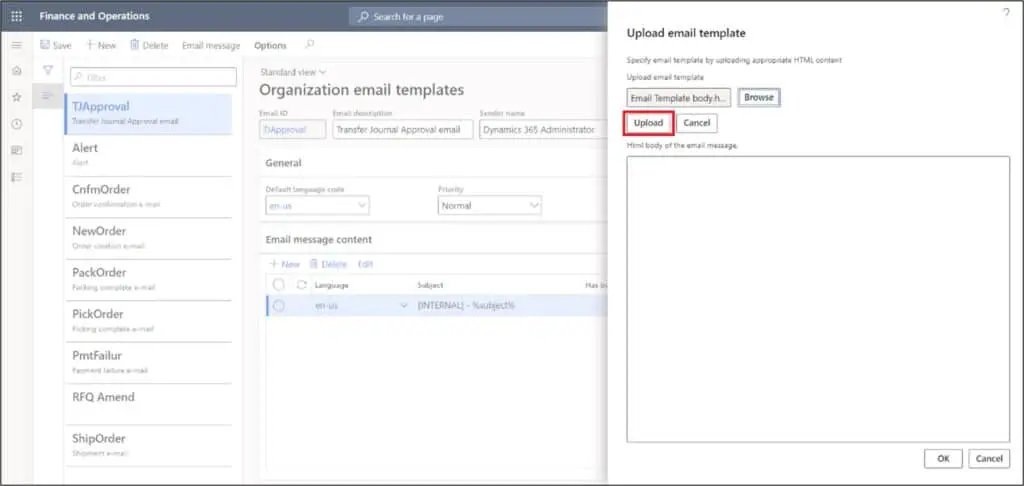
After selecting the file, click on the Upload button.
After uploading the email template it will show a preview of the HTML code that was uploaded. Let’s break down the code.
%message%: This is a simple placeholder that fetches the message body from the workflow work item instruction field in the workflow editor.
Go to Transfer Journal: It is button that is built on a simple HTML code. This button has the link to Microsoft Dynamics 365 Finance and operations. Here is the HTML code file attached for reference.
<!DOCTYPE html>
<html>
<body>
<span>
%message%
</span></br></br>
<a href=”https://YOURD365LINKHERE.dynamics.com/?cmp=USMF&mi=InventJournalTableTransfer” target=”_blank” style=”text-decoration:none;display:inline-block;color:#ffffff;background-color:#8a3c90;border-radius:4px;width:auto;border-top:0px solid transparent;font-weight:400;border-right:0px solid transparent;border-bottom:0px solid transparent;border-left:0px solid transparent;padding-top:5px;padding-bottom:5px;font-family:Arial, Helvetica Neue, Helvetica, sans-serif;text-align:center;mso-border-alt:none;word-break:keep-all;”><span style=”padding-left:20px;padding-right:20px;font-size:16px;display:inline-block;letter-spacing:normal;”><span dir=”ltr” style=”word-break: break-word; line-height: 24px;”>Go to Transfer Journal</span></span></a>
</body>
</html>
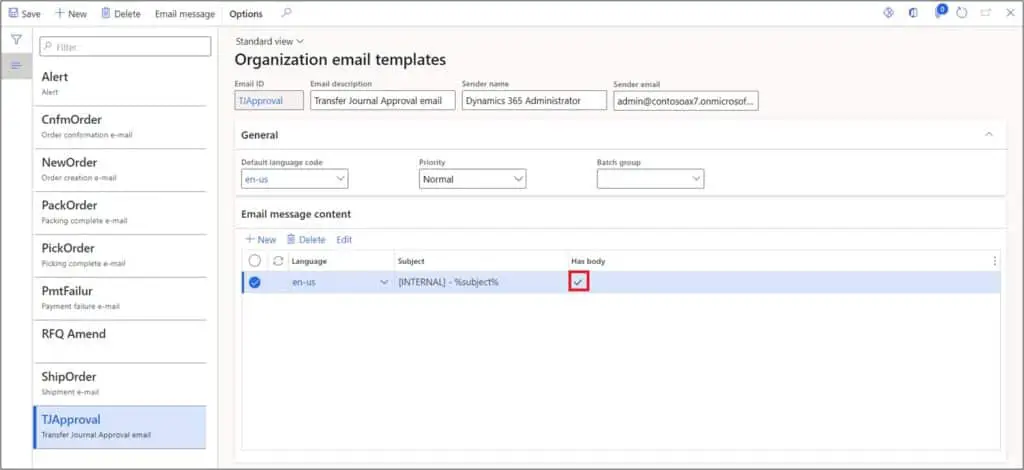
Once the message file is uploaded successfully, the Has body field gets checked which means this email template has the message body to send with email.
Workflow Configuration With Email Notification
The email template has been created and ready use. Now let us associate the email template with the Inventory transfer journal workflow that will send the email using the associated email template and show the email content as per the email template configuration.
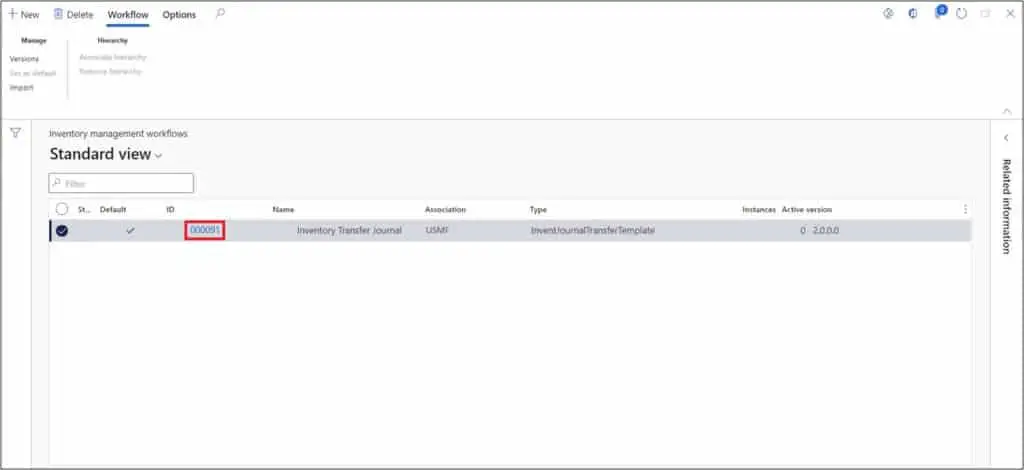
Navigate to Inventory management > Setup > Inventory management workflows.

Click on the ID to open the inventory management workflow.
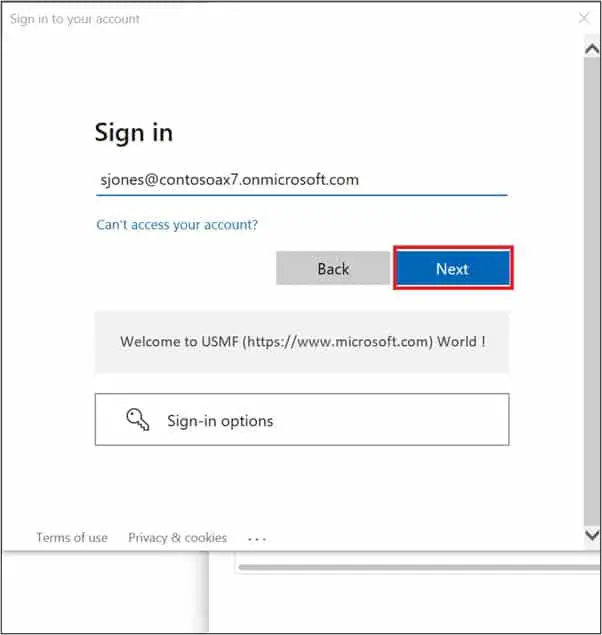
Now sign into workflow tool using the credential of you Microsoft dynamics 365 account.
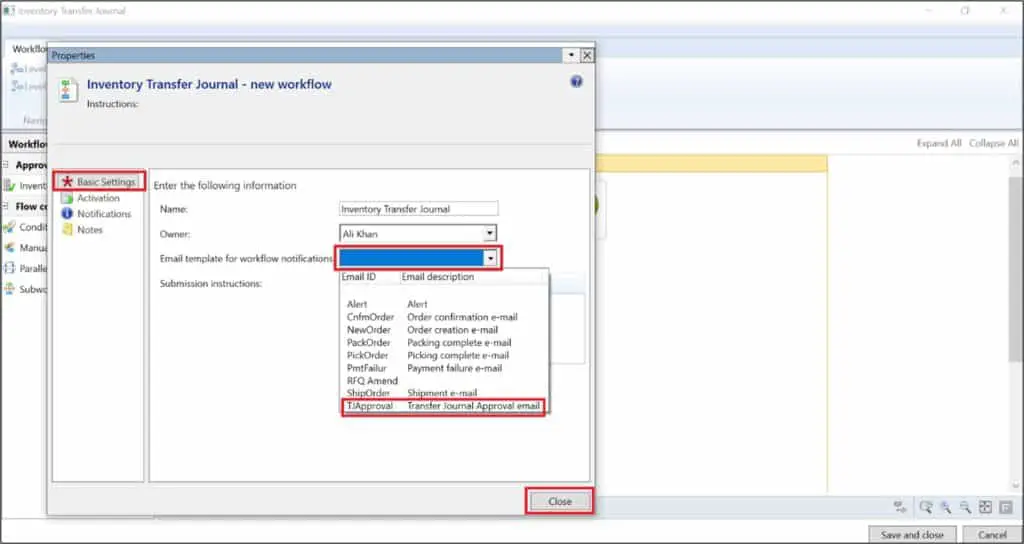
Click on Workflow and then click on Basic settings.
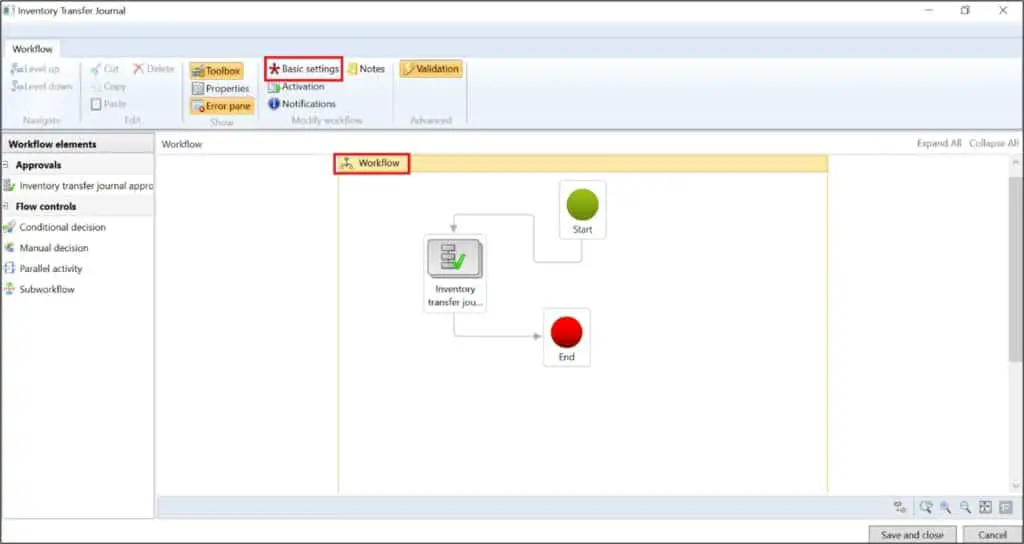
In the basic settings tab, the email template that we created is shown in the Email template for workflow notifications. Select the email template and click the Close button.
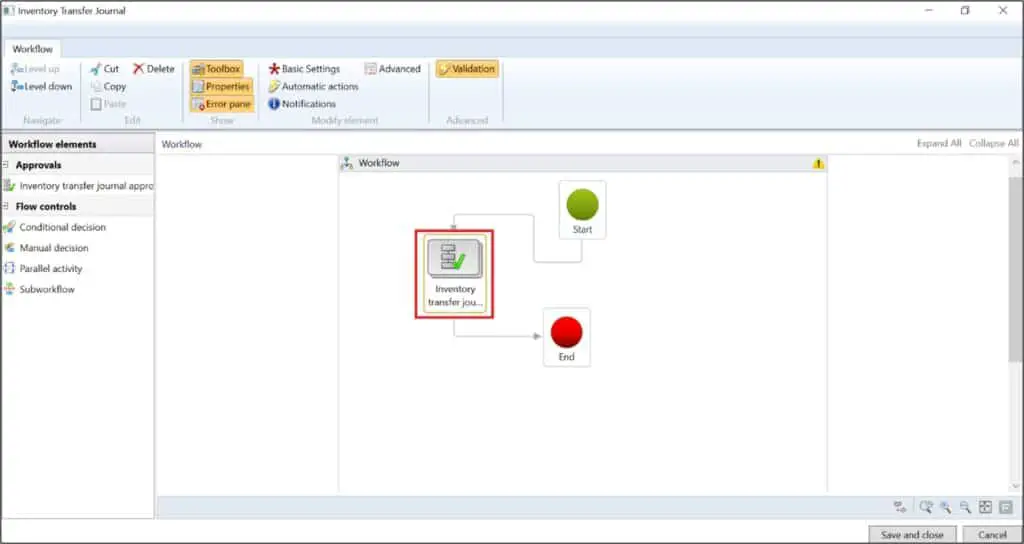
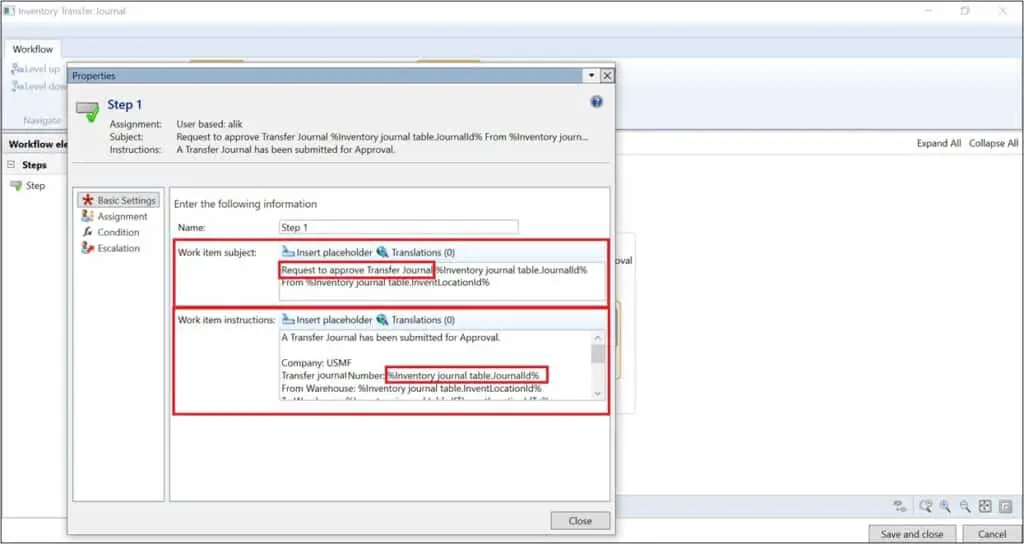
Now let’s design the dynamic Subject and Message body of the workflow approval email. Double click on the Inventory transfer journal approval element.
Select the approval step and click on Basic settings button.
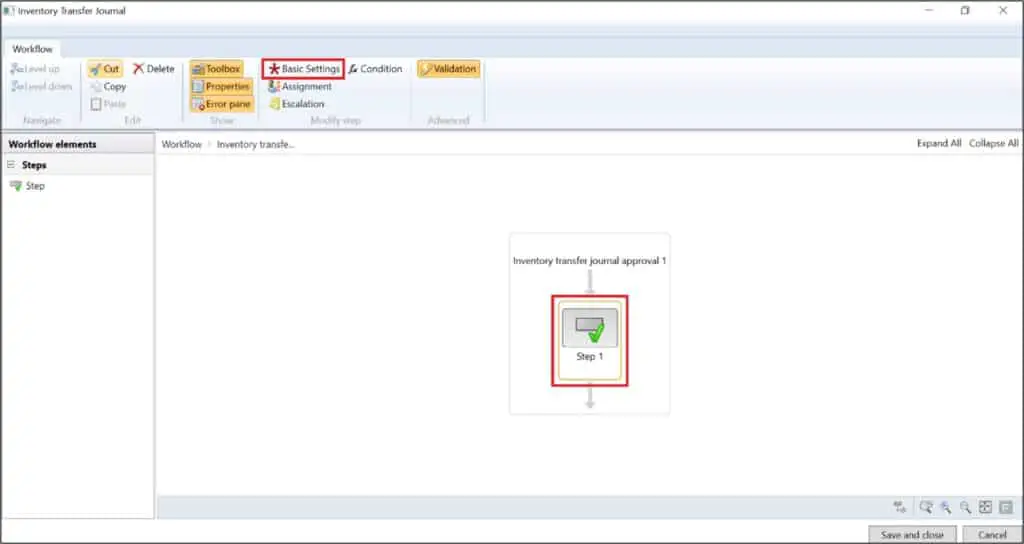
In the work item subject and Work item instructions you can enter both the static and dynamic text.
The static text appears as it is in the email subject and message body.
The dynamic text appears from the relevant journal. Here is the dynamic text that we have set. The dynamic text is bolded in the following example.
Work item subject:
Request to approve Transfer journal %Inventory journal table.JournalId% From %Inventory journal table.InventLocationId%
Work item instructions:
A Transfer journal has been submitted for your Approval.
Company: USMF
Transfer Journal Number: %Inventory journal table.JournalId%
From Warehouse: %Inventory journal table.InventLocationId%
Total lines: %Inventory journal table.NumOfLines%
Click below to view the Journal.
Thanks
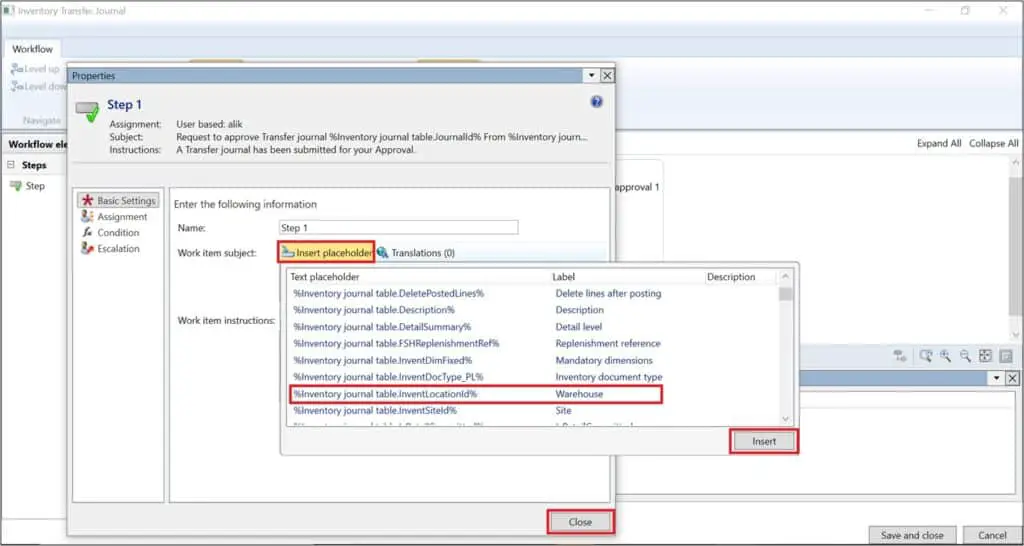
Here is how you can enter the dynamic text using the placeholders.
Click on placeholder button and you will be able to see all the fields from the Inventory Transfer journal table. Select the required field and click Insert button. Click close button.
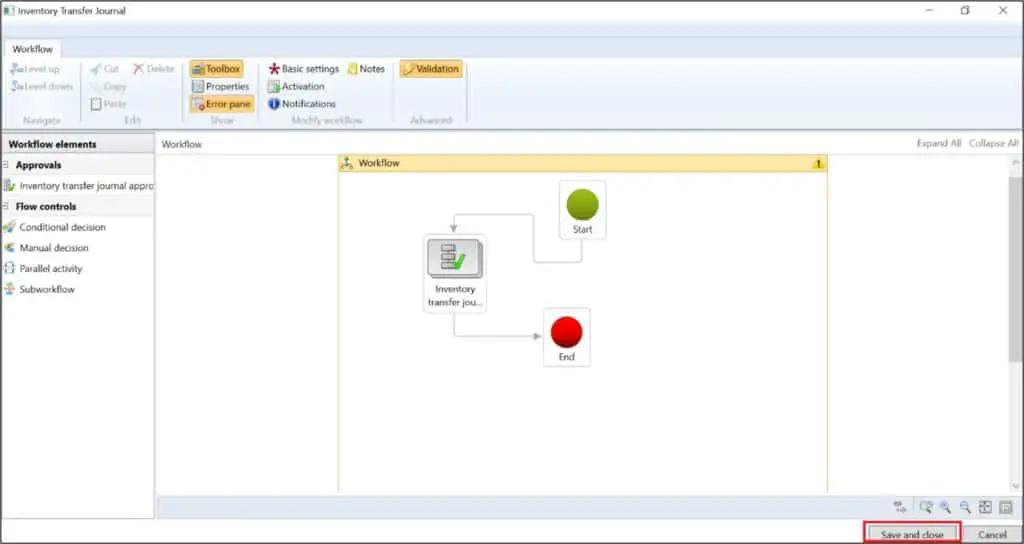
Click the Save and close button.
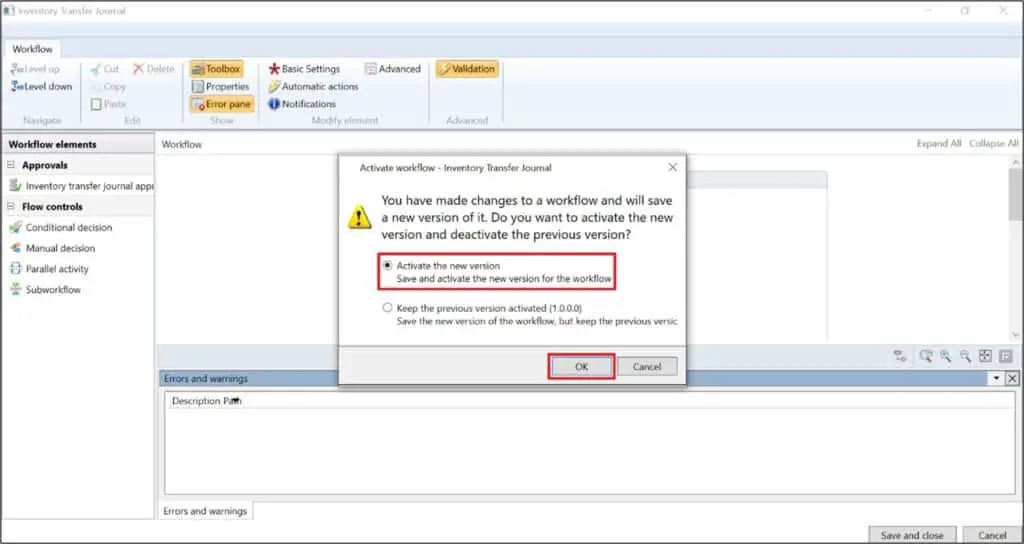
Select Activate new version and click the Ok button.
Submit Workflow
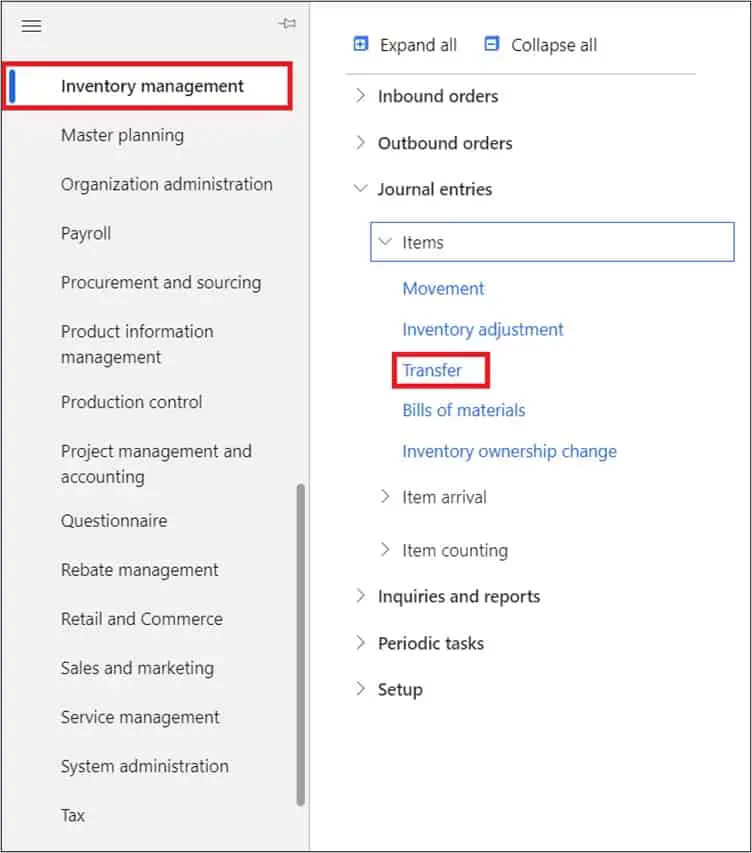
Now we are all set to trigger an email. Let’s create an Inventory transfer journal and submit it for approval which will send an email to the approver. To do this navigate Inventory management > Journal entries > Items > Transfer.
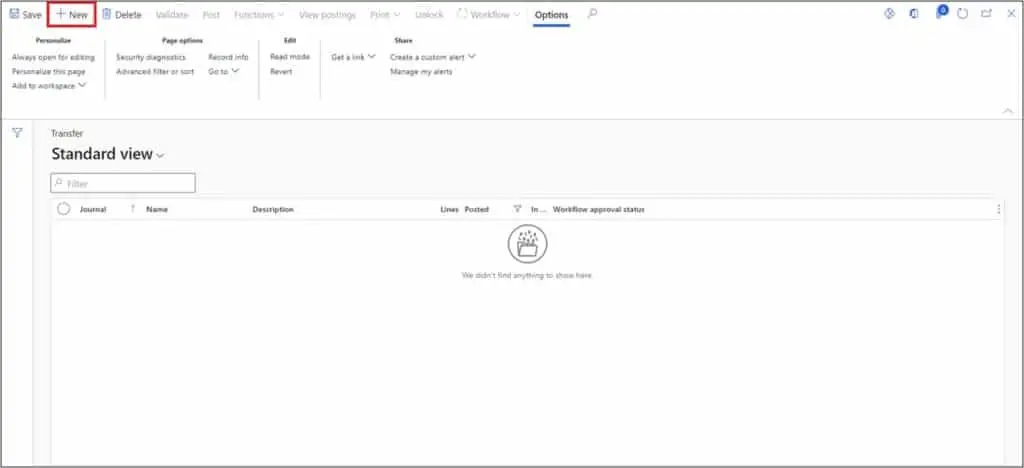
On the Inventory transfer journal page, click the New button.
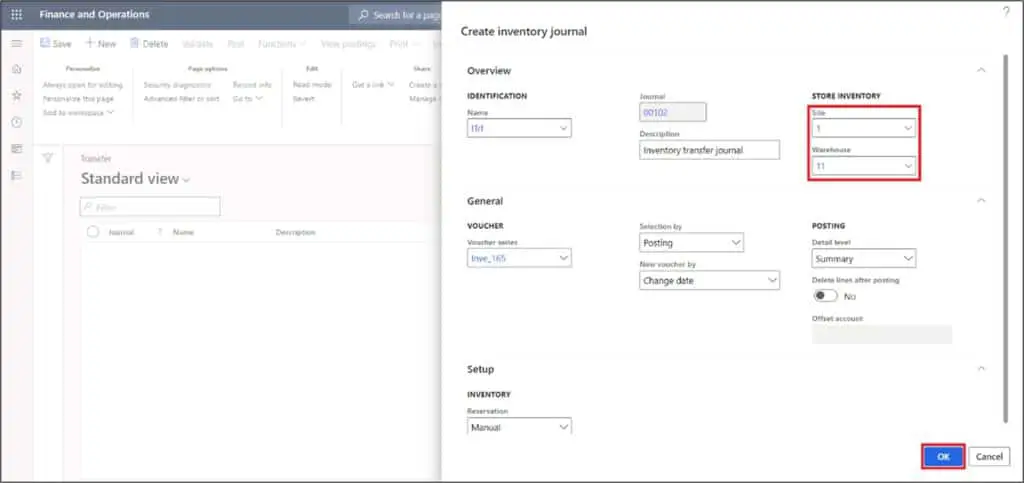
Select Site and Warehouse and click the Ok button.
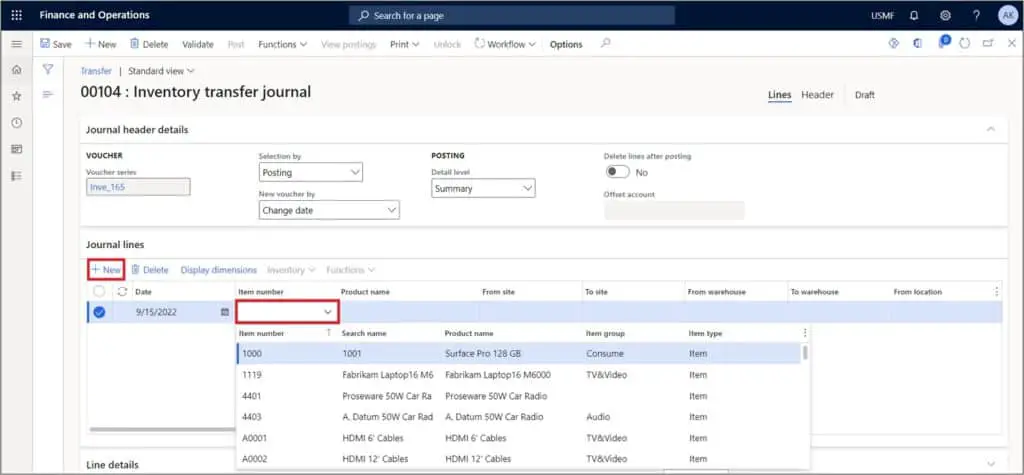
Click the New button in the Journal lines tab and select the item.
Select the To Site, select To Warehouse and enter the quantity. Click on the workflow button and click on Submit button.
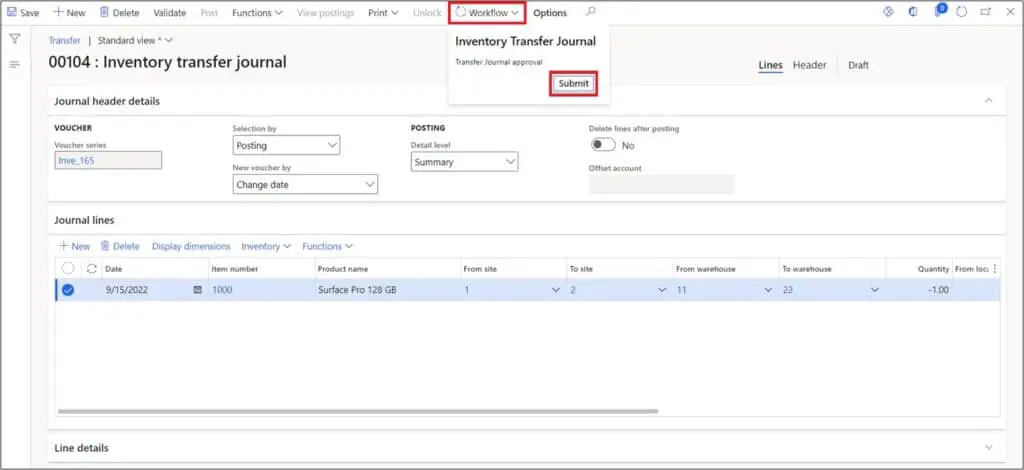
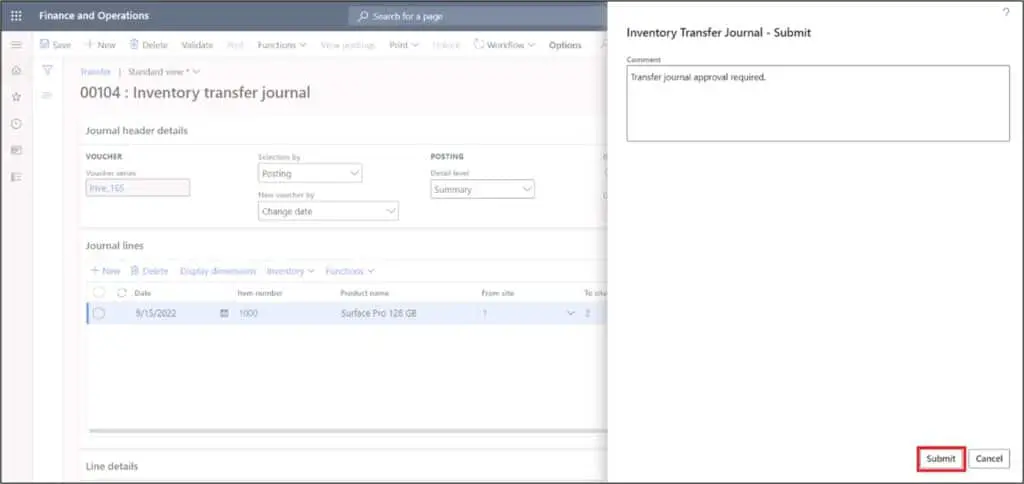
Enter the comments for the approver and click the Submit button which will generate an email and an approval task for the approver.
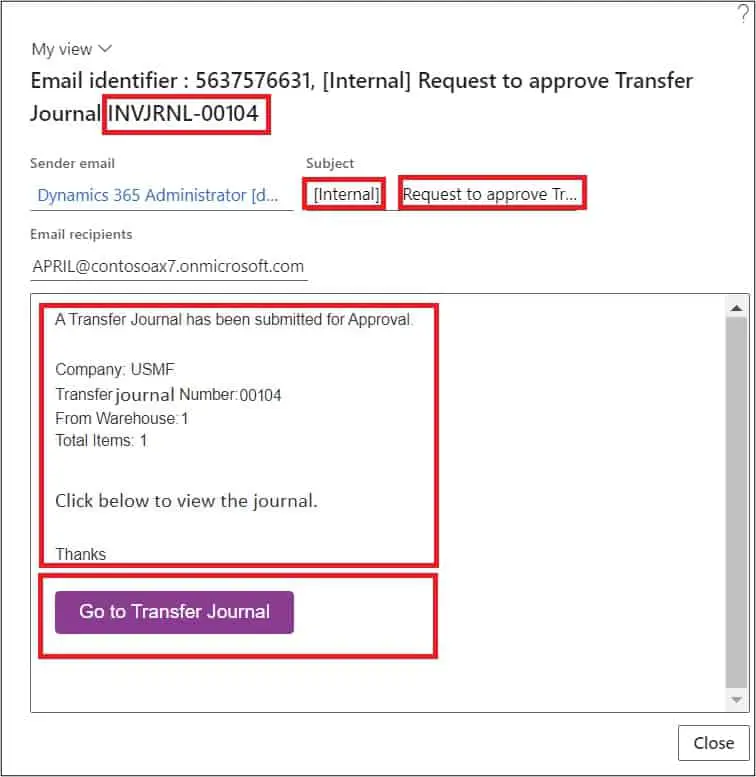
Here is the email that the approver has received upon submitting the Inventory transfer journal by the requester.
The following information has been highlighted separately in the email:
- The static text from the email template.
- The static text from the work item subject and work item instructions from the workflow.
- The dynamic inventory journal number, From warehouse and number of lines from the workflow.
- The email sender from the sender name field of email template.
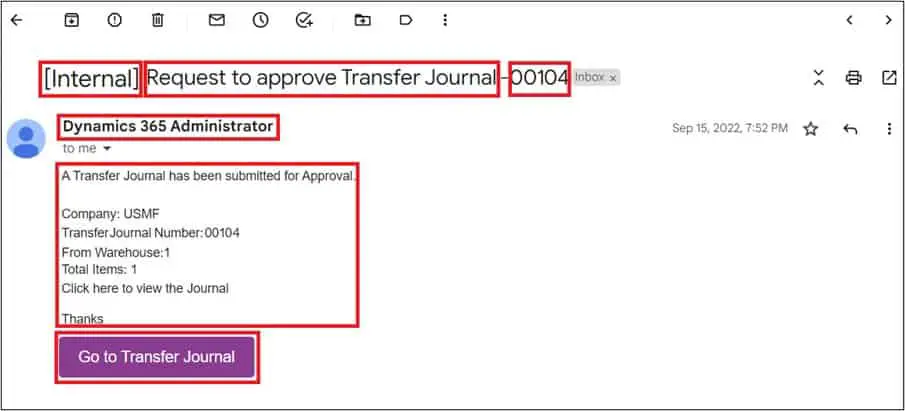
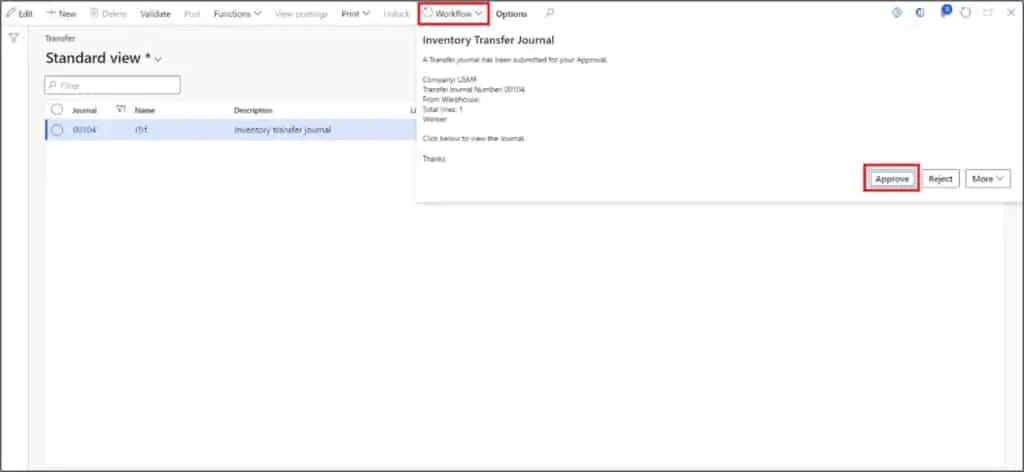
Click on ‘Go to Transfer Journal’ button to go to the Journal and approve.
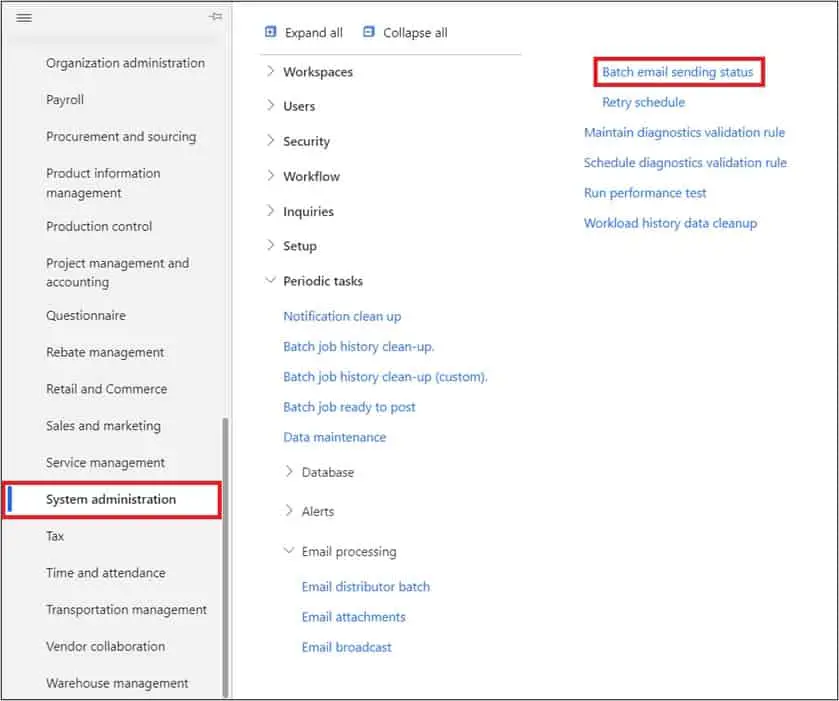
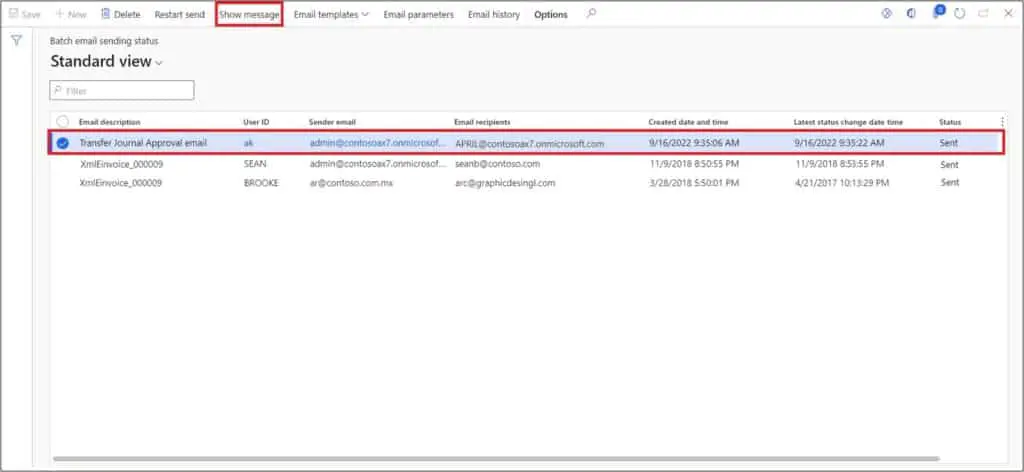
You can also see the email message on the Batch email sending status. The batch email sending status shows a log of the status of emails that are waiting to be sent, have been sent, or have failed to send for whatever reason.
Navigate to System administration > Periodic tasks > Email processing > Batch email sending status.
If you need to resend or review the message that was sent you can do that here. Select the Transfer Journal Approval email and click on Show message button.
Here is the preview of the email message as per the email template.
Takeaways
Microsoft Dynamics 365 Finance and Operations email templates allow super users and functional administrators to create automated emails that are triggered via workflows, and alerts. For users that are not in D365 on a daily basis these email alerts can be very important for timely approvals.