
A fundamental part of using Dynamics 365 Finance and Operations is being able to load data into the system. This article will show you how to load data in Dynamics 365 Finance and Operations.
Dynamics 365 Finance and Operations uses data entities to load data into the system. A data entity is just an abstraction or denormalization of specific tables to enable users to access the database through several layers of business logic and security. The collection of data entities and the mechanism by which we access them make up what is referred to as the data management framework (DMF).
There are two main ways to utilize theses data entities to load data. One is directly through the data management workspace and importing data using a templated Excel file and calling the entities directly to import the data. The second way is to use the Excel add-in to connect to the data entity and load the data directly through Microsoft Excel. Both use the data entities but each one has its own procedure to accomplish the load.
Load Data Using Data Management Workspace
Build Your Template
The first step is to build our template that we will use to upload the data. The easiest way to do that is to create a record the way it should look in the system and export it. By exporting the data using the data entity you are able to see the what fields in the D365 UI map to which fields in the template.
You can also narrow down and eliminate unneeded fields in the template. In this example we will load Vendors which is a data migration that happens in the majority, if not all projects I have been on. Before you begin, start by creating a new vendor and filling in all the relevant details depending on you specific business requirements. Check out my article How to Create a Vendor if you need some help.
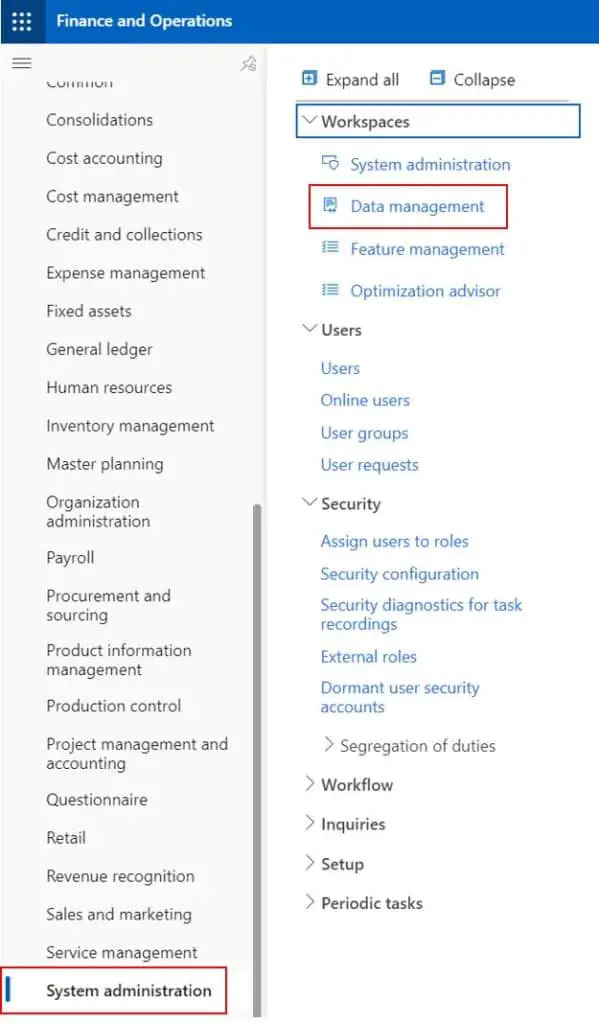
- Navigate to System Administration > Workspaces > Data management.
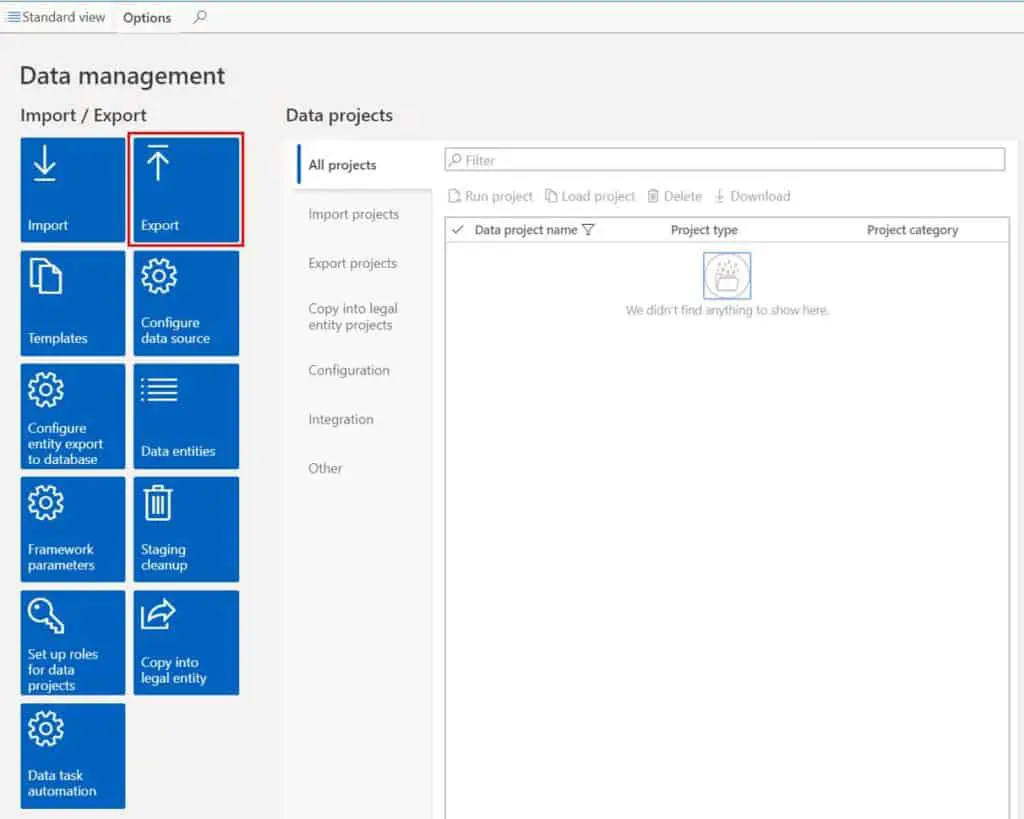
- Click the “Export” tile.
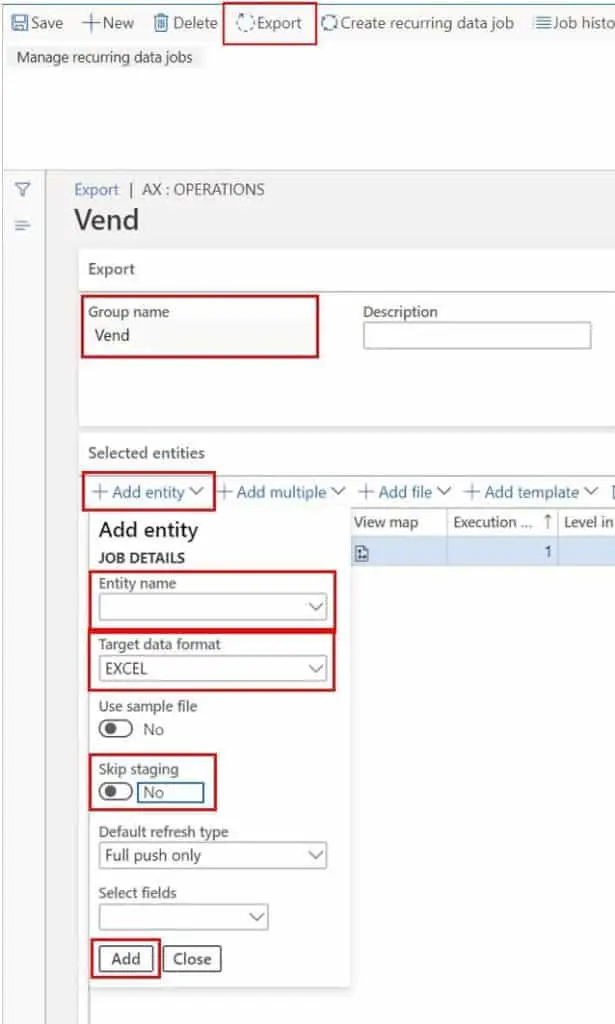
- In the “Group name” field type in “Vendors”.
- Click the “Add entity”.
- Select the “Vendors V2” entity or the latest vendor entity if there is an updated entity.
- In the “Target date format” select “Excel”.
- Deselect “Skip staging”.
- Click “Add”.
- Click “Export” to begin the export.
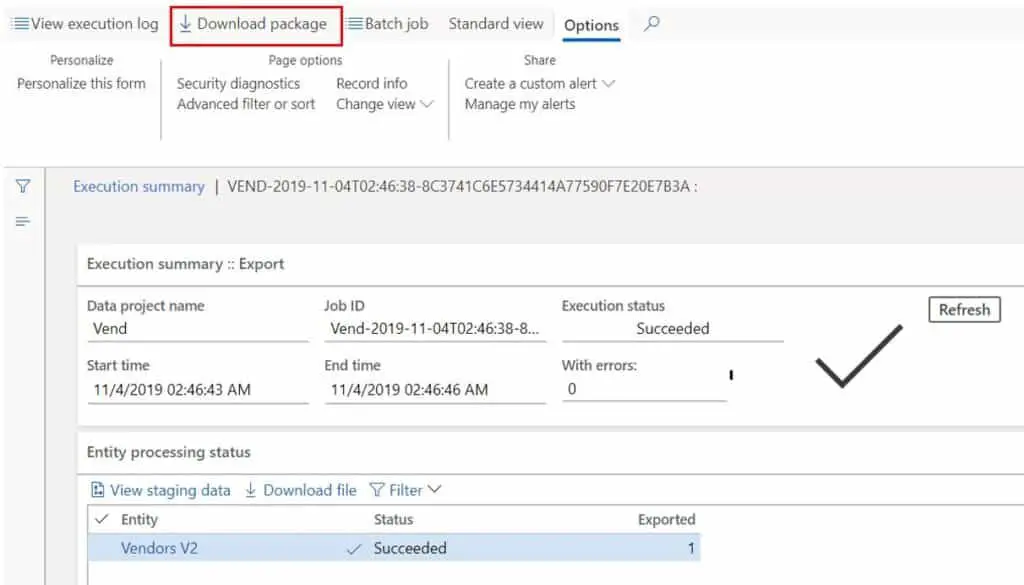
- Click the “Download package” button to download the data package.
- Open the zip file and open the Vendor export Excel file.
Now we have out template that we can use to import data. With this template you can now see the fields that you have entered when you created your vendor. To import multiple vendors, you just need to populate the fields in the template using the record you created manually as your guide. When you have your template populated save your Excel file somewhere locally on your computer.
Load Your Template
Now that the template is ready we can load the template.
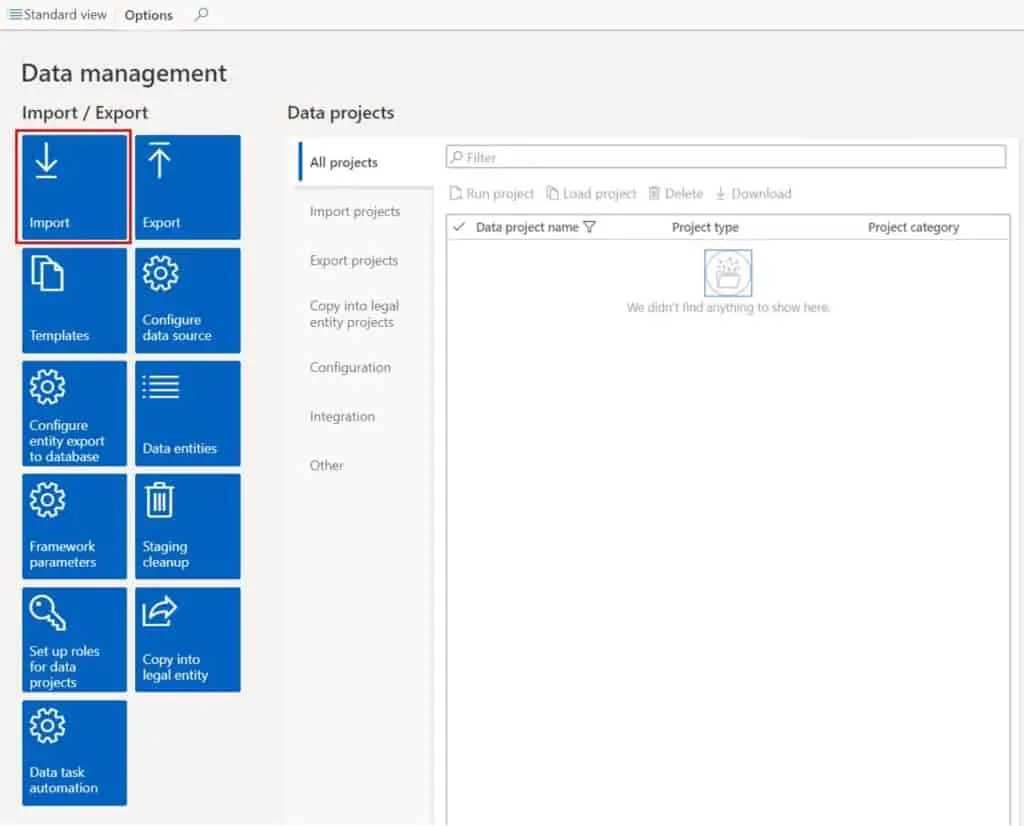
- Navigate to System Administration > Workspaces > Data management.
- Click the “Import” tile.
- In the “Group name” field type in “Vendors Import”.
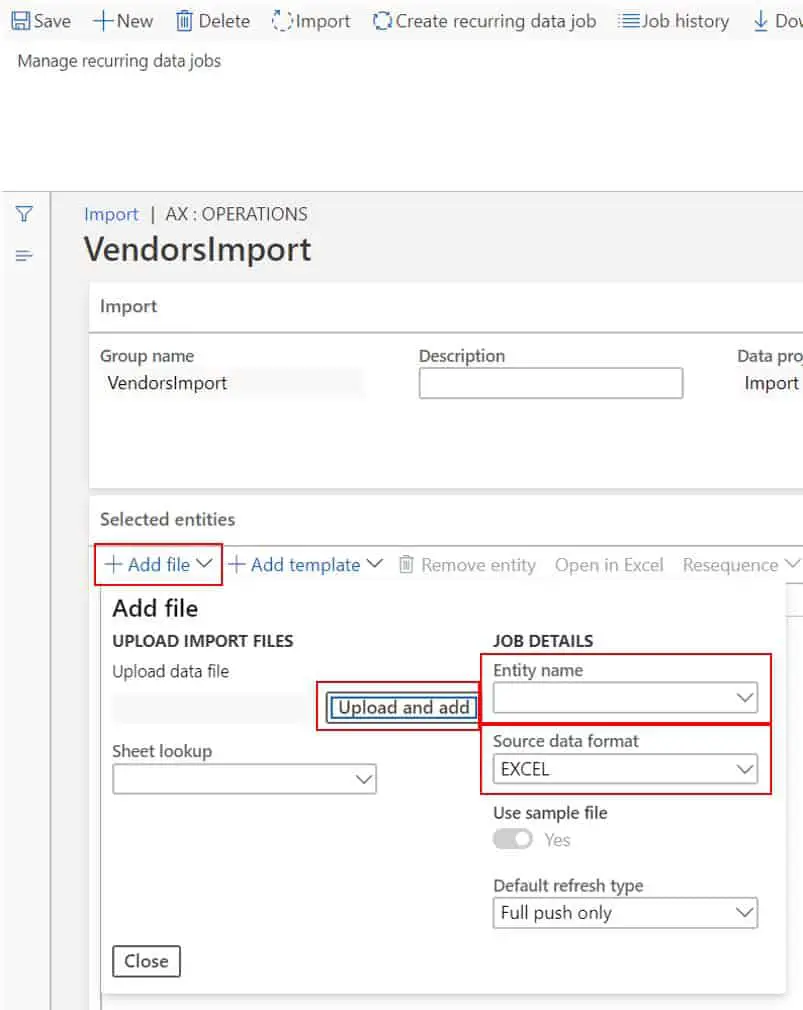
- Click the “Add file” button.
- Select the “Vendors V2” entity or the latest vendor entity if there is an updated entity.
- In the “Target date format” select “Excel”.
- Click the “Upload and add” button.
- Select your Vendor template.
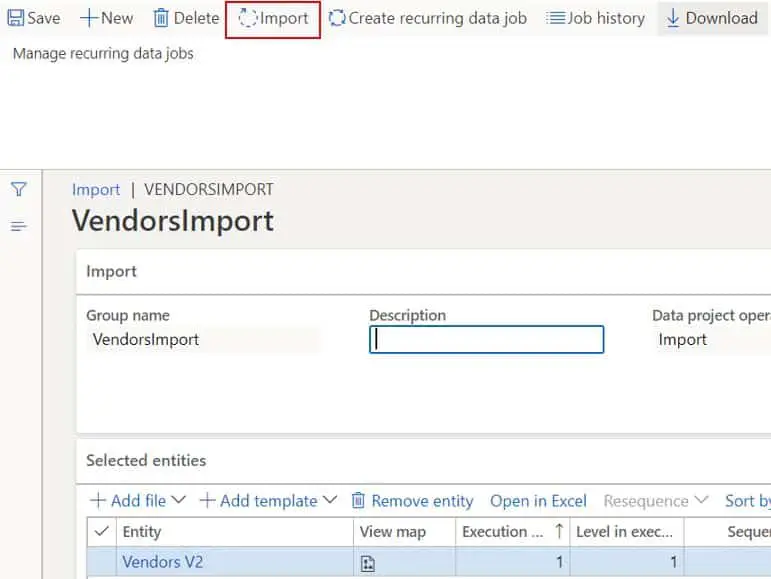
Click the “Import” button.
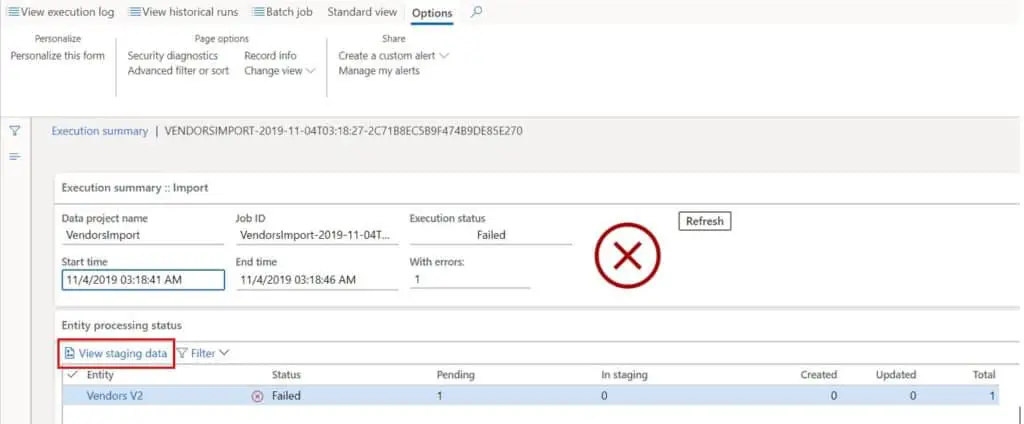
If you get an error you can view the error by clicking on the “View staging data” button. I received the error below which is solved by changing the vendor account number sequence to “Manual” for the import and then setting it back once the import is complete.
“Results. Field ‘Vendor account’ does not allow editing.
Results. Invalid specification of Vendor account
Results. Number sequence Acco_47 does not allow change to a lower number.
Results. Validations failed”.
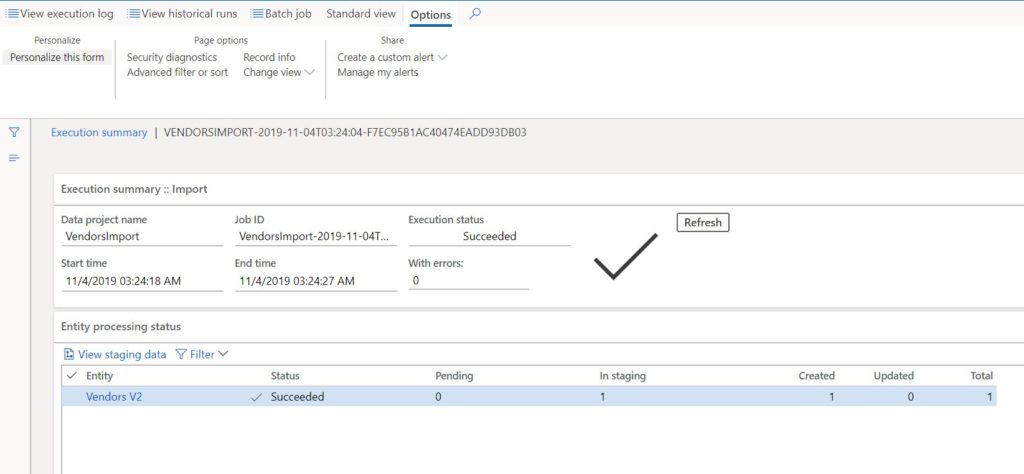
After that you should see a successful import with the record count of the successful records and records that failed.
Excel Add-In
The second way to upload data is using the Excel Add-In.
- To continue with the vendor example navigate to Accounts Payable > Vendors > All Vendors.
- Click the Microsoft office icon in the top right corner.
- Click the “Vendors V2” option under “Open in Excel”.
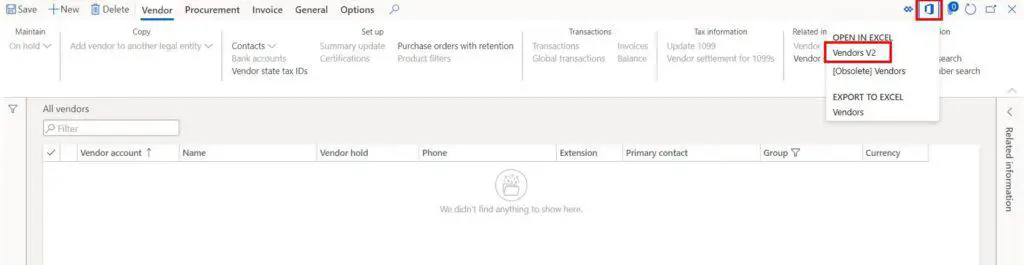
- D365 will prompt you with a “Download” button and then you will need to click “Open” to open the file.
- Once the Excel document opens click the “Enable content” button and the data will begin to be pulled into the document.
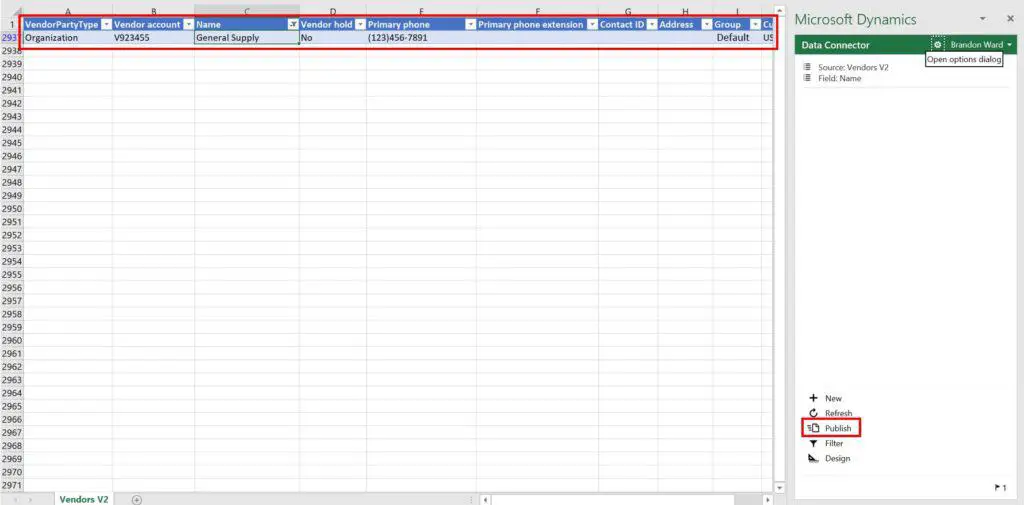
You should see the vendor you created manually. You can copy this row and paste it at the end of the spreadsheet and change the vendor account number, name, phone, address, and any other fields that need to be changes depending on the vendor. When you have finished adding the record you can now click the “Publish” button to load the new record.
If you navigate back to the vendor list page Accounts Payable > Vendors > All Vendors and refresh the form you should now see the uploaded vendor record.
You have now seen two ways to load data is Dynamics 365 Finance and Operations.