

Processing a purchase order in D365 can be intimidating at first if you are unfamiliar with the purchase order form and all the various buttons, tabs, and fields available to the user. In this post I will walk you through the end to end process of creating, printing, receiving, and invoicing a purchase order in Dynamics 365 Finance and operations.
This guide assumes that you have some basic setup complete in your environment similar to a Contoso demo environment. Although each business will have unique variations in the procurement process the basic process follows the same flow. This guide will take you through the most commonly used fields and processes used in the purchase order lifecycle.

Enter The Purchase Order
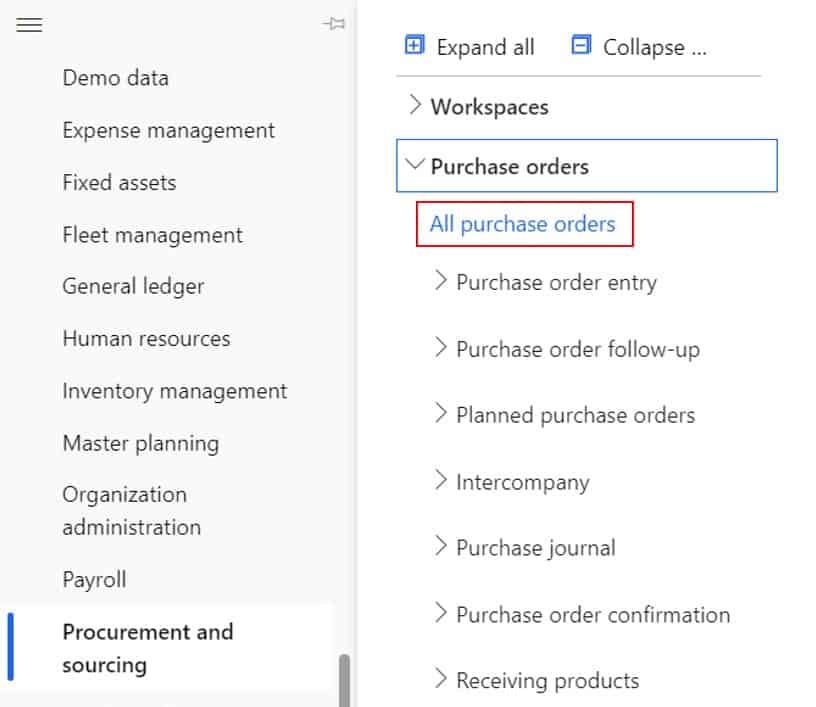
To create a purchase order, navigate to Procurement and Sourcing > Purchase orders > All purchase orders.
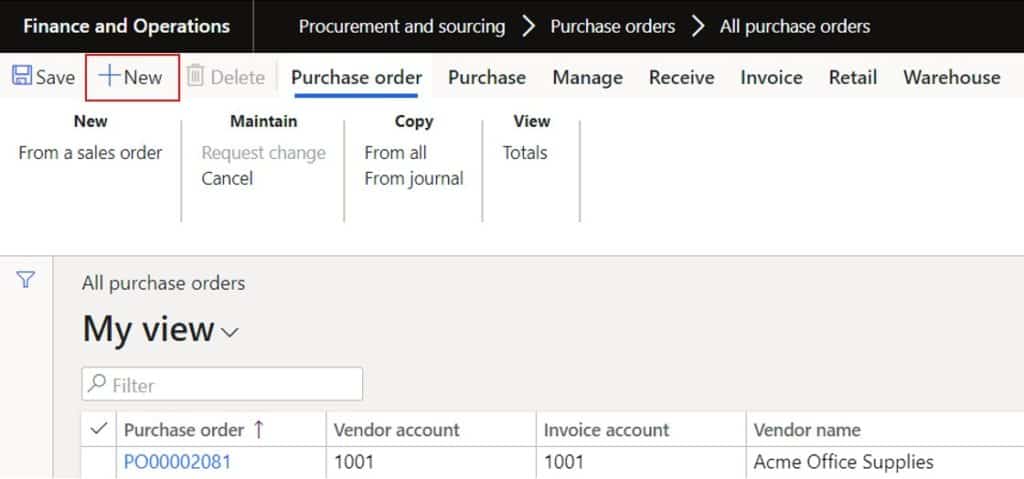
Click the “New” button to create a new purchase order.
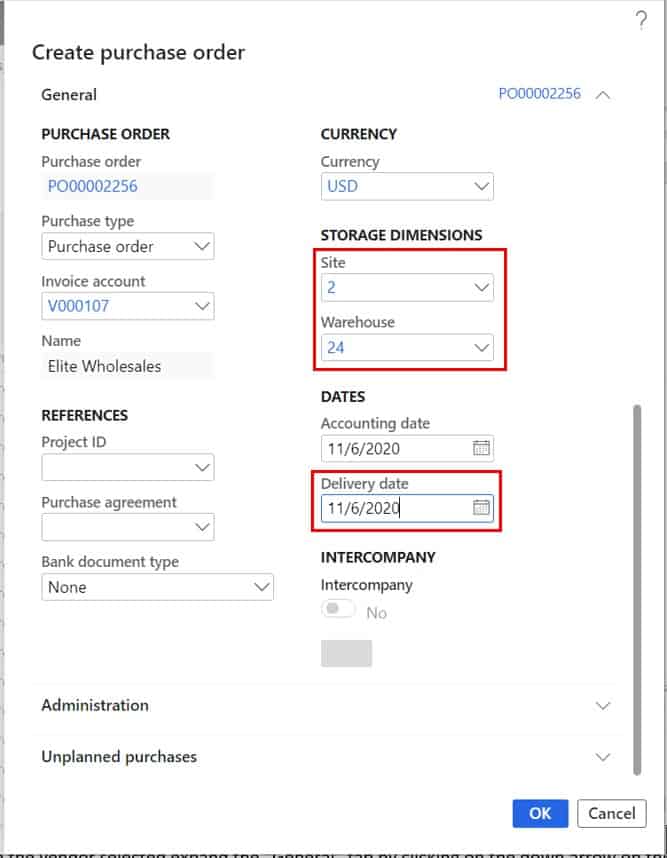
This will open the purchase order fly out form.
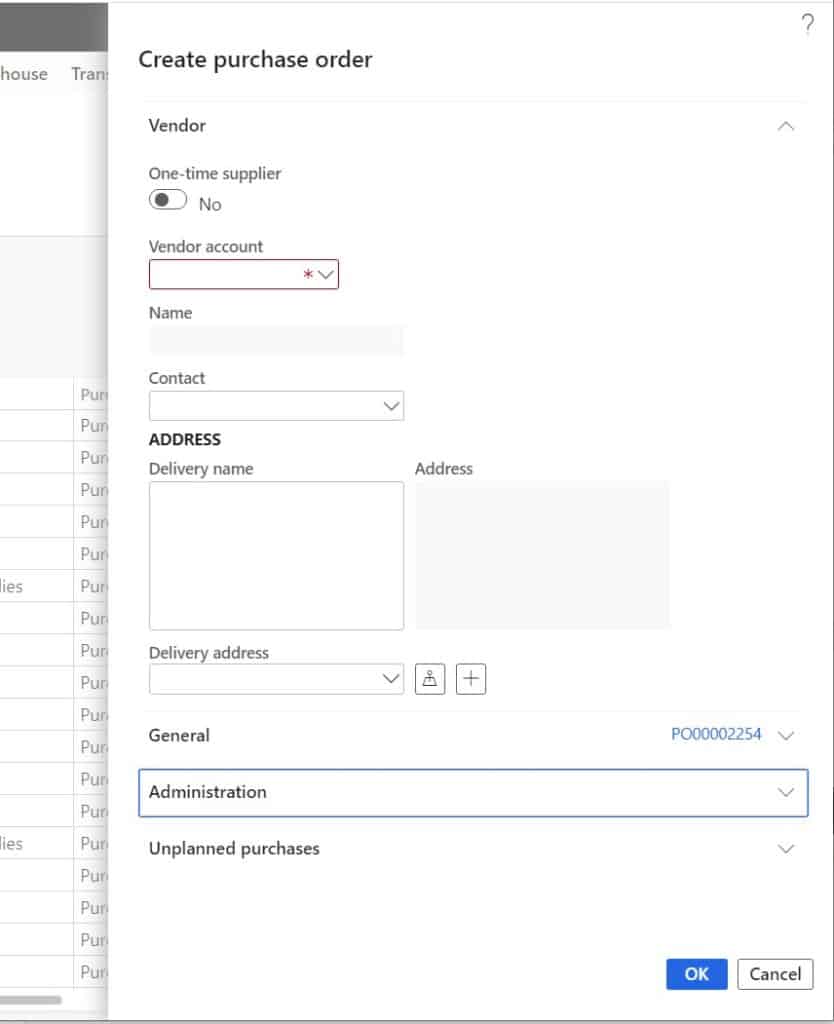
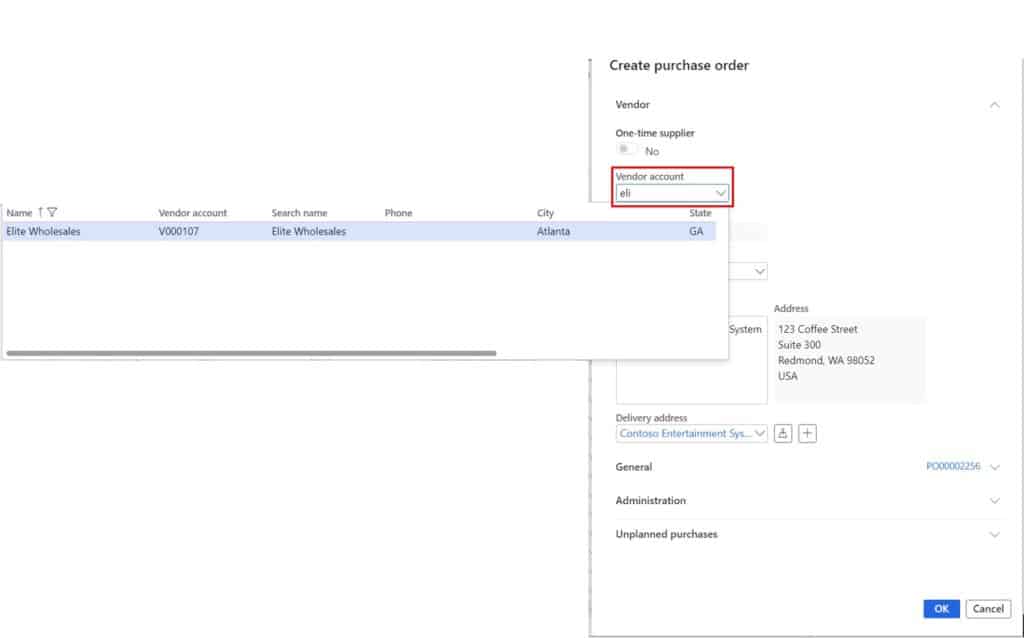
First select the vendor from the “Vendor account” dropdown list. If you know the name of the vendor, you can start typing it in the vendor account field and the list will auto filter for your vendor.
Once you have the vendor selected, expand the “General” tab by clicking on the down arrow on the right.
In the “General” tab select the “Site” and “Warehouse” where the product will be delivered and received into the warehouse. The site and warehouse can be set at the vendor record in the “Purchase order defaults” fast tab and defaulted onto the purchase order so it does not have to be manually entered each time.
Next select a “Delivery date” that indicates the date that the product is needed. Although you can set a delivery date at the purchase order header level the delivery date for each purchase order line will default based on that item’s lead time defined in the default order settings or in the trade agreement.
Next click the down arrow on the “Administration” tab to open the tab. Here we can select a “Buyer group” and a purchase “Pool”. Buyer groups and pools can also be defaulted from the vendor. These fields are not required fields but are very often used.
Buyer group – Buyer groups are used to segment purchase orders into groups of responsibility by buyer or procurement agent. Buyers typically have a particular product line, component set, or type of product that they buy, and this helps to delineate those purchase orders.
Pool – Purchase pools are another way to group types of purchase orders together to help filter and search for different types or groupings of purchase orders.
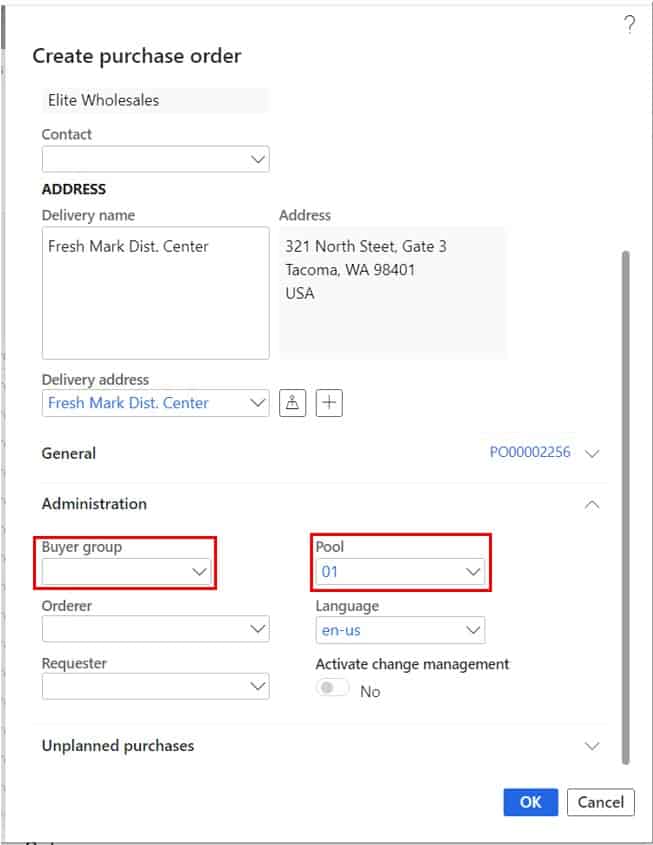
Click the “Ok” button to create the purchase order.
Enter The Purchase Order Lines
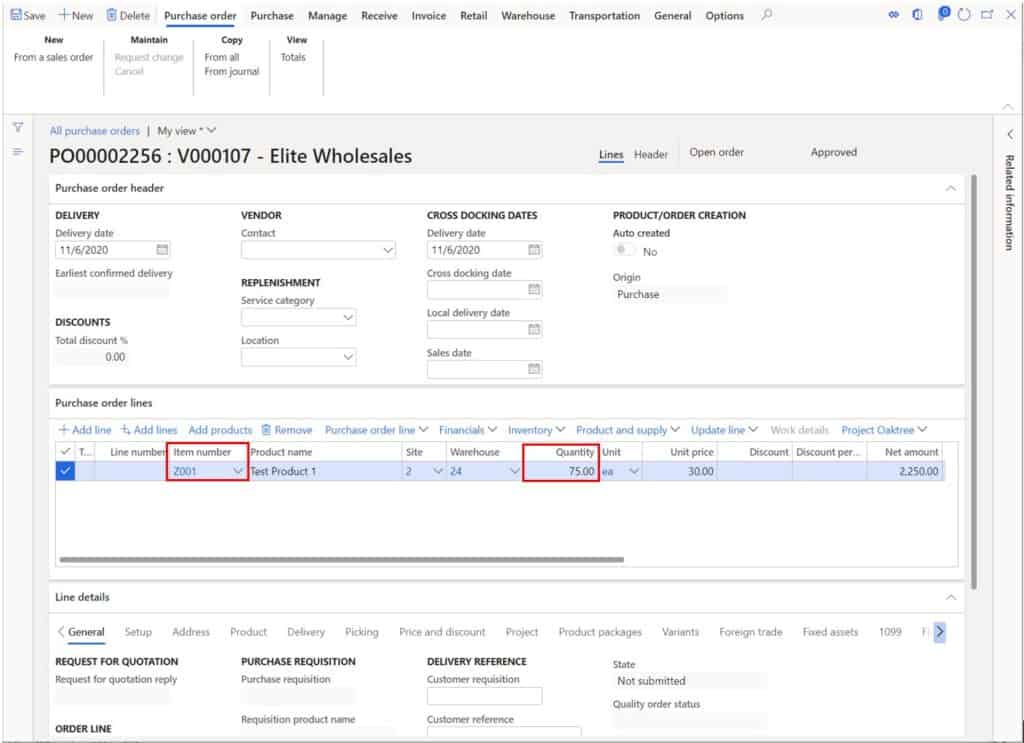
In the line section of the purchase order form click the dropdown for “Item number” and select the item number you would like to purchase. Next select the quantity you would like to purchase. The “Unit price” field will default with the purchase price from an existing trade agreement.
If there is no trade agreement the price will default from the base purchase price on the item, and if there is no base purchase price on the item you will need to manually enter the unit price for the item. The “Net amount” will be automatically calculated based on the quantity and price.
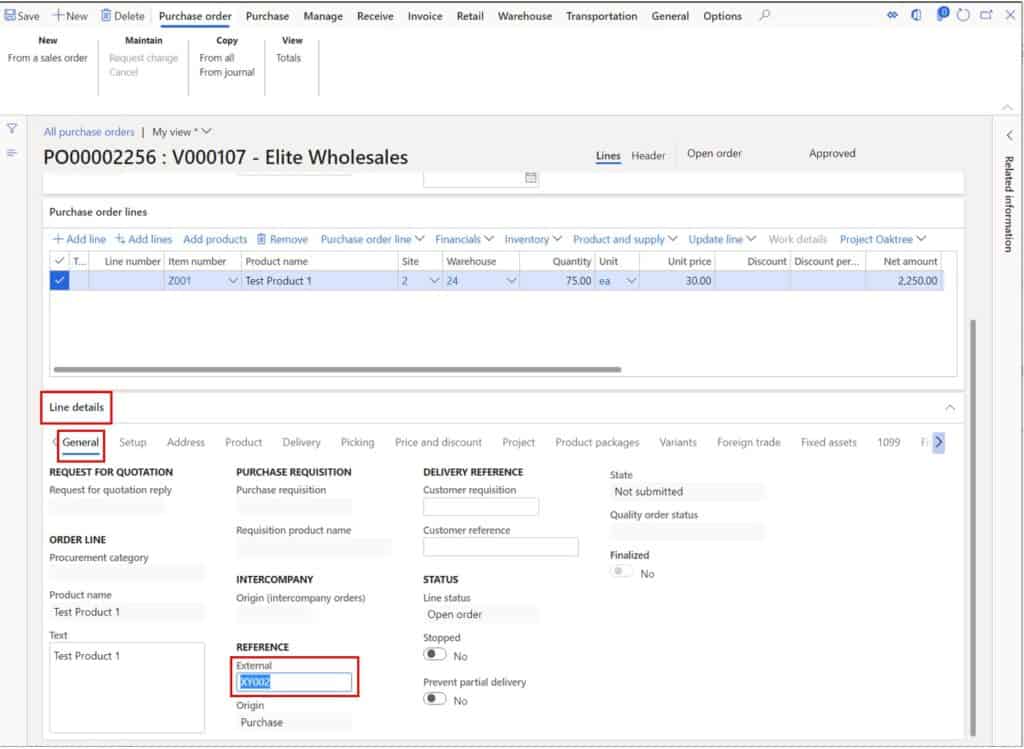
In the “Line details” section of the form there are additional tabs that have additional fields and data related to the line. In the “General” tab you can enter a vendor part number in the “External” field in the “Reference” section of the form. This vendor part number can be configured to print on the purchase order in the place of the internal part number or along with it.
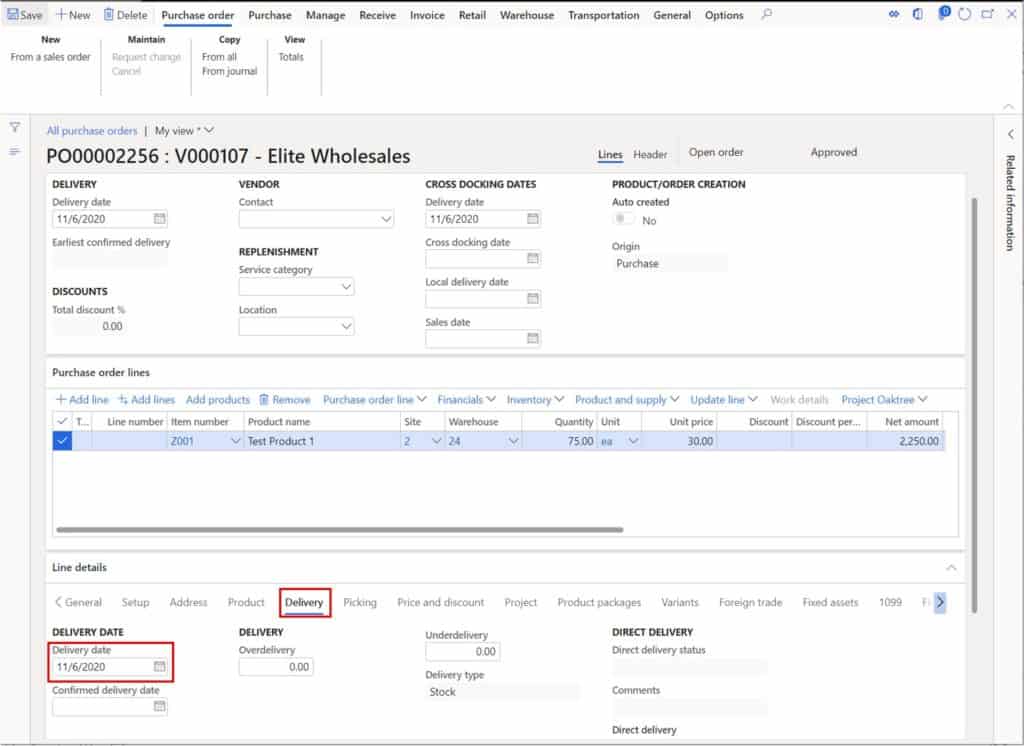
Next click on the “Delivery” tab in the line details section. Here you will see the delivery date for the line. The delivery date will be based on the product’s defined lead time. If there is no lead time defined the date will default to today’s date. Set the date to the date the item is required.
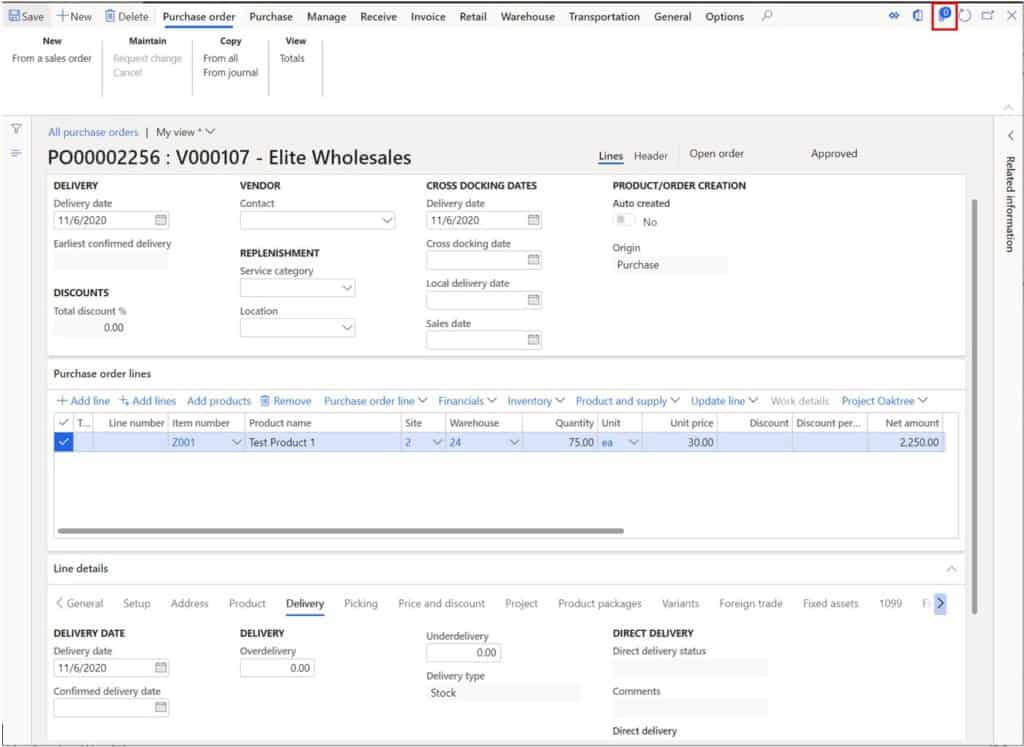
There may be cases where you need to add a note to the purchase order for the vendor to adhere to special instructions or just to communicate something to the vendor. To add a note that can be printed on the purchase order click the paperclip icon in the top right corner of the form.
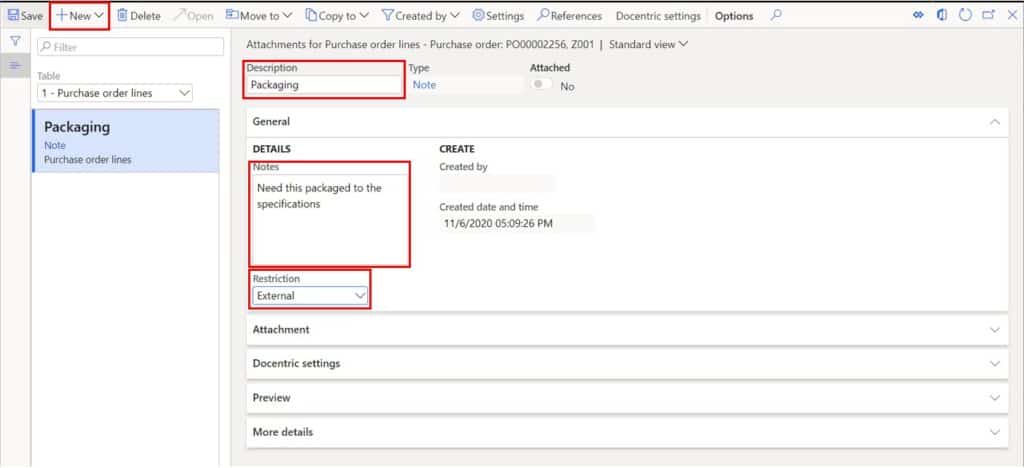
In the attachment form click the “New” button and select “Note”. In the “Description” field enter the title of the note. In the “Notes” field enter the body of the note. This is the part that will print on the purchase order. Next make sure you set the “Restriction” field to “External” so that the note will be visible to external parties like the vendor. When you’re finished with the note close the form.
Print Purchase Order
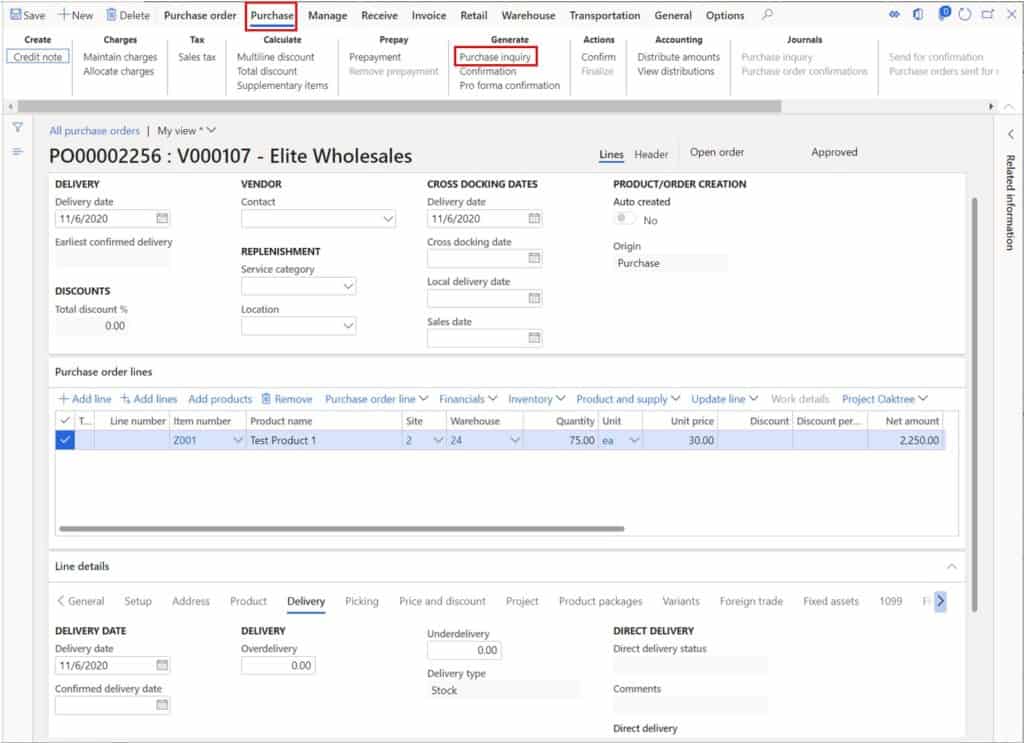
Now that we have finished entering our purchase order we need to print and send this purchase order to the vendor and ensure that the vendor can meet the delivery date, the quantity required, and the price specified. To do this click the “Purchase” tab in the ribbon and click the Purchase inquiry button.
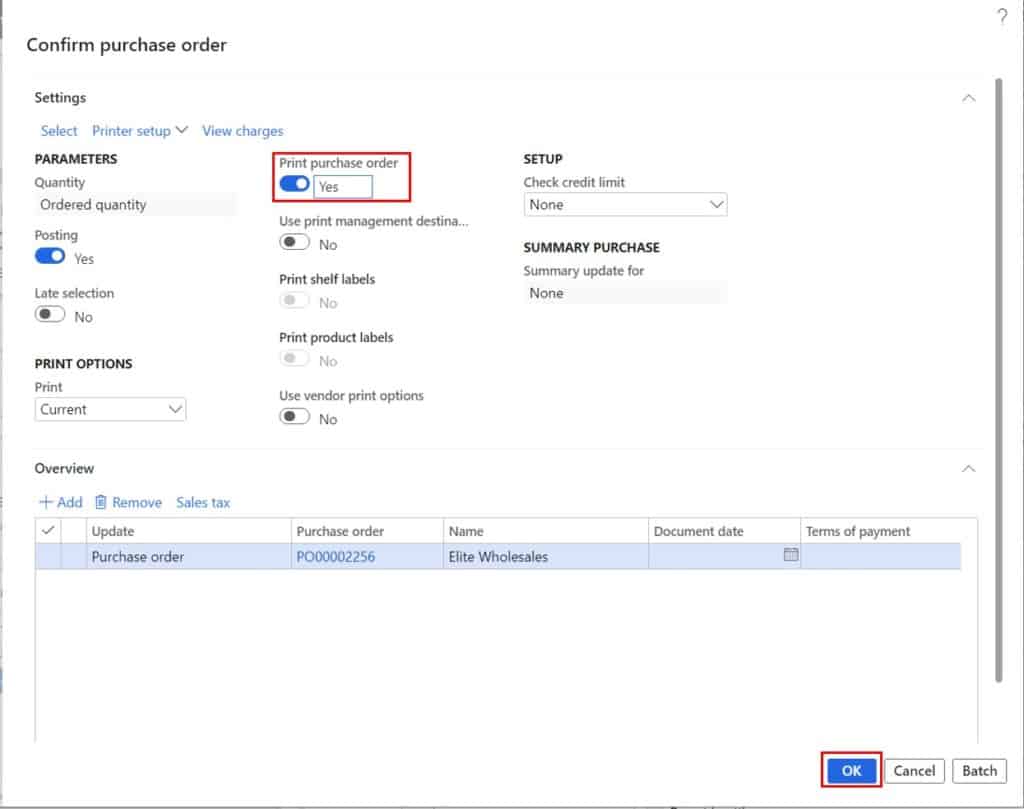
This will open the purchase inquiry post form. Select the “Print purchase order” option and click the “Ok” button to print the purchase order.
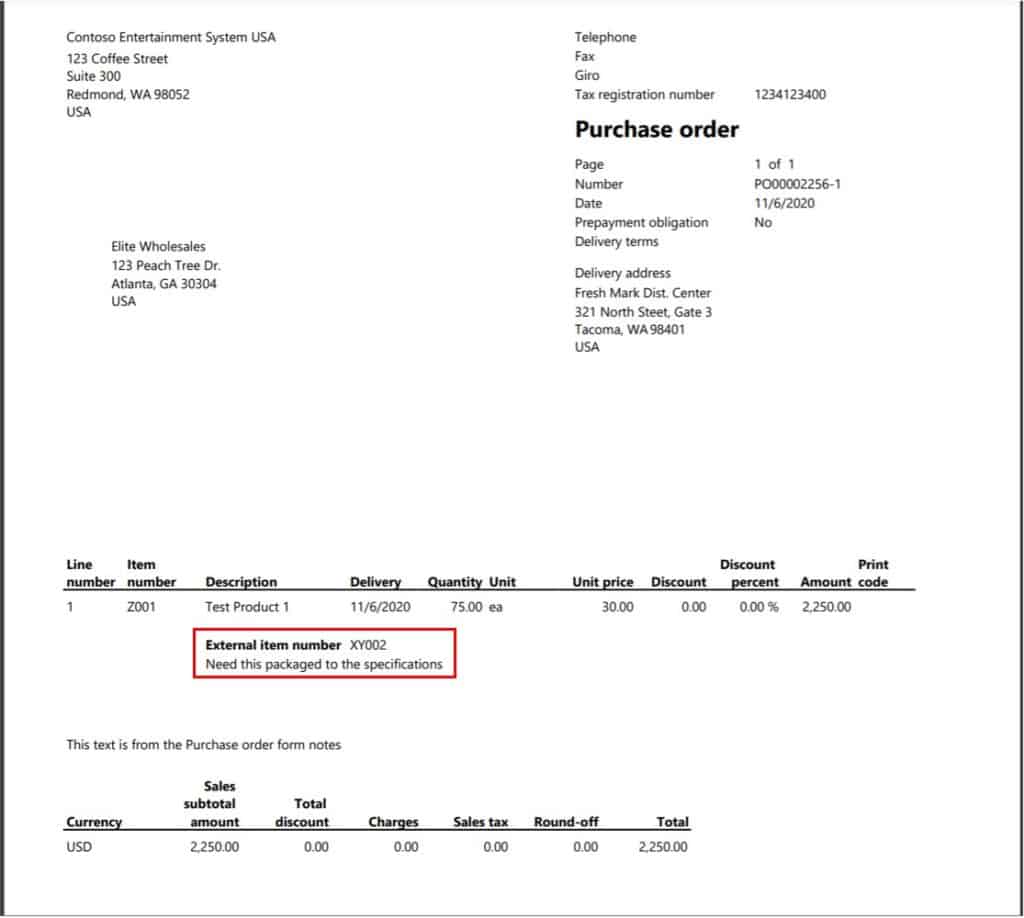
This will print the purchase order. As you can see our vendor part number has printed as well as the note we added to the purchase order.
Confirm Purchase Order
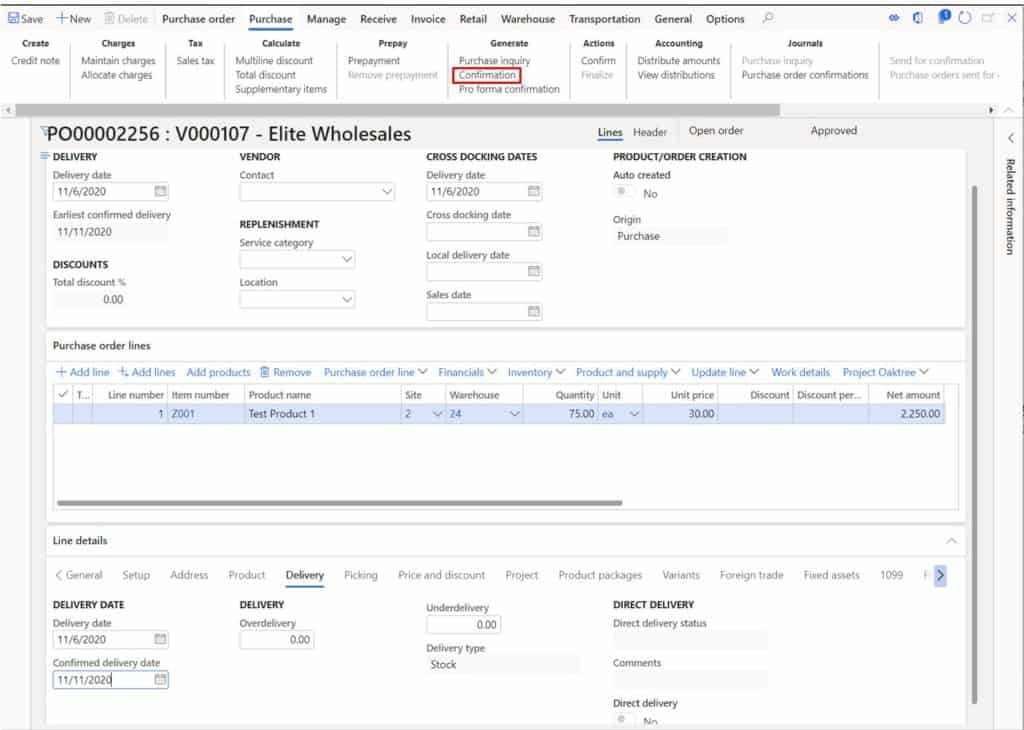
When the vendor responds with information about the order, we will need to update the purchase order with any changes to the quantity, price, or delivery date. Once we have made the changes requested by the vendor, we can print the confirmation and send that to the vendor if required. To do this click the “Confirmation” button.
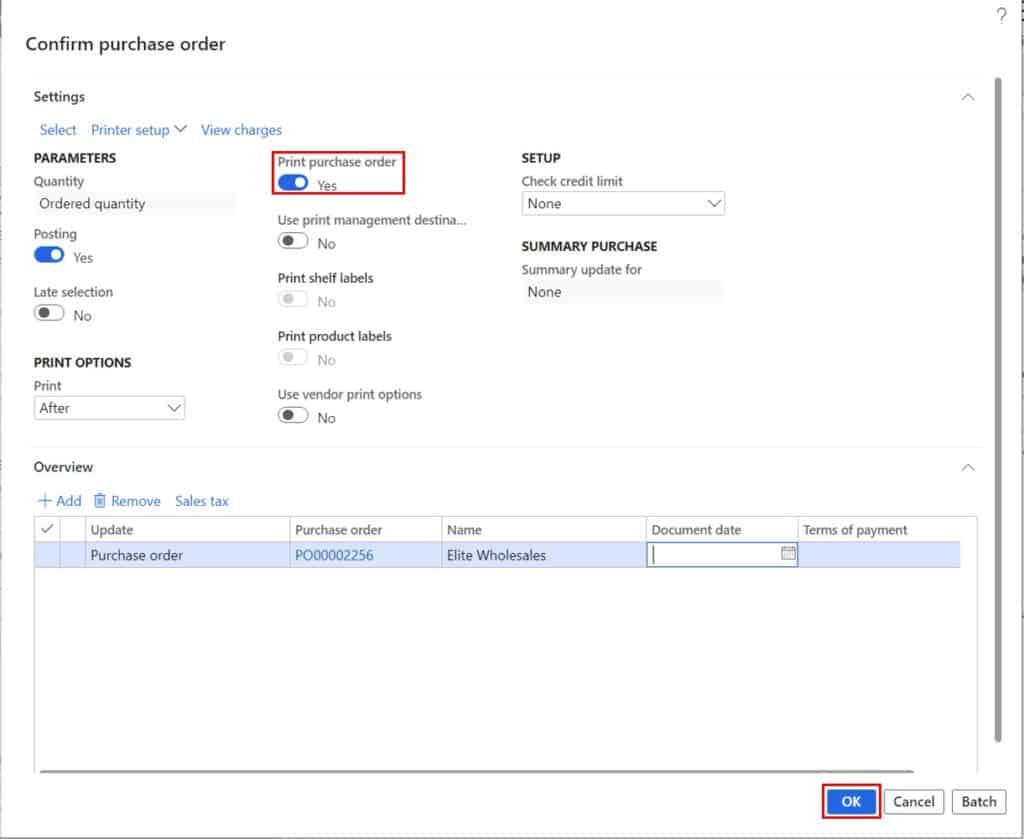
This will open the purchase order confirmation form. Click the “Print purchase order” and click the “Ok” button.
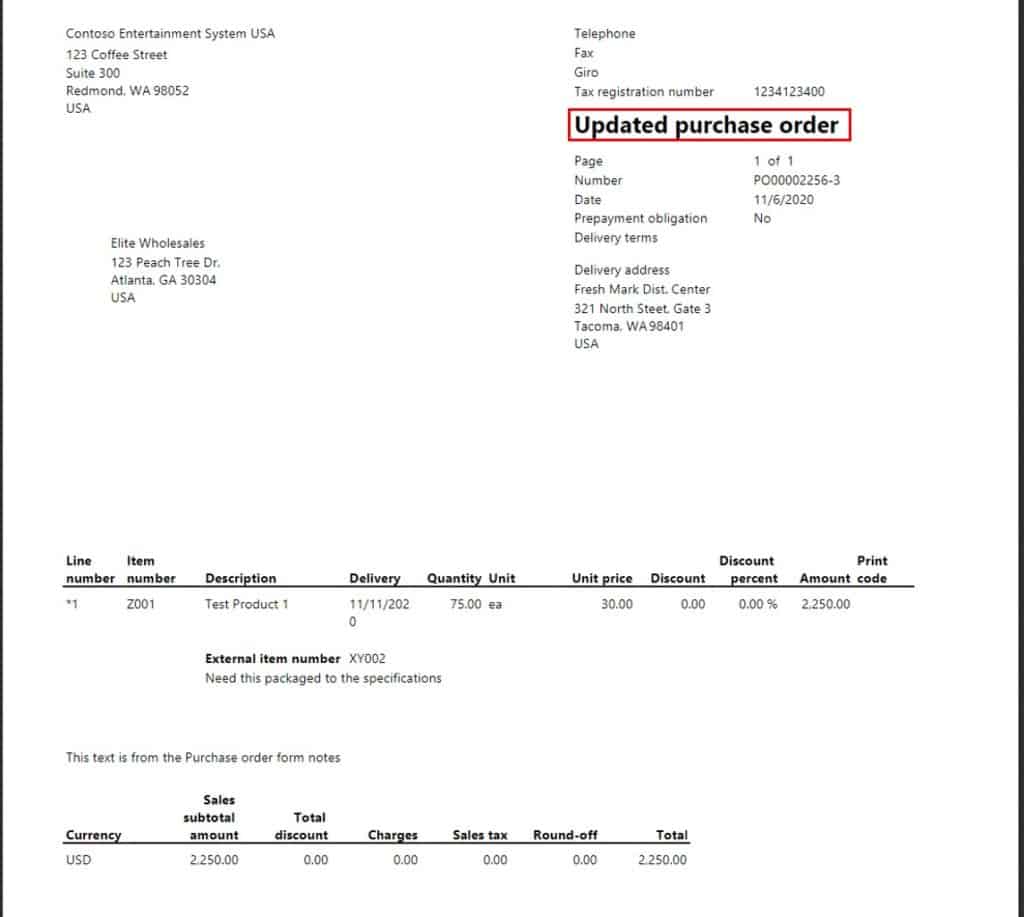
If you make a change as I did with the delivery date for the line, you will see that the purchase order printout says “Updated purchase order”.
Receive Product
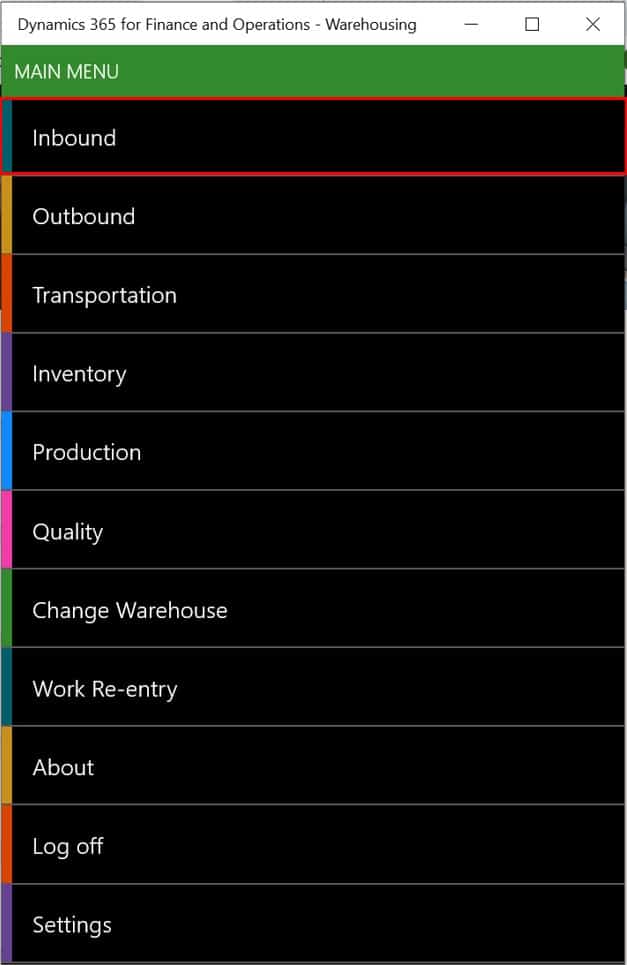
When the product arrives at the dock, the warehouse team will need to receive the purchase order. To do this we will use the warehouse mobile application. In the warehouse mobile application menu, select the “Inbound” option.
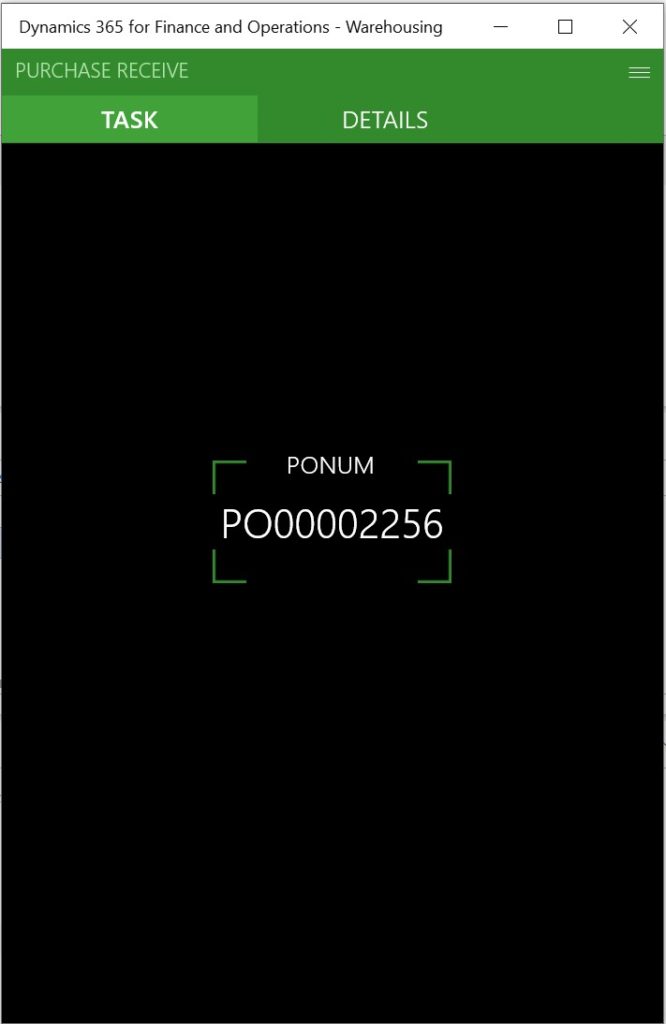
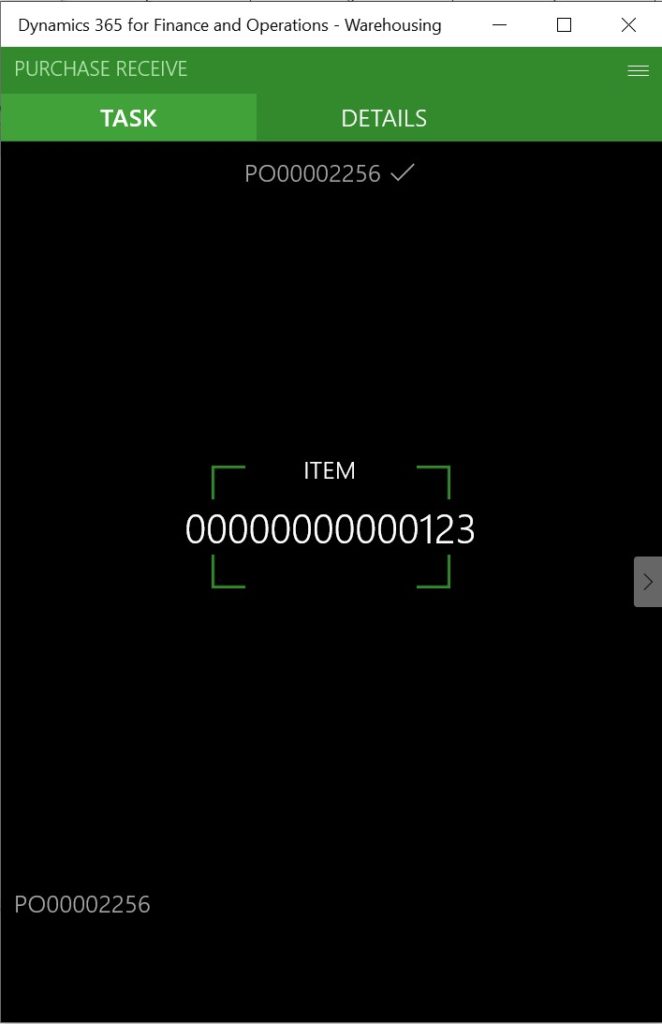
Then we will use the “Purchase receive” menu to begin the receiving registration process. If the vendor provides a barcoded purchase order number on the packing slip this can be scanned on the warehouse mobile application, otherwise it can be typed in.
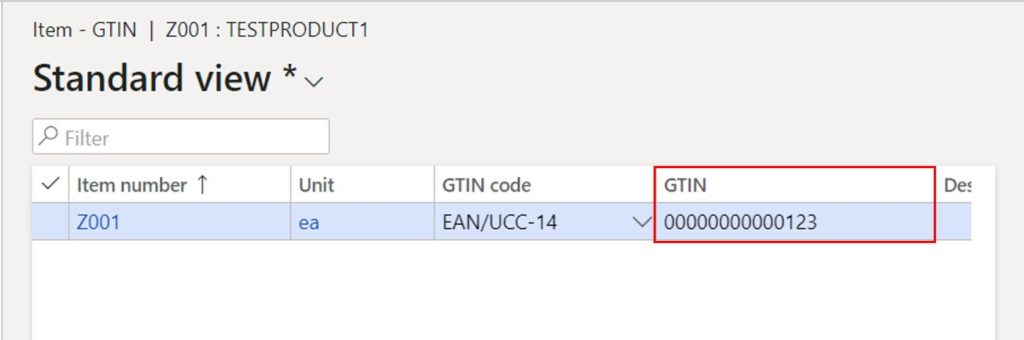
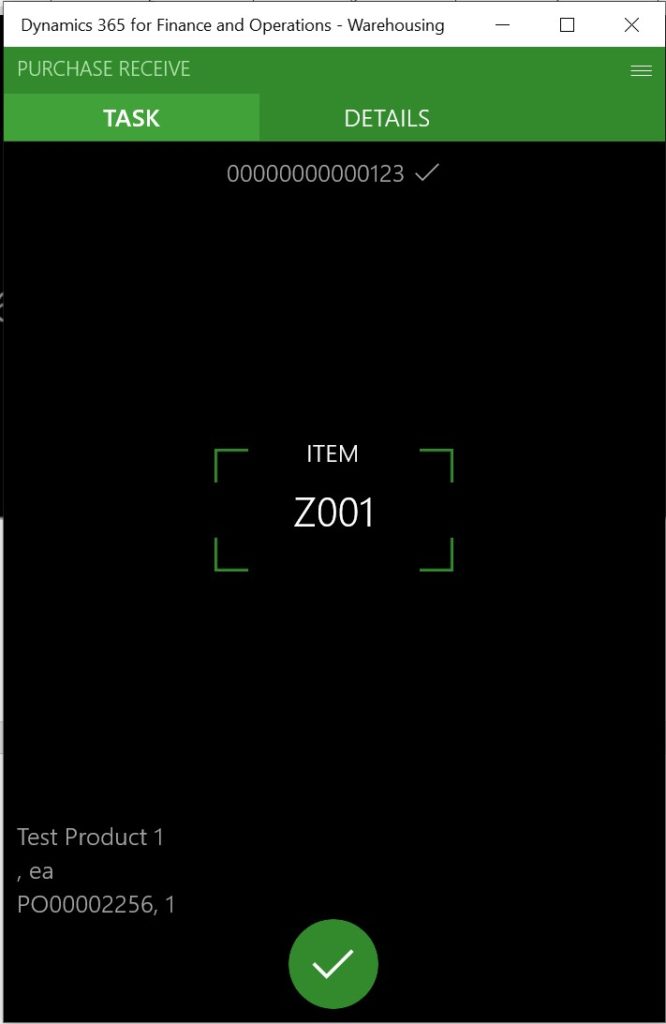
The particular product I am using for this demonstration has a GTIN barcode which can also be scanned by the warehouse mobile application.
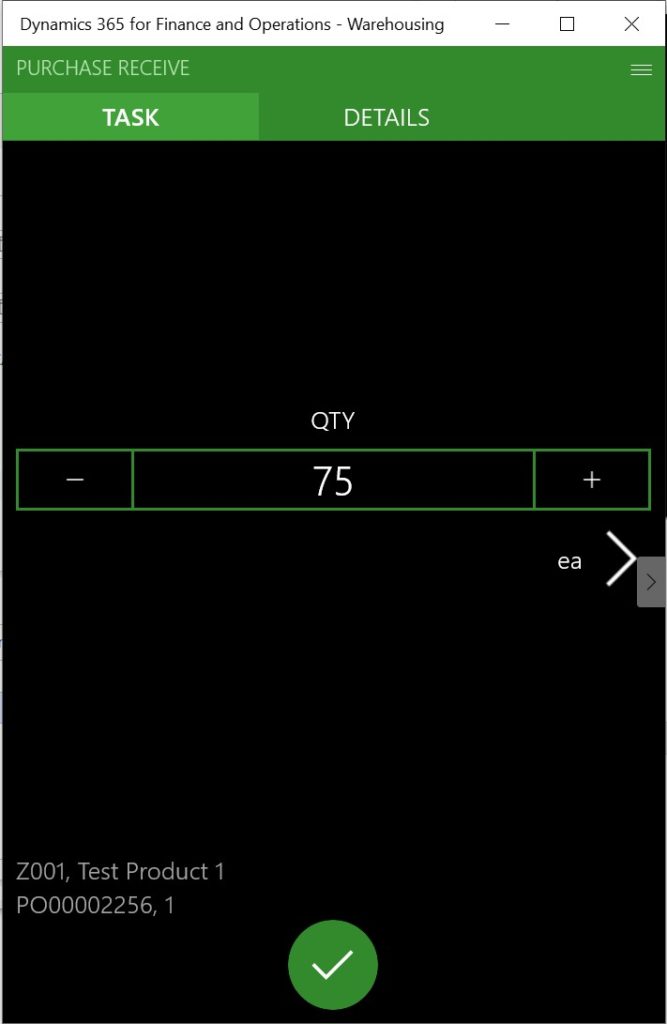
Next, we will enter the quantity that we actually received from the vendor.
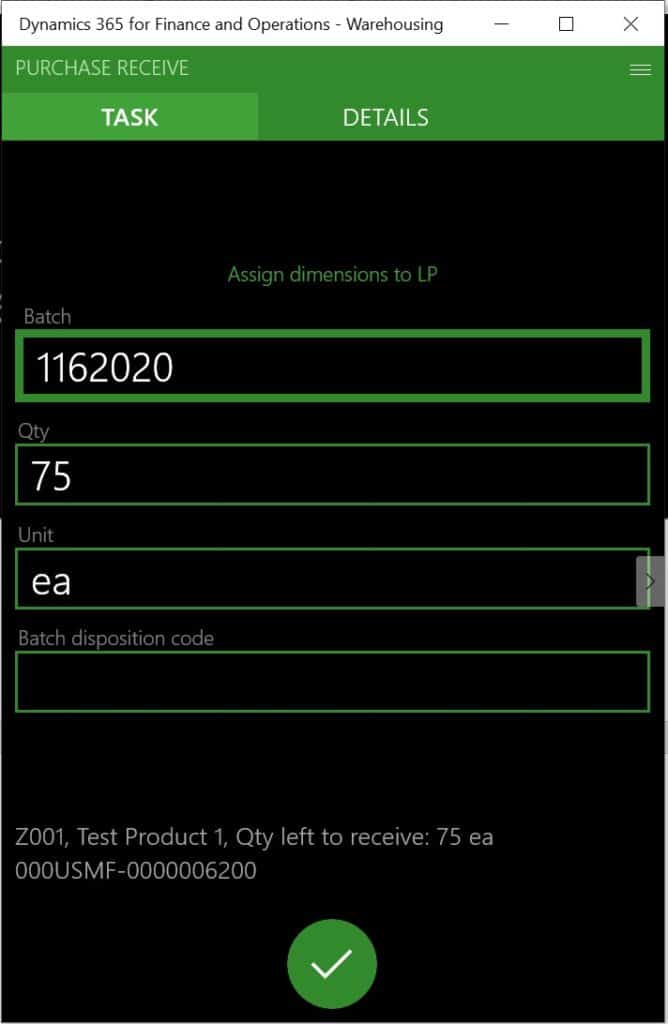
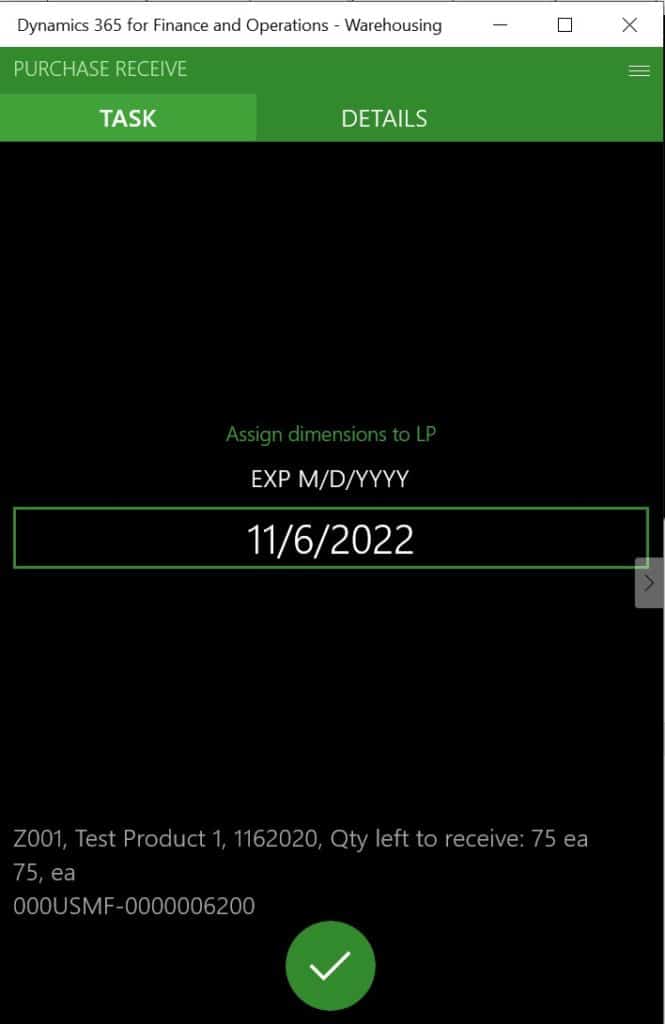
This item I am using is batch tracked so I will now scan the batch number and expiration date associated with the batch.
Now we can see that the work was successfully completed. In the background there was work that was created for the user to put the product away to its storage location in the warehouse.
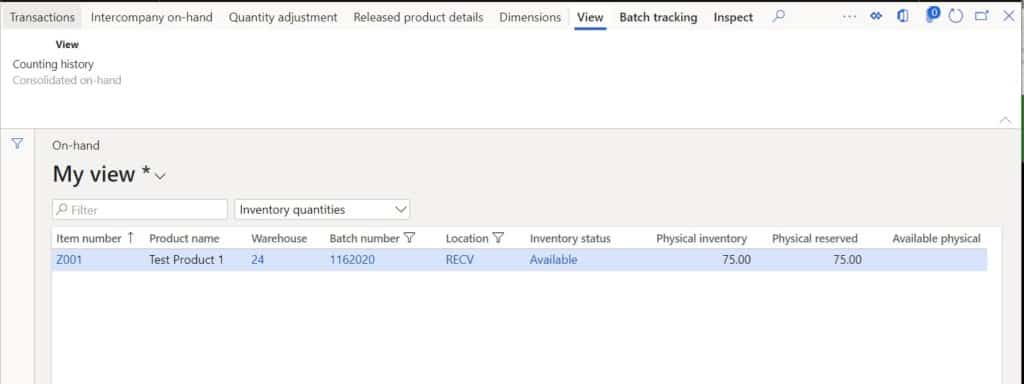
If we look at on-hand inventory we can see that we now have on-hand inventory of 75 sitting at the receiving dock. It has a reservation against it because there is pending work for someone to put that product away to its storage location.
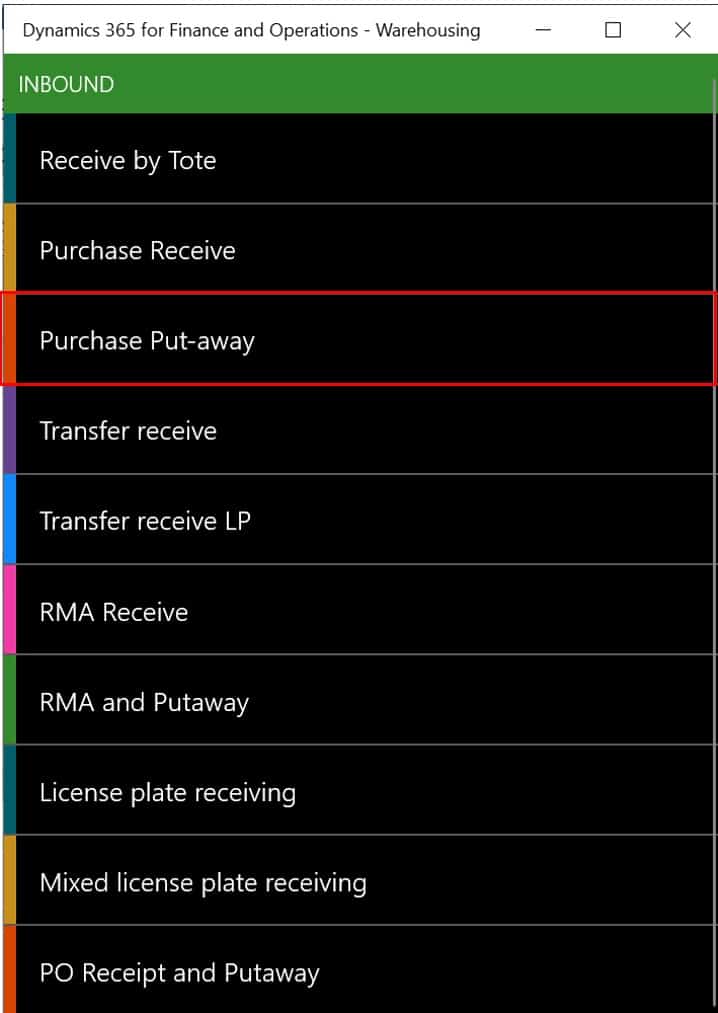
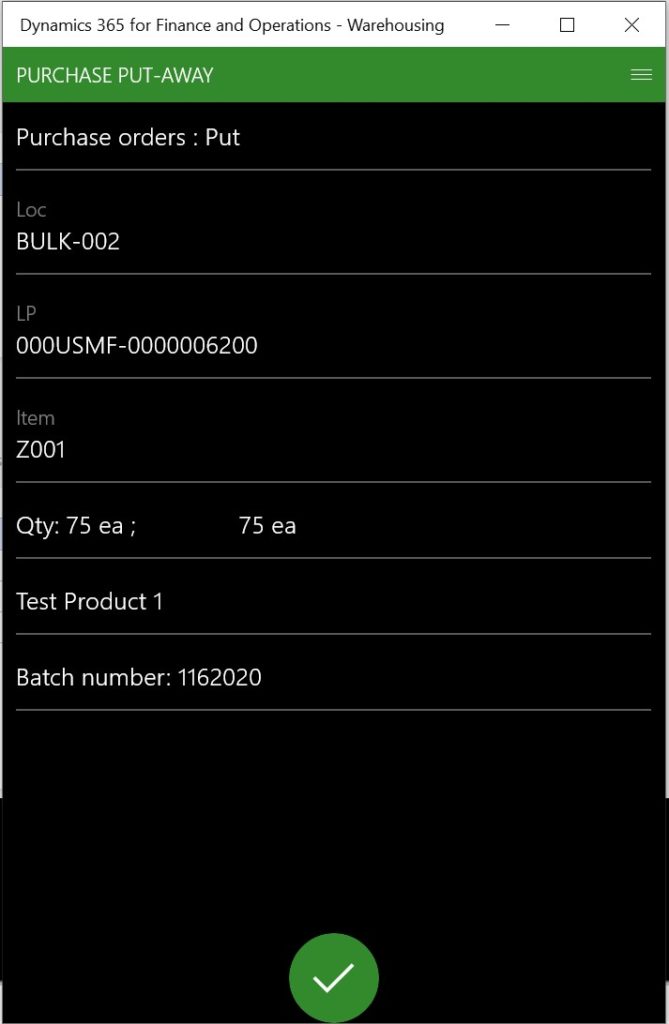
Next, I’ll navigate back to the “Purchase put-away” menu to complete the put away step of the receiving process.
Now the warehouse mobile application is asking me to scan the license plate associated with the product that we received.

Next I will confirm my pick from the receiving dock.
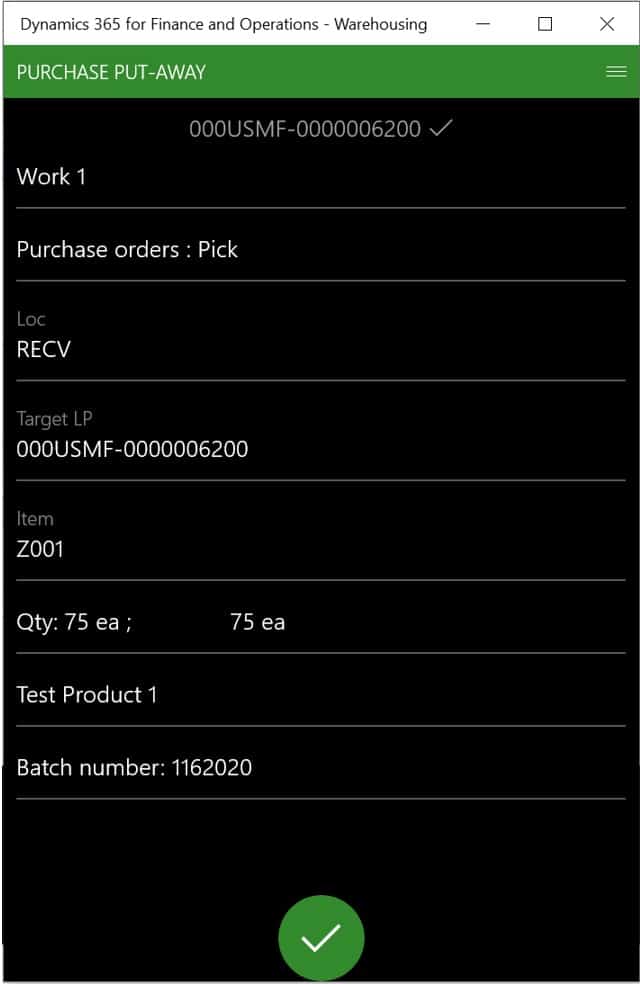
Now the warehouse mobile application is telling me where I need to put the product away. After I have put the product away in the location, I can confirm the put by taping the green checkmark. The warehouse mobile application can be configured to require product, quantity, and location confirmation scans on the pick, or put steps.
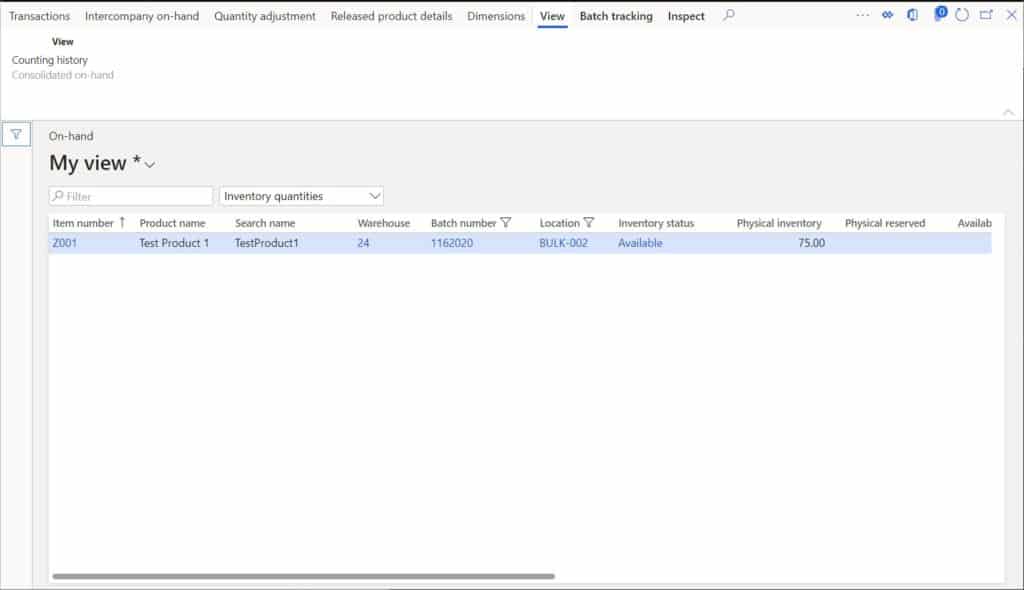
If we take a look at on-hand inventory we can see that we now have on-hand inventory sitting in our storage location.
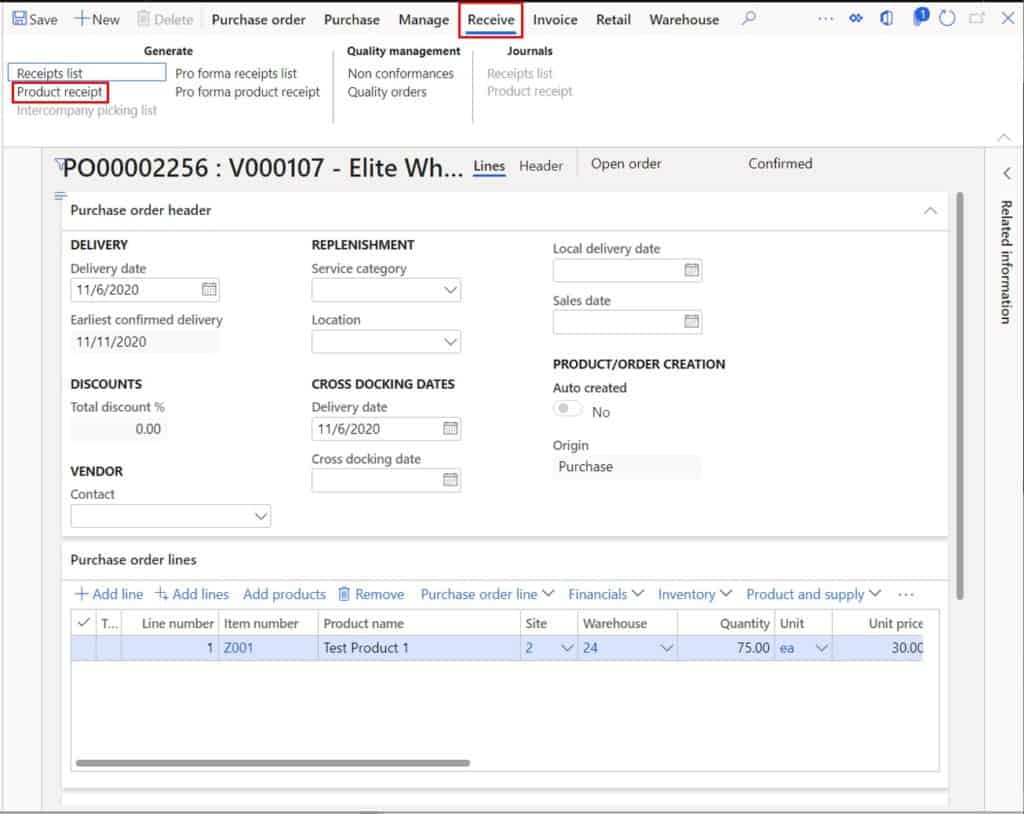
Now that I have finished with the receiving registration process, I can now post the product receipt which will physically update the purchase order and post physical cost to the ledger. This will also post a purchase accrual if configured. To do this navigate back to the purchase order and click the “Receive” tab. Click the “Product receipt” button.
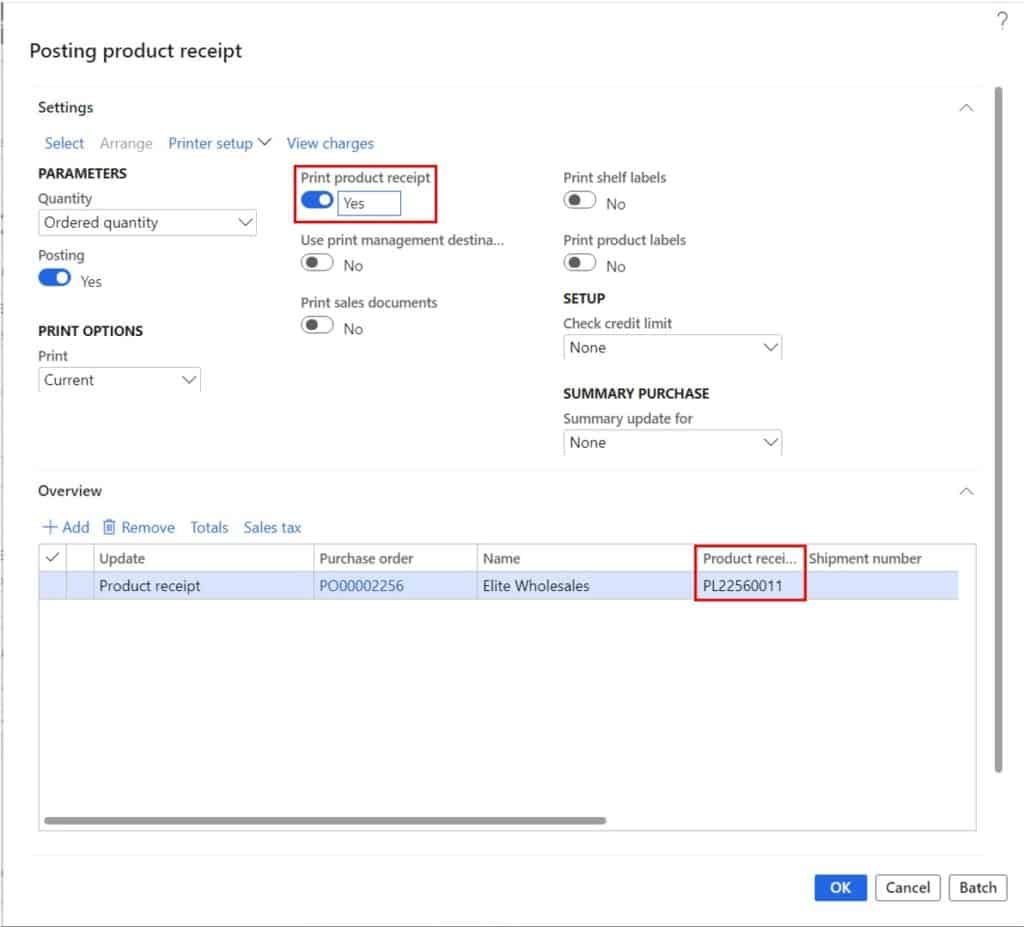
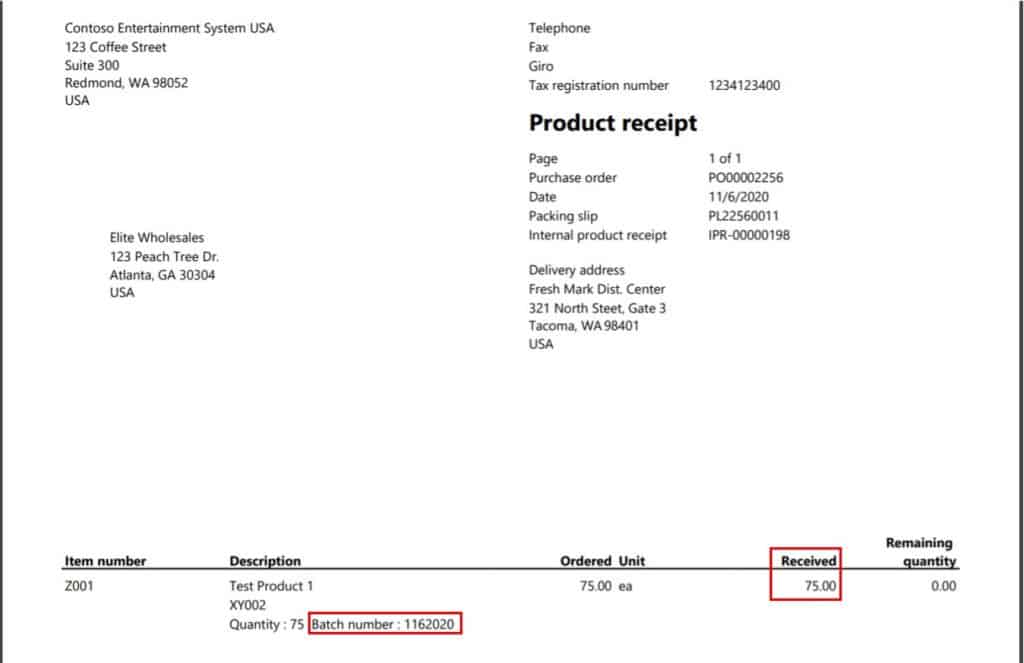
On the product receipt posting form, select the “Print product receipt” option and enter the packing slip number in the “Product receipt” form. Then click the “Ok” button to post and print the product receipt.
The product receipt printout will show the quantity received along with the batch number received.
Invoice Purchase Order
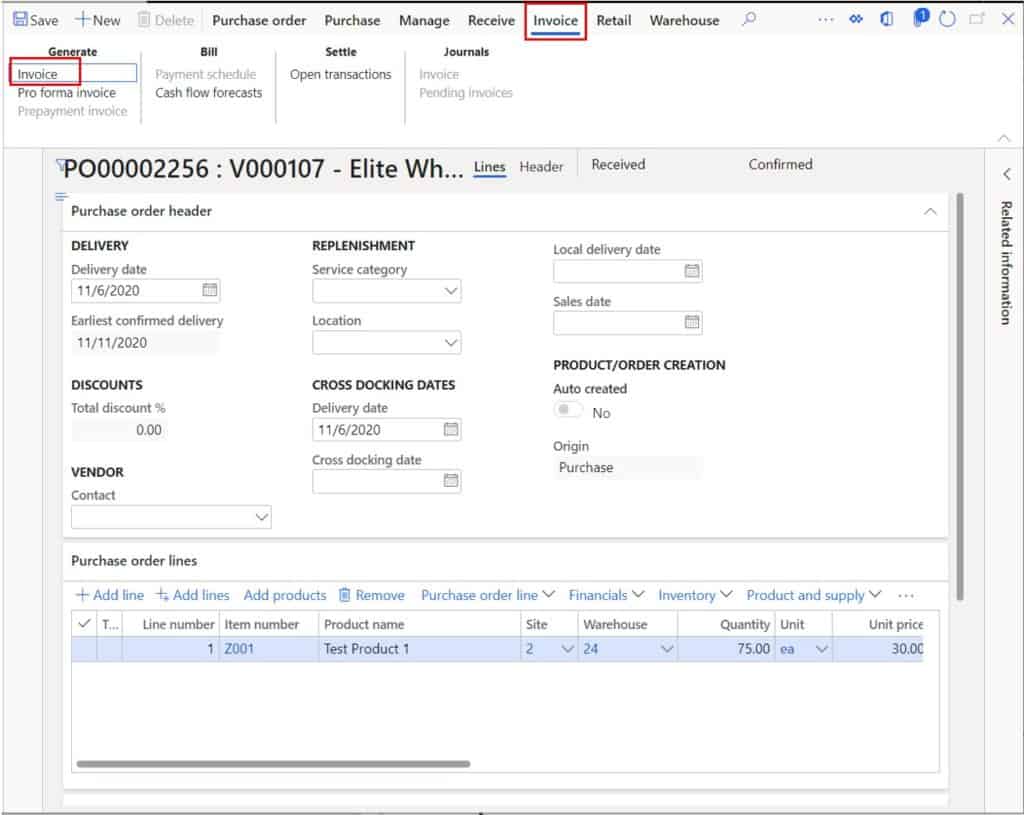
Later when the vendor sends the invoice for the purchase order, we can invoice the purchase order by clicking the “Invoice” button in the “Invoice” tab in the ribbon.
On the invoice entry form enter the vendor invoice number and the invoice date for the invoice. When you are ready to post the invoice click the “Post” button.
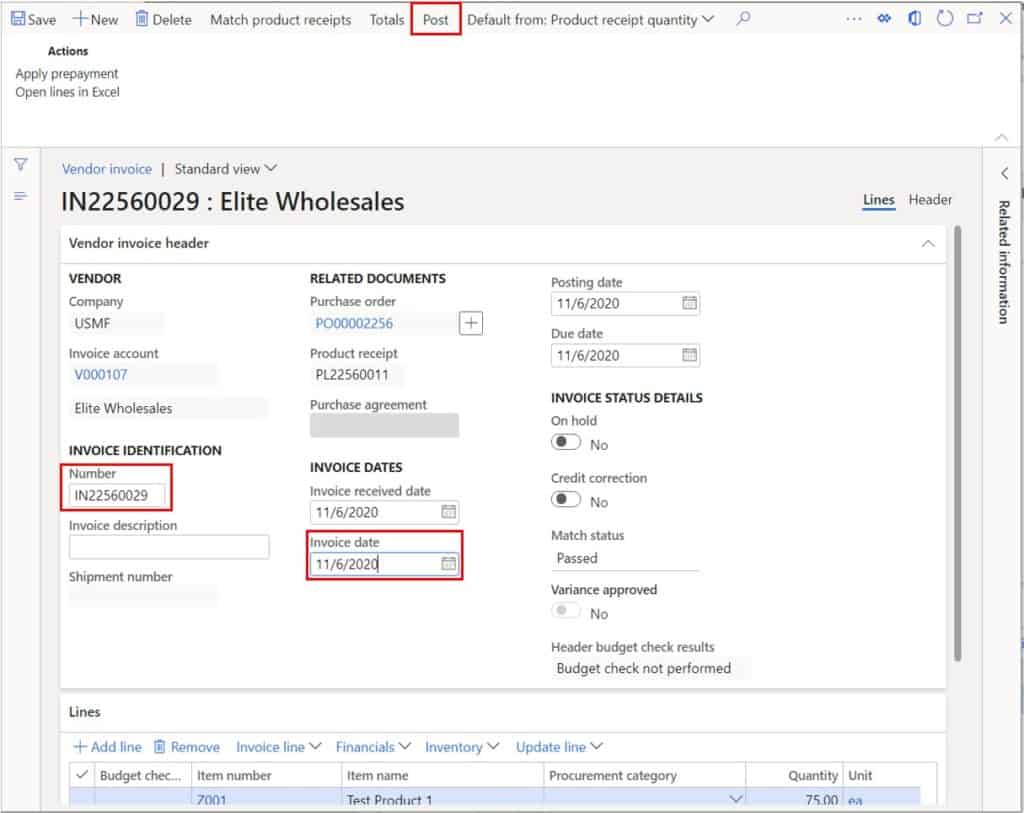
Now we will see that the invoice has been successfully posted.

Takeaways
Although there are going to be different features, functionality, and fields used for different companies based on their specific business requirements, the high level purchase order processing flow will be similar to the steps shown in this guide. I hope this has been a helpful walkthrough on the purchase prodder end to end process.