

The saved views feature in Dynamics 365 Finance and Operations allows users to save personalizations into sets of views that they can toggle back and forth between. Saved views are an excellent user experience feature in Dynamics 365 Finance and Operations and are a way to administrators can standardize the forms that users interact with across the organization by tying saved views to security roles.
The saved views feature existed in prior versions of Dynamics AX 2012 but until recently was absent from Dynamics 365 Finance and Operations. I am very glad they brought it back and they brought it back better than ever because it has much more functionality than the legacy feature ever had. In this article I will explain how to use the saved views feature and all the functionality this feature has to offer through real examples and screen shots.
Introduction
The saved views functionality exists on a majority of list pages, inquiries, and setup forms but it does not exist on all forms such as like workspaces and dashboard. You will know immediately if the saved views functionality is available for the form you are on by looking at the top of the data section of a form and looking for the bold “View” section.
Saved views can be saved individually by each user where the view is only available to each respective user account. That means I can save as many views as I want and no one else will see them.
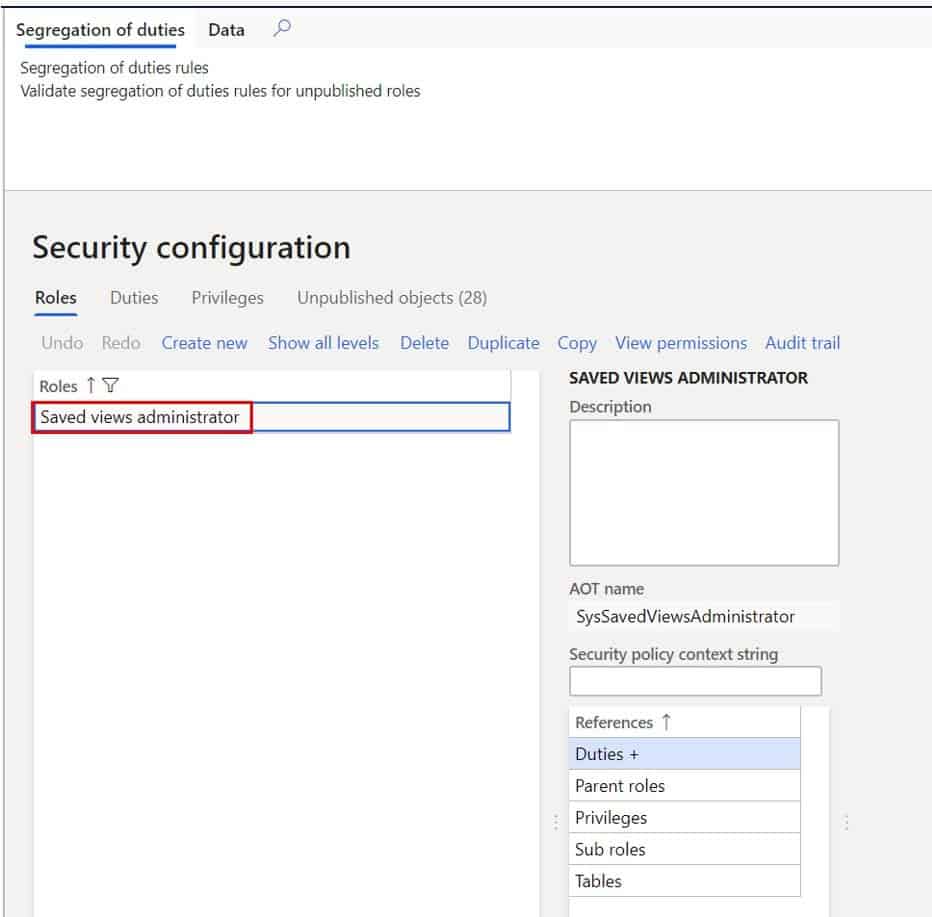
The saved view can also be published to a security role but only users with the “Saved views administrator” or “System administrator” security roles can perform this task. This enables you to standardize the view for anyone with that security role. This is a huge feature that did not exist before that is something users have been requesting for a long time. Later in the article you will see this demonstrated.
Another big plus is that saved views are not wiped out if you ever need to clear your usage data! I can’t tell you how many times I have had to clear my usage data because of some sort of cache issue after spending 15 minutes personalizing a form just the way I wanted it. Now we don’t have to worry about that as long as you save your work under a view.
How To Save A View
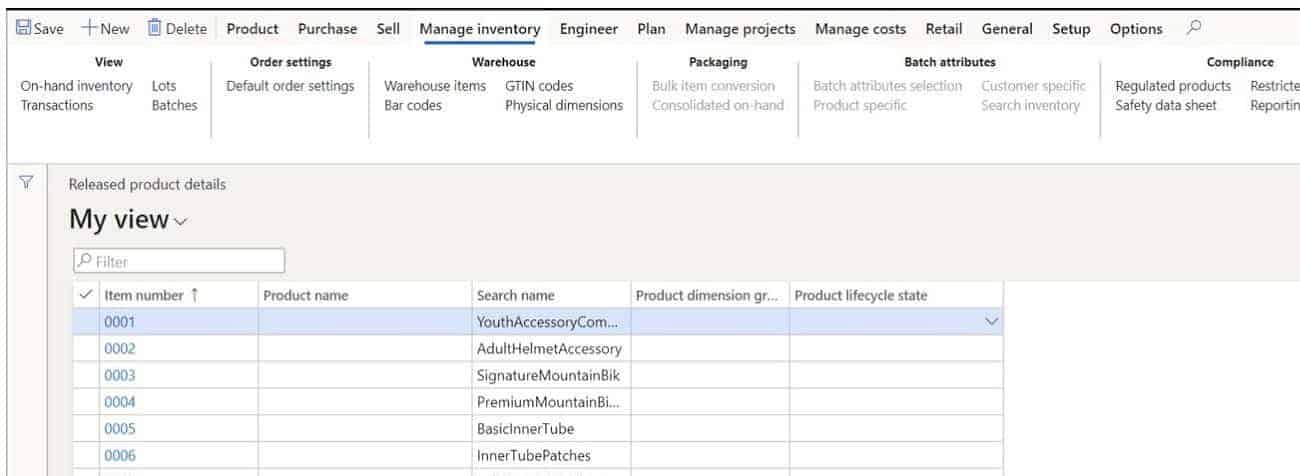
To save a view you just need to personalize, filter, or sort any form or list page where the save view functionality is available. In this example I am going to personalize a new field on the products list page and save that as my view.
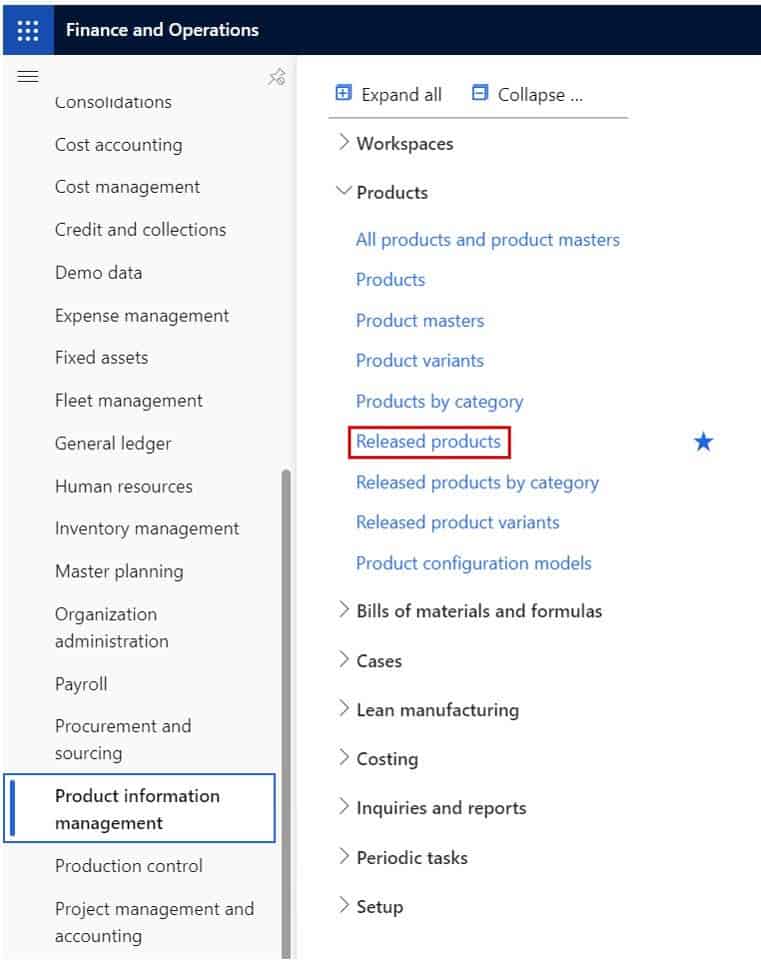
- Navigate to Product information management > Products > Release products.
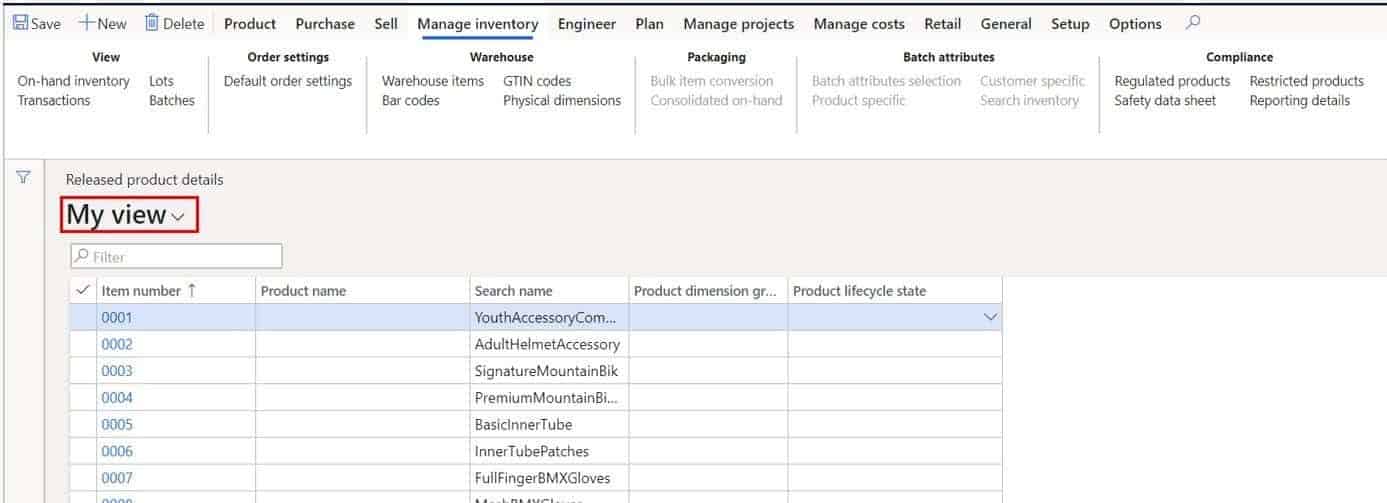
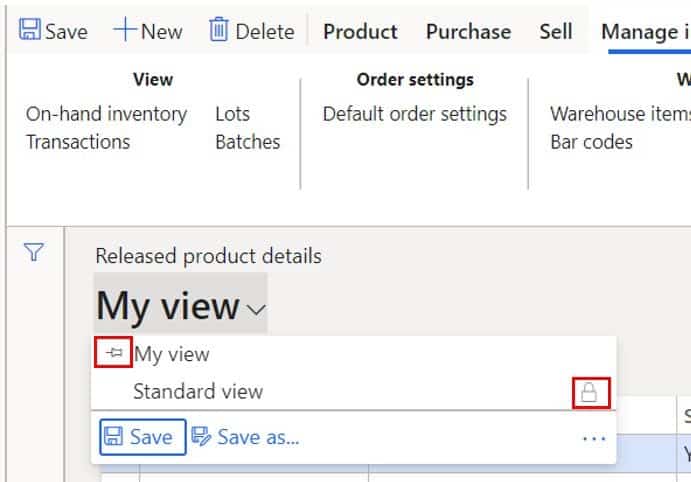
As you can see the default view is “My view” as indicated by the pin icon. We also have the option of the standard view which is the view that comes standard with Dynamics 365 Finance and Operations. The “Standard view” cannot be modified as shown by the lock icon out beside the view.
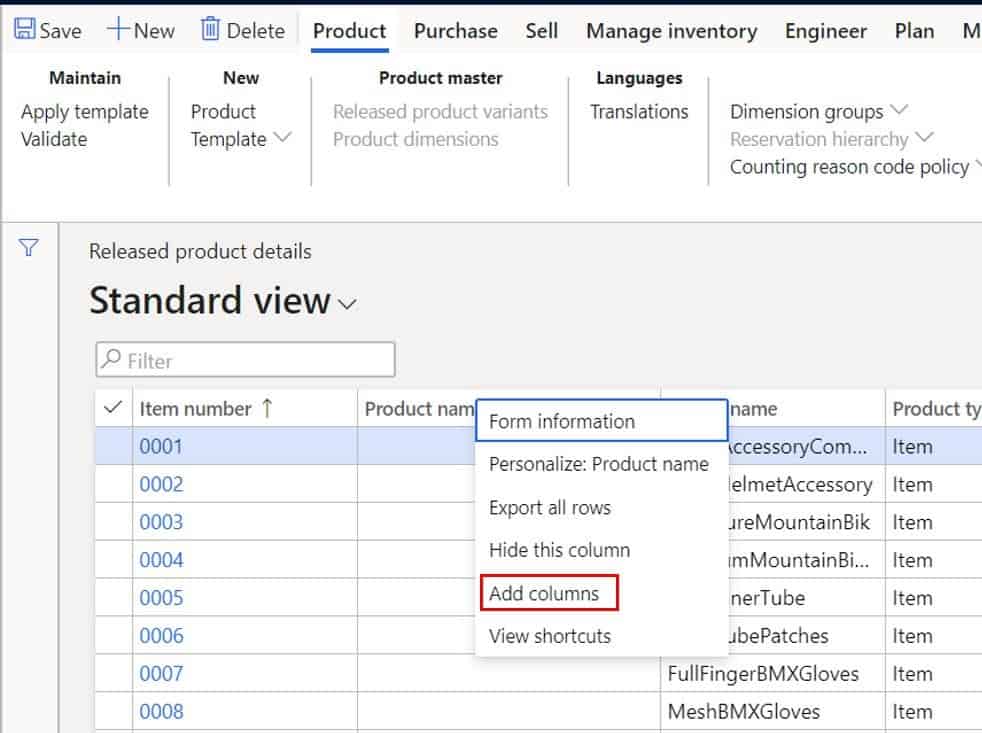
The first step is to personalize the field on the form. To do this right click in the grid and click “Add columns”. If you’re looking for more information on personalization please see my article called Personalization: Dynamics 365 Finance and Operations.
Select the column you want to add and click the “Insert” button.

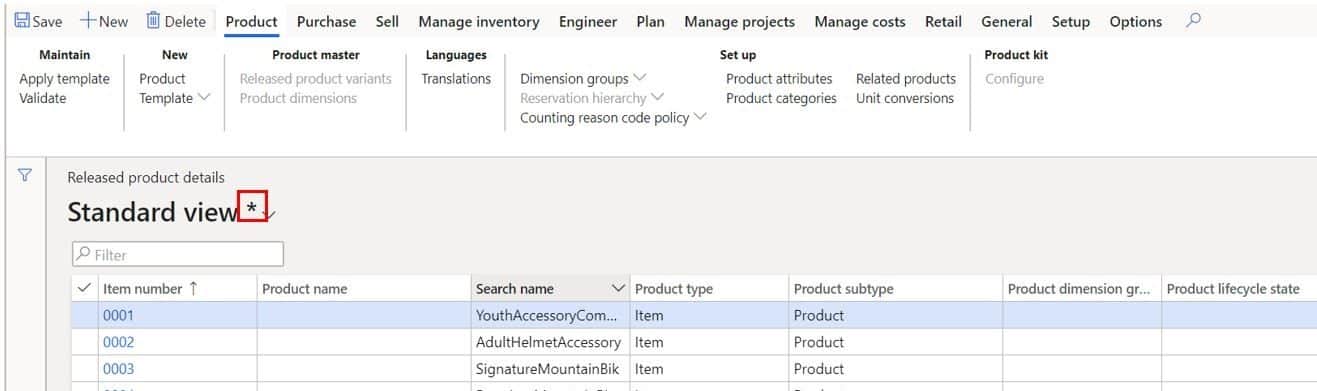
You can now see that the “Standard view” has an asterisk “*” appended to it. This indicates that a change has been made and can be saved into a view.
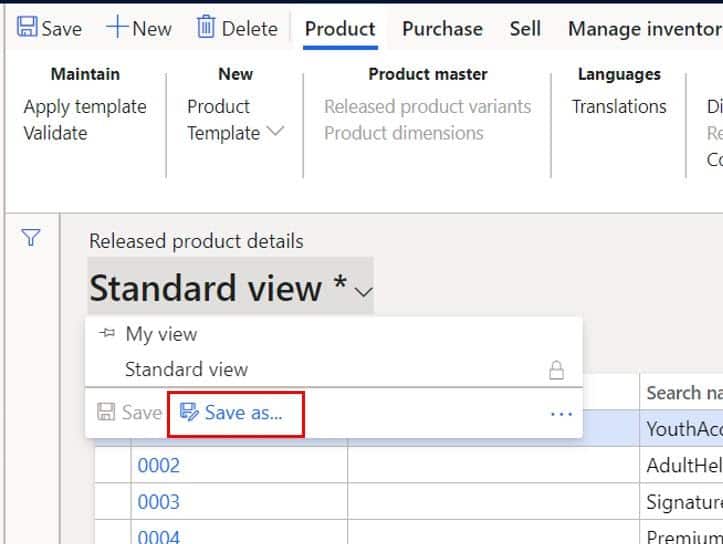
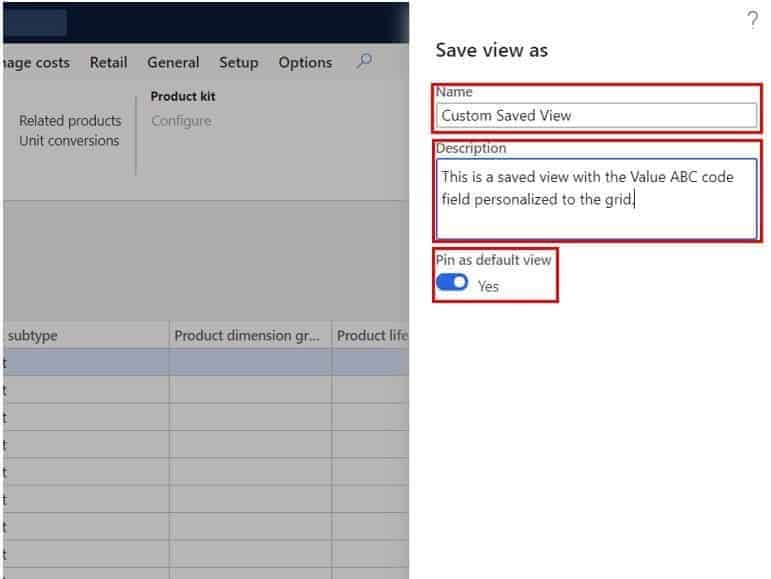
To save the view click the view drop down and click “Save as”.
- In the “Name” field you can enter a meaningful name for the view.
- In the “Description” field you can enter a long description that further defines the view.
- You can enable the “Pin as default view” to pin the saved view as your default view. This means that the next time you navigate to this form this view will be the default view selected.
Set A Default View
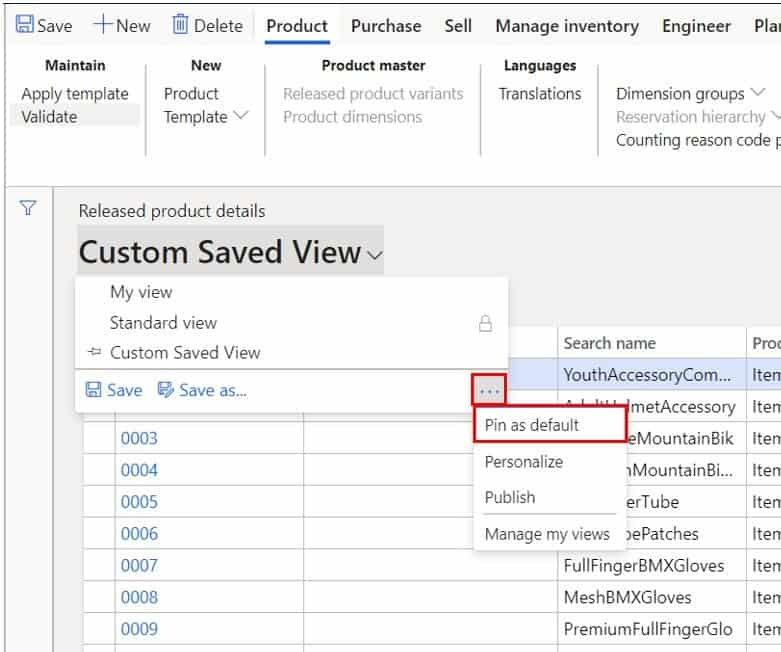
- If you want to pin a different view as you default view, first select the view, then click the view drop down and click the ellipses button (“…”).
- Click the “Pin as default” button to pin the view as the default view for the page.
The next time you return to the page the pinned view will be the default view.
Manage Views
Once you have saved some views you are able to keep track of them using the manage views button.
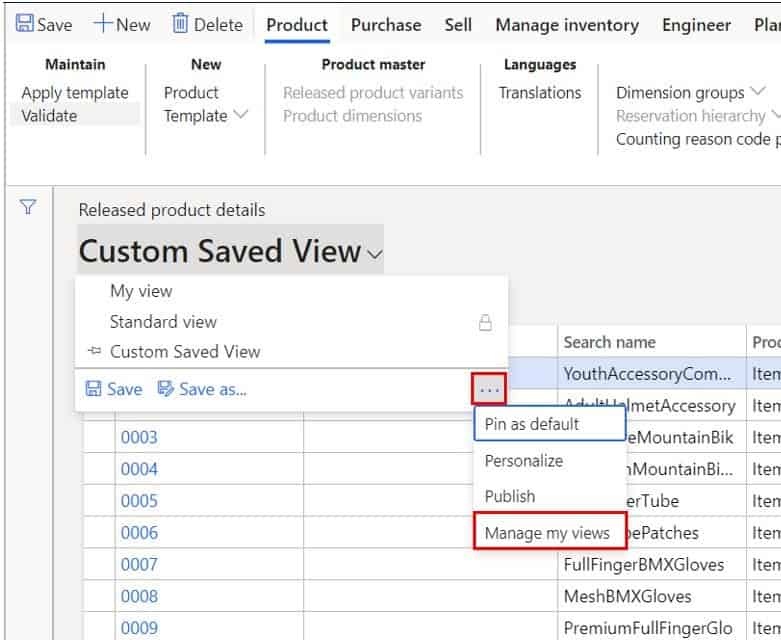
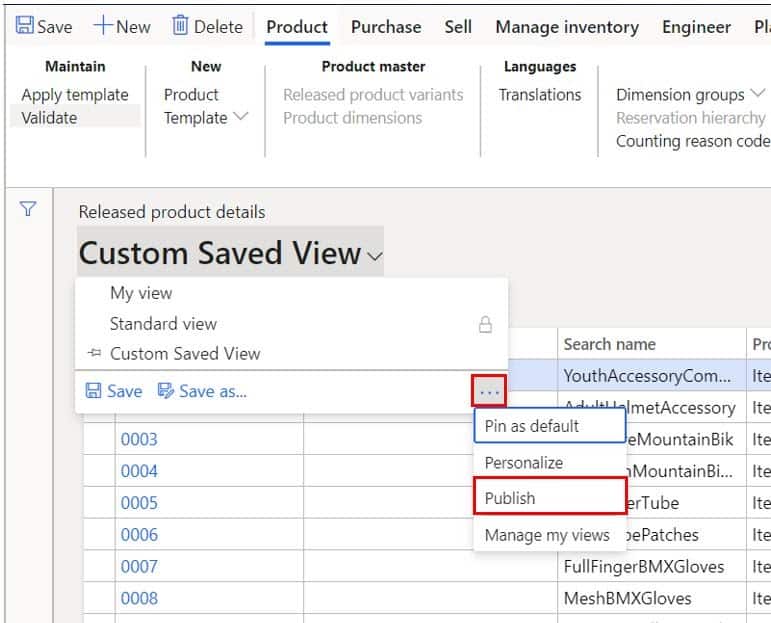
- Click the views drop down and click the ellipses button and click the “Manage my views” button.
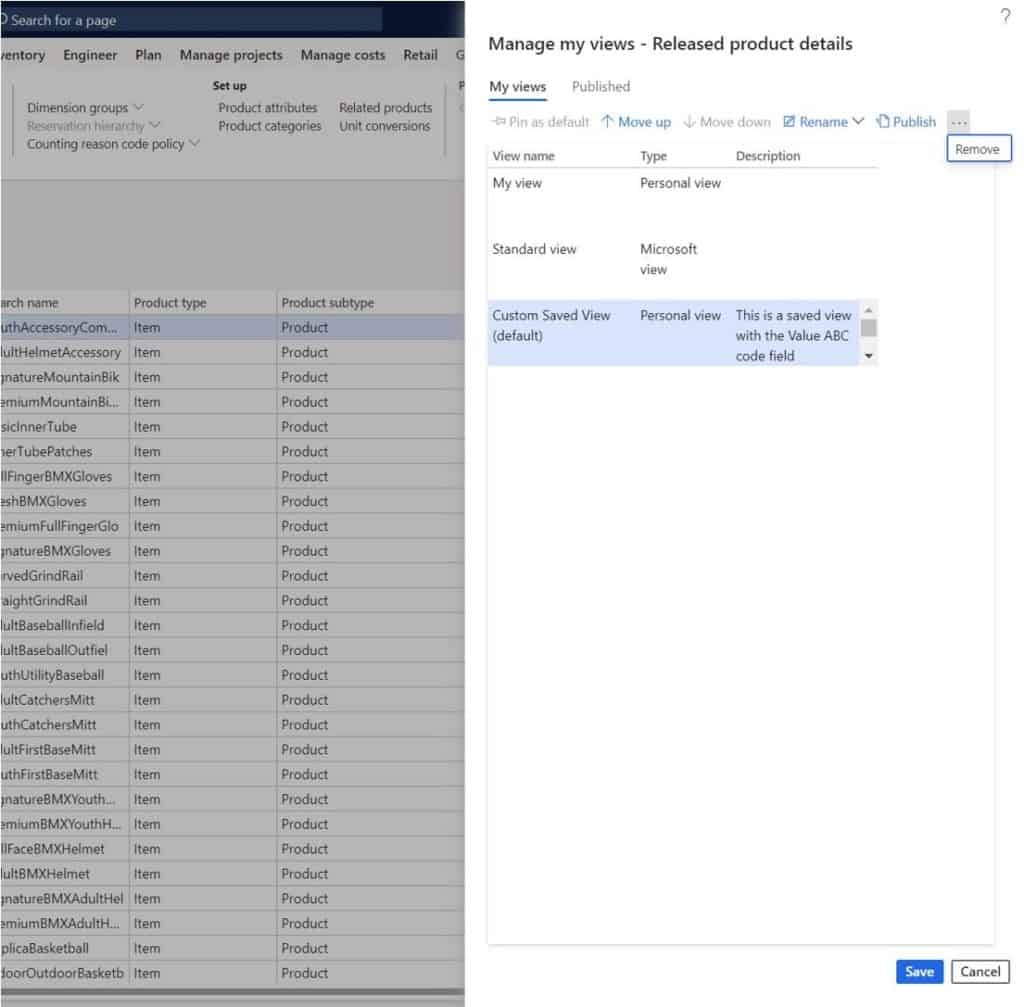
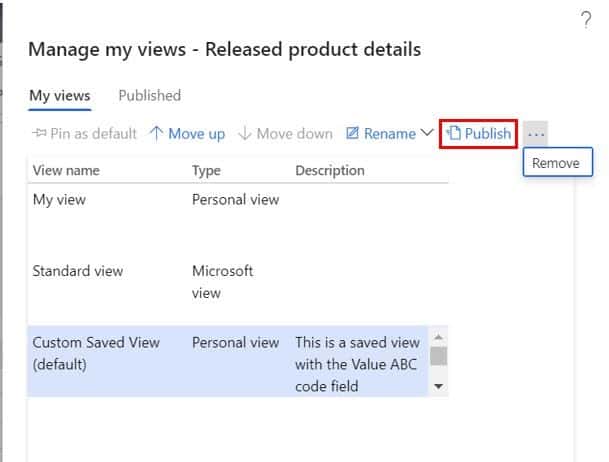
Here there are several buttons that allow you to perform different tasks:
- Pin as default – This is just another way to pin a view as a default view. This button will be disabled if the view you are currently selecting is the default view.
- Move up and Move down – These two buttons let to change the order in which the views are displayed in the view drop down.
- Rename – This lets you rename the view.
- Publish – This lets you tie the view to a security role. So, anyone that has that security role will see this view. Note: The publish feature is only available for those who have the “Saved views administrator” or “System administrator” security roles.
Remove – This lets to delete views you no longer need or wish to keep.
Publish Views
The publish views feature lets you publish a saved view to a security role. This means that any user that has that security role assigned will also be able to see the saved view you have published. This is a way that super users or power users can define how they want a form to look like for specific users and then standardize it so everyone has the same view.
- To publish a view, click the “Publish” button in the “Manage my views” form or in the views drop down.
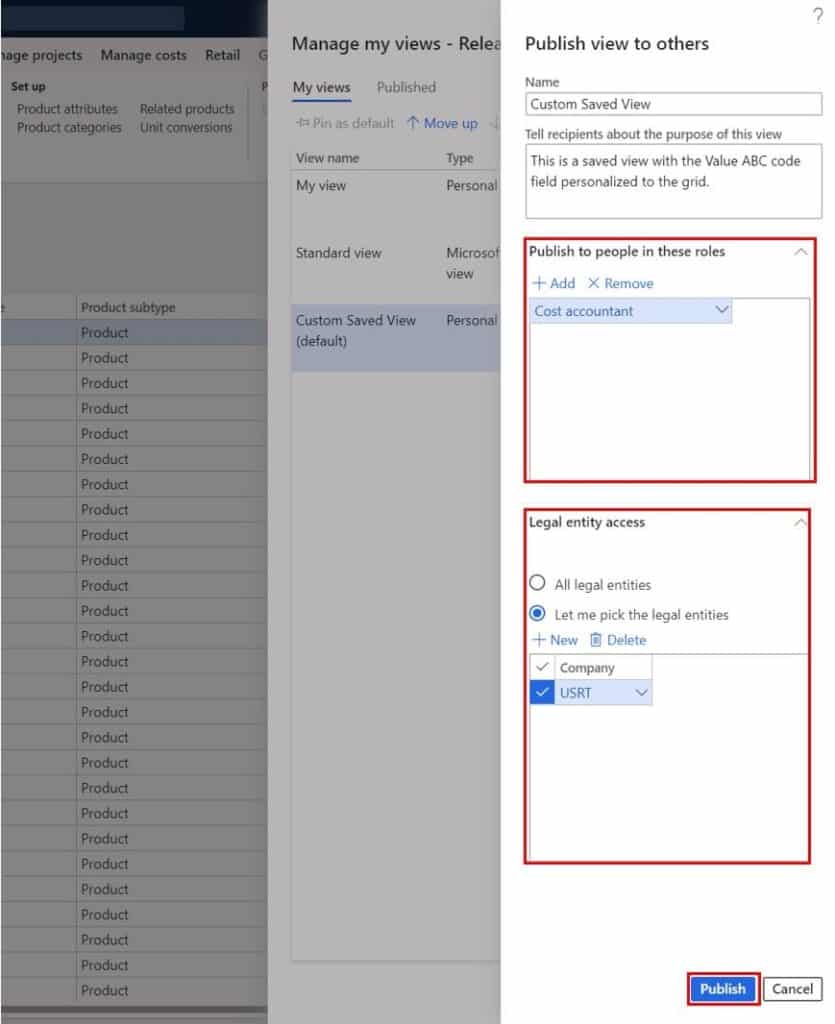
- In the section called “Publish to people in these roles” you are able to select the security roles that you want the view to be accessible to by clicking the “Add” button and selecting the security role(s).
- In the “Legal entity access” section you can define if it should be available in specific legal entities or all legal entities.
- Click “Publish” to publish the view to the selected security role(s).
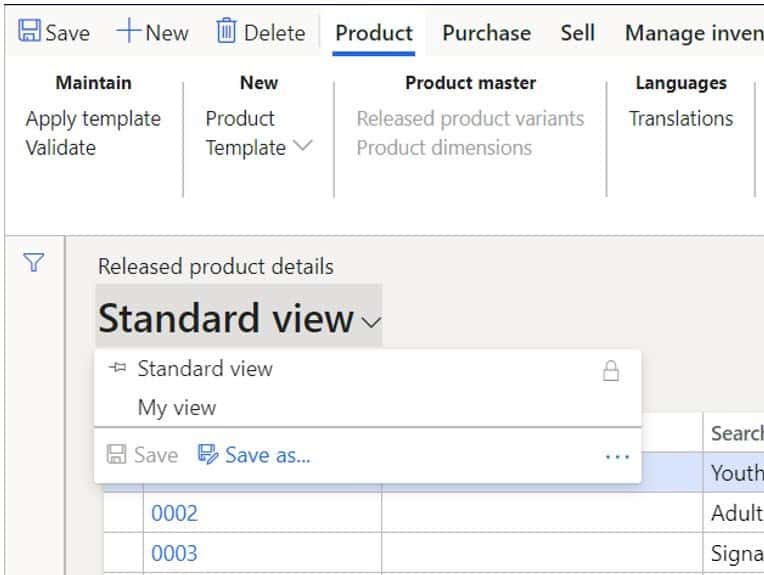
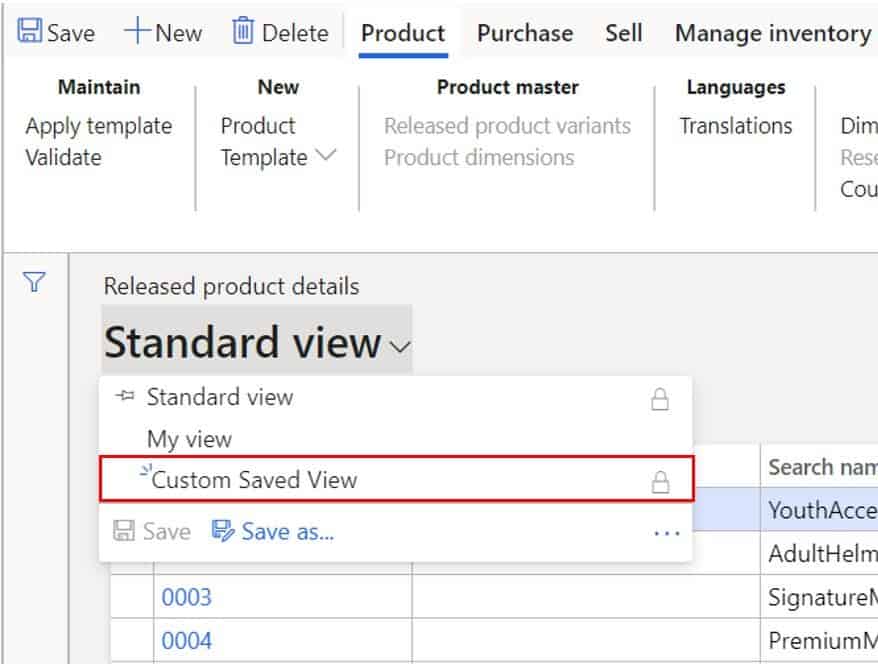
Now let’s go test this out. First, I will delete the saved view I created called “Custom Saved View”. As you can see it no longer shows up in my list of views.
Next I will assign the “Cost accountant” security role to my user ID. If you’re not sure how to assign security roles please see my article called Security Roles that shows step by step how to create and assign security roles and much more.
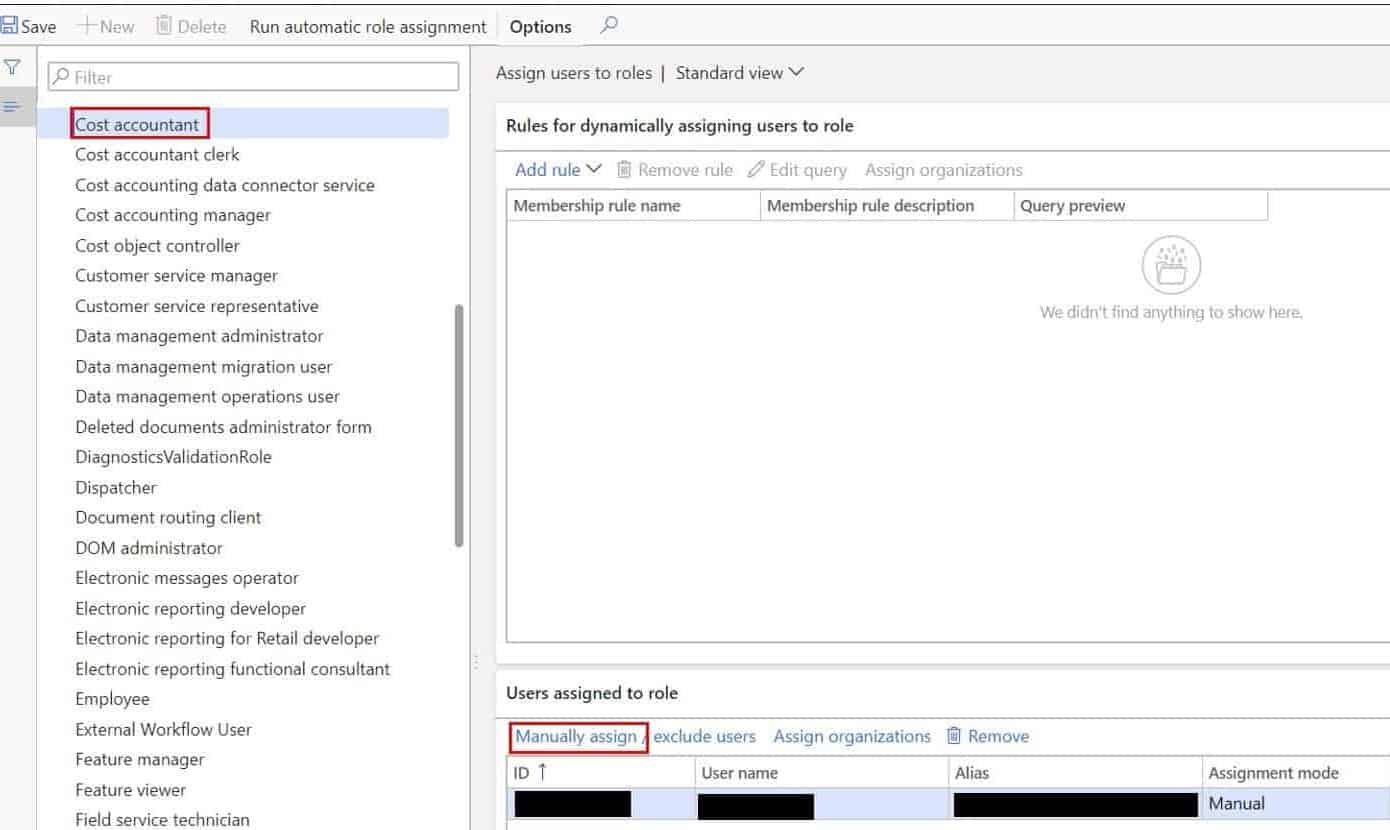
Then when I go back to the “Released products” form and click the views drop down I now see the saved view again because it was published to the security role that is now assigned to my user. Very cool!
Takeaways
I am personally very excited for this feature to be back in the standard product and the publish functionality takes it to a new level. Keep in mind the publish feature should only be given to power users or team leads that will be defining how forms should look for their teams. I hope you have a good sense of how the saved views feature works in Dynamics 365 Finance and Operations and can put it to good use for you or for your team.