

Task recorder is an automated task capture feature that comes standard with Dynamics 365 Finance and Operations. Task recorder will automatically capture each click, and field value selection the user makes during a process and then gives the user the option to export it as a Word document or play it back as an interactive task guide.
The task guide feature uses visual cues to guide the user through each click and value selection in the process.
In this article I you will learn how to make a task recording, play that recording back as a task guide, modify steps, and enable automatic screen shots with the task recorder.
How To Enable Automatic Screen Shots
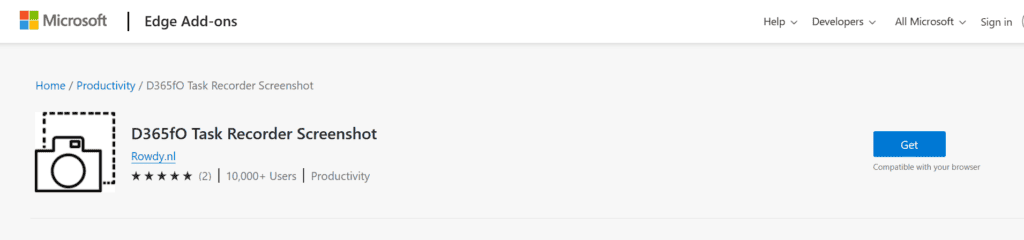
The first thing I would recommend before you get started is to download a Microsoft Edge extension that allows the task recorder to automatically take screen captures during the task recording.
By default, the task recorder only captures the clicks and does not take screenshots. So, when you export the task recording to Microsoft Word it only contains the numbered steps captured in the recording. Here is the link for D365fO Task Recorder Screenshot.
Click the “Get” button to download the extension.
After you add the extension to Edge, you will see the “Capture screenshots” option available when you create your task recorder.

There is a recent feature that was released by Microsoft that is not compatible with the extension. Make sure you disable the “Upgrade three jQuery components libraries” feature or the screen capture functionality will not work. For information on how to enable or disable features see this article on feature management.

Plan Ahead
Before you start your task recorder it is a good idea that you practice your process a couple of times and know the clicks and data that you want to use. If you have a lot of stray clicks or have to go back and re-do steps it makes for a very messy task recorder which requires a lot of clean up. It is best to think of it like a video recording and you want to make sure you know your lines before you click record.
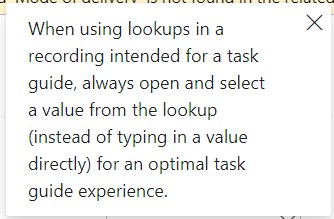
Also keep in mind that the task recorder does not capture shortcut keys or entering data manually instead of clicking the dropdown in a field. Make sure that when you are filling in fields you click the dropdown to select the data. You will also get warnings if you do not use the dropdown selections to enter data.
How To Capture A Task Recording
Now that you have the task recorder extension installed and you have planned out your process that you want to record, we are ready to start the recording.
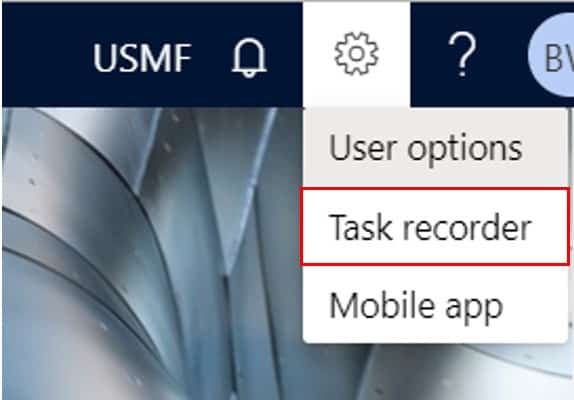
In the top right corner click the gear icon and click the “Task recorder” button.
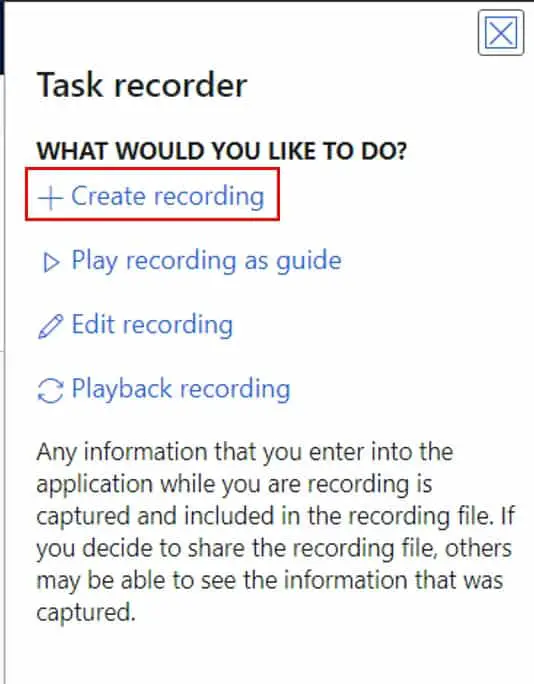
This will open the task recorder flyout. Click the “Create recording” button.
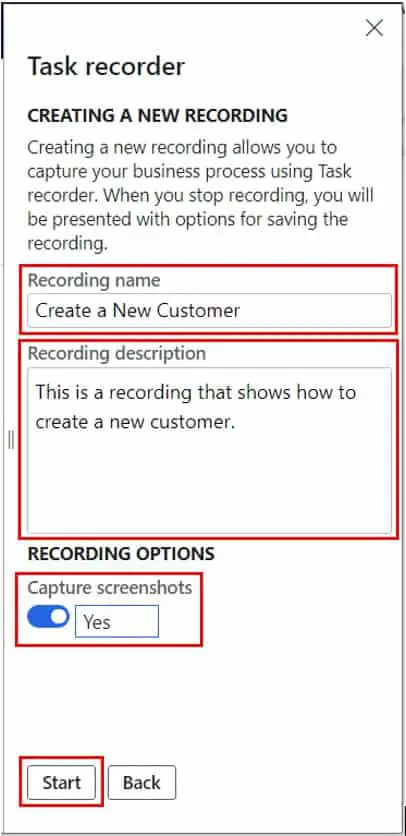
In the create task recorder fly out form enter the “Recording name” which will be the title of the recording. In the “Recording description” you can enter a longer description that will give the user a better idea of the context of this process.
Next, enable the “Capture screenshots” slider so that the task recorder will automatically capture screenshots for the word document that will be automatically generated. Then click the “Start” button to begin the recording.
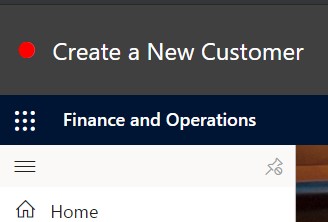
In the top left corner, you will now see the title of your task recording along with a red dot commonly associated with the record function on a video camera. This red dot is how you know the recording is running and will capture all your subsequent clicks and steps within the application.
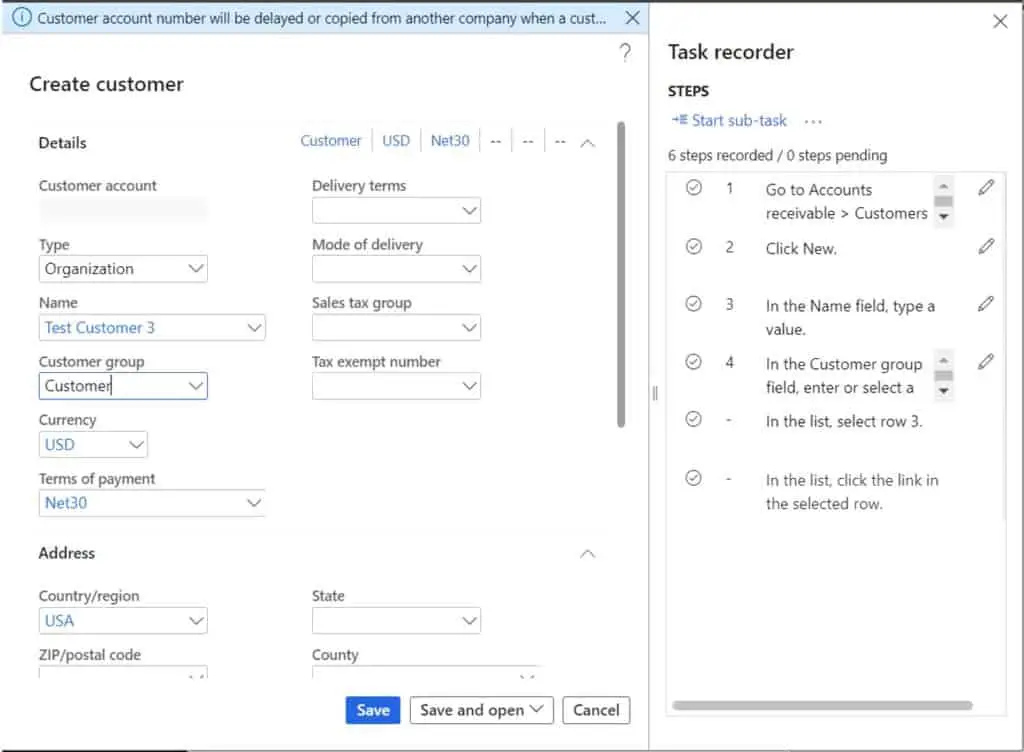
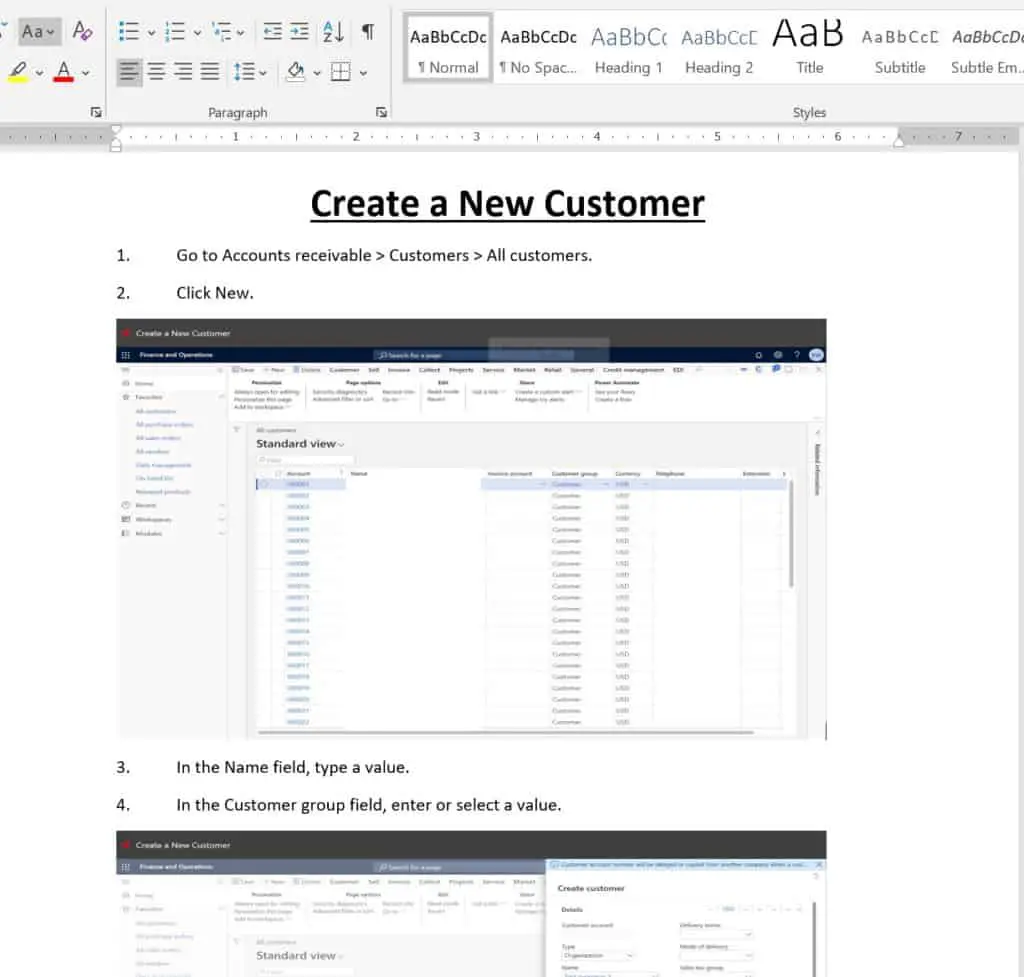
Now as I go through the process of creating a customer, I can see that my clicks are being recorded. However, some of the steps are very generic like “In the list, select row 3”.
The system doesn’t know anything about your business so you may want to add some commentary around what values should be selected in certain cases. I’ll show you how you can do that later in this article.
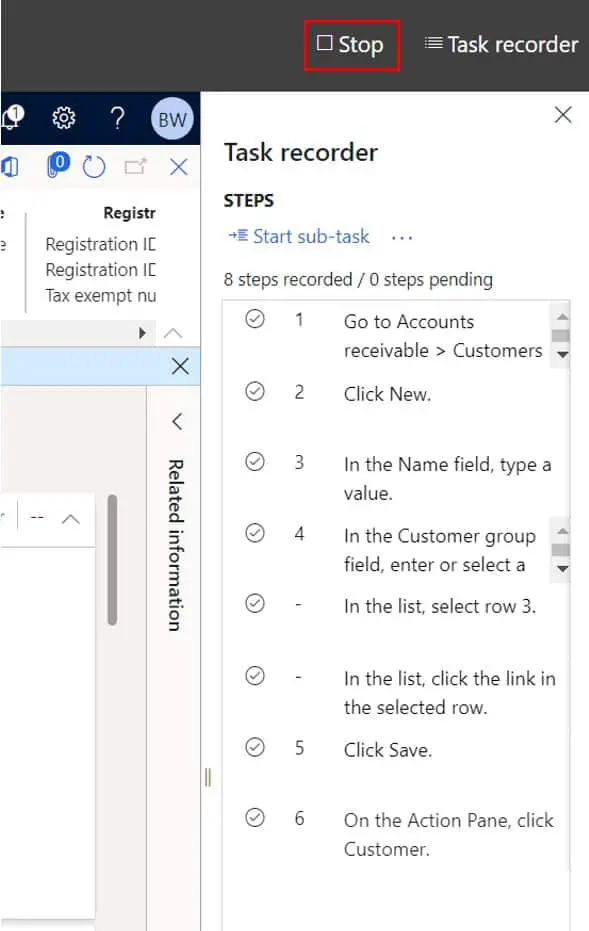
Once you have finished recording your process click the “Stop” button in the top right part of the form to stop the recording.
Once you have stopped the recording you will be presented with a few options.
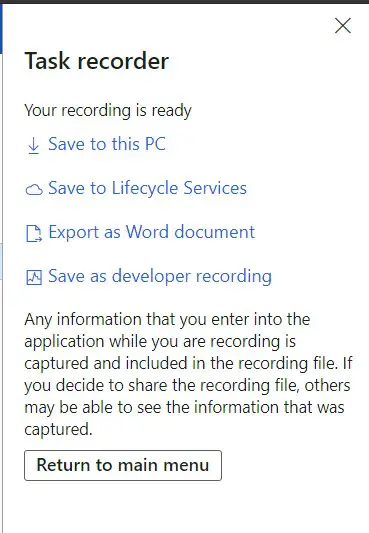
- Save to this PC – This option will save an AXTR file to your local computer. The AXTR file is used to run the task recording as a task guide.
- Save to lifecycle services – This option allows you to upload the task recorder to lifecycle services where your task recording can be associated with a business process model and can be made available in the help screen.
- Export as a Word document – This option allows you to export your task recording and screen captures to a Microsoft Word document.
- Save as a developer recording – This option is used for RSAT (regression suite automation tool) and in certain code generation scenarios for developers.
Click the “Save to this PC” option and the “Export to Word document” option. This will download two files. One file will be a word document and the other will be an AXTR file.

Click the Word document to open the recorded steps.
Edit A Task Recording
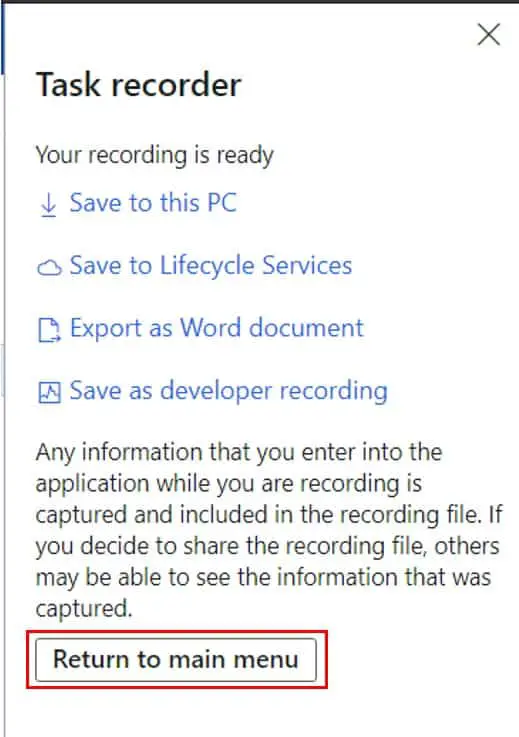
Let’s say you made a mistake, or you wanted to go back and add some additional detail or business specific notes to some of the steps. You can do this by clicking the “Return to main menu” button.
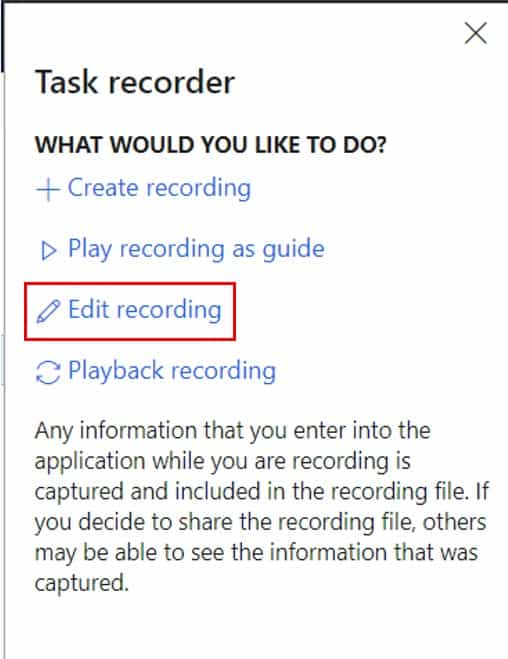
Next click the “Edit recording” button.
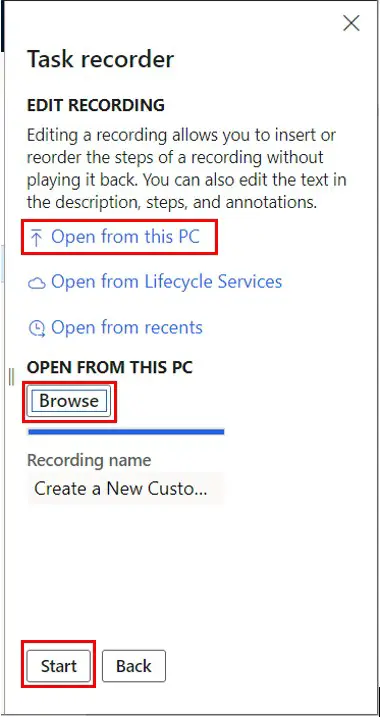
Click the “Open from this PC” button and select the AXTR file that should be sitting in your downloads folder. After you have uploaded the file click the “Start” button.
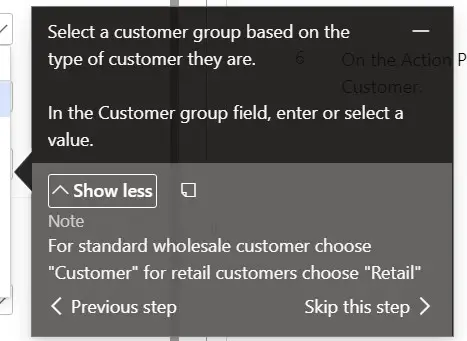
Now let’s say I wanted to change step 4 from “In the Customer group field, enter or select a value” to something more helpful and relevant to my specific business process. I can click the pencil icon next to step to edit that step.
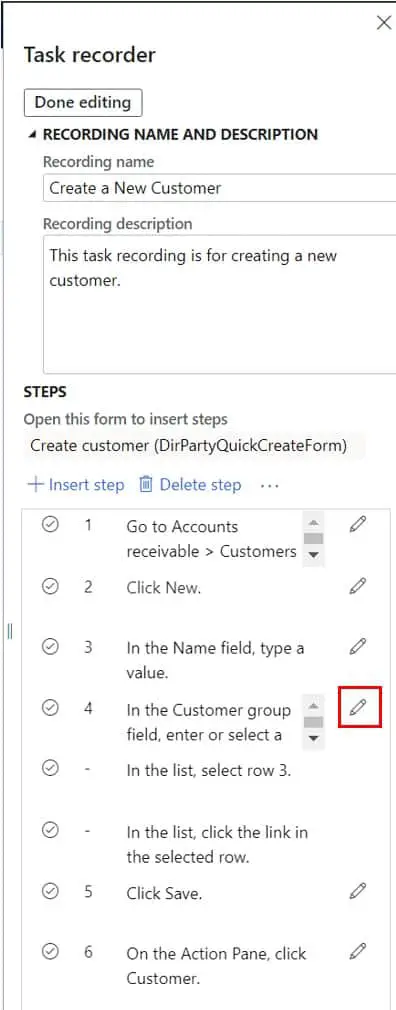
The “Title” field will be in the work instruction step and the “Notes” will show up as notes under the work instruction step. When you have finished modifying the step click “Ok”.

Next click the “Done editing” button.
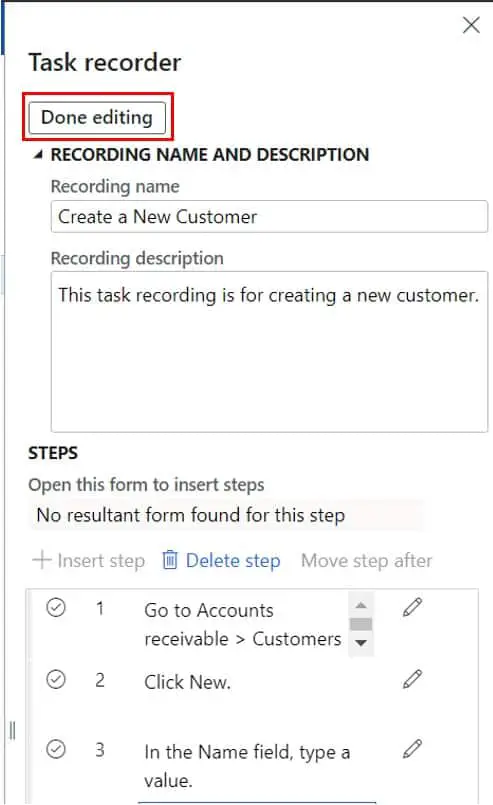
Then click “Save to this PC”.
How To Play The Recording As A Guide
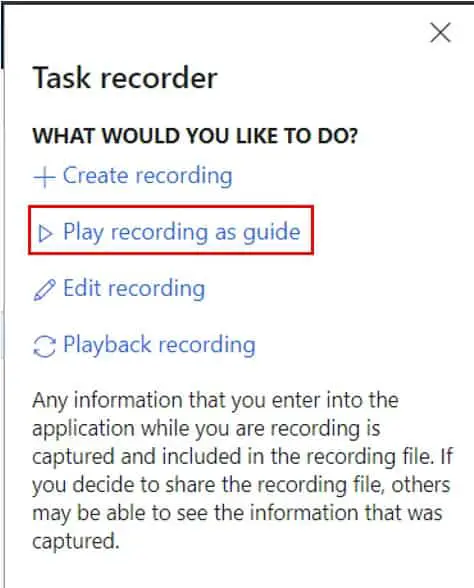
Now that we have created the recording and made some edits, we are ready to play back the recording as a guide. Using the export as Word document is an awesome feature but the guide functionality is really cool. Click the “Play recording as guide” button on the task recorder menu.
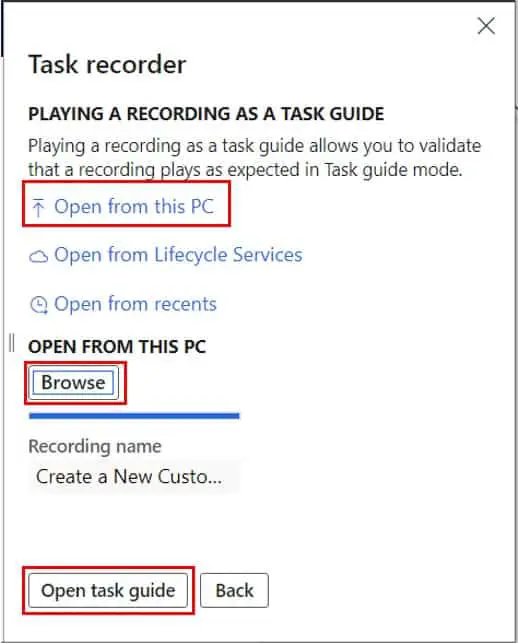
Click the “Open from this PC” button and select the AXTR file that we just downloaded. Next click the “Open task guide” button.
Click the “Start task guide” button the start the task guide. When the task guide starts you will see the floating task guide that will move around the screen and show you where to click.
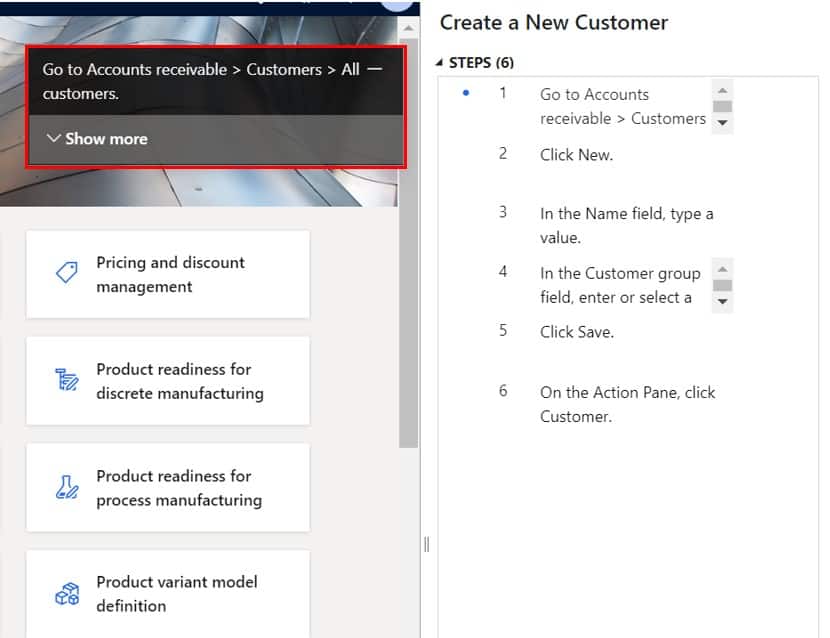
After I navigate to the “All customers” list page, the guide floats over to the next button I need to click.
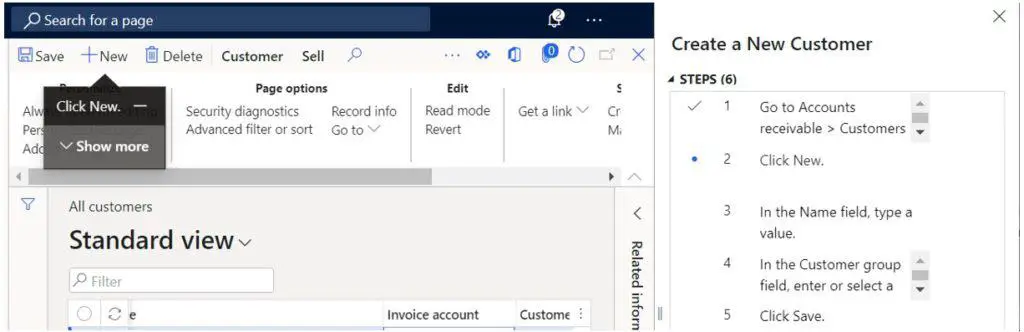
The guide will continue to guide the user through each of the recorded steps of the guide. Now when we get to the step we edited; it shows the helpful text we added into the step to give our user some more helpful information while completing task guide.
Takeaways
The task recorder is a very powerful and helpful standard feature in Dynamics 365 Finance and Operations.
User training is an extremely important part of any ERP implementation, but training is also an ongoing effort after implementation as new employees are brought into the organization.
I hope this article will help you take full advantage of the task recorder functionality for all of your D365 training needs.