
Dealing with non-conforming products is an issue that most businesses have to deal with on a daily basis and having a streamlined, systematic process can drive operational efficiency and traceability. The Non Conformance features in Dynamics 365 Finance and Operations allow you create, track, approve, and finalize Non Conformances through the process of identification to problem correction and closure.
The typical non-conformance business process starts with identification of the non-conforming product, someone confirming if the identified product is indeed non-conforming, printing documentation, taking corrective action, and closing the non-conformance.

Create a Non Conformance
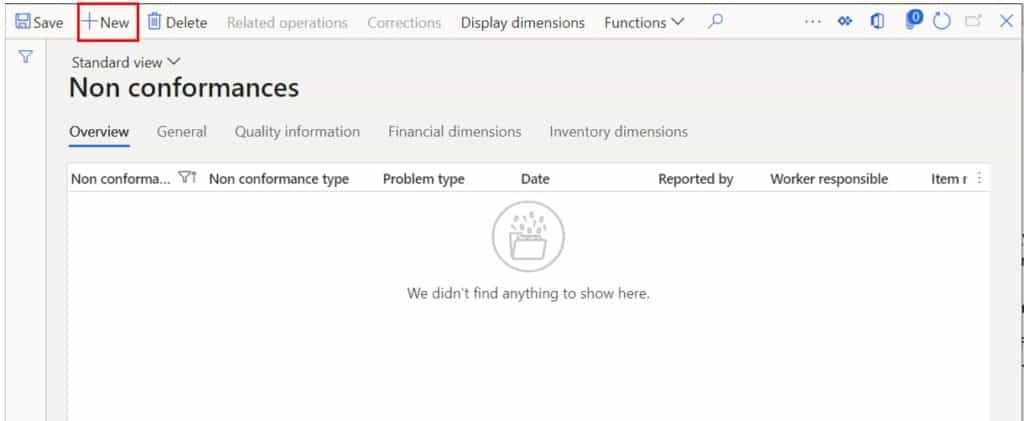
When a non-conforming product is discovered the first step is to create the non-conformance in D365 Finance and Operations. To do this navigate to Inventory management > Periodic tasks > Quality management > Non conformances.
Click the “New” button.
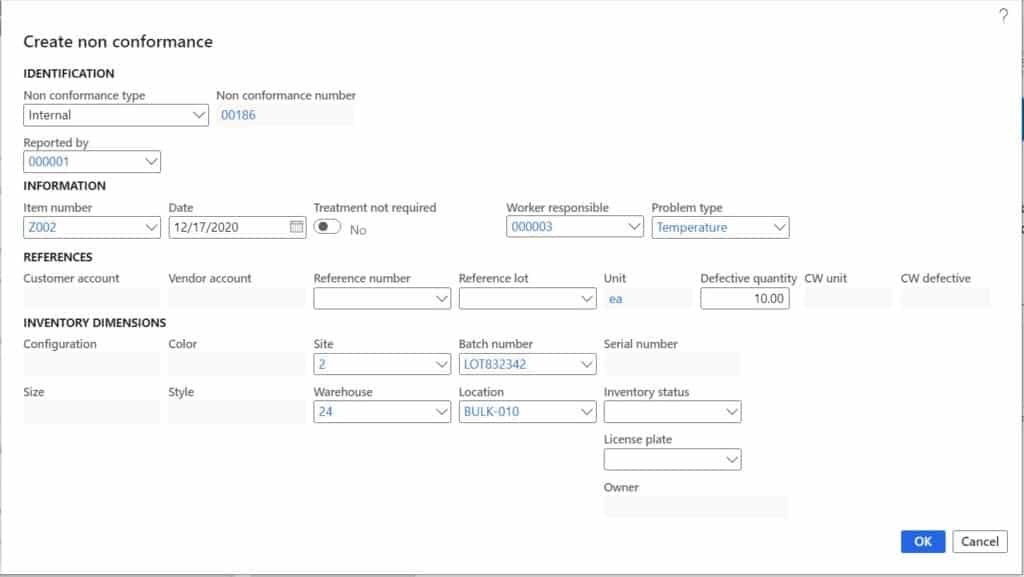
On the “Create non conformance” flyout form we will need to fill out some information about the non-conformance.
Non conformance type – The con-conformance type indicates what type of reference will be associated to the order. For example, if the non-conformance was associated to a purchase order receipt the type would be “Vendor” and you would be able to select a specific purchase order and associate that to the non-conformance in the “Reference number” field. In this example I will use the internal type non-conformance which I can link to a quality order or chose to not link to anything.
Reported by – This is the user that reported or identified the non-conformance.
Item number – This indicates the item the non-conformance was created for.
Date – This is the date of the non-conformance.
Treatment not required – This indicates if testing or treatment is required.
Worker responsible – This is the worker who is responsible for working the non-conformance.
Problem type – This is the identification of the problem or reason for the non-conformance. This may not be known at the time of creation so having an option configured for “Unknown” or “Investigation” may be necessary.
Reference number – This is where you can link the non-conformance to a source document like a purchase order, quality order, production order etc.
Inventory Dimensions Fields – The inventory dimension fields will be enabled depending on which inventory dimensions are in use for the item. If you have enabled different product dimensions like size, color, and style, you will see those enabled. This allows you to identify inventory dimensions that can add further detail to the non-conformance. Unlike the quality order, a non-conformance does not make inventory reservations or transactions of any kind. Non conformances are for reporting and informational purposes only.
Defective quantity – This is the quantity that was found to be non-conforming.
Once you have entered the details of the non-conformance click the “Ok” button to create the non-conformance.
Approve a Non Conformance
The next step in the non-conformance process is for a quality manager or someone responsible for processing the non-conformance to approve the non-conformance and verify that the non-conformance is accurate. To approve the non-conformance click the “Functions” button and click “Approve non conformance”.
If you get an error saying “No worker is mapped to the current user. Specify the worker in the Name field in the Users form”, this means that your user account is not associated to a worker in D365 Finance and Operations. You will need to navigate to System administration > Users > User and associate a worker record with your user record.
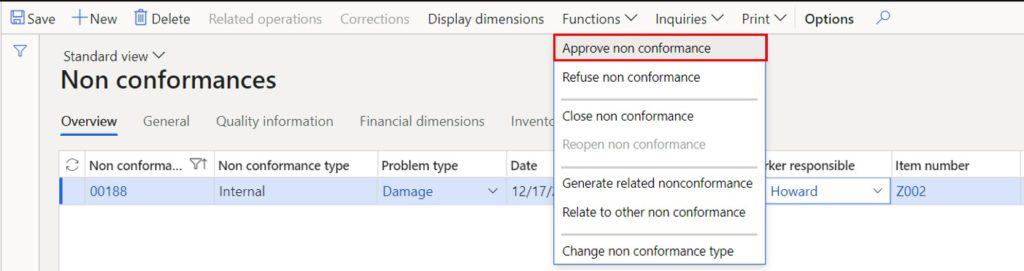
This will change the “Approval” field to “Approved”.

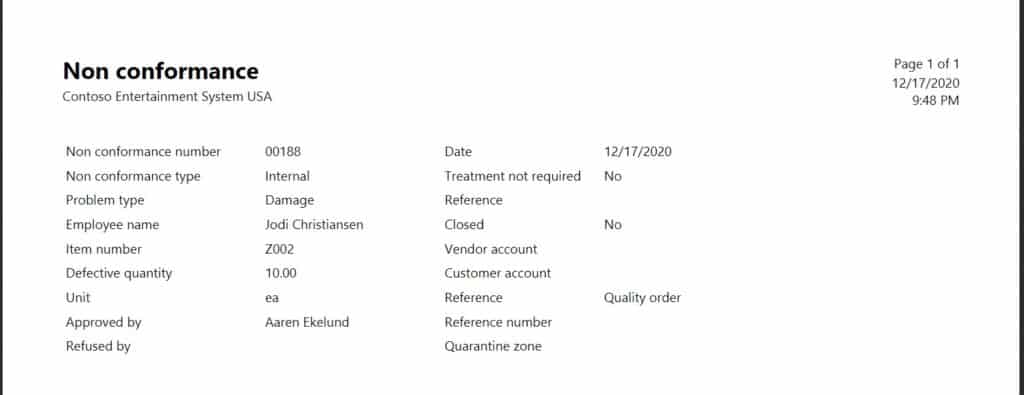
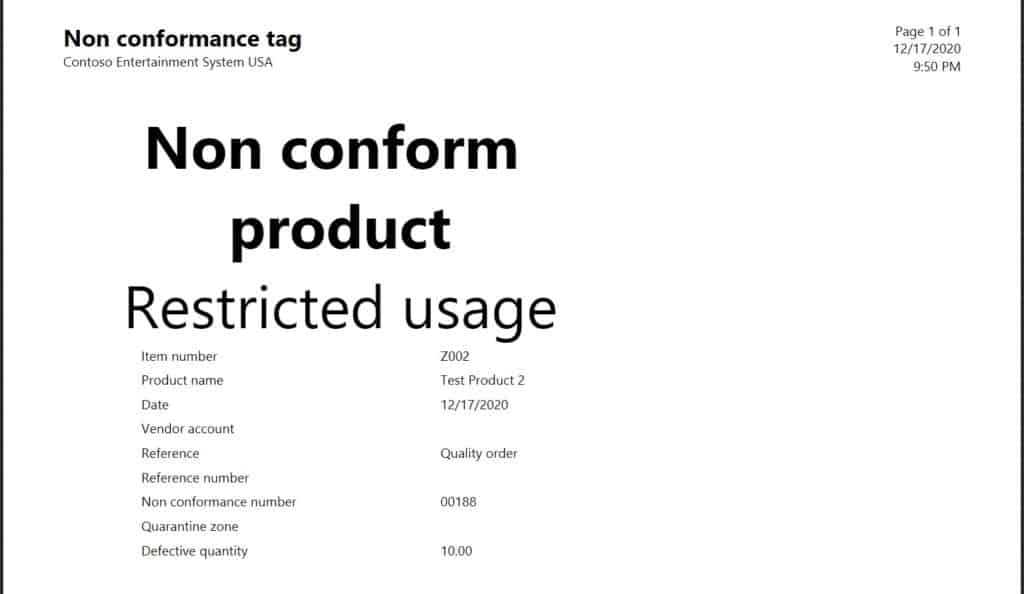
Print Non Conformance Documentation
The next step in the non-conformance process is to print documentation. There are two documents you can print related to the non-conformance. The first is a non-conformance report which is typically used as a document that can be passed along to a workstation for corrections or repairs. The non-conformance tag is typically printed, on colored paper, and taped or affixed to a pallet as a visual indicator in the warehouse of the non-conforming product.
To print the non-conformance report, click the “Print” button and click the “Non conformance report” button. Select your print settings and click “Ok”.
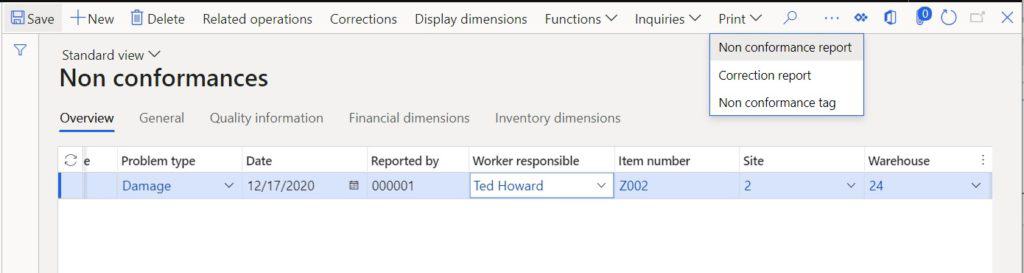
To print the non-conformance tag, click the “Print” button and click the “Non conformance tag” button. Select your print settings and click “Ok”.
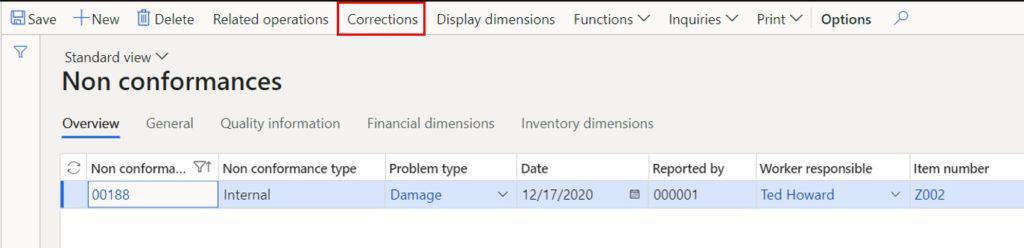
Take Corrective Action on Non Conformance
Depending on the product and the issue that was discovered there may be corrective action and repairs that require parts, and labor. The non-conformance allows you to record all of these things. Let’s say we need to capture all the corrective actions that must be taken to fix or test the product. We can capture those things by clicking on the “Corrections” button.
In the corrections form click the “New” button and select a diagnostic type. This is identifying the corrective action that will take place. You can additionally fill out any of the other relevant fields and click “Save”. Once each correction is complete you can click the “Mark as complete” to indicate that the corrective action is complete.

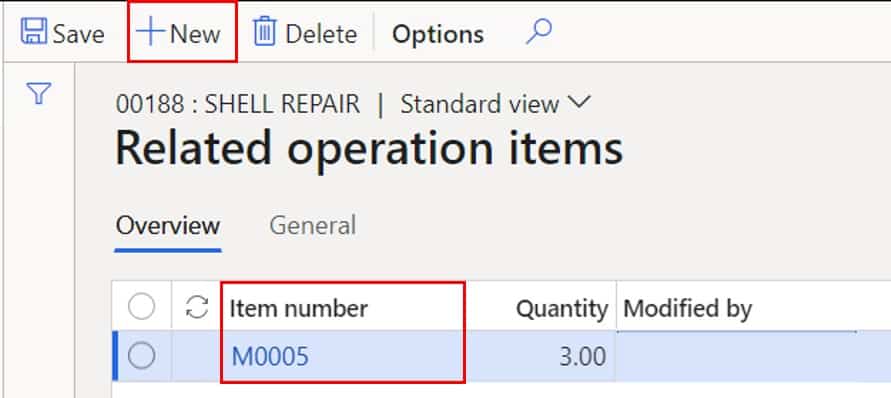
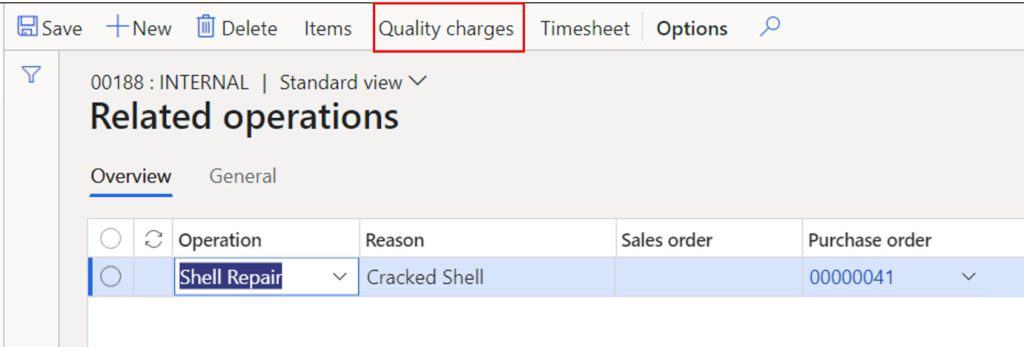
If you need to capture parts used for repair or labor utilized during the non-conformance process, you can do that by clicking the “Related operations” button.
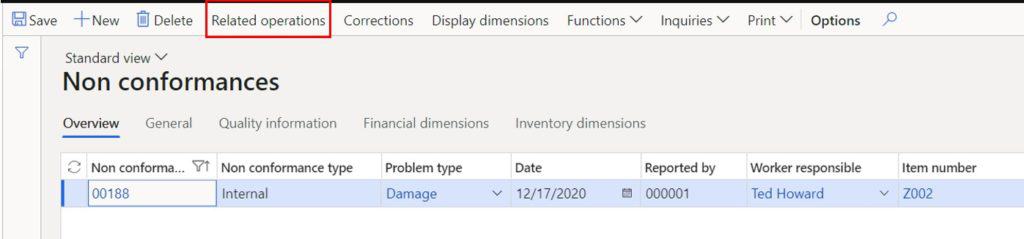
In the related operations form click the “New” button to add an operation that was performed in the non-conformance process. Here you can select the operation and reason the operation was performed. On the operation setup form you can select if the operation is associated to a purchase order or sales order. This lets you reference a purchase order or sales order if the work needs to reference a specific order. This is optional though.
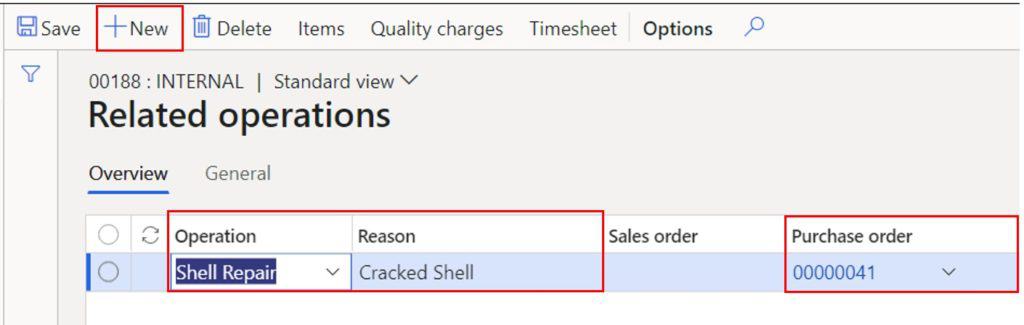
Next if you used some parts to complete the repair you can reference those items and the quantities you used by clicking the “Items” button and enter the item number and quantity used. These do not have any effect on inventory and do not create transactions. This is simply for reporting and tracking purposes.
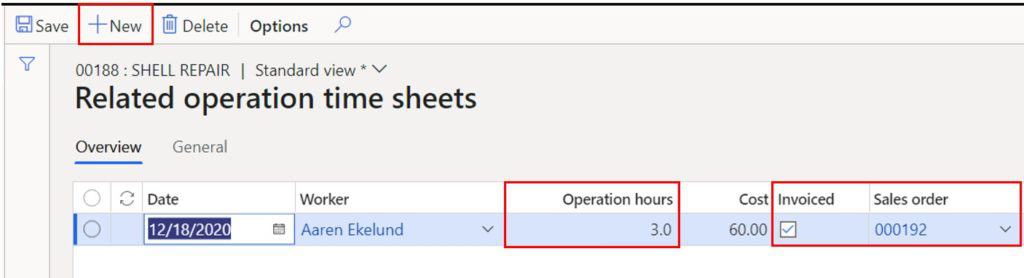
You can also record time spent during the non-conformance process by clicking the “Timesheet” button.
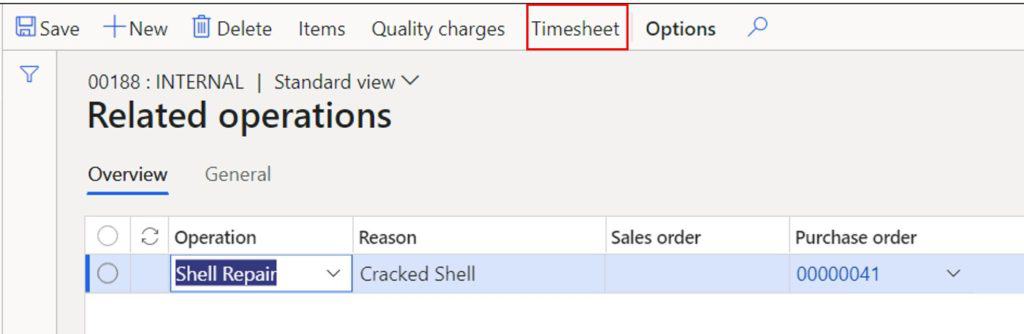
To add time to the non-conformance, click the “New” button and enter the hours spent working on the non-conformance. Optionally you can select if the hours were invoiced and if so, which sales order they were invoiced on. Again, none of this has any financial impact it is just for informational or reporting purposes. Also, the cost will default from the worker you select. You can change the cost of the worker by changing the cost price associated to the worker.
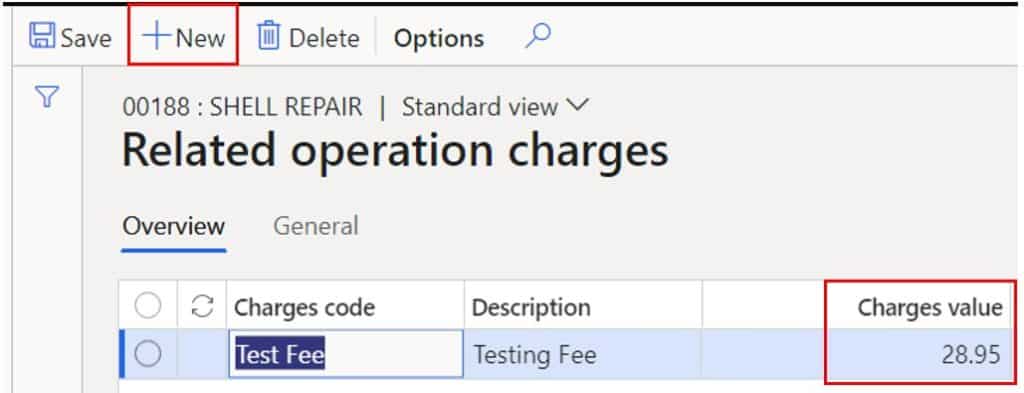
The last thing you may want to do is record different charges for various reasons that should be charged to the customer or vendor. You can do this by clicking the “Quality charges” button.
Click the new button, select a charges code, and enter the values of the charge. This, like the other details we have entered on the non-conformance, are for informational purposes only. If you need to charge the customer, you will need to actually create and process an invoice or debit note against the customer or vendor.
Close a Non Conformance
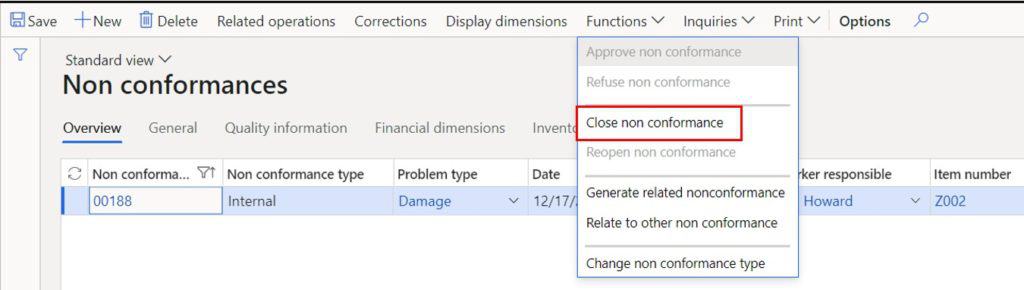
Once you have finished processing the nonconformance and figured out what the cause and have dispositioned the non-conforming product in the appropriate manner it is time to mark the non-conformance as closed. To do this click the “Close non conformance” button. Click “Yes” on the pop up to close the non-conformance. If you get an error message saying “The system cannot update non conformance”, check to make sure you have marked all of the corrections as complete.
Takeaways
The non-conformance process is very flexible so you can use all or some of the features you have seen in this post and apply it to your business process. There are a lot of informational data that can be entered in the non-conformance process however there are not currently many standard data entities for these tables so you may need to create some custom data entities to be able to report on all of this really useful data that gets captured during this process.