

Vendor rebates in Dynamics 365 Finance and Operations provide a flexible and automated process to capture, calculate, and take rebates offered by vendors. Vendor rebates can play an essential role helping to lower supply chain costs and overall margin of products.
In this article I will take you through and explain the setup for vendor rebates and then we will walk through an actual example with screenshots so you can see the process and understand how Dynamics 365 Finance and Operations calculates and processes vendor rebates.
Setup
Procurement and Sourcing Parameters
The first sets we need to do are in the procurement and sourcing parameters form.
- Navigate to Procurement and sourcing > Setup > Procurement and sourcing parameters.
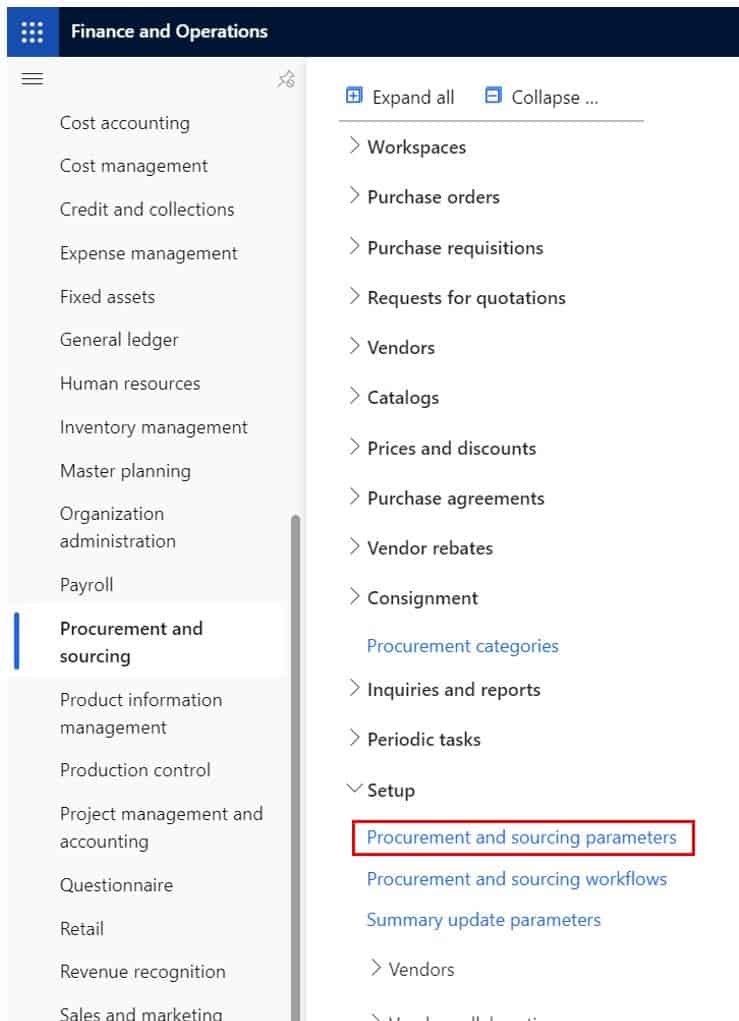
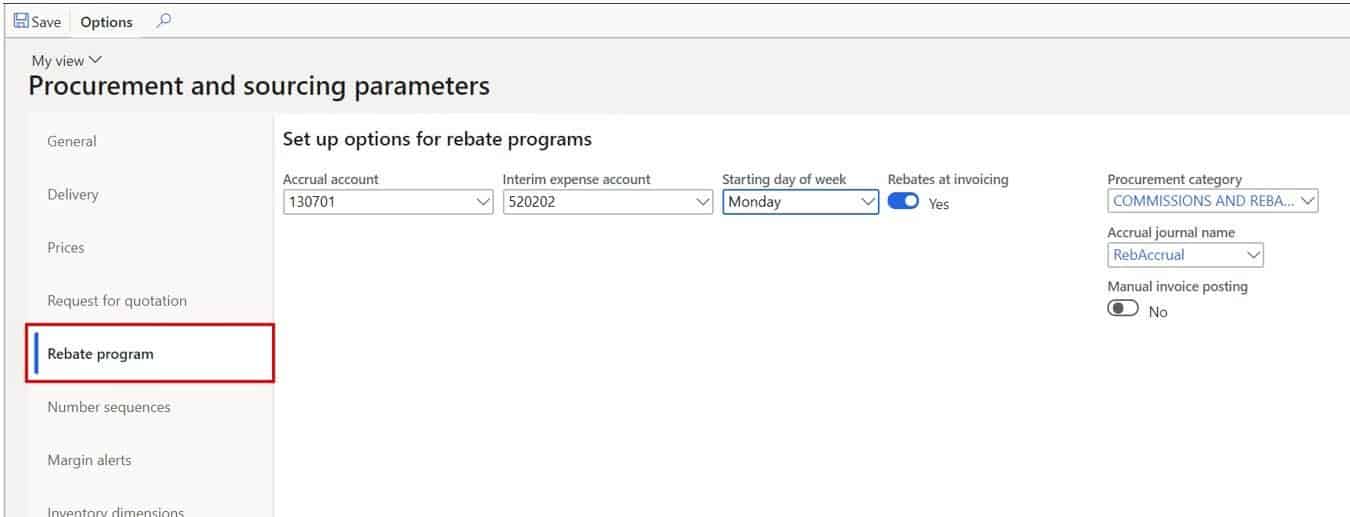
- Click the “Rebate program” tab.
- In the “Accrual account” enter the account number where the vendor rebate accrual should debit when we approve the rebate and post the accrual.
- In the “Interim expense account” select the account you want to credit when we post the vendor rebate accrual.
- In the “Starting day of the week” field select the day you want to use to start calculating the vendor rebates. This is only applicable if you are accumulating rebates on a weekly basis.
- Select the “Rebates at invoicing” option. This tells the system to create a rebate claim automatically upon invoicing. If this is unchecked the system will not create a claim.
- Select a “Procurement category” that should be used when you post the debit note invoice against the vendor. The account associated with the procurement category will be credited.
- In the “Accrual journal name” field select the journal name of the journal you would like to use to post the rebate accrual entry.
- Keep the “Manual invoice posting” option disabled because we want to automatically post the debit note invoice against the vendor when we process the vendor rebate claim. If this is selected, you will have to post the vendor invoice manually.
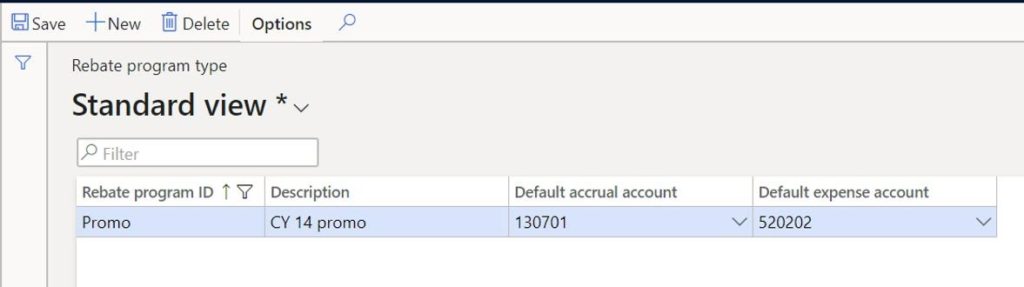
Rebate Program Types
You could have many different types of rebates and for those different types you may want to post the accruals to different accounts. You can do this by creating different rebate program types and changing the accrual posting setup.
- Navigate to Procurement and sourcing > Vendor rebates > Vendor rebate type.

Create a new rebate type and fill in the accrual and expense accounts.
Rebate Groups
There are two type of rebate groups. Item rebate groups and vendor rebate groups. You can use these groups to include groups of vendors and groups of items into a rebate program instead of having to set up a program for each individual vendor and item. In our example we are going to set up a vendor rebate that is applicable for one vendor and one item only so we will skip this setup.
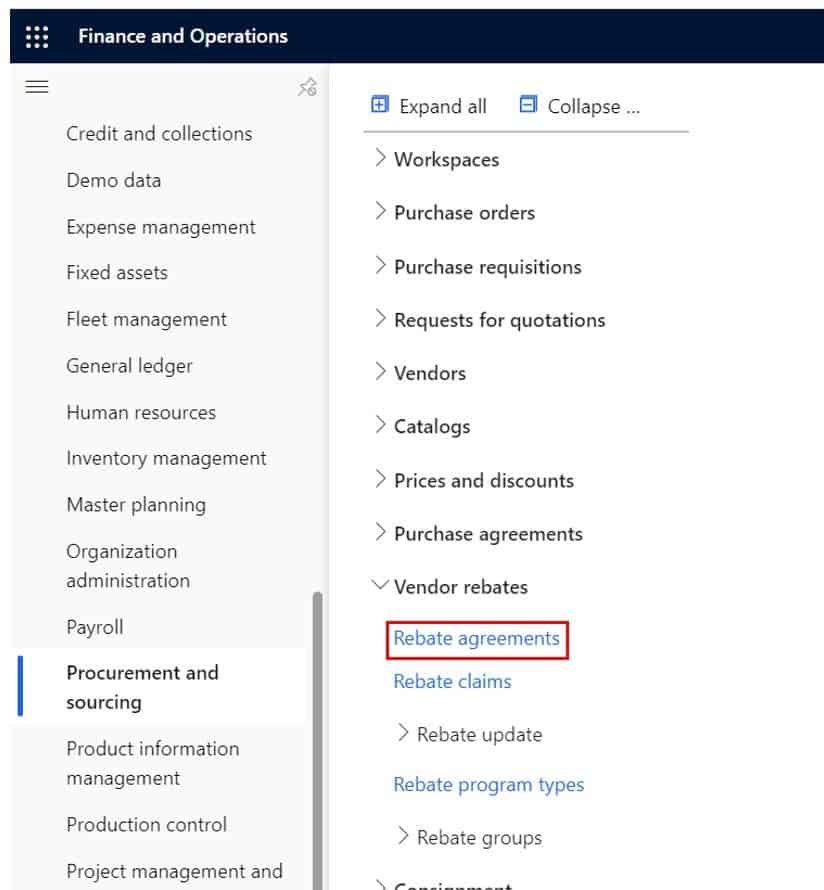
Rebate Agreements
Rebate agreements are how we define the parameters of the vendor rebate. These are things like which item and which vendor is the rebate applicable for, how long is the offer, what are the conditions that will trigger the vendor rebates, and how will the vendor rebate be calculated.
- To get to rebate agreements navigate to Procurement and Sourcing > Vendor rebates > Vendor rebate agreements.
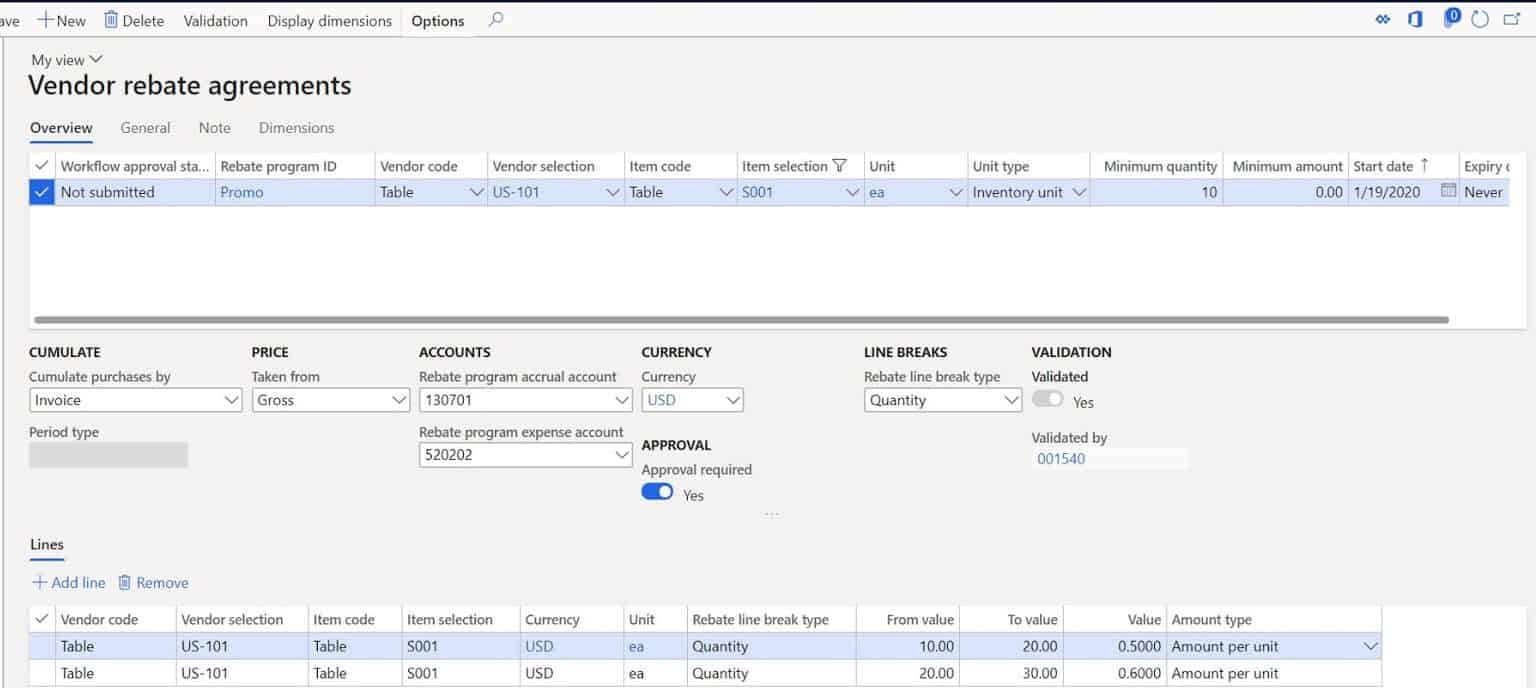
- Create a new vendor rebate agreement by clicking the “New” button.
- Enter the “Rebate program ID” we created earlier.
- In the “Vendor code” field select “Table”. This indicates that we want to select a specific vendor.
- In the “Vendor selection” select the specific vendor the rebates apply to.
- In the “Item code” field select “Table”. This indicates that we want to select a specific vendor.
- In the “Unit” field select the unit of measure you will be purchasing in. If the unit of measure is a specific requirement for the rebate you can select the “Exact match” option in the “Unit of measure rebate option” field on the “General” tab. Otherwise there will be a unit conversion on whatever unit you use on the purchase order to determine the vendor rebate.
- Keep “Unit type” set to “Inventory unit” unless you are using catch weight.
- In the “Minimum quantity” field enter a minimum quantity required to be eligible for the rebate.
- In the “Minimum amount” field enter a minimum amount required to be eligible for the rebate.
- In the “Start date” field indicate the validity start date for the rebate. By default, the system will use the “Created date” but you can use the “Requested delivery” date as the basis for the validity date if you change the “Calculation date type” on the “General” tab.
- In the “Expiry date” you can select the date that the vendor rebate should end.
- In the middle section we have a few options we need to consider. The first is the “Cumulate purchases by” field. This option determines how the rebate claim is to be calculated. In this case I want the rebate claim to be evaluated based on each invoice that is generated.
- In the “Taken from” field select whether the amount, if you are using an amount based rebate, should be taken from the “Gross” amount or “Net” amount after any discounts have been taken.
- We will skip the accounts because defaulted from our program type.
- If you want the rebate first be approved before a rebate accrual is taken select the “Approval required” option.
- In the “Rebate line break type” field select if the rebate has “Quantity” breaks or “Amount” breaks.
- In the lines section we will set up the conditions for the rebate. In this example I am going to take a rebate of $0.50 per unit when I order 10 – 19 and a rebate of $0.60 per unit when I order 20 – 29 units. As you can probably tell the “From value” is inclusive and the “To value” is exclusive. So, when I order 20 units, I will get a $0.60 per unit rebate.
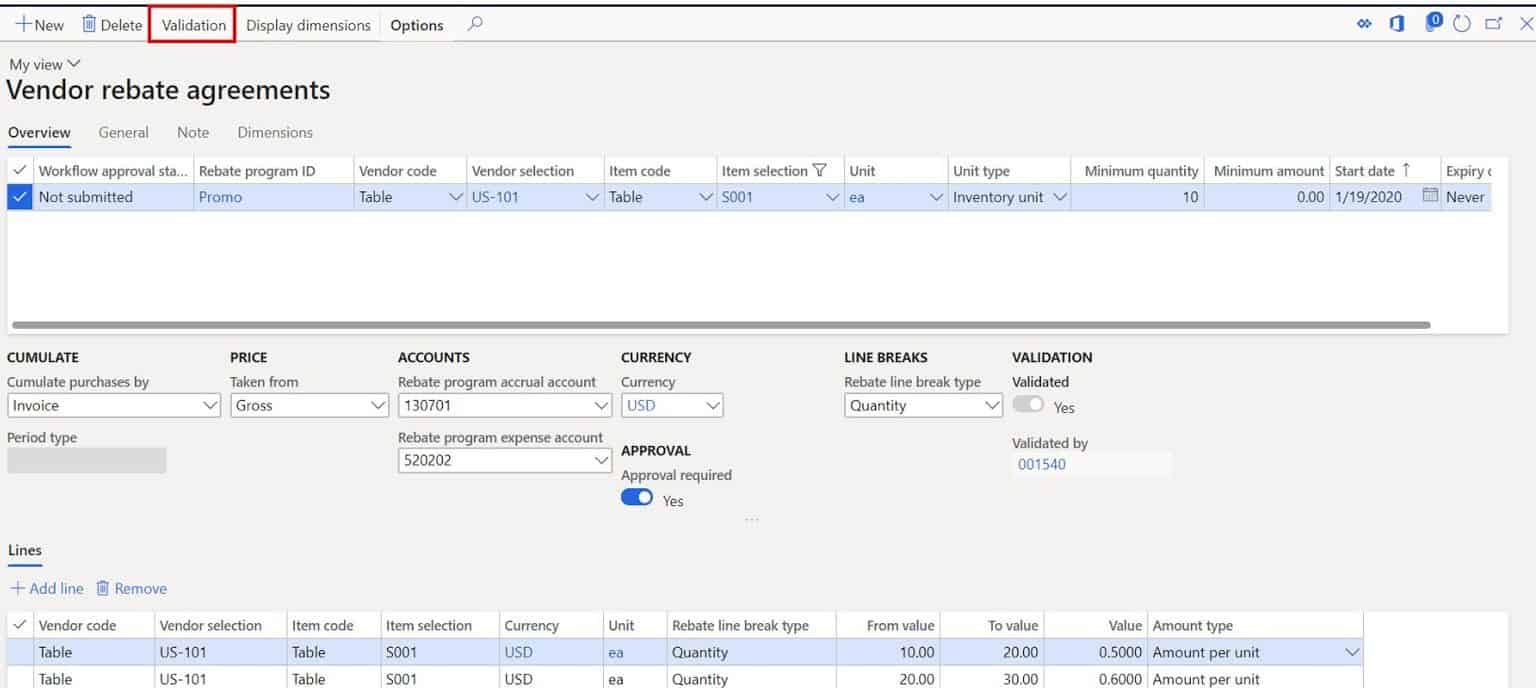
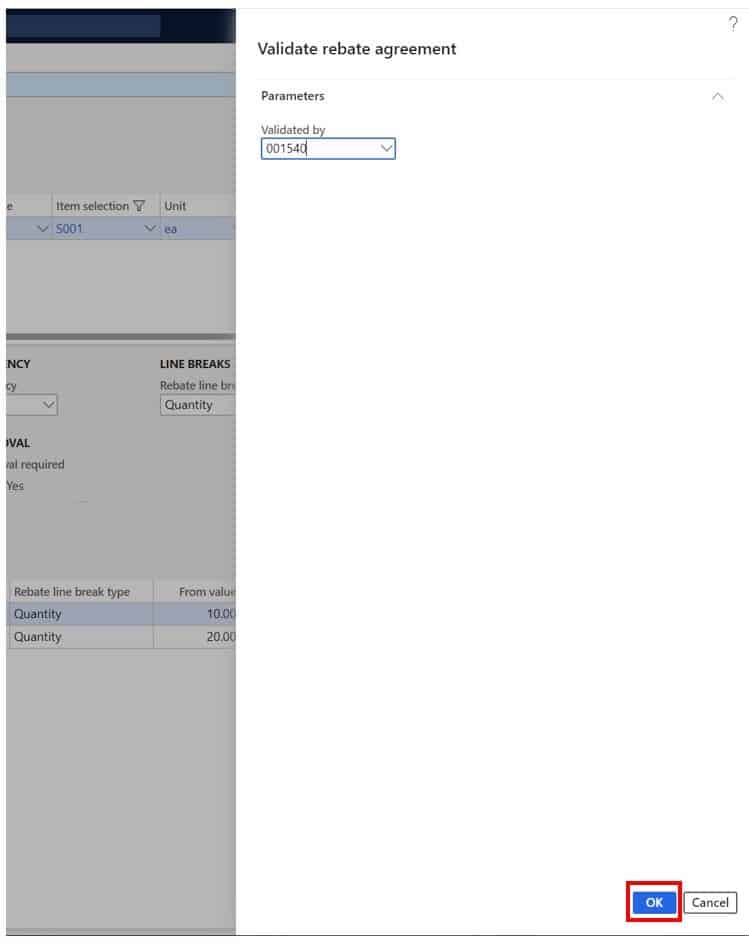
The last step now that we have the rebate agreement the way we want it is to validate and approved the agreement to make it active. To do this click the “Validation” button and click the “Ok” button.
Now we will go through the example and see this in action.
Process Vendor Rebates
The vendor rebate we set up is based on a specific vendor and a specific item, so I am going to create a purchase order against the vendor we selected in our vendor rebate agreement and order the item we chose in our rebate agreement.
- I’ll start by creating a purchase order and selecting the vendor in our agreement.
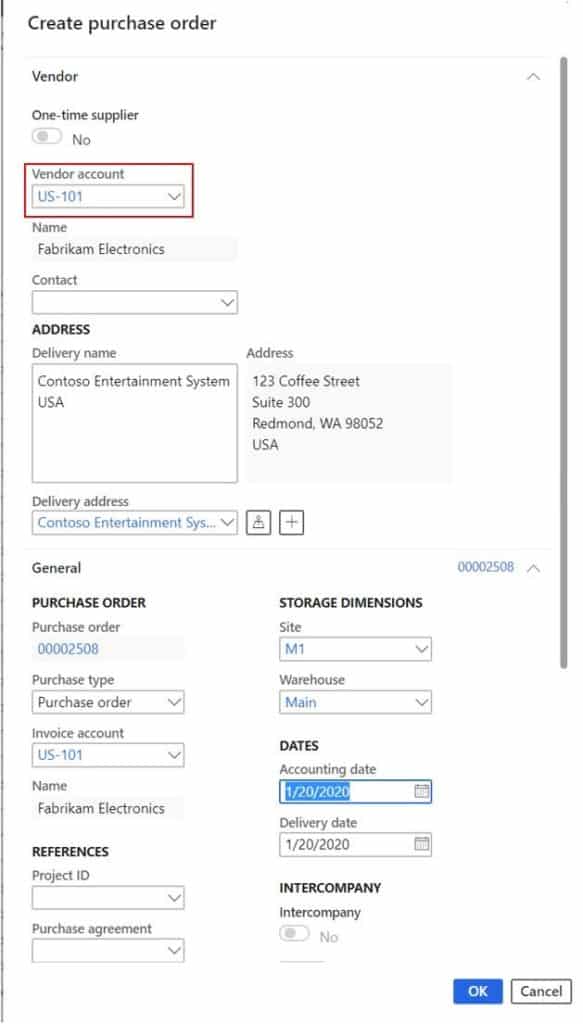
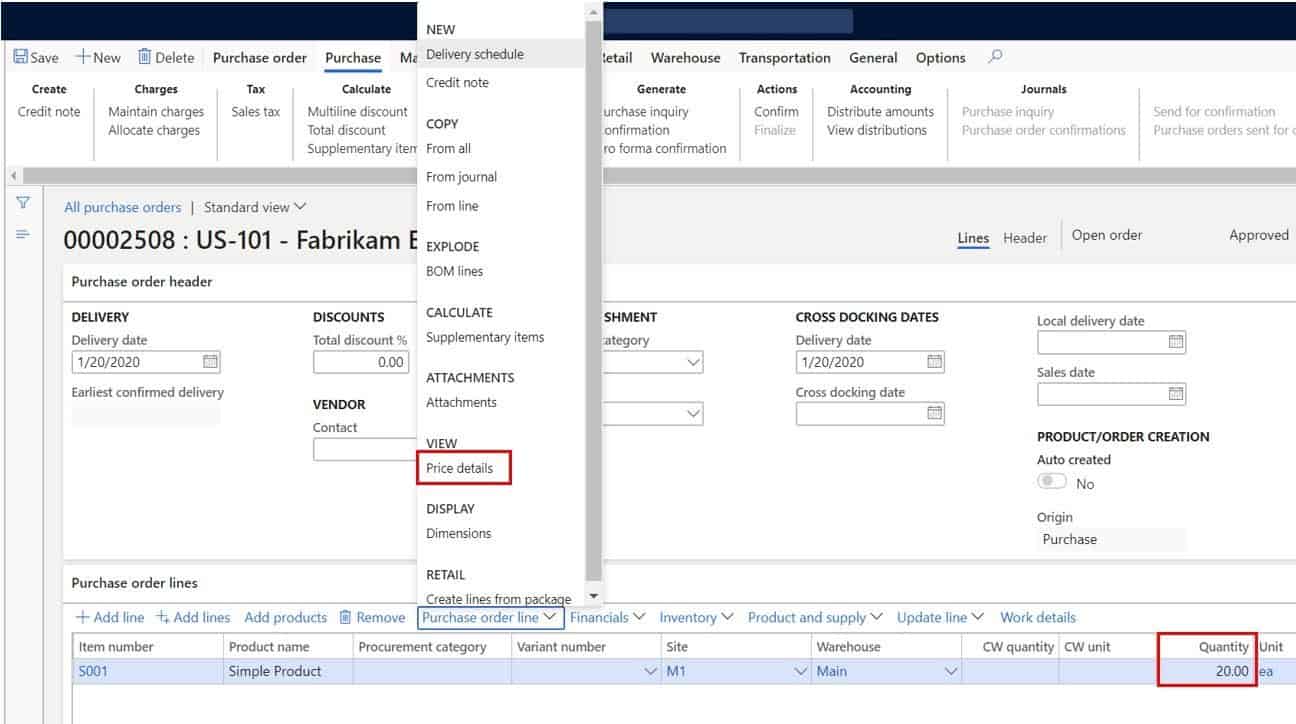
- Next I will create a purchase order line for the “S001” item for a quantity of 20. This will put us in our $0.60 tier of our vendor rebate.
- We can also see the vendor rebate that was selected for our line if we click the “Purchase order line” button and click “Price details”. Here we can see that we have a vendor rebate that has been applied to the line.

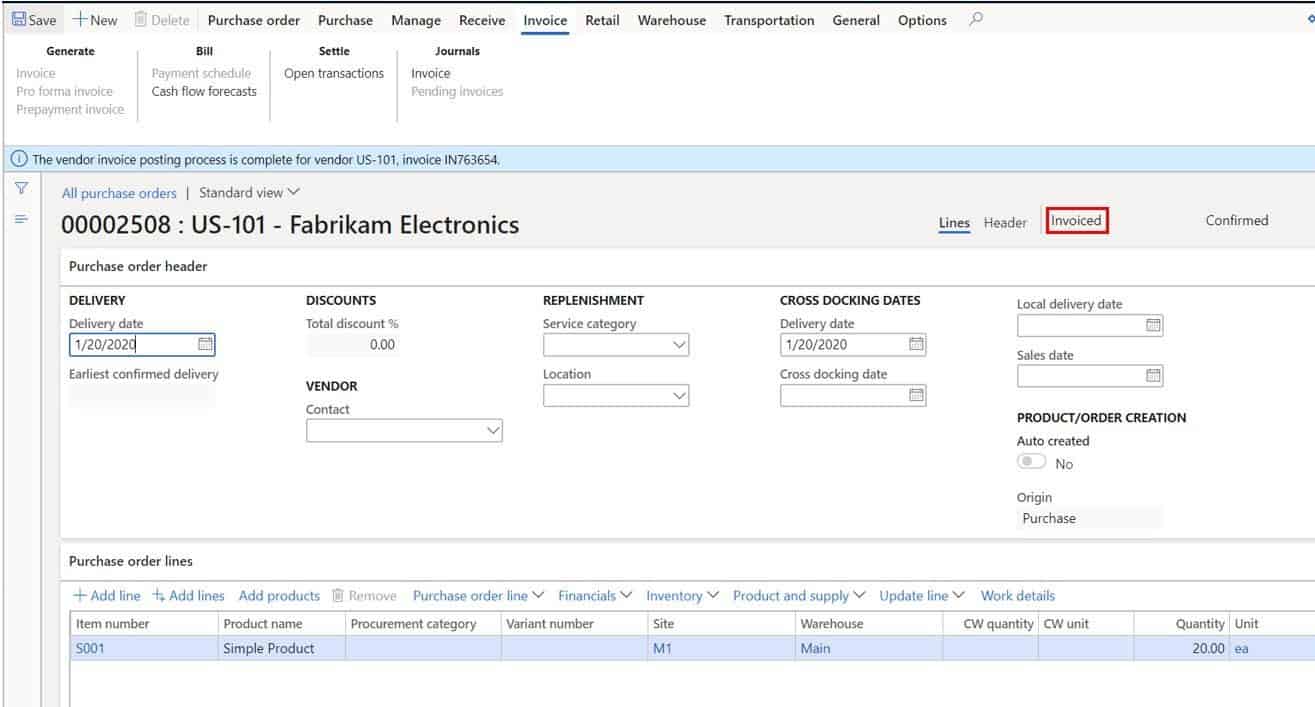
Next I’m going to take this purchase order through confirmation, receipt, and invoicing but I’m going to fast forward to the invoicing step. As you can see, we now have an invoiced purchase order.
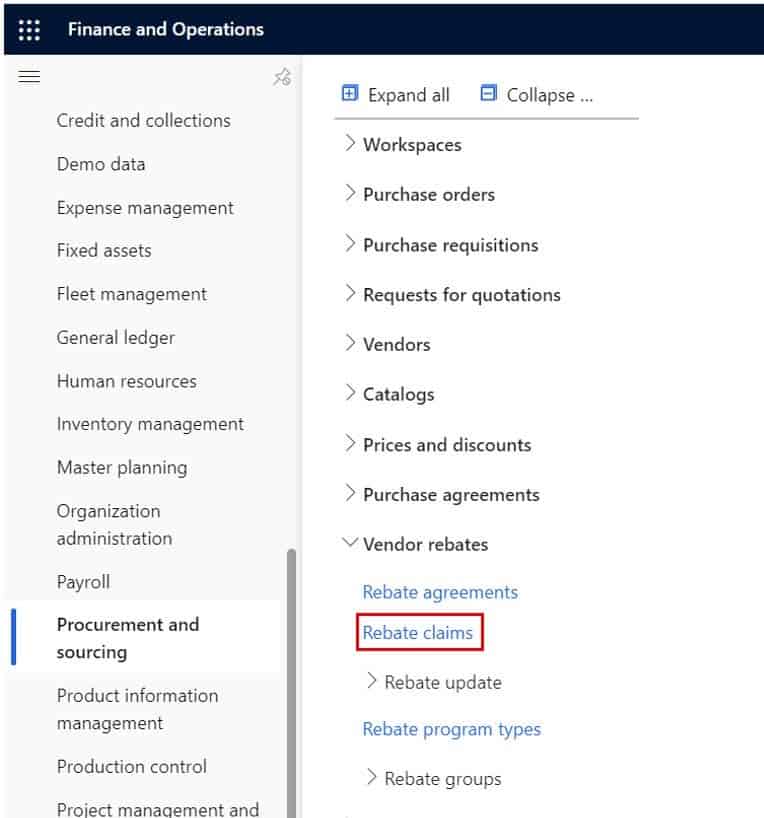
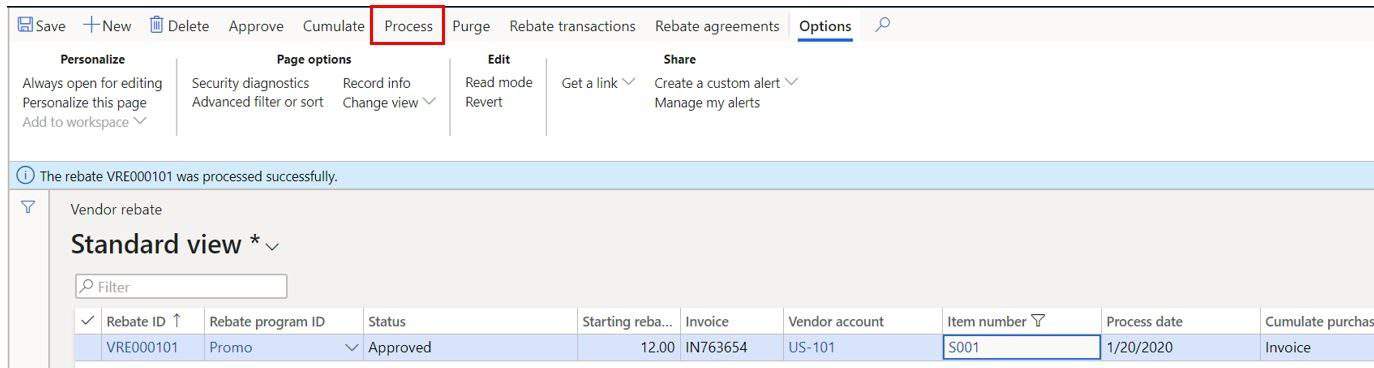
We can now go and see our rebate claim that was generated. To do this, navigate to Procurement and sourcing > Vendor rebates > Rebate claims.
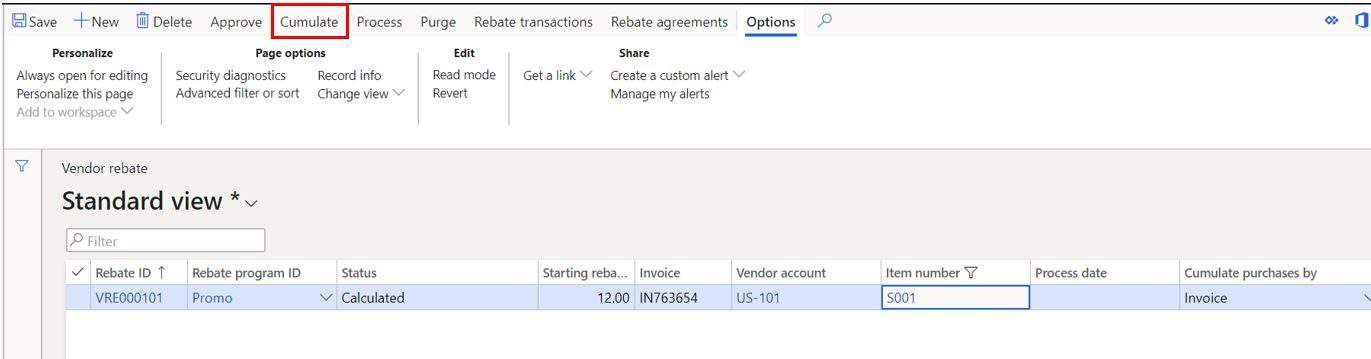
Here you can see that we have a vendor rebate claim record that has been generated.
If you are using a “Cumulate purchases by” method other than “Invoice” you will need to cumulate your vendor rebates. This process just calculates and aggregate the vendor rebates. In this case we have chosen to calculate the rebate on an individual invoice basis, so our claim has already been calculated for us.
The next step is to “Approve” the vendor rebate claim. The approval will post the vendor rebate accrual.
- To approve the claim, click the “Approve” button.
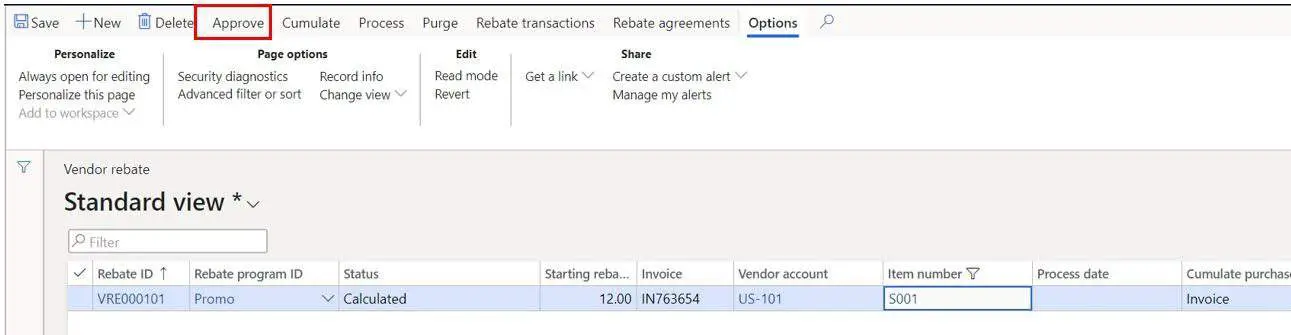
- In the approval dialog select claims for the “Vendor” or “Vendor rebate group” you want to approve and click the “Ok” button.
- You will now see the “Status” field has changed to approved.
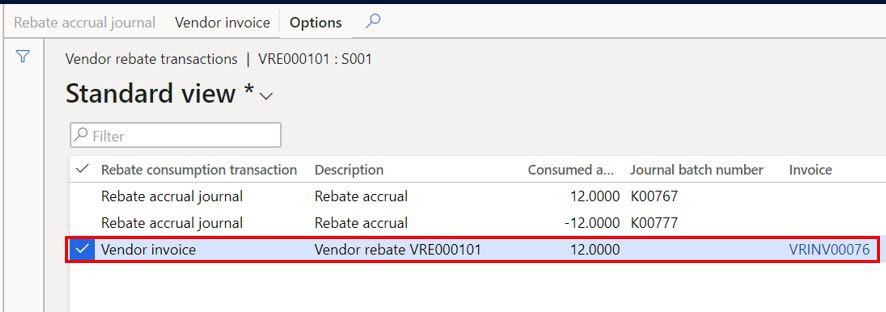
- Click the “Rebate transactions” button to see the vendor rebate transactions that were posted.
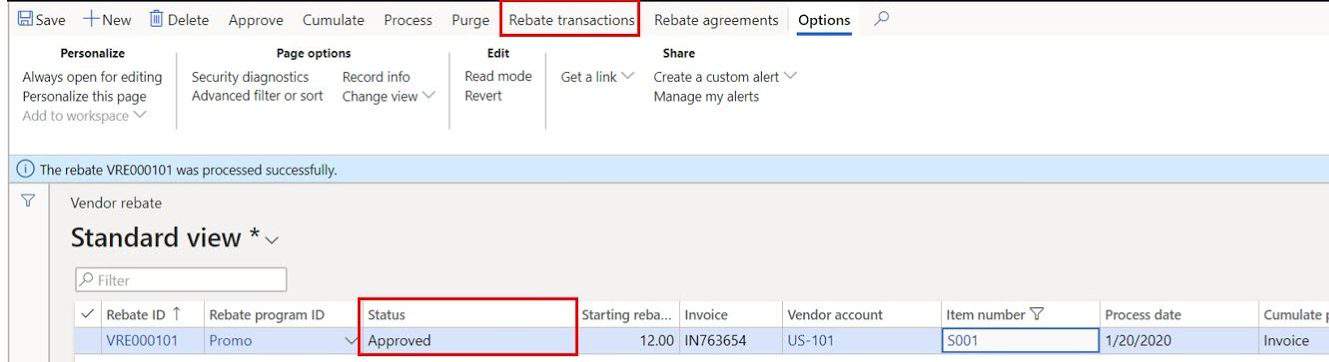
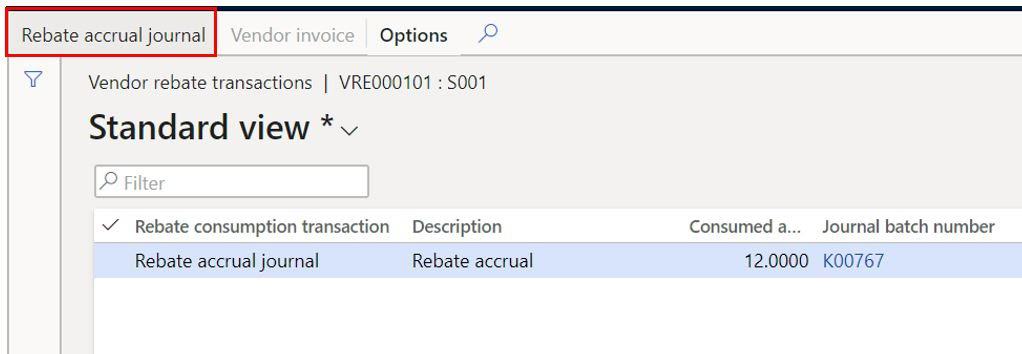
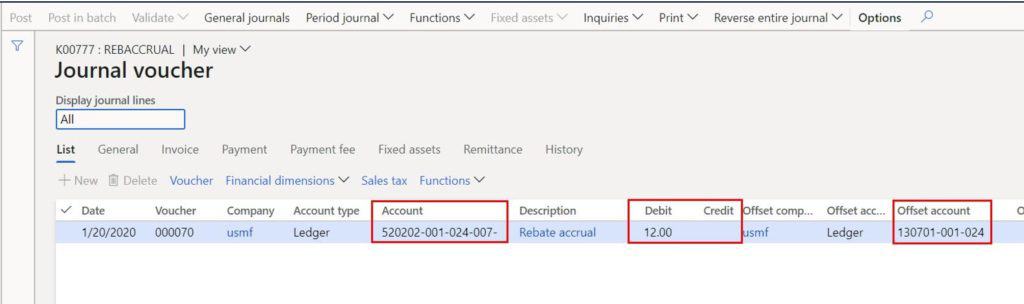
Here you can see a rebate journal was posted for $12.00. We can see the journal if you click the “Rebate accrual journal” button.
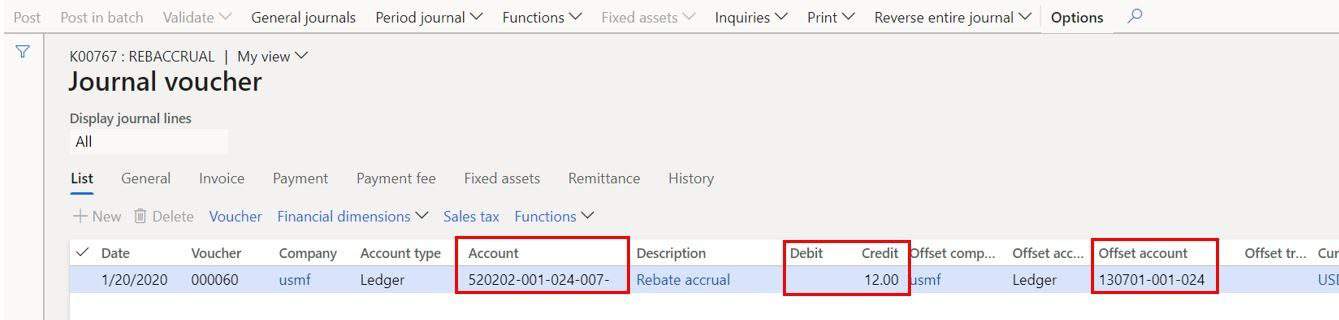
If we look inside the journal, we can see that the 520202 was credited and the 130701 account was debited.
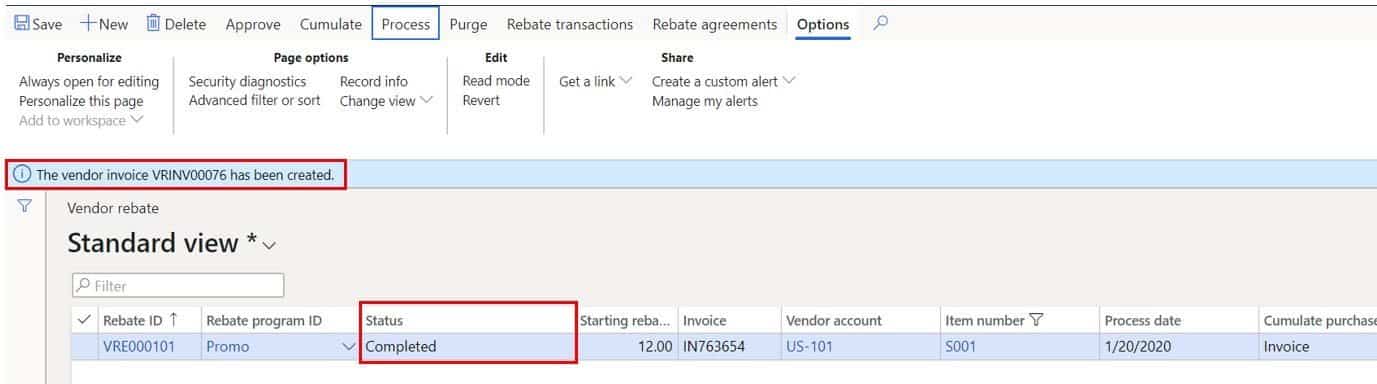
Now back on the rebate accrual claims from we can now process the claim which will post the debit vendor invoice to the vendor account.
- To process the claim, click the “Process” button.
In the “Process” dialog you can use the “Filter” button to filter down to a specific invoice, time period, vendor account etc. to process the exact claims you want. When you have the filter the way you wanted it, click the “Ok” button.

You can now see that the “Status” field has change to “Completed” and we have message telling us that the vendor invoice was created.
If we take a look at the vendor transactions form again, we see that there is another accrual entry. This time reversing the accrual. 520202 was debited and the 130701 account was credited.

Also, we can see that now a debit vendor invoice has been posted against the vendor. The invoice debited the vendor account (AP summary) and credited the expense account associated with the procurement category we assigned earlier in the setup section.
Takeaways
Keep in mind each of the steps we did manually could be automated by setting the “Cumulate”, “Approval”, and “Process” jobs in batch with set filters and recurrences. I hope you are starting to see the power we have at our fingertips here with the Dynamics 365 Finance and Operations vendor rebate functionality.