User groups in Dynamics 365 Finance and Operations allows you to set up and group one or many users together into a group to allow access to perform a certain function, route workflow approvals, or even remove the ability to perform a function by excluding users from a user group.
User groups are pervasive in the Dynamics 365 Finance and Operations application and in this article, we will focus on the most common uses but also look at all the other touch points throughout the system.
Create a User Group
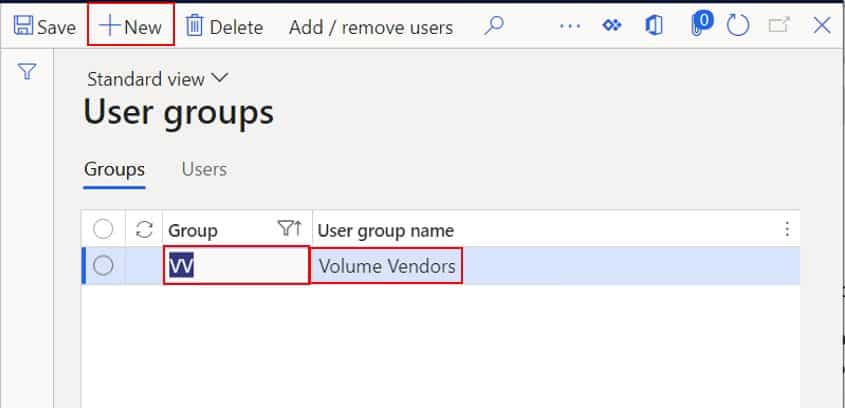
To create a user group, navigate to System administration > Users > User group. In the user groups form click the “New” button and in the “Group” field give the group a unique ID. In the “User group name” field give the user group a descriptive name.
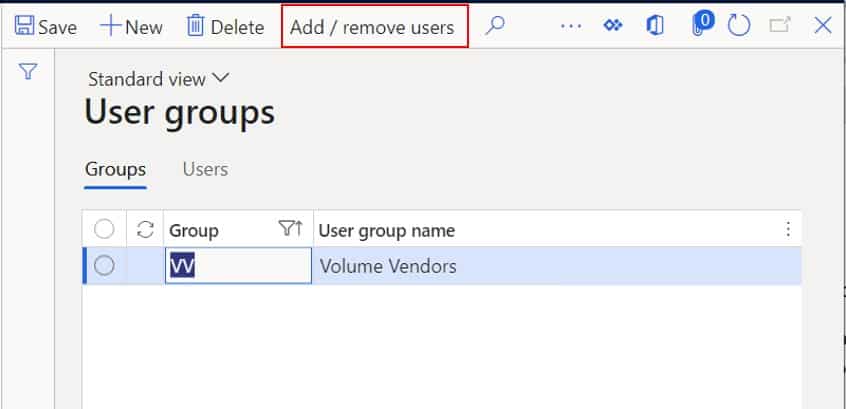
Next, we need to add users to the group. To do this click the “Add / remove users” button at the top of the form.
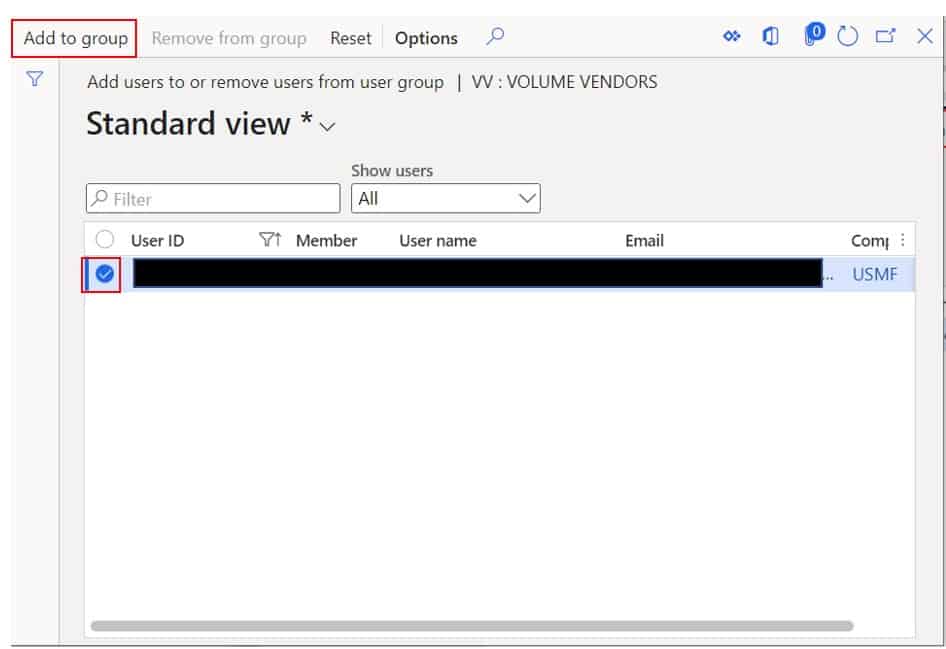
Now you can simply select each user that you want to add to the group and click the “Add to group” button and close the form.
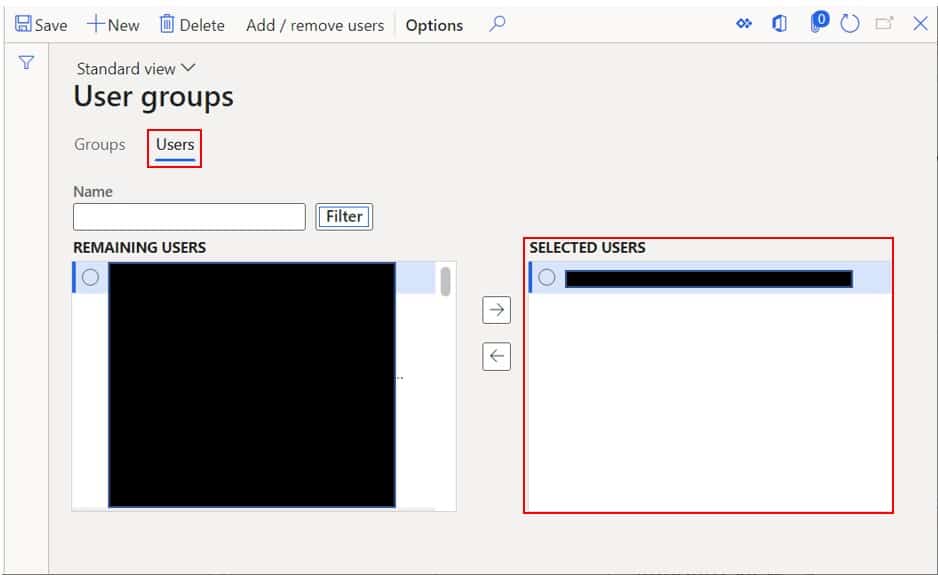
Now if you want to see which users are in that group you can click the “Users” tab and see which users are associated to that group.
Journal Blocking
The most common use case for setting up a user group is to hide certain journals from users to facilitate segregation of duties for users who may have the same or similar security roles but yet should not have access to exactly the same parts of the system like a journals that may be used for different purposes. This works not only for accounts payable, receivable, and ledger journals, but also for inventory journals.
For example, let’s say you set up two user groups, one is only allowed to use a vendor payment journal that has a fixed default offset account that is set to a bank account and the other that has no fixed offset. You only want your VV (volume vendors) accounts payable team to have access to the journal with the default account and the LVV (low volume vendors) to have access to the journal with no fixed offset.
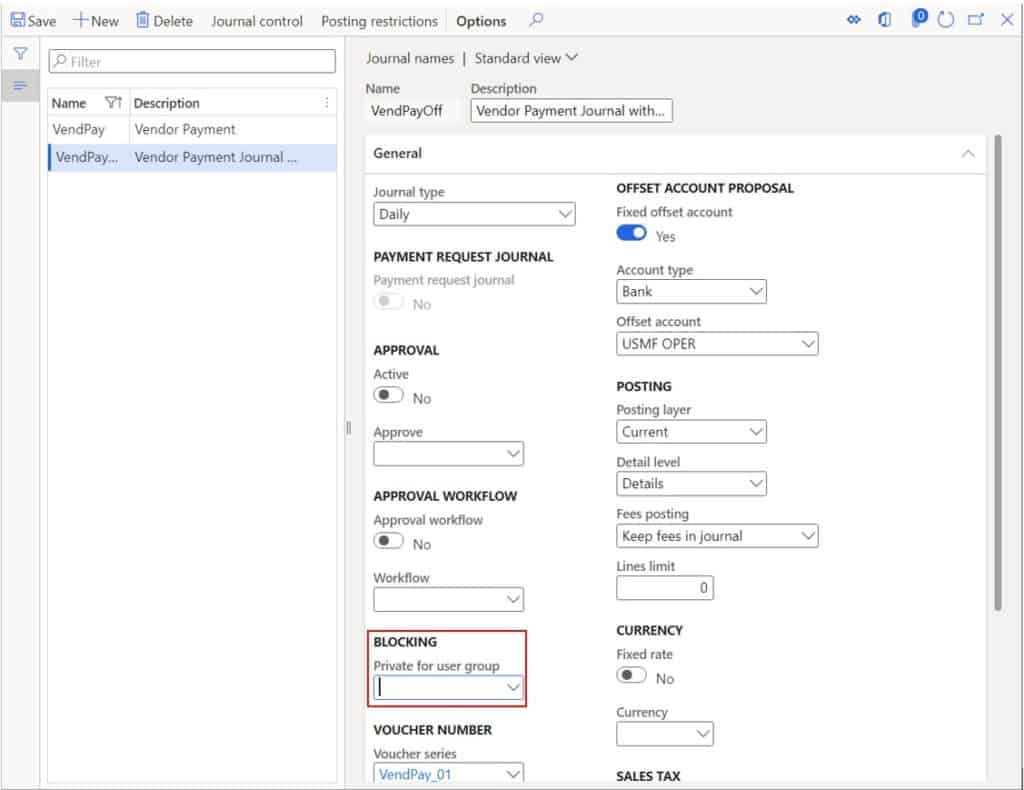
Use the steps outlined in the first section to create two user groups and associate the applicable users to each. Then navigate to General ledger > Journal setup > Journal names. Find the two journals you want to make available for the each of the two user groups and assign the respective user group to each journal by selecting the user group from the “Private for user group” field in the “General” fast tab of the form. This will make the journal only visible to users who are apart of that selected user group.
Journal Approval
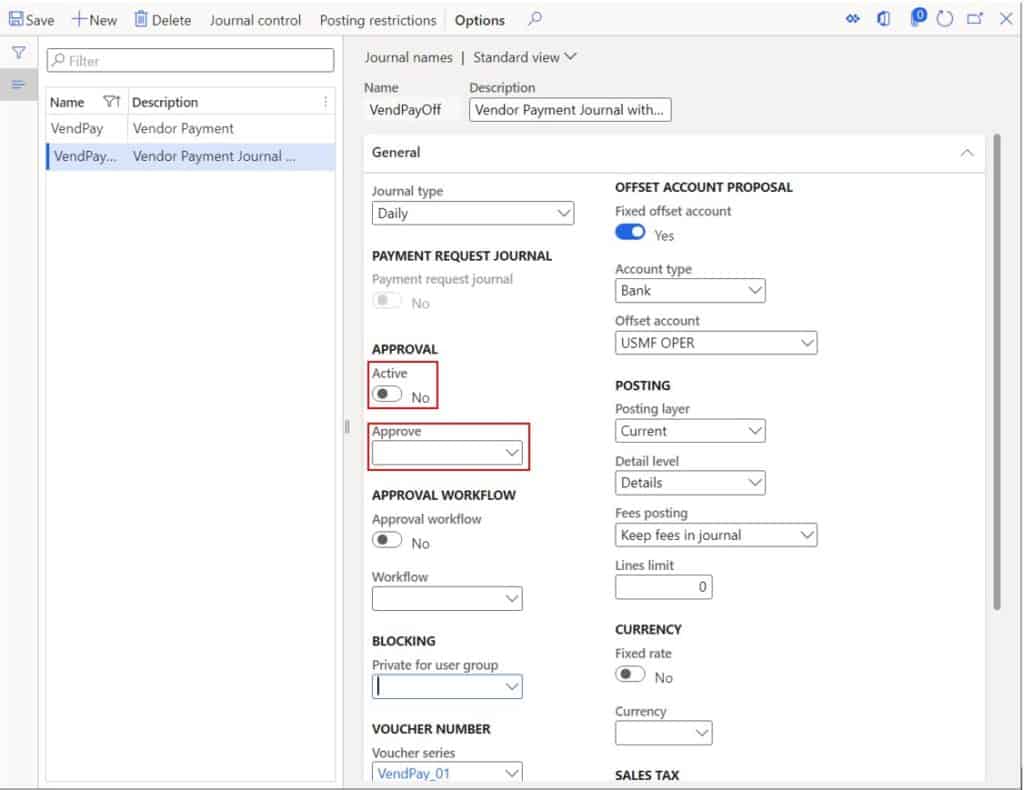
Dynamics 365 Finance and operations has functionality available to require manual approval of a journal before the journal can be posted. It also allows you to select an approval user group which allows only those users in the selected user group to approve the journal to be posted. To do this, navigate back to General ledger > Journal setup > Journal names.
Find the journal where you want to activate approvals and enable the “Active” flag in the “Approval” heading. Then select the user group that should be allowed to approve that journal. Once the journal is approved the “Post” button in the journal will become enabled and the journal can be posted.
Workflow Approval Routing
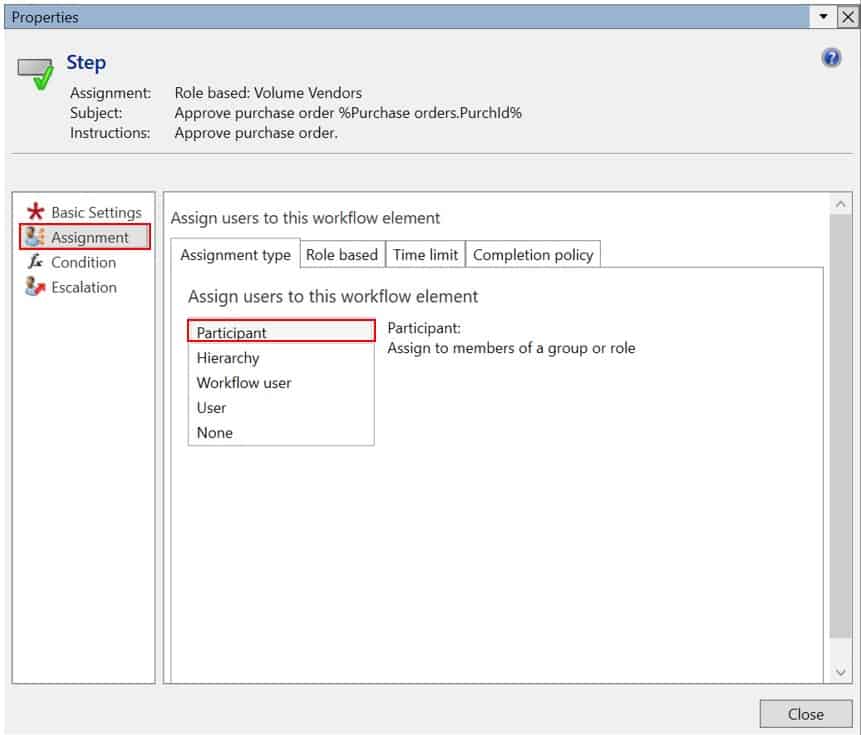
There are several ways to assign a workflow approval step and one of those ways is by assigning the approval to a user group. In the workflow editor on the approval step in the “Assignments” tab select “Participant” as the “Assignment type”.
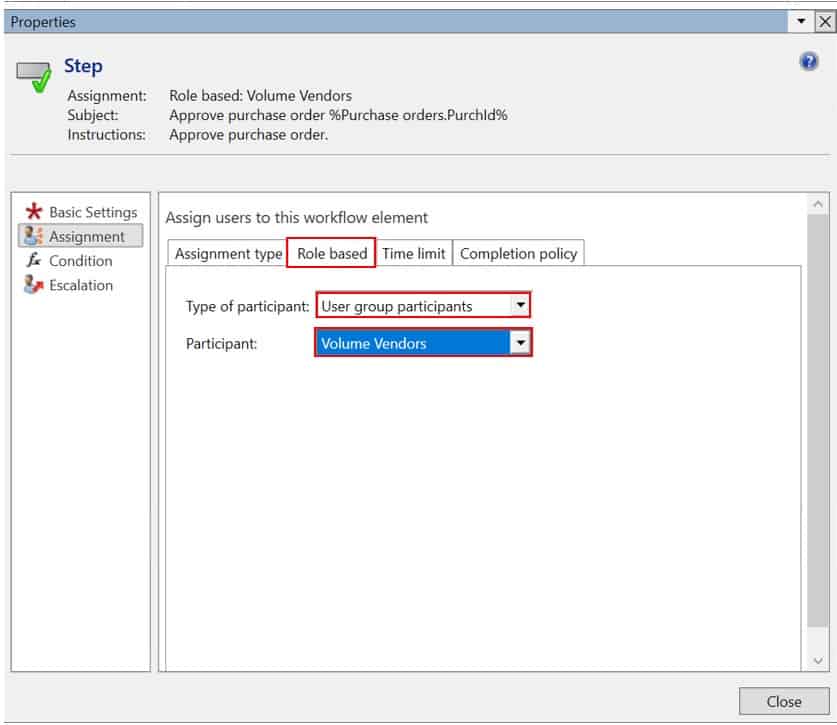
Then click the “Role based” tab select “User group participants” as the “Type of participant”. Then in the “Participant” field select the user group that you want the workflow approval to be assigned to. Keep in mind if you choose a user group, the approval will be routed to all members of the selected group and the approval of the workflow will depend on the completion policy you specify in the “Completion policy” tab. So, you could set it where only one member of that group needs to approve, and it doesn’t really matter who approves it as long as one member of the user group approves it.
Module Access During Month End Close
This is another very common use for the user group. Typically, at month end or yearend close you want to keep people out of certain parts of the system to prevent accidental financial postings while the finance team is completing period end processes. You can use user groups to limit the access to each module by legal entity.
Then once the finance team has finished closing the period or the year the access can be opened up again. To do this navigate to General ledger > Calendars > Ledger calendars. Here select, your period you are working in on left and on the right, you can select, for each legal entity, which user group should have access to post transactions in those modules. If no one should be able to post transactions, you can also select none.
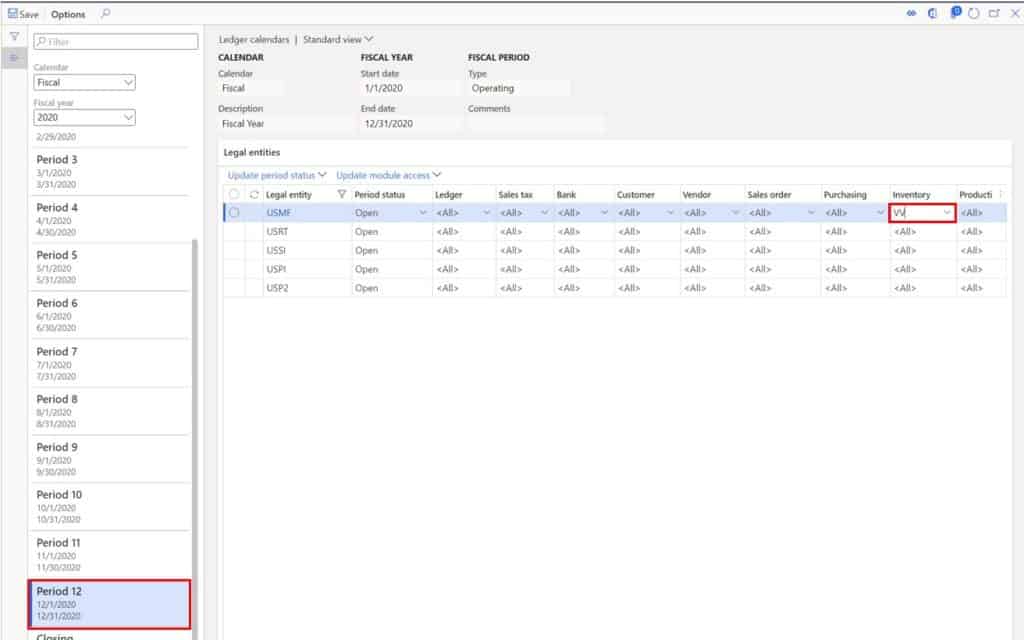
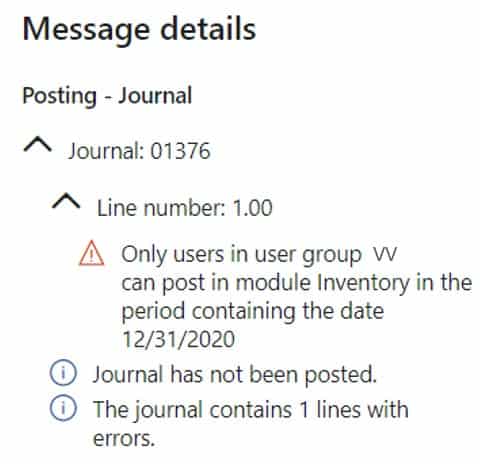
For example, If I take myself out of the “VV” user group, set the “VV” user group against the “Inventory” module, and try to post an adjustment journal I get this error.
Notification Group for Batch Transfer Rules for Subledger Journal Account Entries
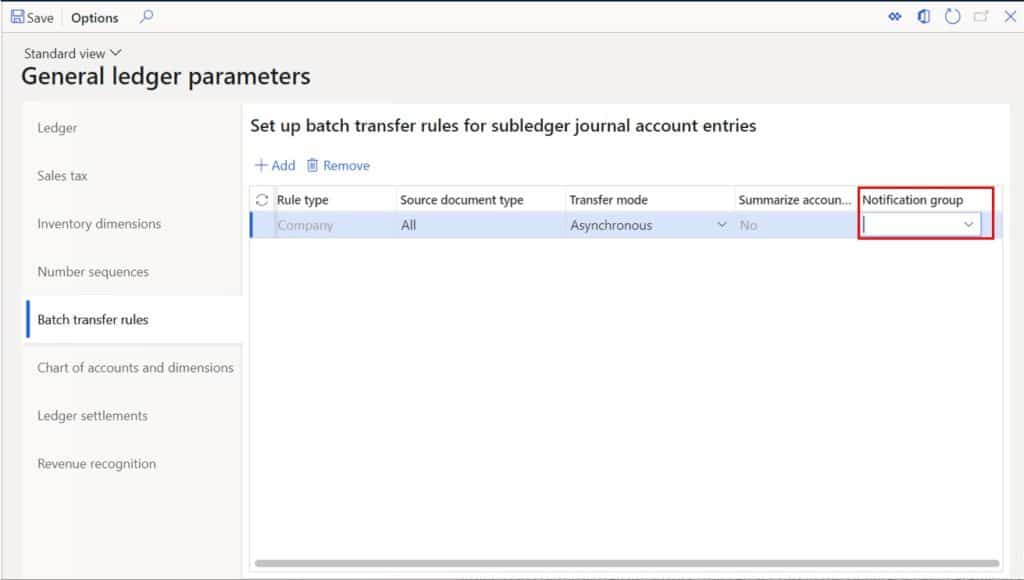
Ledger postings from subledger to ledger are posted asynchronously via a batch job. In cases where there are errors during the batch transfer you can select a user group that will receive notifications. You can set this in the General ledger parameters by navigating to General ledger > Ledger setup > General ledger parameters. Then click on the “Batch transfer rules” tab. In the “Notification group” tab you can select a user group that contains the users who should receive the notification when a batch transfer errors.
Ledger Account Alias
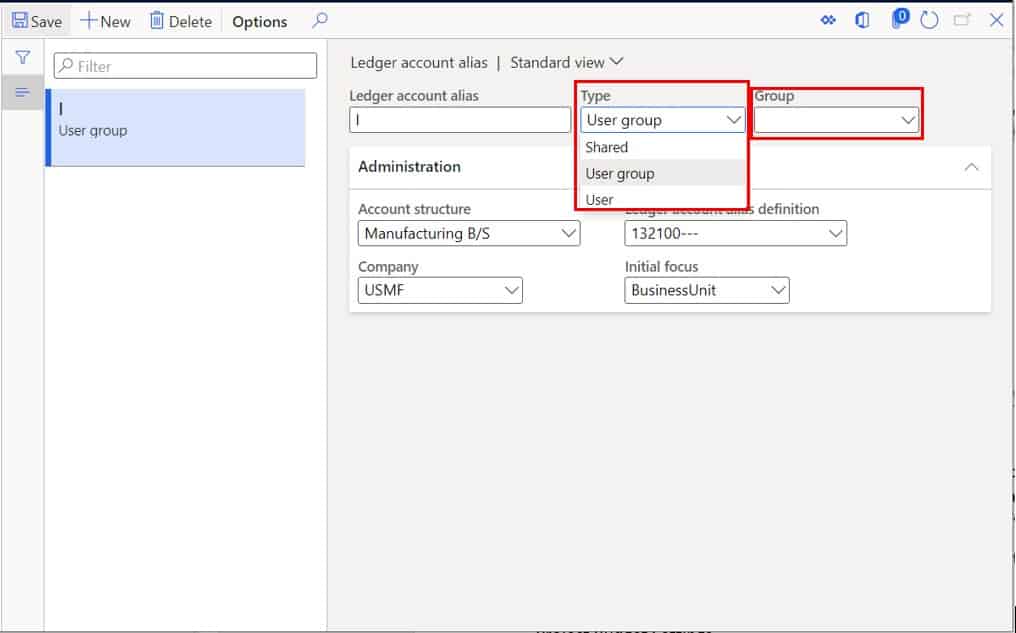
A ledger account alias is kind of like a short code that is mapped to a ledger account so that when a user types in a short code like “Pay” that maps to the actual ledger account and that account is defaulted directly into a journal.
Ledger account alias allows you to specify if the account alias applies for a specific user, a user group, or all users. To set up a ledger account alias, navigate to General ledger > Chart of accounts > Accounts > Ledger account alias.
Over-Budget Permissions
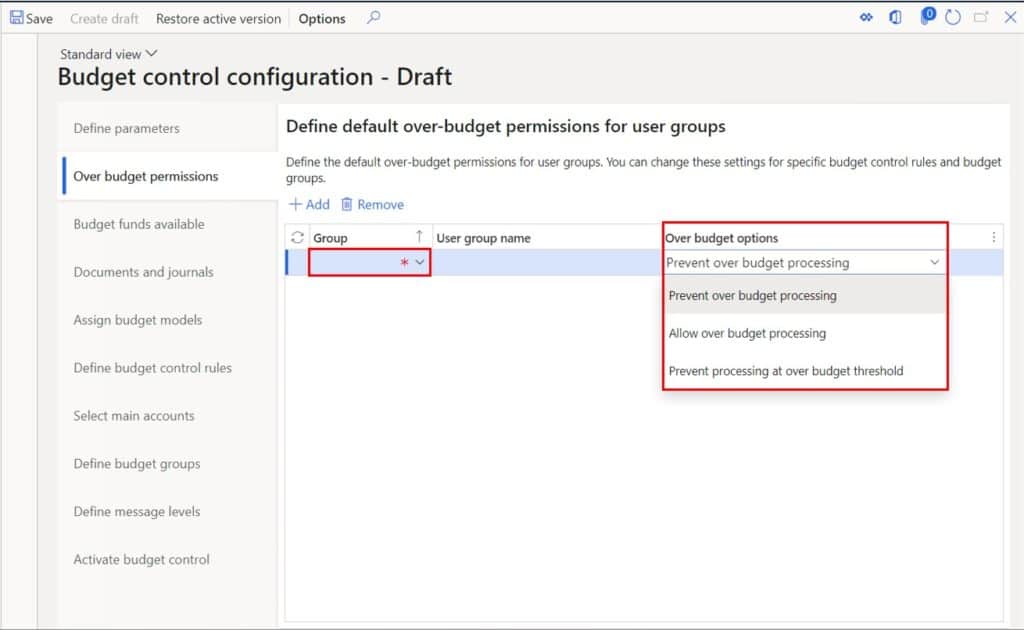
Over budget permissions allows you to define over budget options by user group. So, if a certain user is part of a user group that does not allow over budget transactions, when the user tries to post the document (purchase order, journal entry, etc.) the user will receive an error. This configuration is found in Budgeting > Setup > Budget control > Budget control configuration.
Project Budget Settings
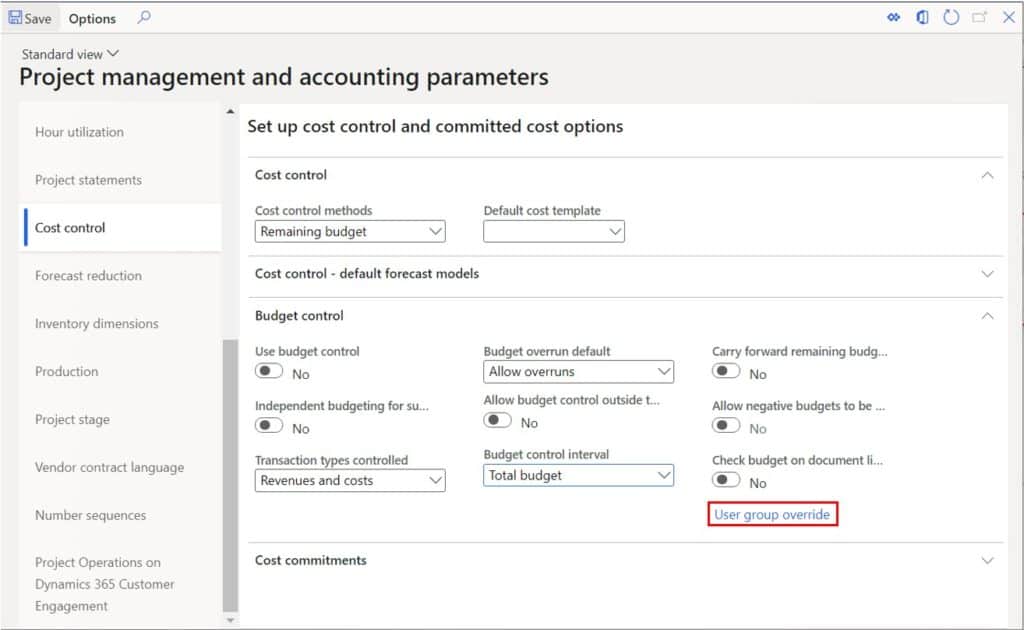
In the project management and accounting module you can set up budget control overrides by user group, for a specific project, a group of projects, or for all projects. This can be set up in Project management and accounting > Setup > Project management and accounting parameters. Then on the “Cost control” tab in the “Budget control” fast tab click, the “User group override” button.
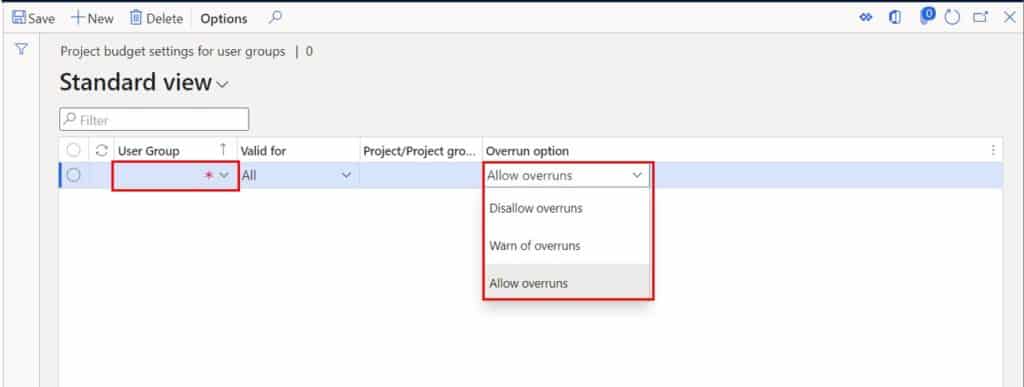
In this form you can set a user group and adjust the “Overrun option” to allow, warn, or disallow overruns for that that user group and/or project combination.
Budget Plan
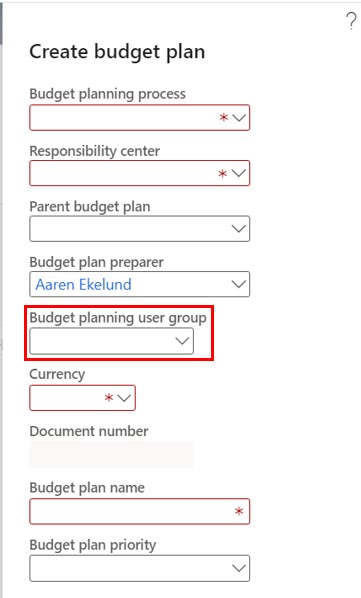
User groups can be used to allow certain users to see budget plan records. When you create a budget plan record by navigating to Budgeting > Budget plans and click the “New” button. You can select a user group when you create a budget plan. If you select a user group, the budget plan will only be visible to users in the selected user group.
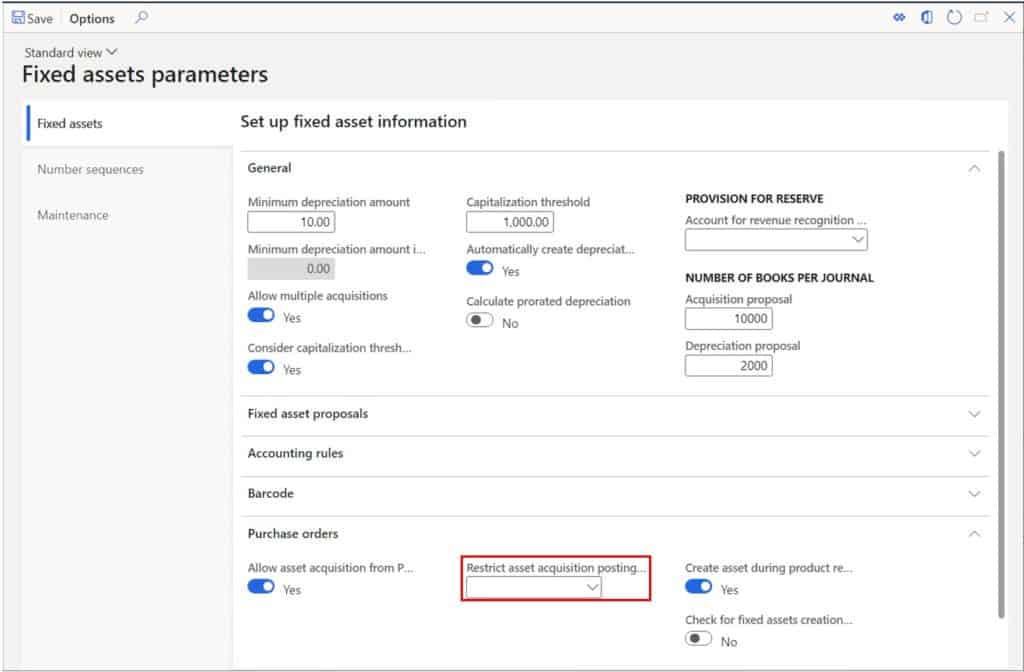
Restrict asset Acquisition Posting
If you need to limit the acquisition posting from an invoice to only a specific set of users, you can utilize a user group to do this. Navigate to Fixed assets > Setup > Fixed assets parameters. In the “Fixed assets” tab in the “Purchase orders” fast tab you can select the user group in the “Restrict asset acquisition posting to user group” field. This will prevent any user not in this user group from posting an invoice where an acquisition transaction occurs.
Takeaways
User groups have so many uses in Dynamics 365 Finance and Operations. If you have requirements around separating access to similar parts or functions in the system, especially if it is related to journals or workflows, take a look and see if setting up a user group could fulfill the requirement.

