

In Dynamics 365 Finance and Operations workflows are used to route specific business documents (e.g., purchase orders, purchase requisitions, general journals, vendor invoices, etc.) to the appropriate person or persons in the organization for approval. The workflow editor is the graphical drag and drop tool used to build complex and intricate workflows.
If you’ve never worked with workflows before or you’re new to setting up workflows this post will walk you through the different workflow elements, and also how to get a simple workflow up and running.
How to Enable Workflow for Different Document Types
Different document types require different configurations to enable the workflow. In the section below we will look at the different configurations required to enable some of the most common workflows in Dynamics 365 Finance and Operations.
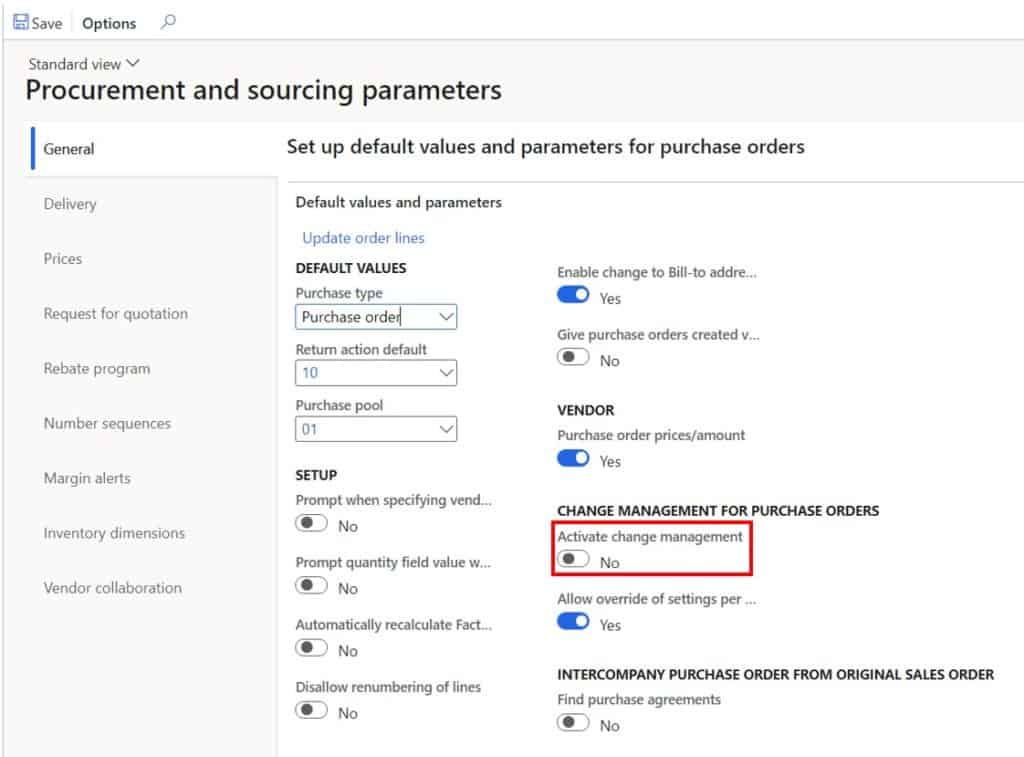
Purchase orders
To enable workflows for purchase order approval you need to enable change management. Change management can be enabled on the Procurement and sourcing parameters using the following path: Procurement and sourcing > Setup > Procurement and sourcing parameters.
Purchase requisition
There is nothing you need to do to enable workflow for purchase requisition. In fact, workflow is required to process a purchase requisition. If you are using purchase requisitions, you will need to have at least a simple purchase requisition workflow created.
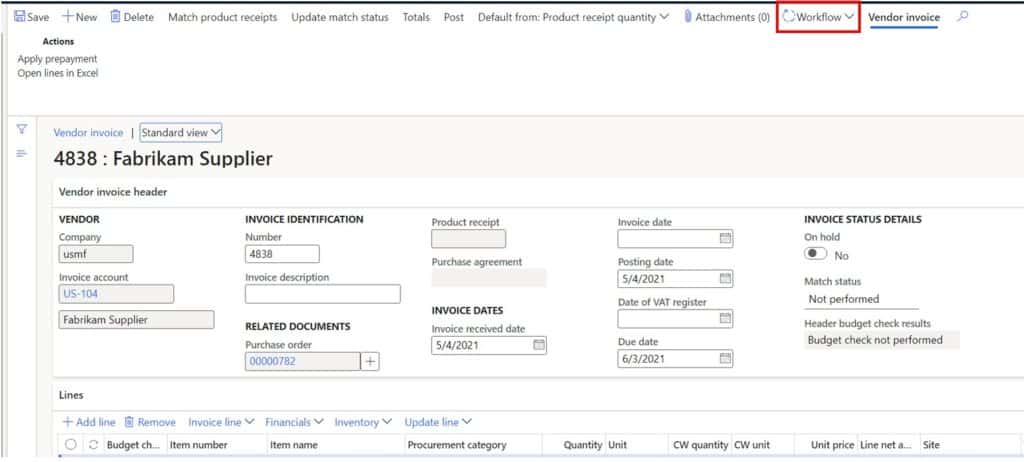
Vendor Invoice
The vendor invoice workflow is only for invoices created from purchase orders. There is a separate workflow used specifically for vendor invoice journals. To enable the vendor invoice workflow all you need to do is create a workflow for vendor invoice. After you do this you will see the workflow button in the ribbon.
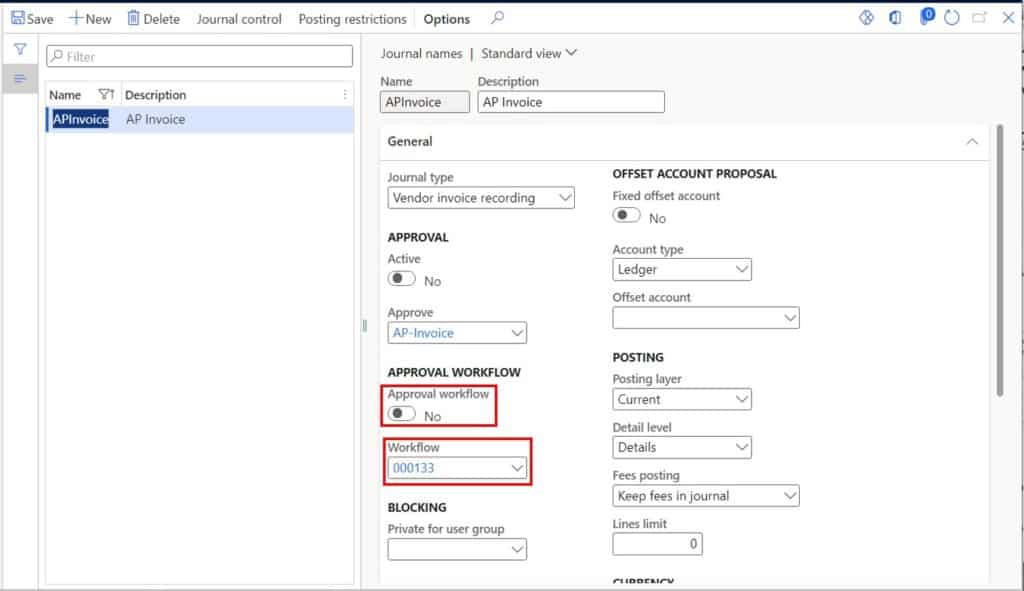
Vendor Invoice and General Journals
For the vendor invoice and general journal workflow, you can configure and enable workflows by journal name. This means that it is possible to have different workflows for each journal name. To enable the workflow on the journal name, navigate to General ledger > Journal setup > Journal names. To require the journal to go through workflow, enable the “Approval workflow” option. Next select the workflow you want to execute when the journal is submitted to workflow.
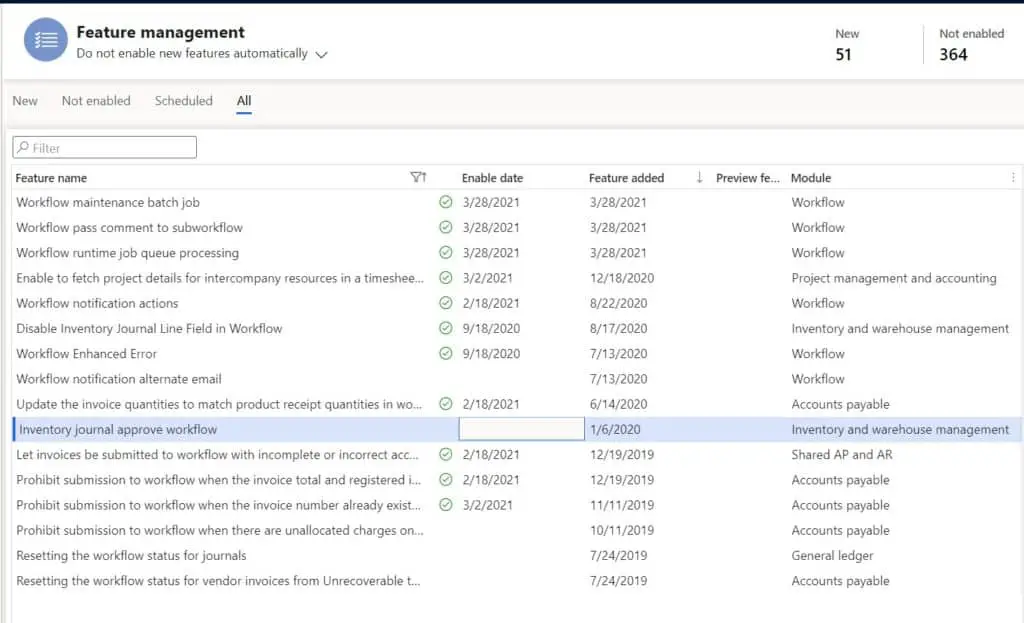
Inventory Journals
Microsoft has recently released functionality to allow workflow approvals for inventory journals as well. If you want to enable workflow for inventory journals you will need to make sure the “Inventory journal approve workflow” feature is enabled. If you need more information on how to enable features, see this post.
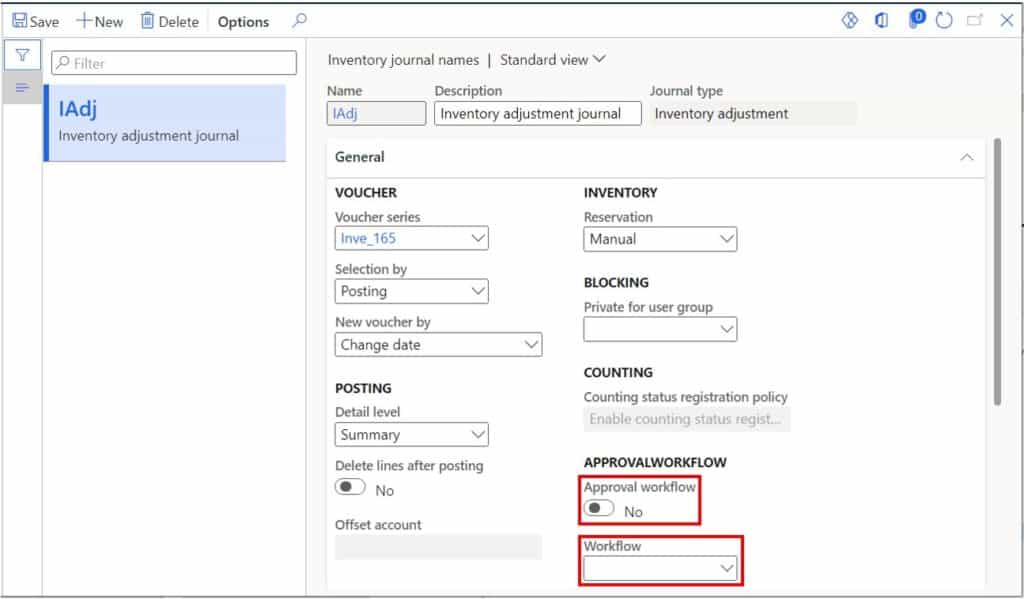
To enable workflow for specific inventory journal names, navigate to Inventory management > Setup > Inventory journal names > Inventory. Next click on the inventory journal name you want to add a workflow process to and, in similar fashion to general journals, enable the “Approval workflow” selection and select the workflow process you want to use for this journal name in the “Workflow” field.
Workflow Element Types
Now that you know how to enable some of the more common types of workflows let’s go over the basic elements of a workflow, so we know how to use them when you set up your workflow.
Approval – The approval element is the workflow element that when assigned to a user allows the user to approve or reject the order or journal. The approval element is required because this element is the only element that can set the order or journal to the approved status which allows further processing.

Conditional Decision – The conditional decision workflow element allows you to define a condition and then the system will evaluate that condition based on the current order or journal to be true or false and it will send the workflow down the true branch or the false branch. You can have one or many conditional decision nodes depending on how complex your workflow turns out to be.

Manual Decision – The manual decision workflow element allows you to define two options for the user, to whom the workflow has been routed, to choose from. Depending on the option chosen, the workflow will go down one branch or the other. This is used in cases where the conditional decision is too complex to let the system decide, or it requires human intervention to determine the outcome of the workflow.

Parallel Activity – This workflow element is used if you needed to run two workflows at the same time inside of the main workflow. To setup the two activities make sure you double click on the parallel activity node. This will allow you to set up each of the parallel workflows.
Subworkflow – The Subworkflow element allows you to invoke a subworkflow at a given point on your main workflow. You can choose to either wait until the subworkflow finishes or continue with the main workflow while the subworkflow executes.
Line workflow – The line level workflow element is used when you need specific approvals at the line level. To use the line level workflow, you need to first create the line workflow separately and then add it as an element in a header level workflow (for example a purchase order line workflow can be used as an element on a purchase order approval workflow).

Review – The review workflow element is used to assign a review task to whomever the workflow is routed to. This is different from an approval workflow element in that it does not change the status of an order or journal to “Approved” it is just a task that is assigned to one or multiple users to review before it is sent to someone for approval.

Workflow Infrastructure Configuration
The workflow infrastructure configuration is the configuration that puts three workflow batch jobs into the batch queue. These batch jobs are required for the workflow to execute. I usually set these to run every one or five minutes and if there are any performance issues reevaluate the batch job recurrence. To run the workflow infrastructure configuration, navigate to System administration > Workflow > Workflow infrastructure configuration.
The “Execution account” should default to the “Admin” account. Next fill in the recurrences for each of the batch jobs. Then click “Ok”. Now there should be three workflow batch jobs running in batch.

How to Set Up a Simple Workflow
For this example, we will set up a simple purchase order approval workflow from beginning to end so you can see how easy it is to get started using workflow. There is much more workflow functionality that is available but for the purposes of getting a simple workflow up and running we will not be covering everything. The scenario will be that we want all purchase orders under $1,000 to be automatically approved and anything over that needs to be approved by one of the Accounts Payable Managers.
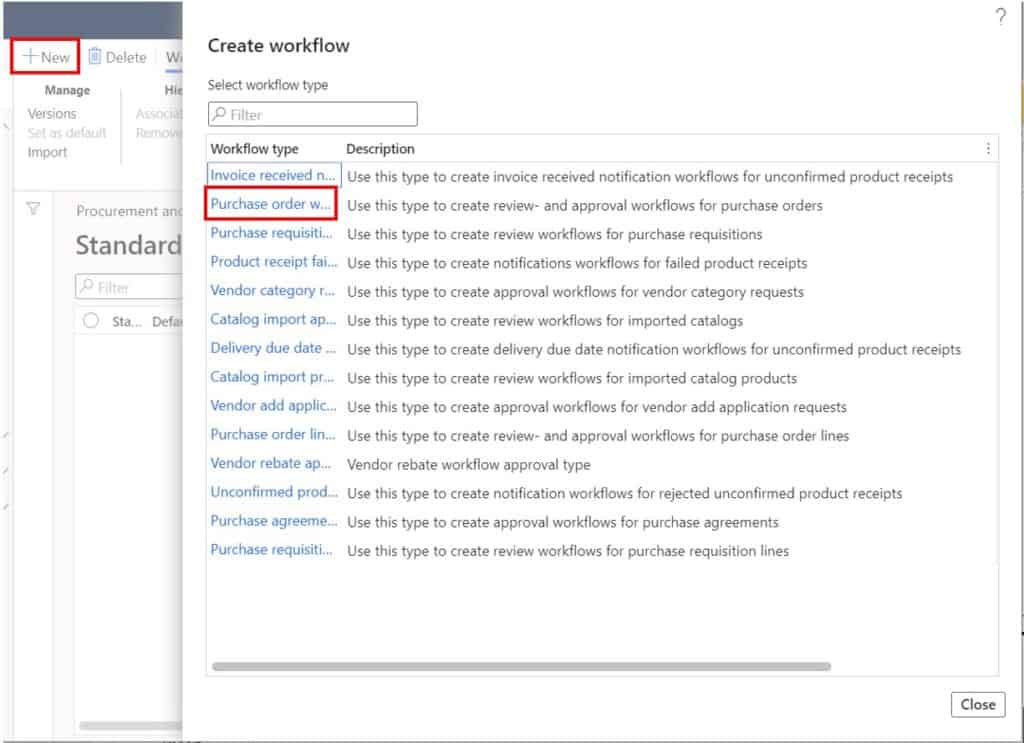
First navigate to Procurement and sourcing > Setup > Procurement and sourcing workflows. Click the “New” button to create a new workflow. Next click the “Purchase order workflow” option.
Note: Make sure you are using the Microsoft Edge browser because the workflow editor application does not seem to run well, or at all, in the Google Chrome browser.
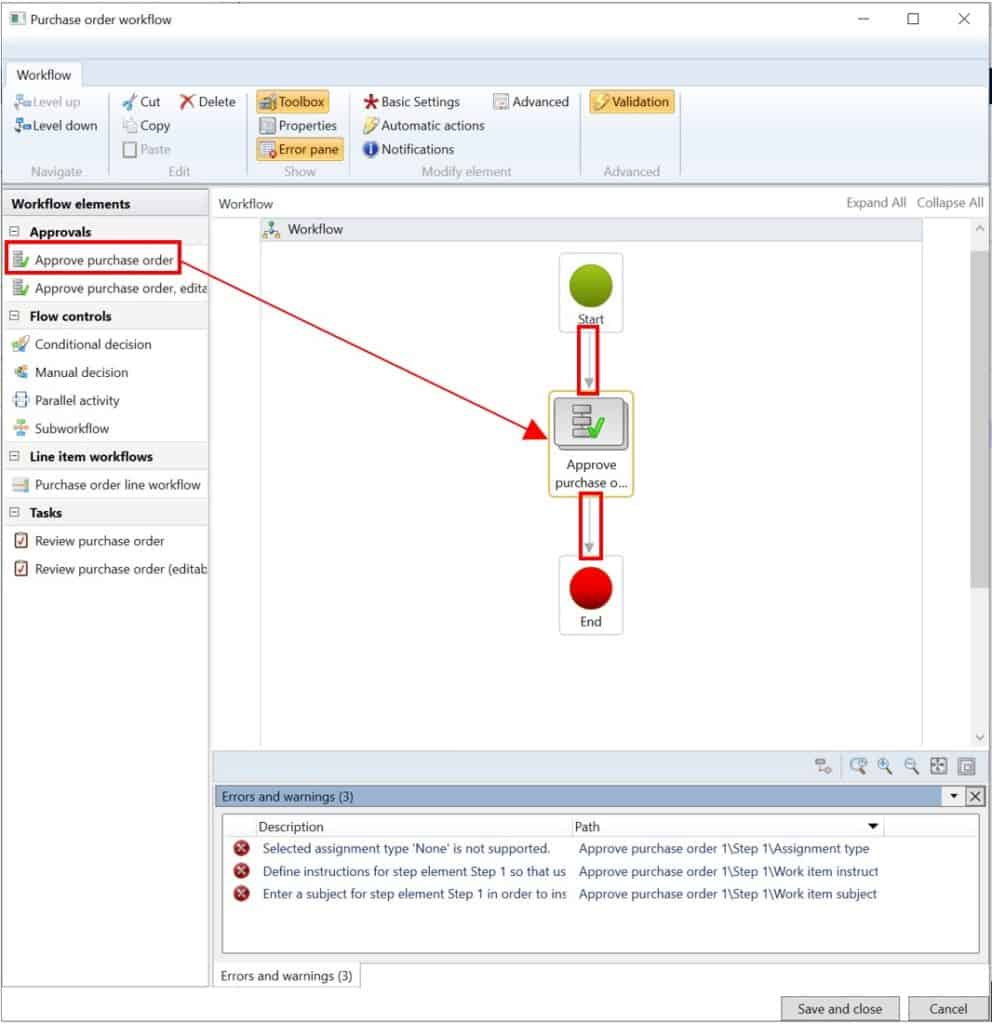
This will open the purchase order workflow graphical editor. First drag the “Approved purchase order” workflow element over on the workflow canvas. Next connect the “Start” node (the green circle) to the approval node and connect the approval node to the “End” node (the red circle). Once you do this you should see a few errors in the “Errors and warning section” go away.
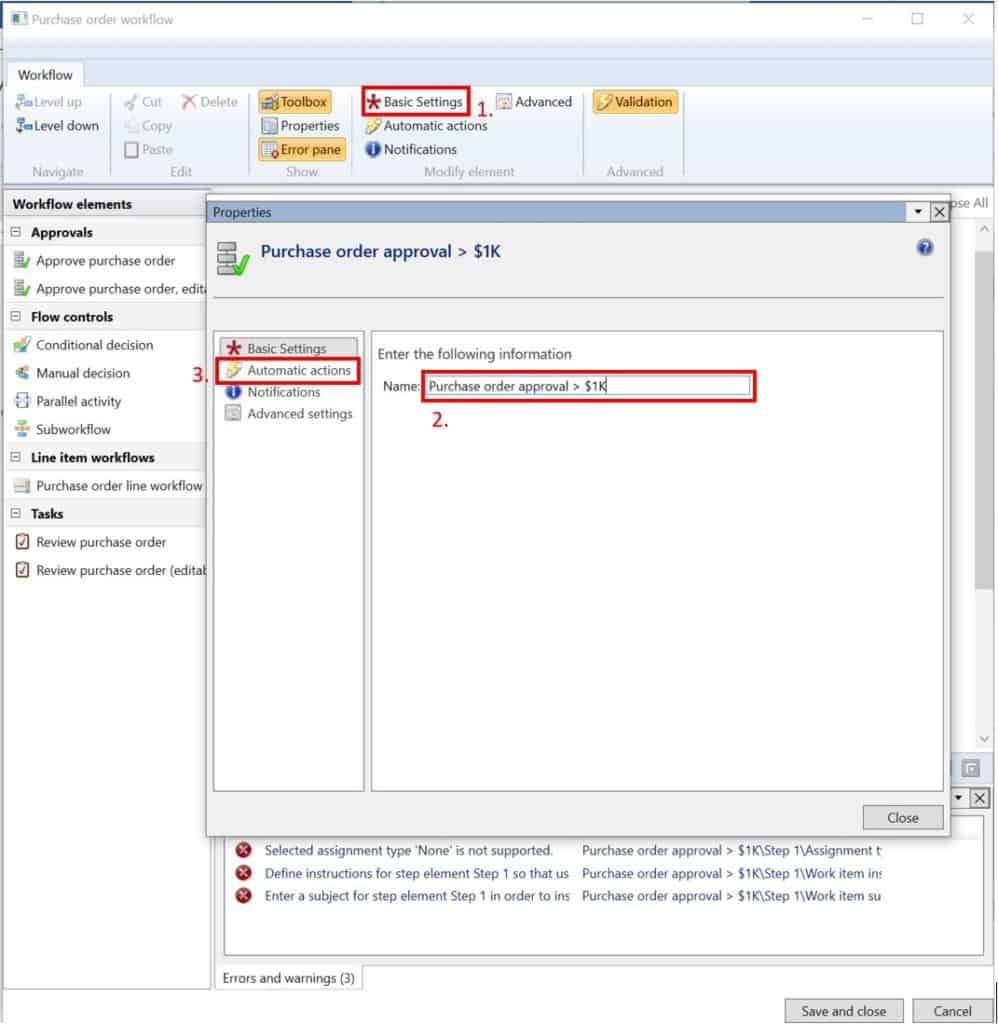
Next click on the “Approve purchase order” node and click “Basic settings” in the ribbon at the top. Next give the approval node a meaningful title so that someone looking at your workflow, who does not know the intricacies of the setup, would still know how the overall workflow is supposed to function. Then click the “Automatic actions” property.
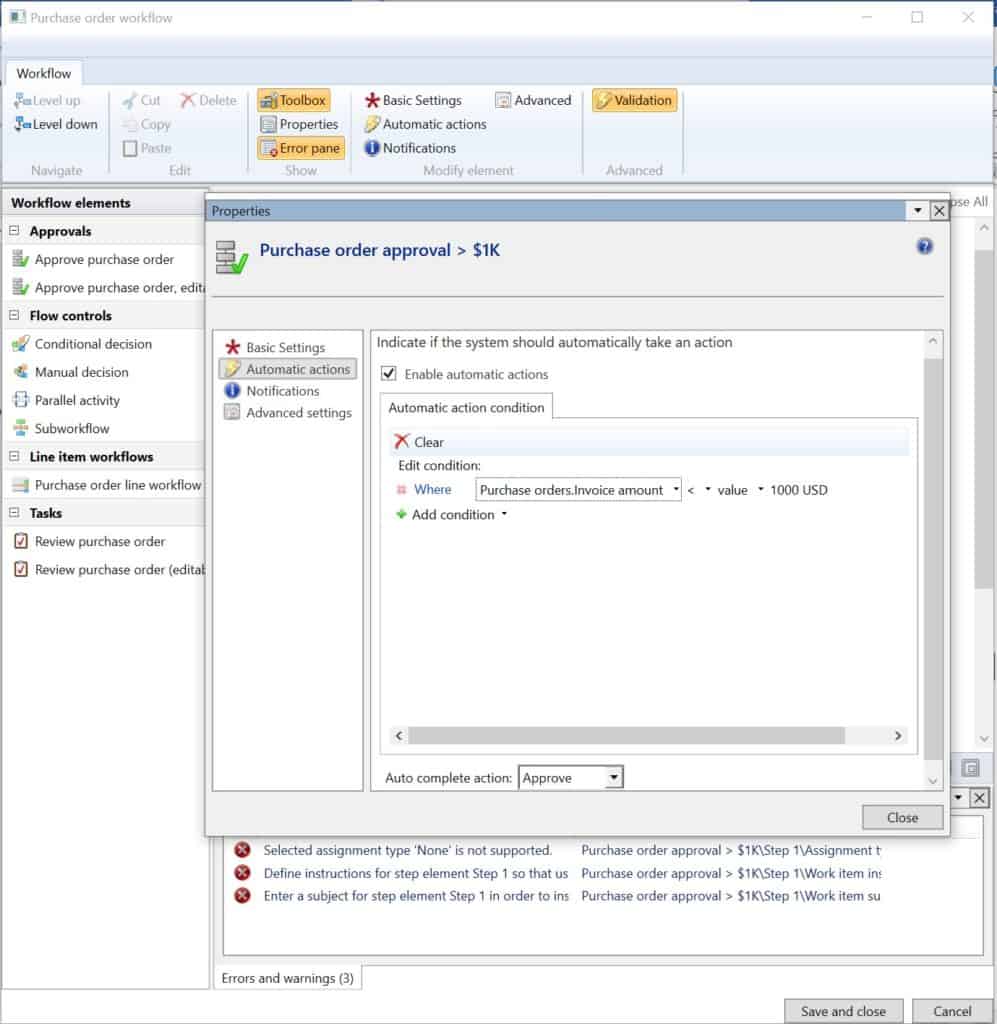
Next click the “Enable automatic actions” checkbox. This will enable us to set the conditions for which the system will automatically approve the order. Click the “Add conditions” button and click the dropdown to select the field we will use in the condition. Select the “Purchase orders.Invoice amount” field. Then select the “less than” operator (<) and set the value to “1000”. Now at the bottom set the “Auto complete action” to “Approve”.
Now double click on the “Approve purchase order” workflow element. Now we can set the details of the approval step. Click on the “Step 1” approval node and click the “Basic settings” button.
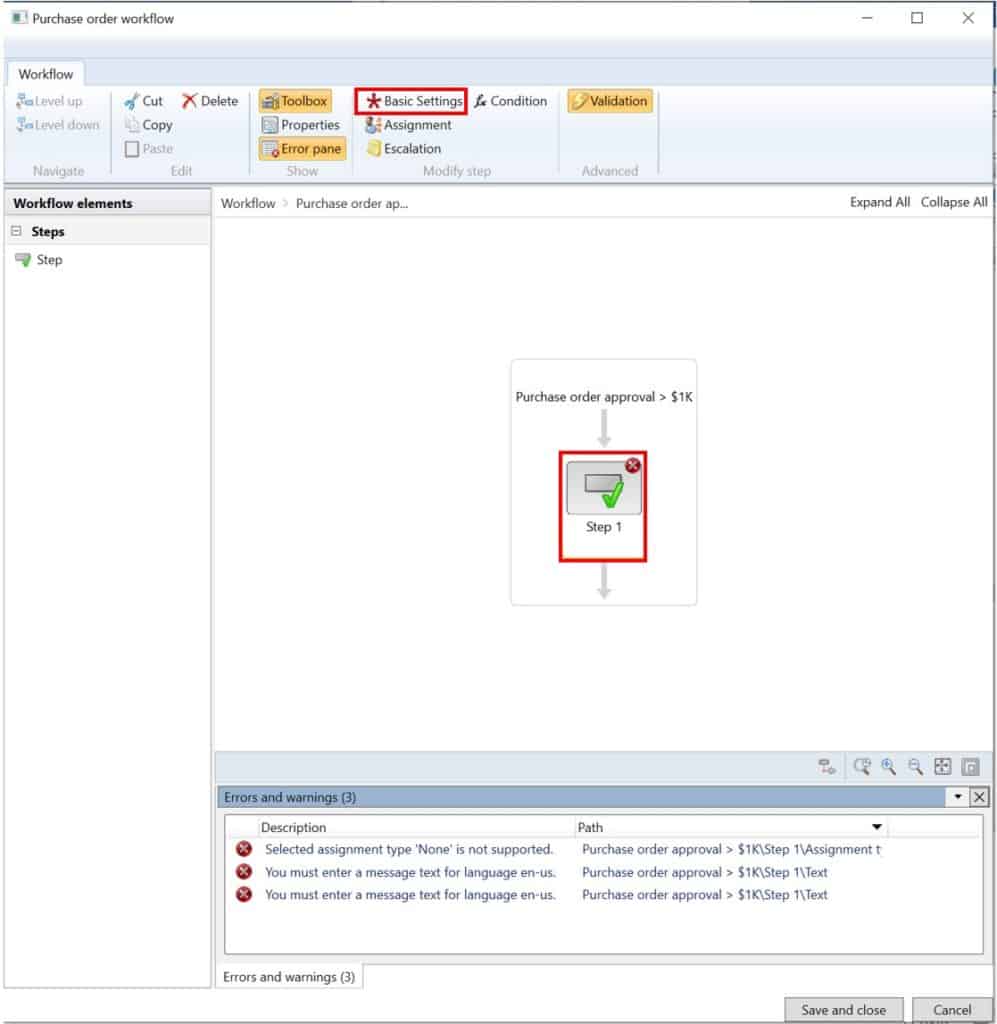
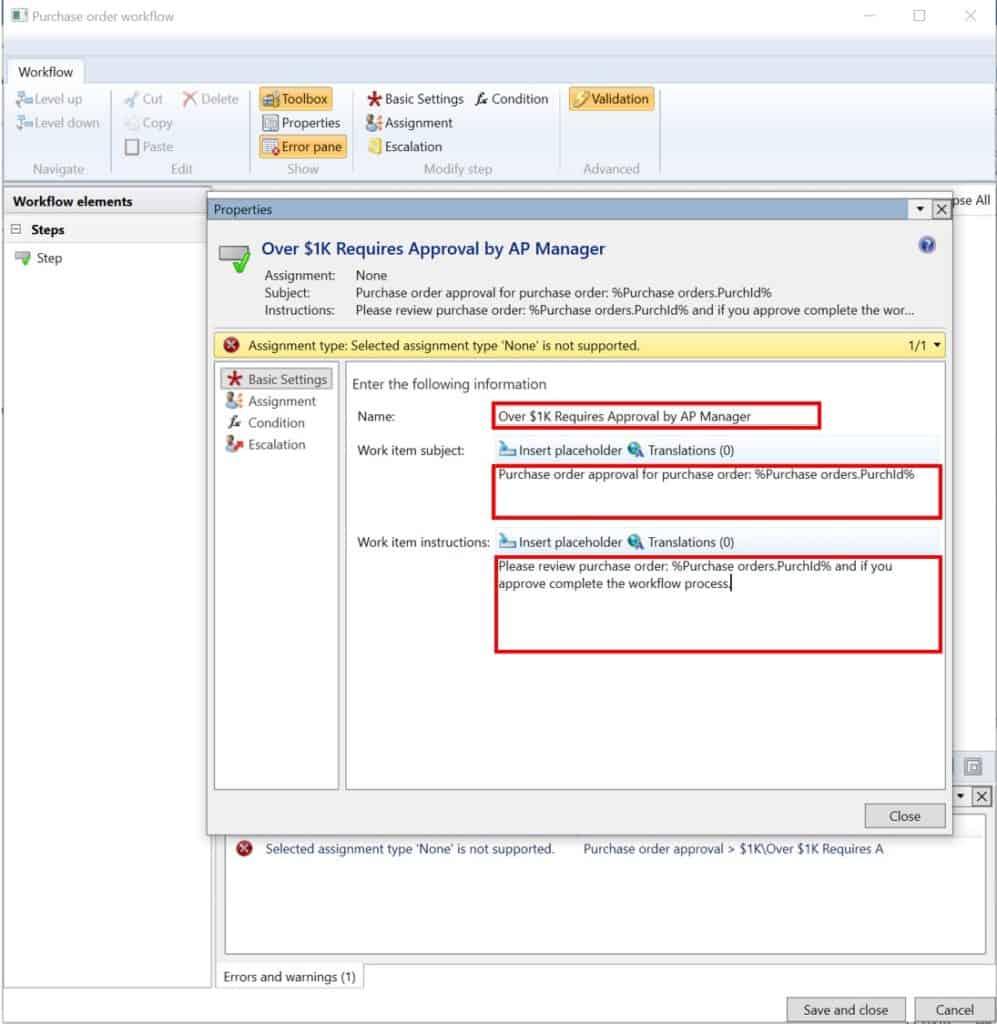
The first thing we need to do is name the approval node. Just give a descriptive name so that someone looking at it would know what it does. In the work item subject and work item instruction fields you can put in text that describes instructions for this workflow approval. You can also use the “Insert placeholder” button to insert variables to make the instructions specific to each order being reviewed for approval.
Note: These fields will be displayed to the user when they go to approve the workflow.
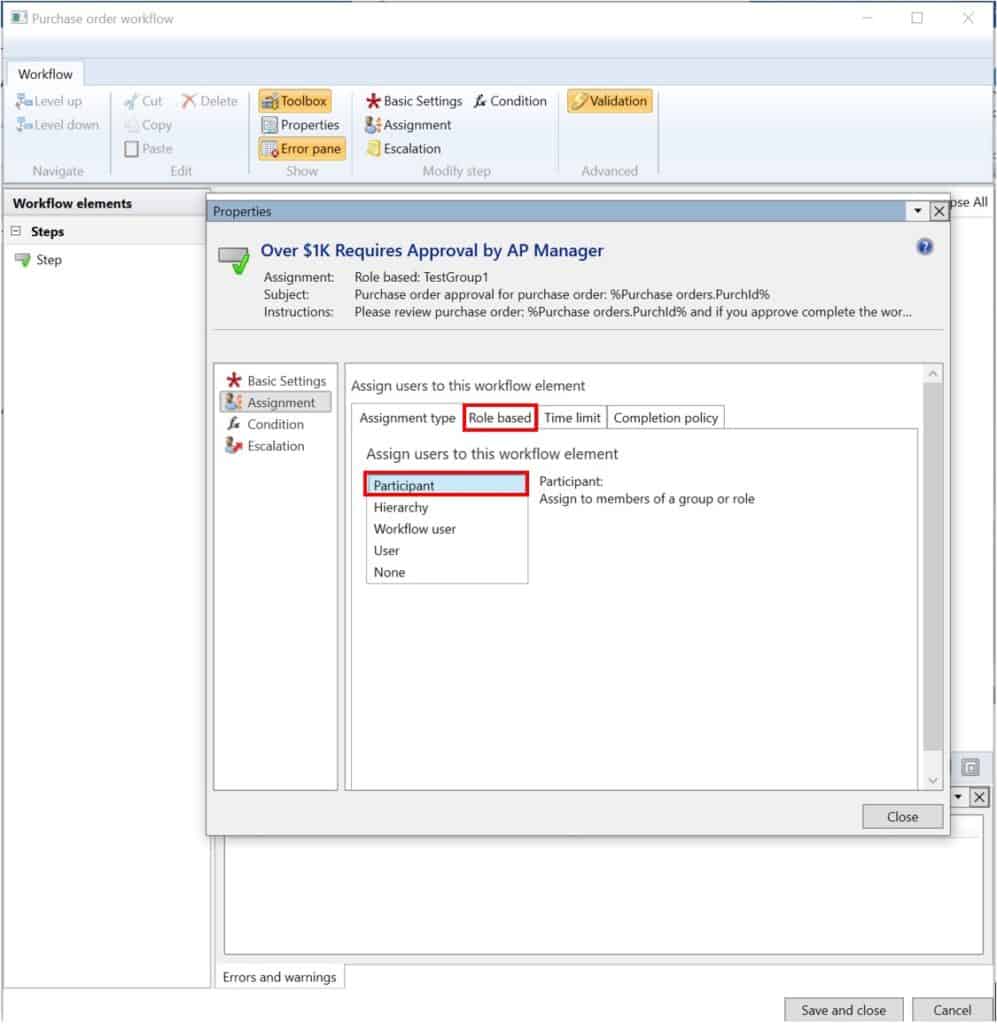
Next click the “Assignment” button. This property determines who will receive the opportunity to approve the purchase order. So here is where we will assign this to a user group that contains the two AP Managers. For more information on user group setup, see this post. In the “Assignment type” type select “Participant”. Click the “Role based” tab.
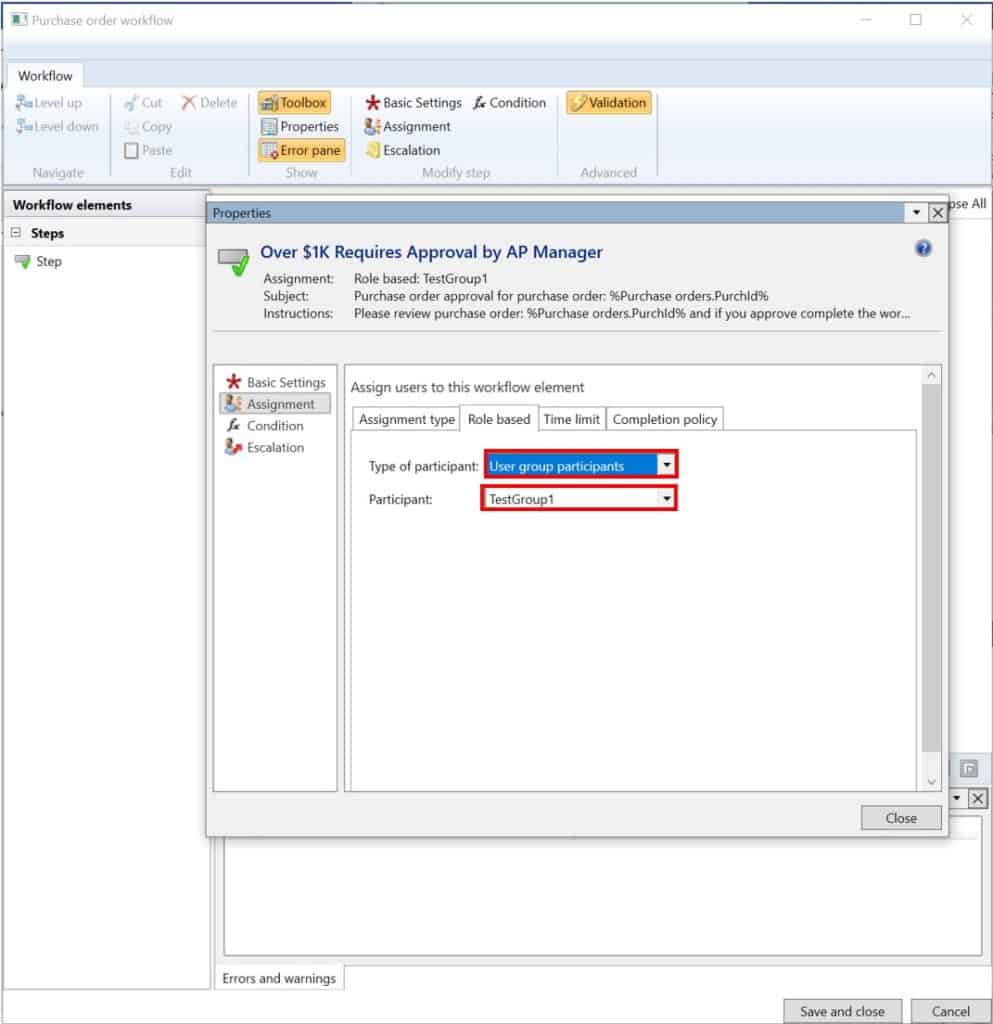
In the “Type of participant” field select “User group participants”. Then in the “Participant” field select the user group that contains the user or users that should approve the purchase order.
Next click the “Completion policy” tab. Here you can define at which point the workflow approval is considered complete. In this example I want the purchase order to be approved if any one of the Accounts Payable Managers approves the purchase order so I will select “Single approver”.

Next click the “Condition” property. Here you can specify conditions for when this specific approval step is run. In this case we want this step to always run so we will leave it set to “Always run this step”. Click the “Close” button.

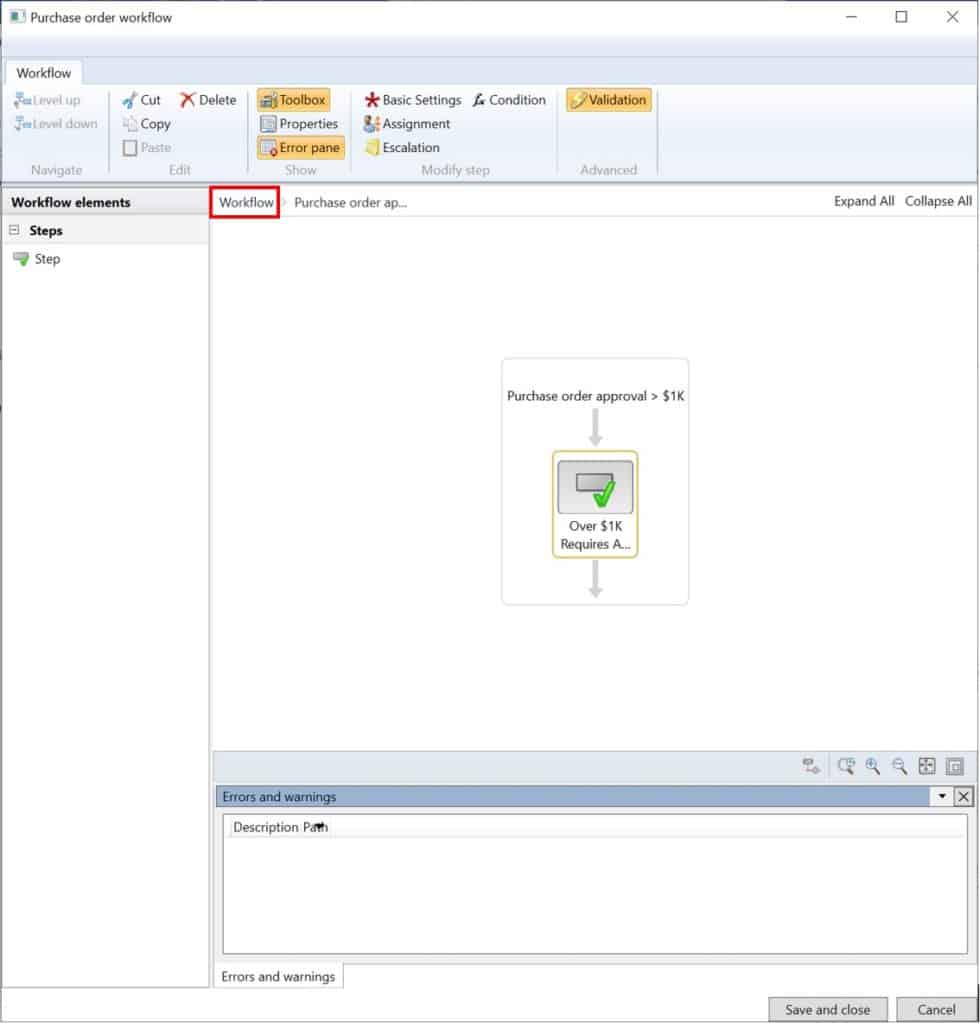
Now navigate back to the main workflow canvas by clicking “Workflow” text in breadcrumb trail.
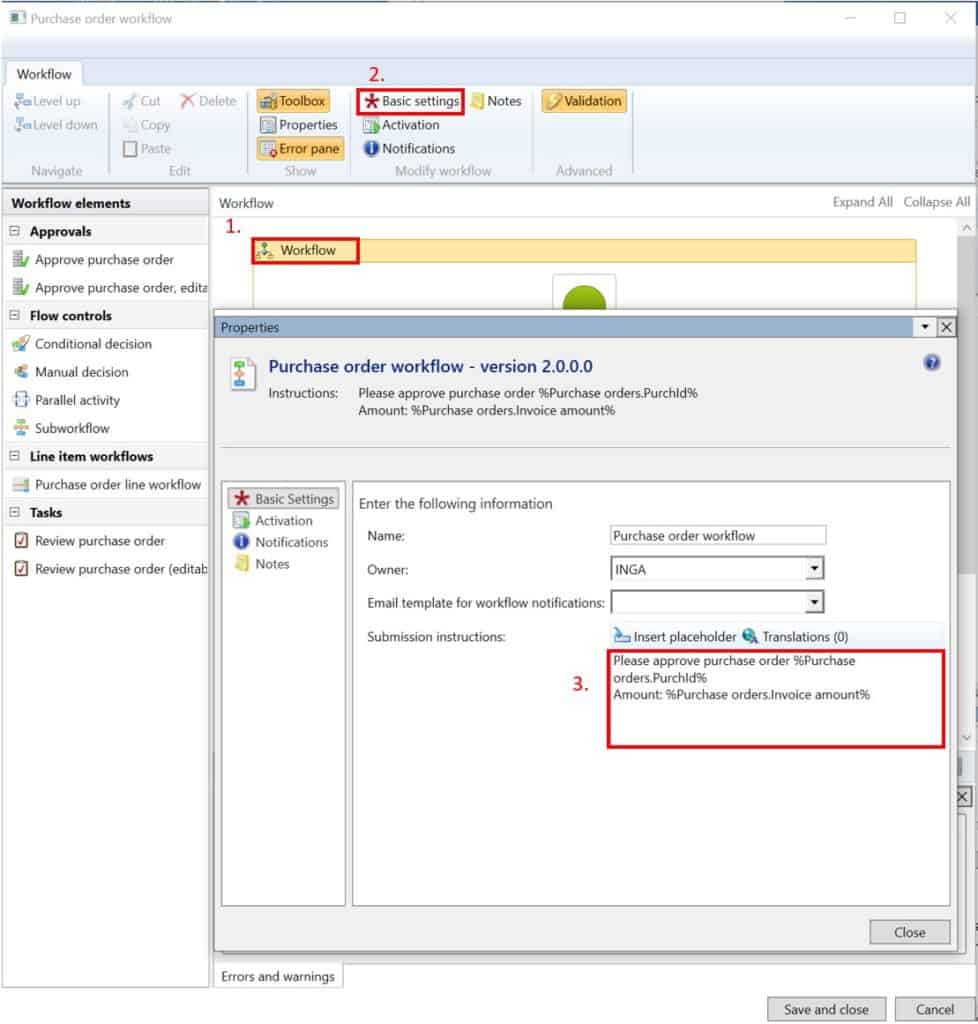
Now click on the “Workflow” icon surounding the canvas and click “Basic settings”. In the submission instructions you can place text and variables that the user will see when they submit the purchase order to workflow. Here again you can select whatever variables you want that would give the submiting user the information they need before submiting the workflow. Optionally you can click the “Activation” property and set criteria for running the workflow. For example there may be certain groups of vendors that should not go through the workflow process and others that should.
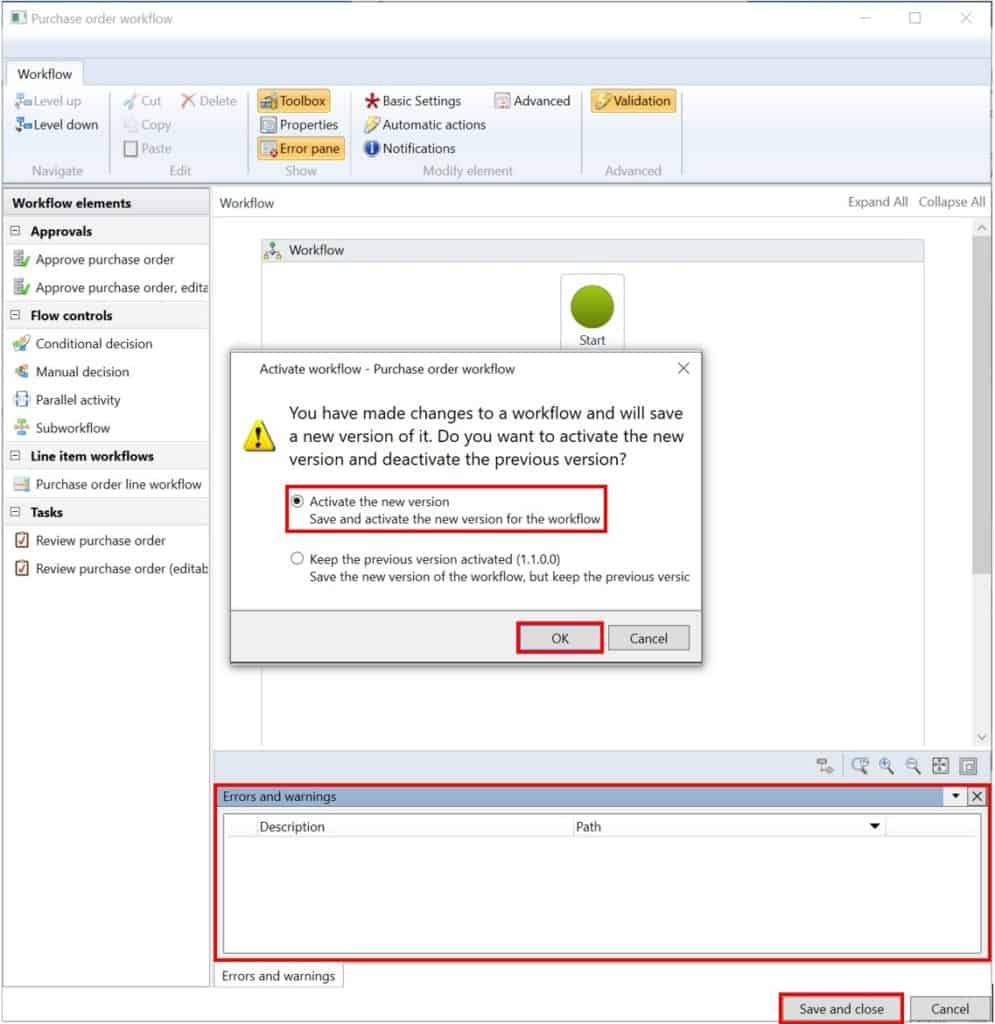
Now you will notice in the “Errors and warnings” section that we have eliminated all the errors, so we are ready to activate the workflow. To do this click the “Save and close” button. On the pop up make sure you select the “Activate new version” option and click “Ok”.
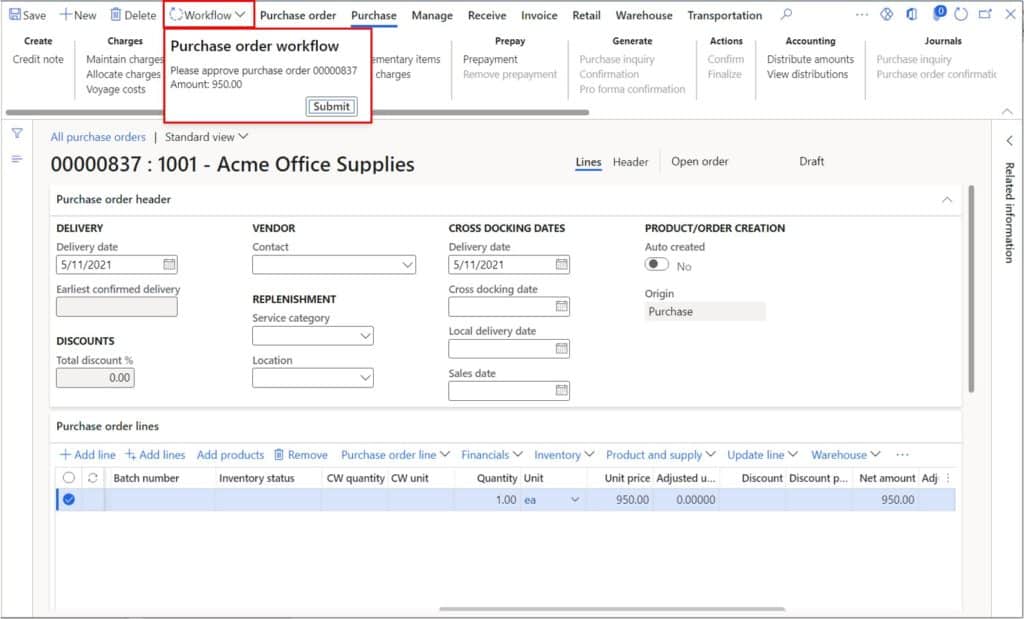
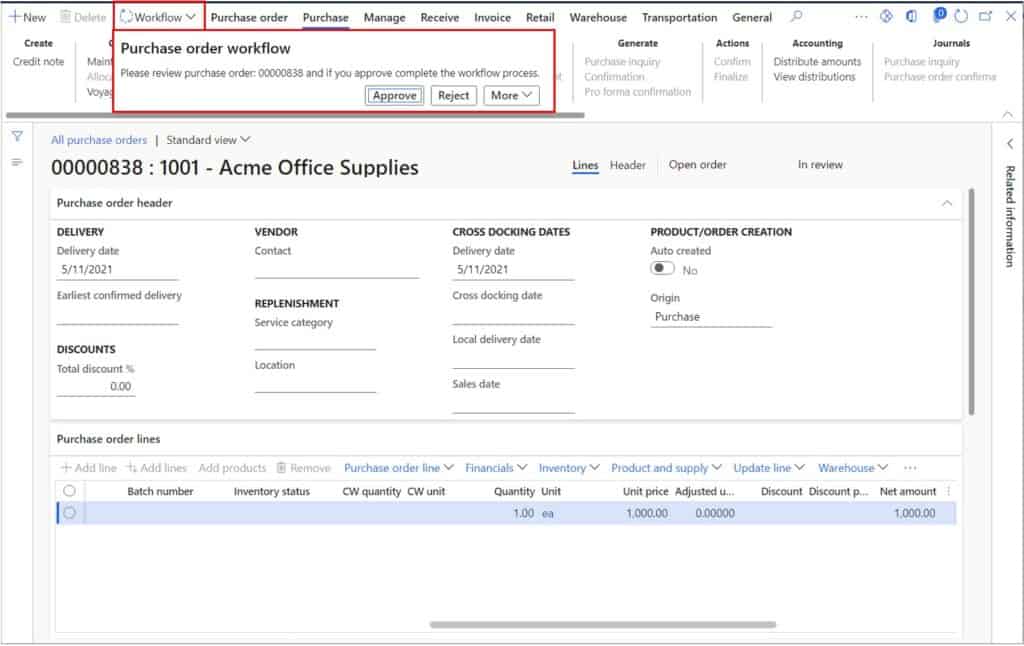
Now let’s go create a purchase order for less that $1,000 and one for more than that and see if our workflow is working properly. After I create the purchase order, I will click the “Workflow” button and submit the purchase order to workflow.
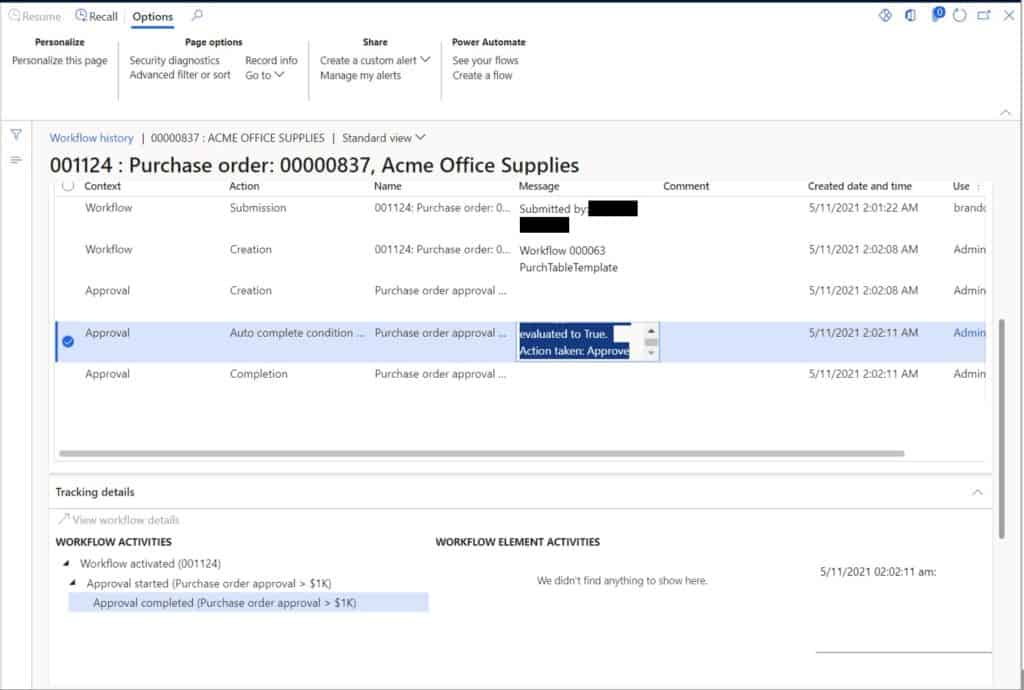
If we look at the history, we can see it triggered the auto-complete condition and my purchase order has been set to “Approved”.
Now if I increase the amount of the purchase order to $1,000 dollars and re-submit the purchase order to workflow, we can see that the approval goes to the user defined in the user group we selected during the workflow setup. Once the purchase order is approved the purchase order review status will update to “Approved” and the purchase order confirmation can be posted.
How to See the Progress of a Workflow
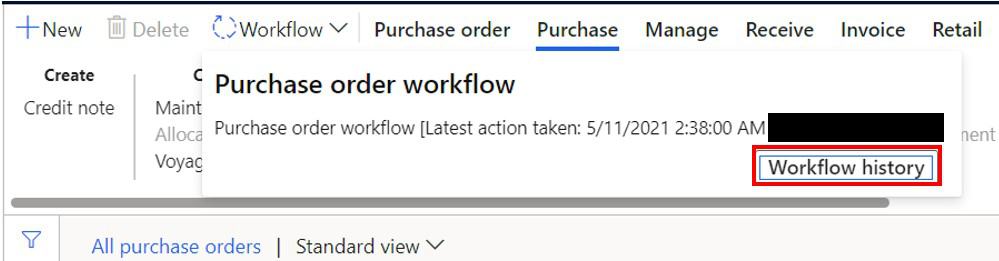
If you need to see the progress or the execution steps of the workflow you can see this by clicking the “Workflow” button after the workflow has executed and click “Workflow history”.
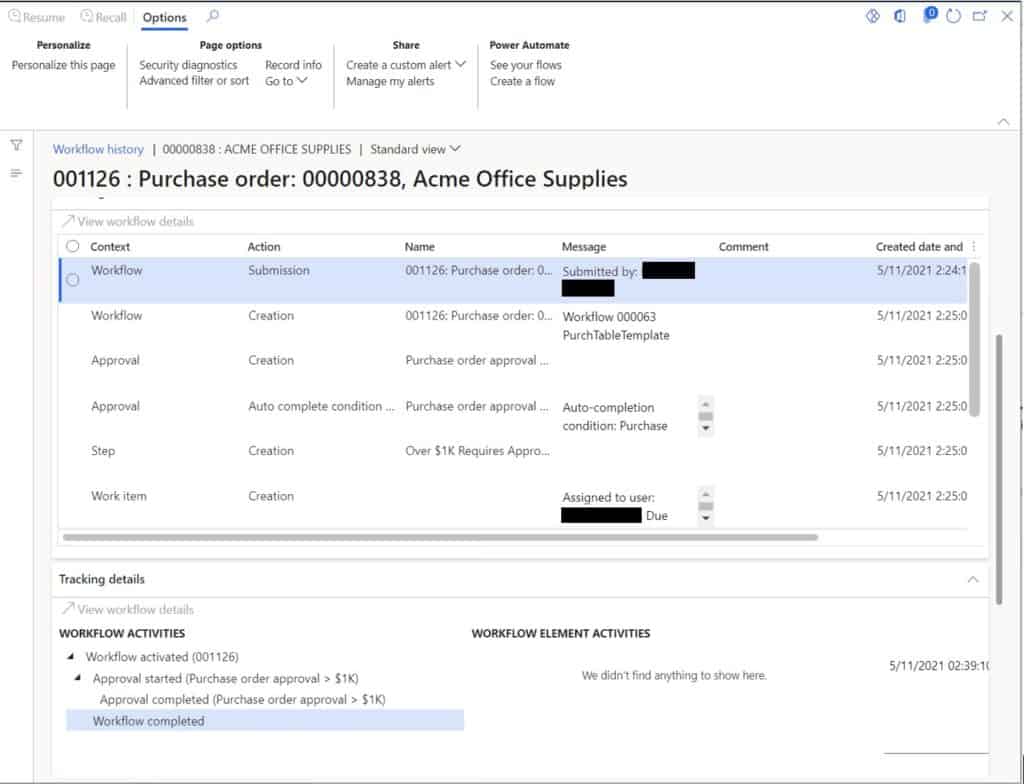
Here we can see each step in the workflow process and if there are multiple approval steps, we can see who approved the workflow at each step in the process. This form is also useful when testing workflows to see how different conditions were evaluated by the system and see where you might need to make tweaks to your logic.
Takeaways
Workflows are a very powerful tool in Dynamics 365 Finance and Operations. It allows functional power users to employ logic to get the required approval from the right people for many different scenarios. If you have a solid foundation on the basics of workflow setup and all the tools available to you, creating a more complex workflow should be relatively easy. The example in this article was a very simple example and there are so many more things that you can do with workflows. I would encourage you to explore, test, and play to find out how you can put workflows to work in your implementation.