
The arrival overview is a workbench that shows the overview of the expected incoming deliveries along with estimated details of the items e.g., item quantities, item volume and item weight etc. It can help the warehouse receiver to have an overview of expected inbound deliveries and the items to be received on a specific day.
In this article, we shall see how the warehouse receiver/Inbound supervisor can process the expected deliveries. Here is the list of incoming orders that a warehouse receiver can see on arrival overview page:
- Purchase orders
- Production orders
- Transfer orders
- Quarantine orders
- Consignment replenishment orders
- Other receipt types
- Return orders
Arrival Overview Setup
The warehouse receiving clerk needs to see what is expected to be received in the warehouse today. The arrival overview page lists the receipt orders and lines that are expected to be received. So, when a delivery arrives at the inbound area of the warehouse, the receiver can start the arrival and post the Item arrival journal to register the items at the default receiving location of the warehouse.
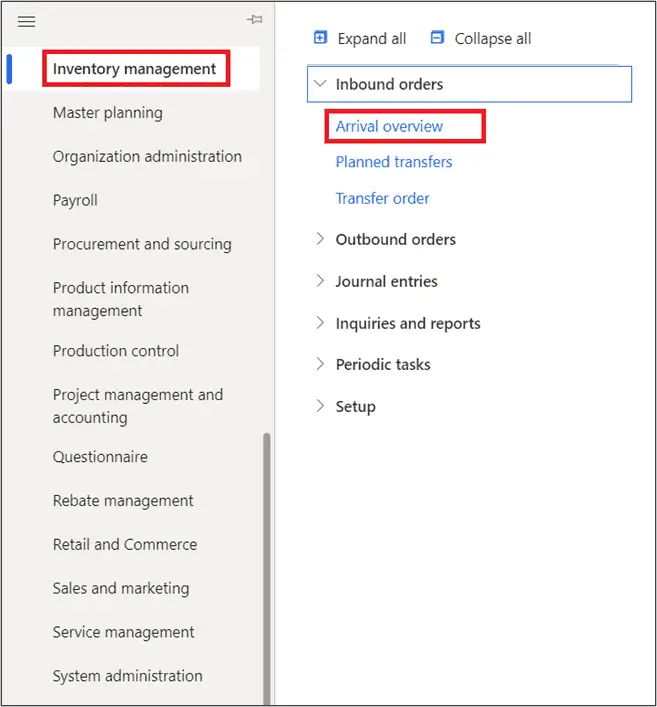
To open the arrival overview form, navigate to: Inventory management > Inbound orders > Arrival overview.
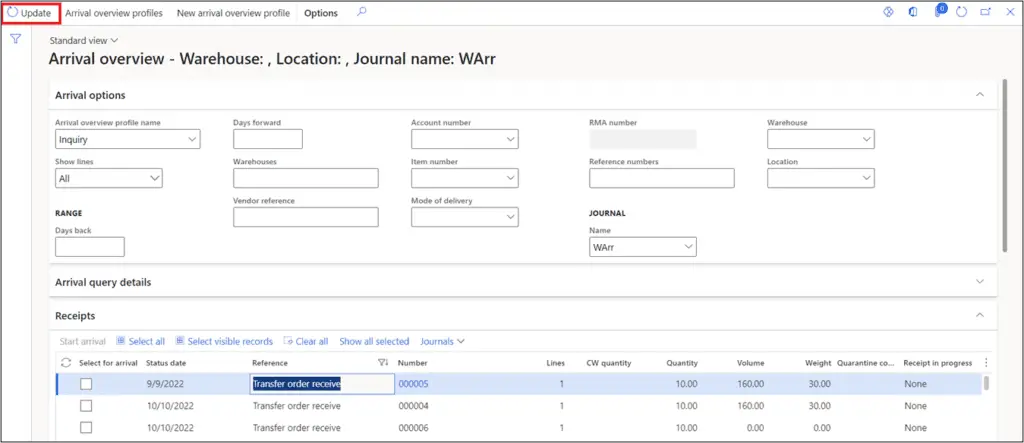
On the arrival overview page, click Update to show the list of orders as per the selected arrival profile. The arrival overview lists down all the incoming orders for the type(s) selected in the arrival overview profile.
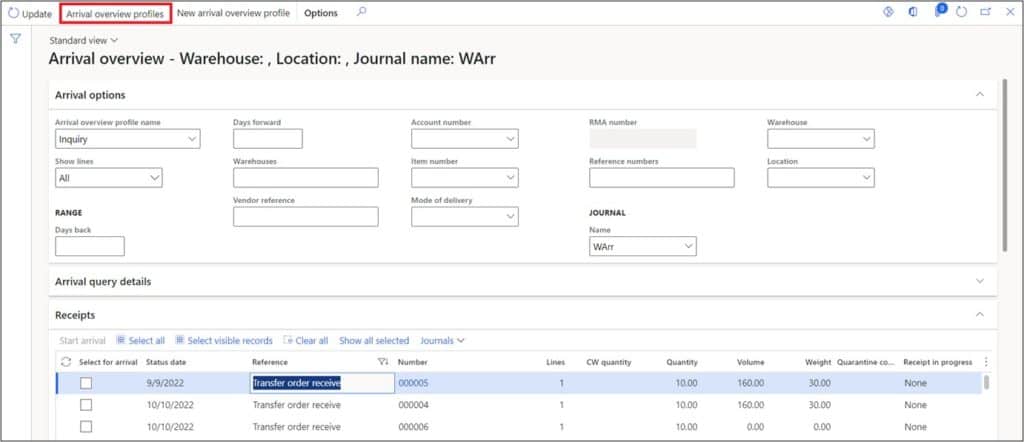
The arrival profile is useful to default the selection criteria so the receiver quickly gets the list of incoming deliveries. To setup an arrival overview profile, click on Arrival overview profile on the arrival overview page.
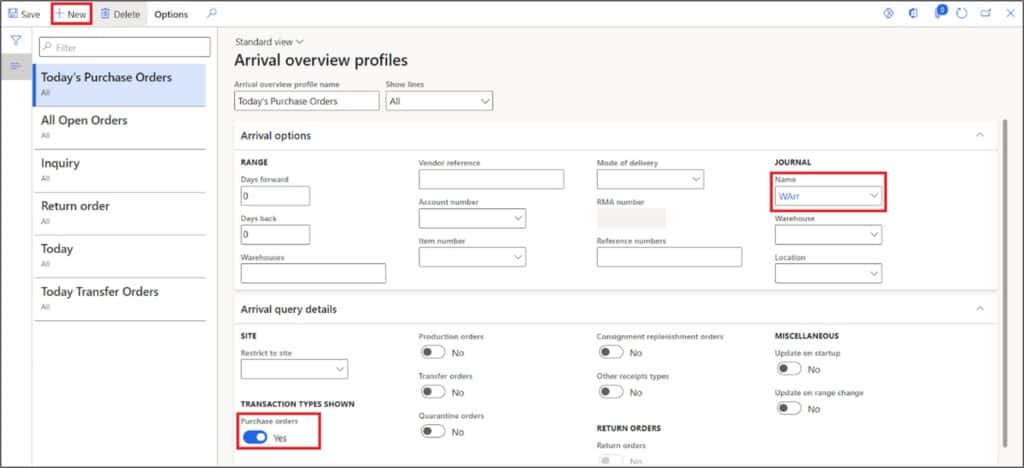
Click on the “New” button on the Arrival overview profiles page.
Enter the profile name, select the transaction type to show for the profile and select the default item arrival journal name to which the order lines will be processed on starting the arrival of items.
On the arrival overview profile, the date range, warehouse, vendor, mode of delivery and order types can be selected which will filter the orders on the arrival overview page based on these selections. Let us set up the profile to see the today’s purchase orders. Enter the profile name “Today’s Purchase Orders”. Select the “Purchase Order” toggle in the Transaction types shown below. Select the default journal name i.e. warehouse arrival journal.
After setting up the arrival overview profile, create a purchase order. For more on creating a purchase order see this post.

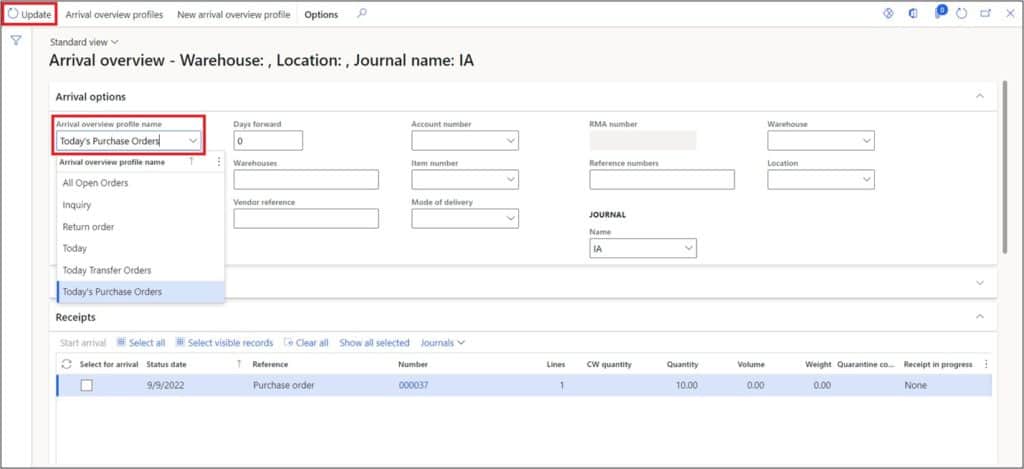
After creating a purchase order, on the arrival overview page, select the “Today’s Purchase orders” profile and click update. The purchase order we just created will appear in the “Receipts” tab and the item from that purchase order will appear in the Lines tab.
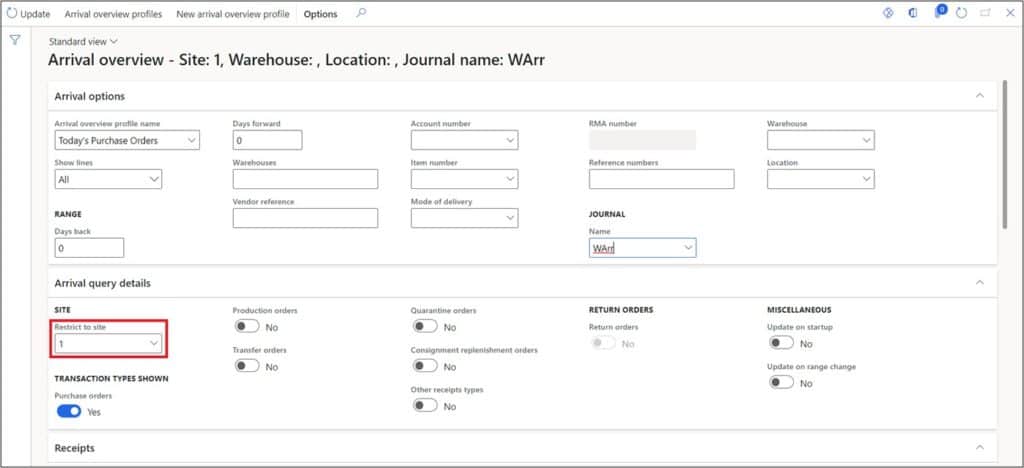
The warehouse receiver can also change the criteria even after selecting the Arrival overview profile. For instance, if the warehouse receiver wants to further apply the Site as criteria, the user can select the Site and click “Update”. The arrival overview page will show the Purchase Orders for the selected site only.
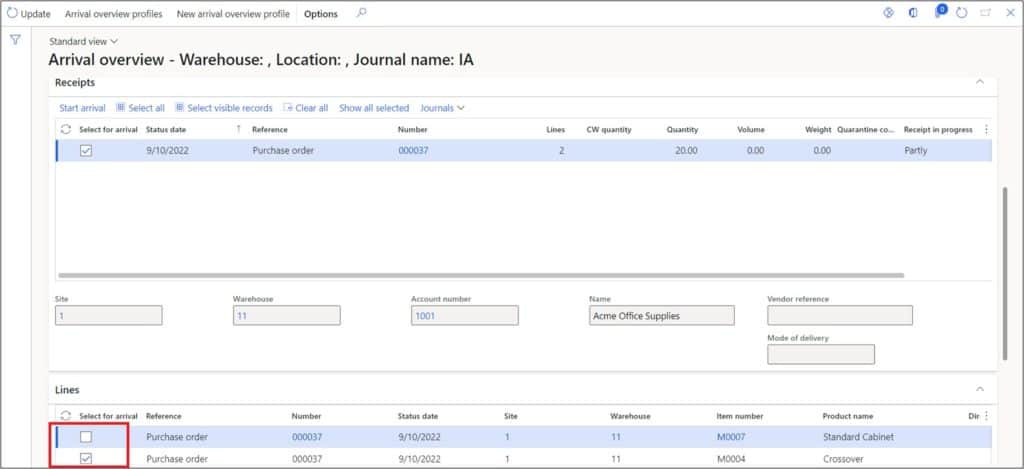
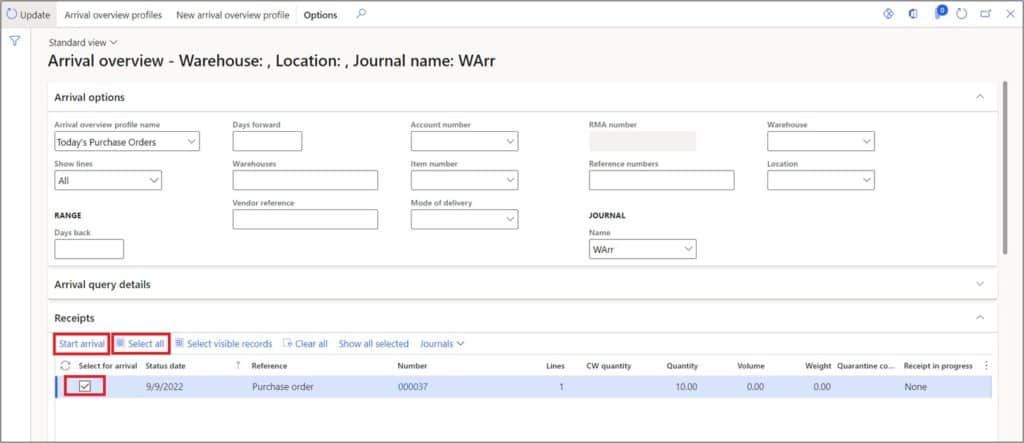
Let us assume that the delivery of the purchase order has arrived and the warehouse receiver has to process the materials. Click select all, select visible or select mark the checkbox. It will select all the lines, if you only want to select one or specific lines, unselect the lines not needed for the receiving process.
After selecting the received item, click “Start arrival”. The arrival overview will create the item arrival journal automatically.
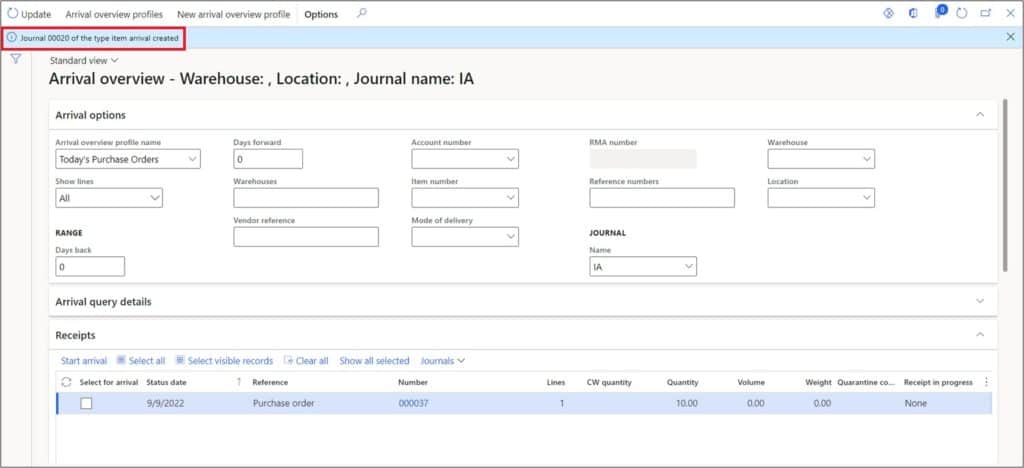
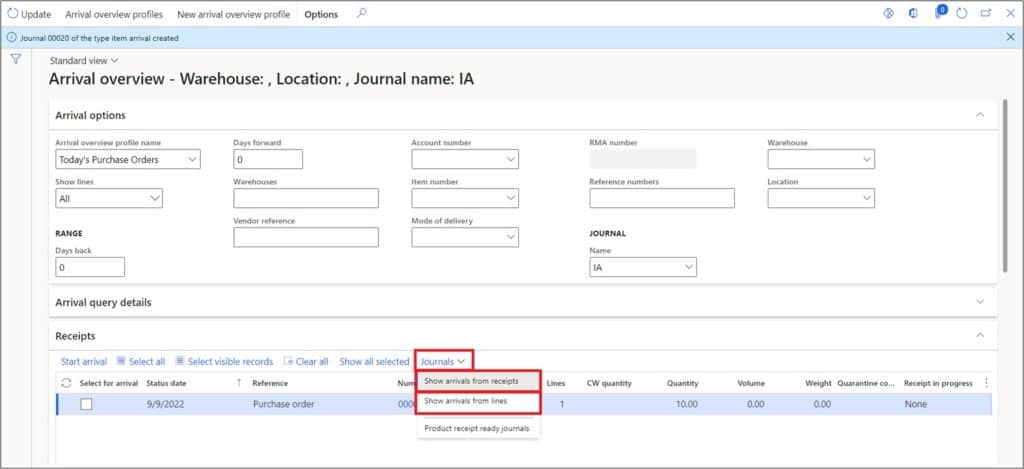
The Item arrival journal number will appear in the success message. Now click on “Journal”, “Show arrivals from” receipts or “Show arrivals from lines”.
Here is what is the difference between two.
- Show arrivals from receipts: It will show the item arrival journal created with reference to the Purchase order header. If there are multiple Item arrival journals posted agains the Purchase order header, it will show the list of all Item arrival journals and receiver can select and post any.
- Show arrivals from lines: It will show the item arrival journal created with reference to the Purchase order lines.
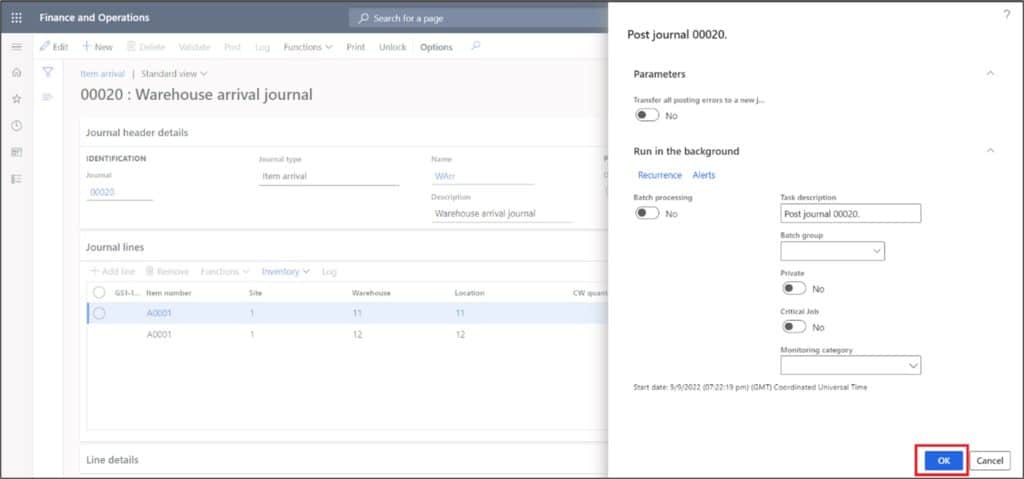
Now click on “Post” to register the items on the default receiving location. By posting, it means the items have been formally received in the warehouse but there is no physical voucher posted yet.
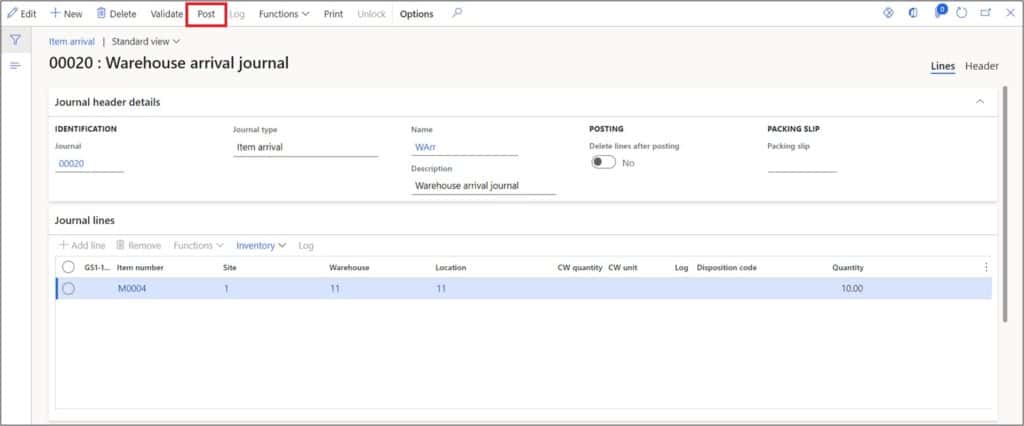
Select the batch processing to run the posting as the background process or click ok to post.
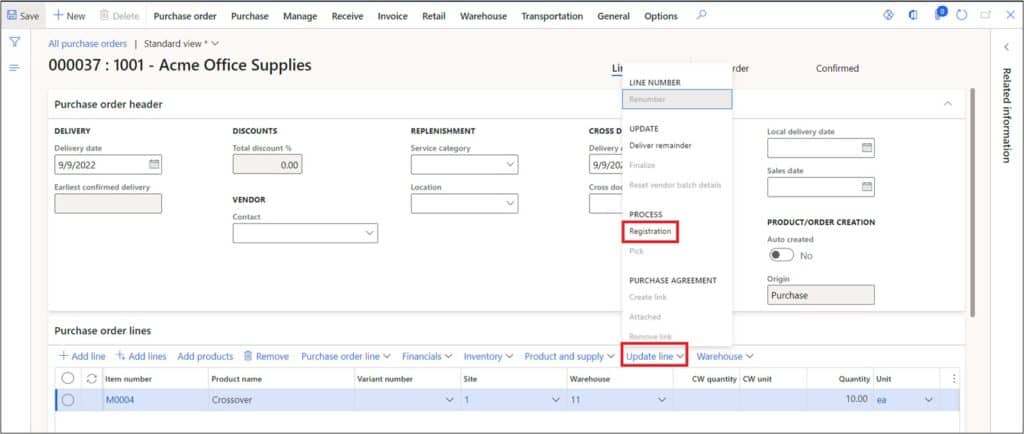
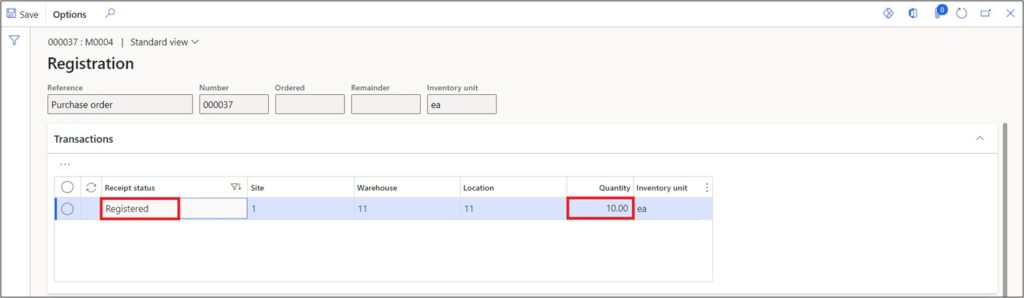
After posting the item arrival journal, navigate to purchase order to see the registered item.
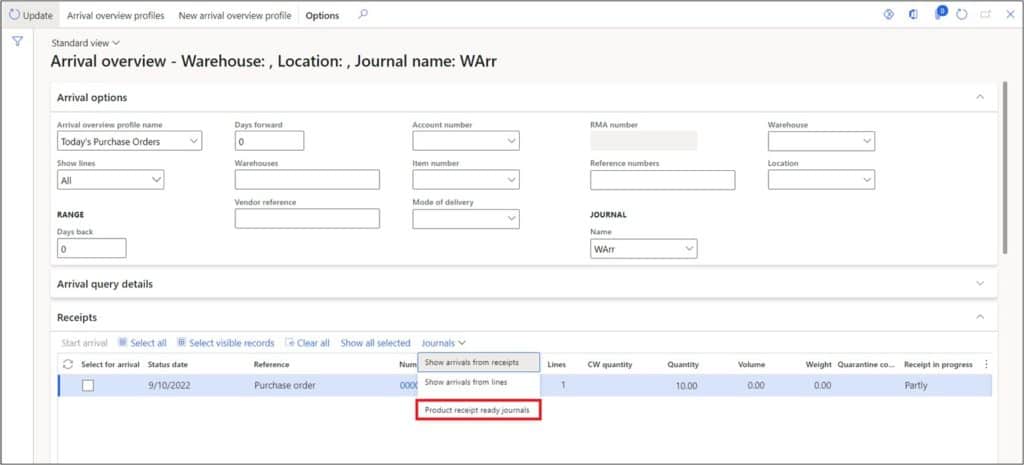
Now let us get back to the Arrival overview page and see how to how to post the product receipt. This allows the warehouse receiver to see the expected inbound deliveries, create the in process record for item arrival, post the item arrival journal and post the product receipt, navigating from only single page.
Since the item arrival journal has been already posted for the selected purchase order, it will show the journals that are ready for product receipt posting (that posts the physical voucher and creates the vendor liability for the received products).
Click on “Journals” then click “Product receipt ready journals”.
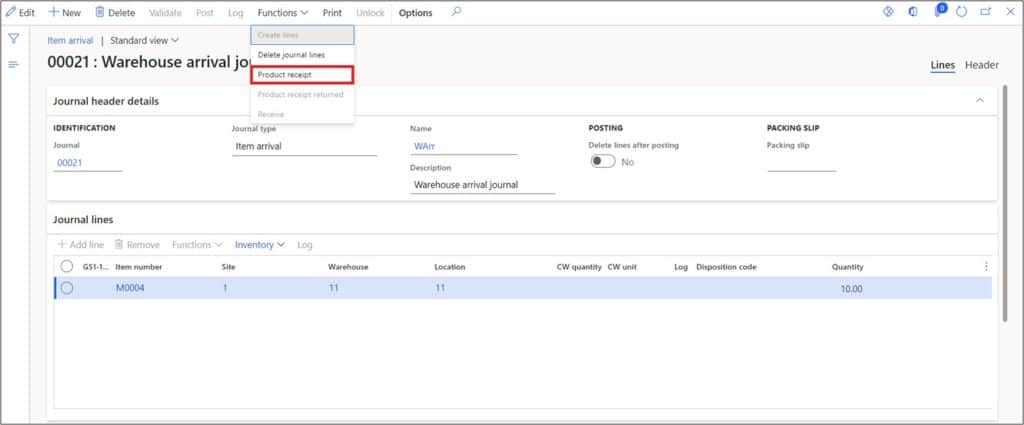
This opens the Item arrival journal that has been already posted. Now click “Functions” and click “Product receipt”.
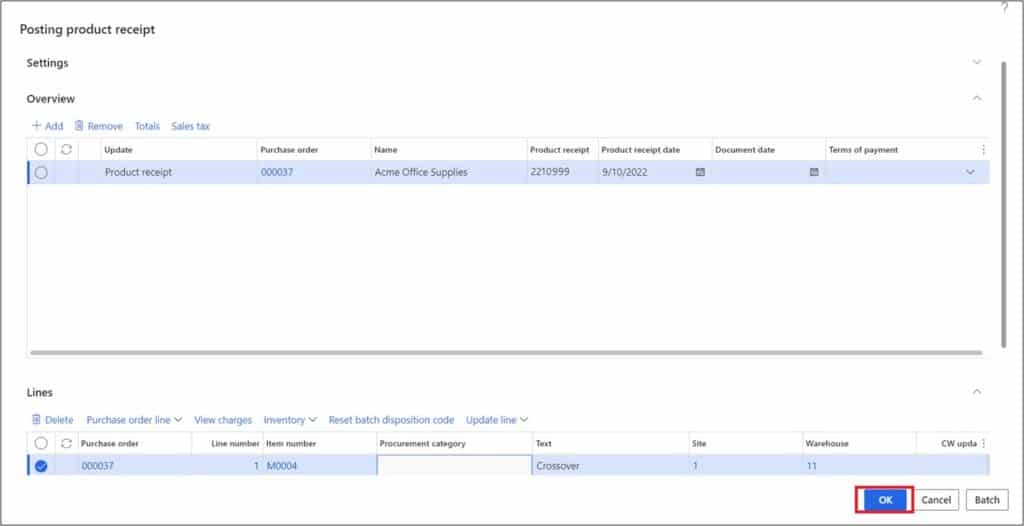
Now enter the product receipt number and click “Ok”.
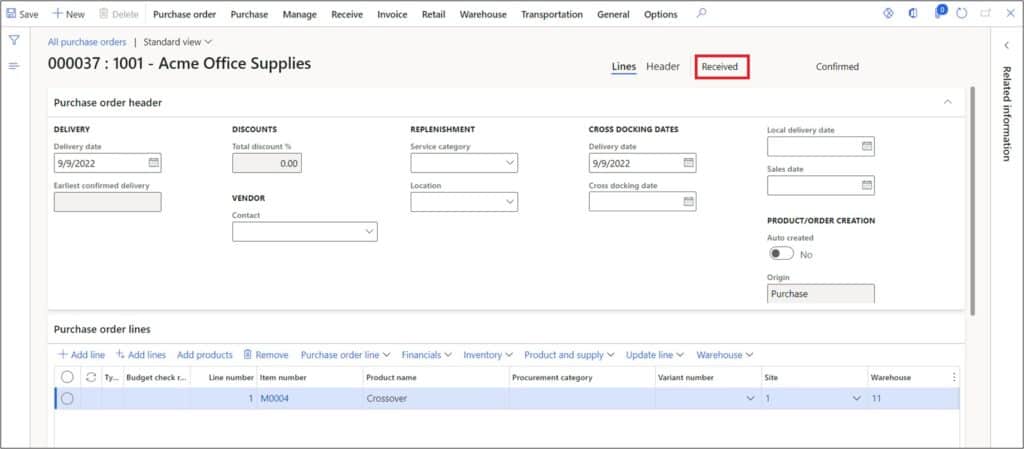
After clicking ok, the Product receipt will be posted, and the purchase order status will change to “Received”.
Takeaways
The arrival overview is page that provides an overview of the expected incoming deliveries so the warehouse receivers can plan their resources accordingly. It allows the warehouse receivers to register the items received without actually posting the product receipt with its associated financial postings. It also provides important details of the items including estimated quantities, volume, and weight.