

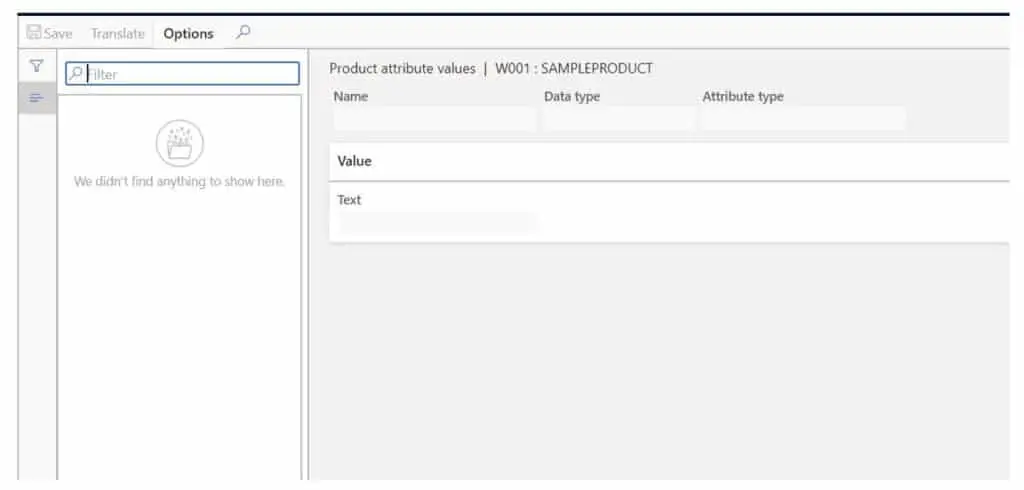
If you have not used product attributes before you may be asking ‘How do I get product attributes to show up on my item in Dynamics 365 Finance and Operations?’ This is a very common issue people have when first try to set up item attributes. They go to the item expecting the attributes to be there and it turns out to be a blank form as shown below. In this article I am going to take you through the setup and show you how to enable product attributes and a couple of tips I have learned along the way.
What Are Product Attributes?
Product attributes are user defined and created attribute fields that use different data types (string, Boolean, date, integer etc.) to describe information related to a product. An example might be tensile strength of bar steel. Product attributes describe attributes at the product level and are not specific to a product variant. I mention this because there is some confusion about this whenever I show this functionality to folks.
Product Attribute Setup
Product attribute values are most commonly viewed from the release products form.
- You can get there by navigating to Product information management > Products > Released products.
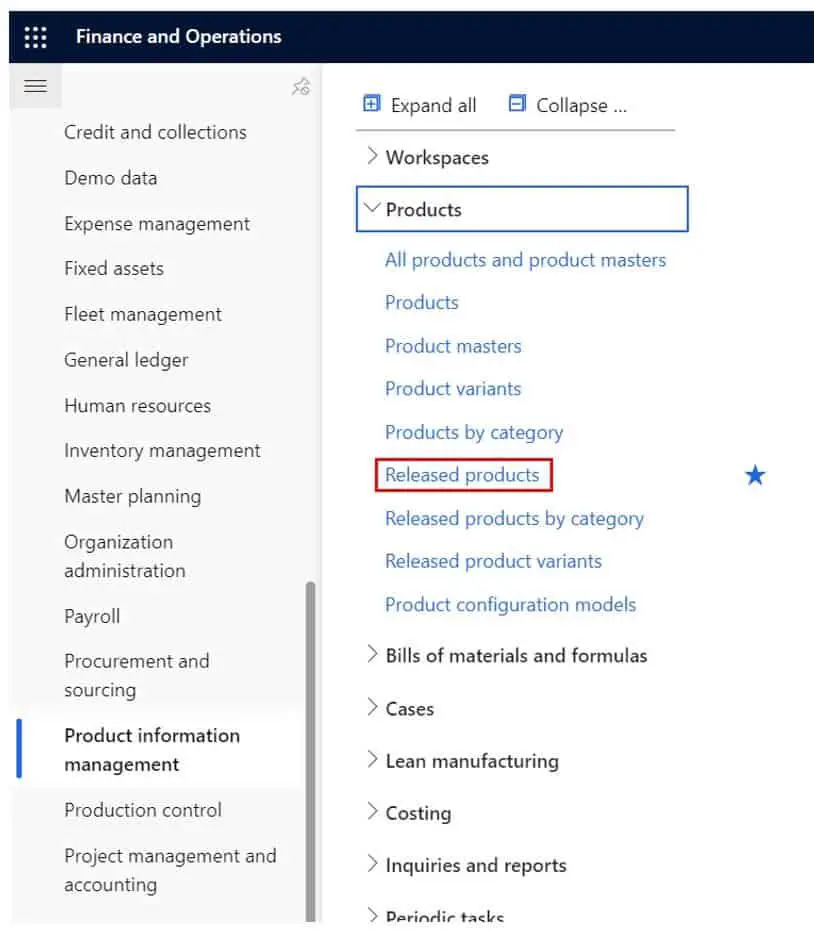
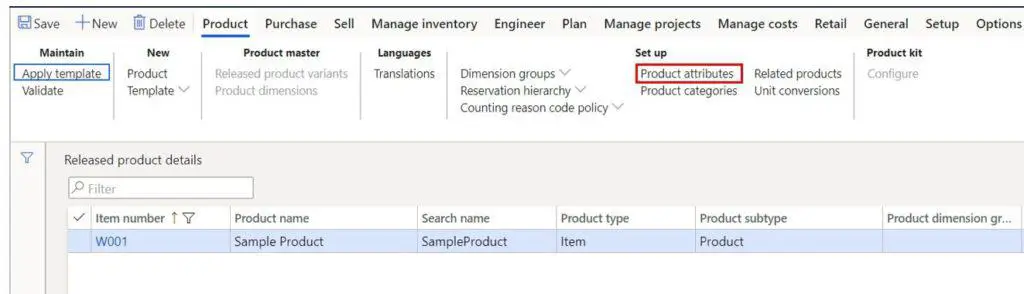
- From here you can click on the “Product attributes” button to view product attributes.
You’ll see that there are no product attributes here yet. Next we will walk through exactly how to get them to show up here.

Attribute Types
The first step is to set up the attribute type. An attribute type is where we define what data type the attribute will have. The available attribute types are listed below.
- Currency
- Date Time
- Decimal
- Integer
- Text
- Boolean
- Reference
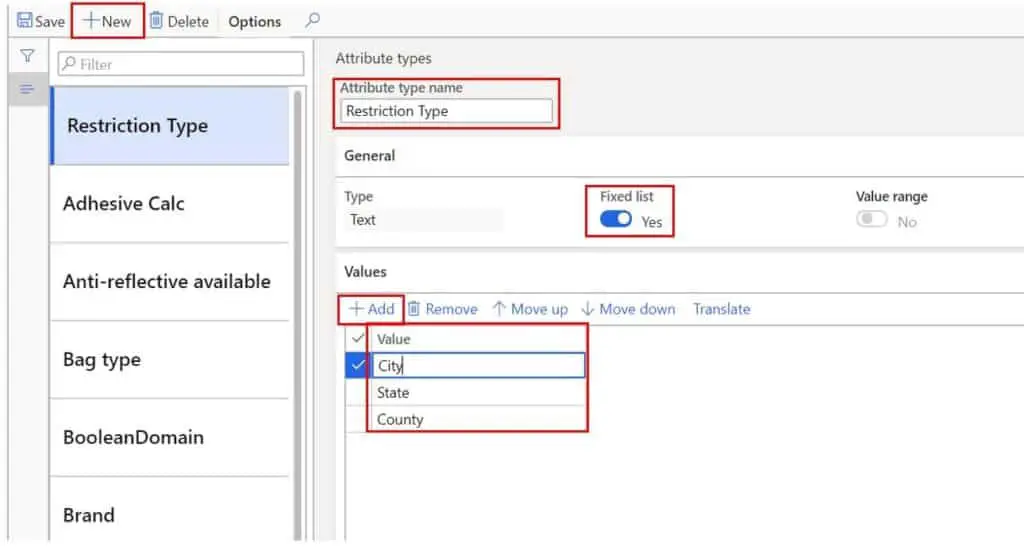
In this example we will create an attribute type with a text data type. We will also enable the “Fixed list” option. This will let us define a set list of available options. This will help with data integrity if you know the acceptable values for the attribute beforehand.
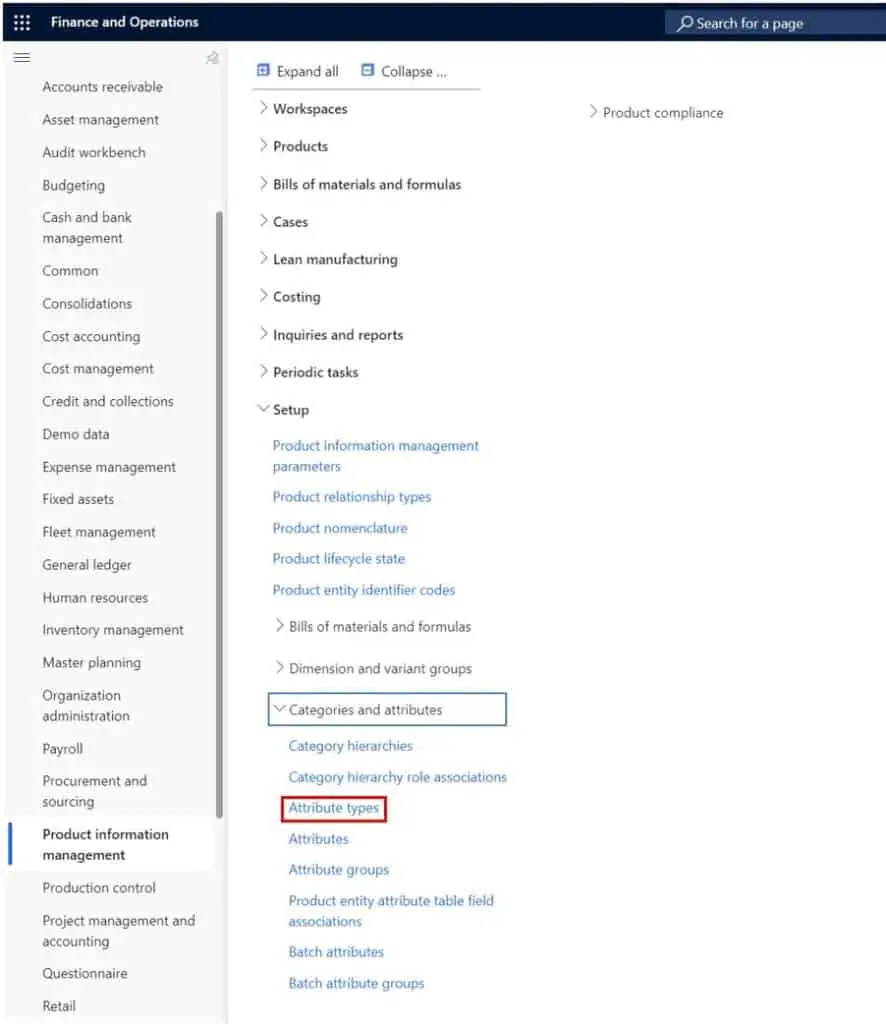
- To create a new attribute type, navigate to Product information management > Setup > Categories and attributes > Attribute types.
- In the attribute types form click the “New” button to create a new attribute type.
- Enter the attribute type name, select the attribute type, and in this case, we will enable the “Fixed list” option enter our drop down values.
- Click the “Save” button and close the form.
Note: In this example I am creating an attribute type specifically for the attribute that I will create in the next step. However, you could create a single attribute type that could be used for several different attributes. For example, if you had four “Yes/No” (Boolean) attributes it would not be necessary to create four different attribute types. You would only need to create one Boolean attribute type and link it to the four attributes. I think this will become clear in the next section.
Attributes
Next we need to create the attribute record and link it to the attribute type we just created in the previous section.
- To do this navigate to Product information management > Setup > Categories and attributes > Attributes.
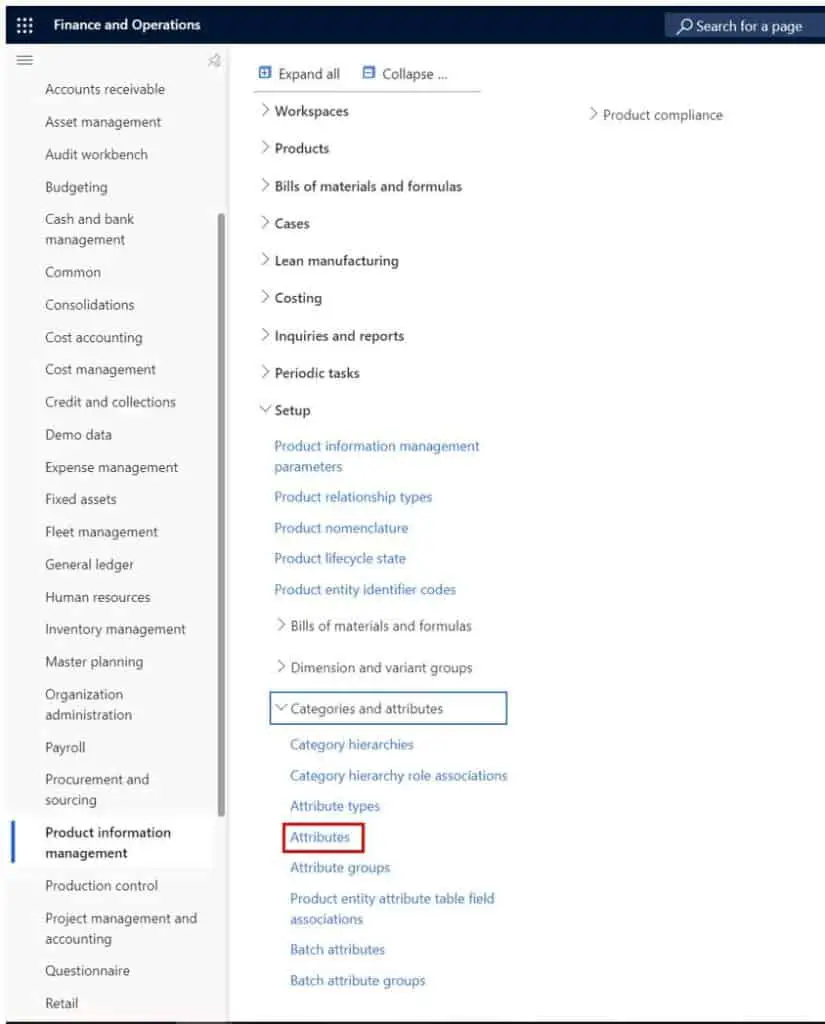
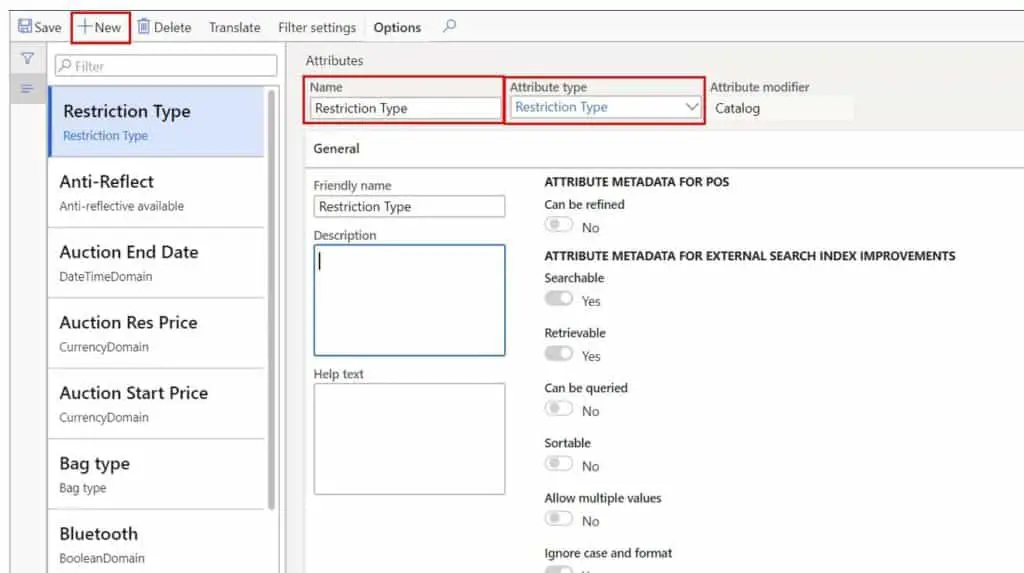
- Click the “New” button to create a new attribute.
- Give the attribute a name and select the attribute type. Remember the attribute type will dictate the attribute value that can be recorded against the attribute. In this example I will use will select the attribute type we created in the previous section.
Attribute Groups
Attribute groups are a way we can group a set of attributes together in an attribute group. So, if some items have these 10 attributes and other items have these 15 attributes, attribute groups are a way we can assign those sets of attributes to those respective items by assigning the attribute group.
Attribute groups are only required to enable attribute values if you are using retail functionality with the retail category hierarchy. If you are not using retail functionality you can use the procurement category hierarchy to enable product attributes. I will illustrate this later in the article.
- To create a new attribute group, navigate to Product information management > Setup > Categories and attributes > Attribute groups.
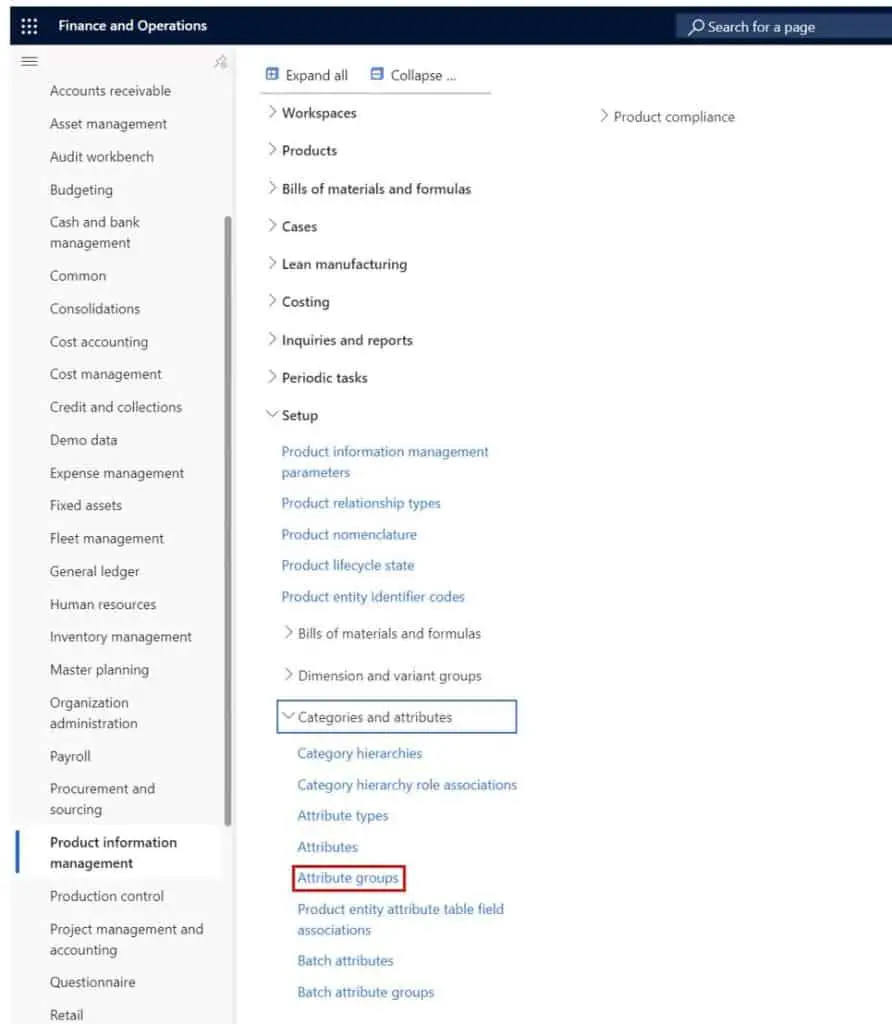
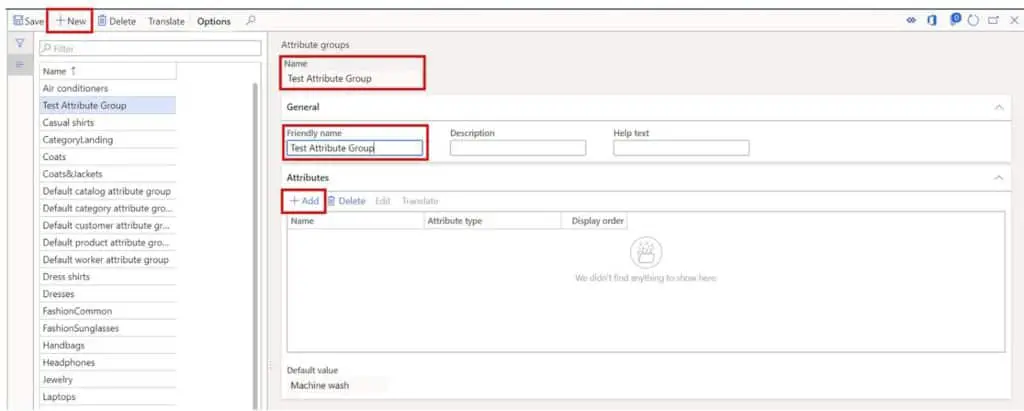
- Click the “New” button to create a new attribute group.
- Enter an attribute group name and a “Friendly name”.
- Next, in the “Attributes” section click the “Add” button.
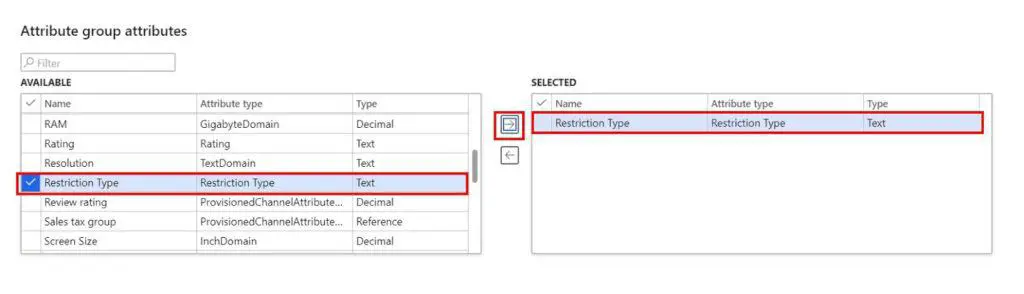
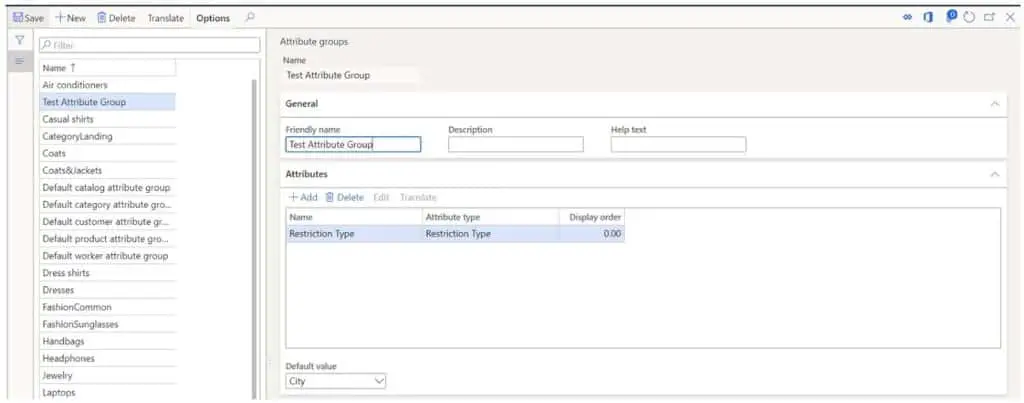
On the left side you have all the available attributes and on the right side you have the attributes that are tied to this attribute group. Click “Ok” after selecting the attribute.
Product Categories
Now that we have our attribute created, we need to tie this attribute to a product category in a category hierarchy. The two types of product category hierarchies that will enable product attributes are the “Retail category hierarchy” and the “Procurement category hierarchy”.
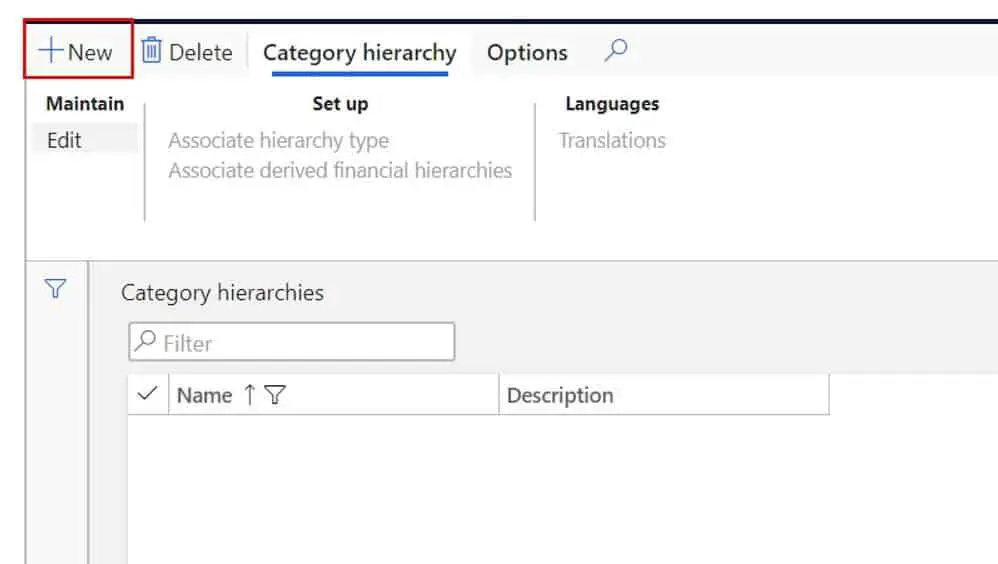
- To create a new category hierarchy, navigate to Product information management > Setup > Categories and attributes > Category hierarchies.

- Click the “New” button to create a new category hierarchy.
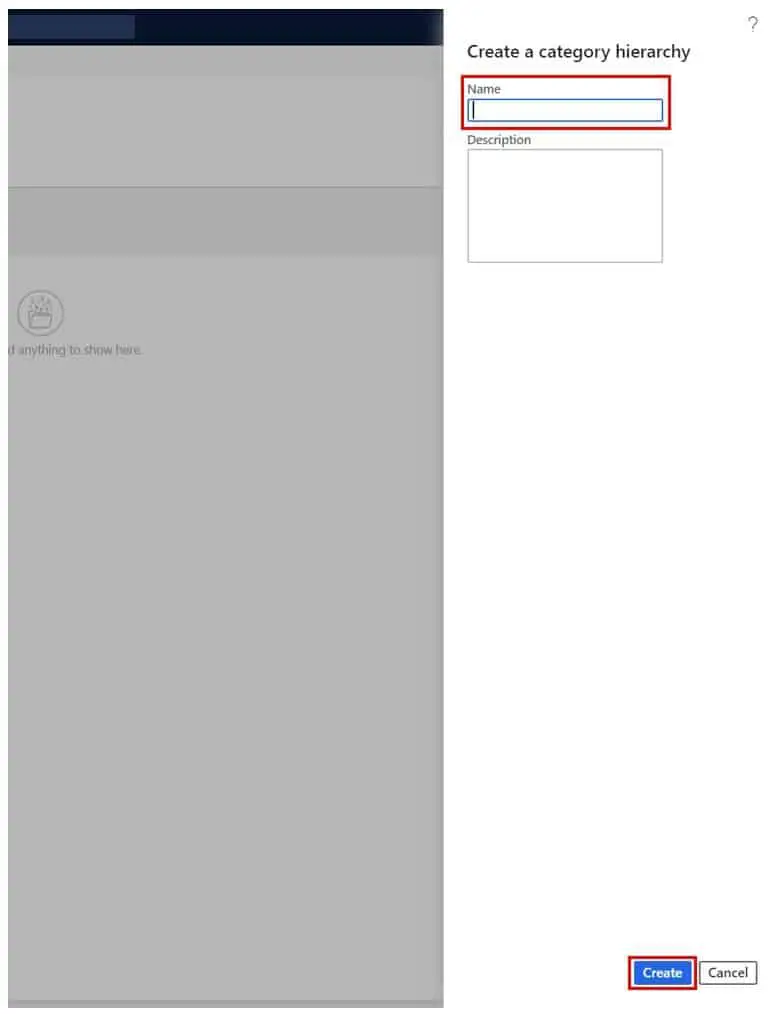
- Give the hierarchy a name and click the “Create” button.
Now that the hierarchy has been created, we need to assign a hierarchy type. This will define what type of hierarchy the you just created will be.
- Click the “Associate hierarchy type” button.
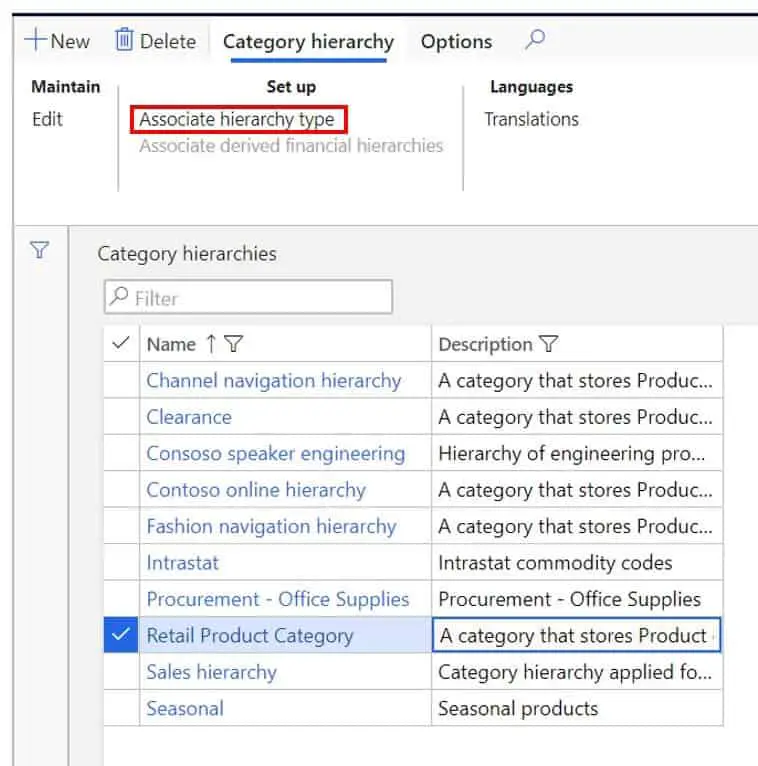
Here you can use the “Category hierarchy type” to select the type and the “Category hierarchy” to link the type with the hierarchy you just created. In this example I am going to use the “Retail category hierarchy”.

Next, navigate to Retail > Products and categories > Retail product hierarchy.

Next, navigate to Retail > Products and categories > Retail product hierarchy.

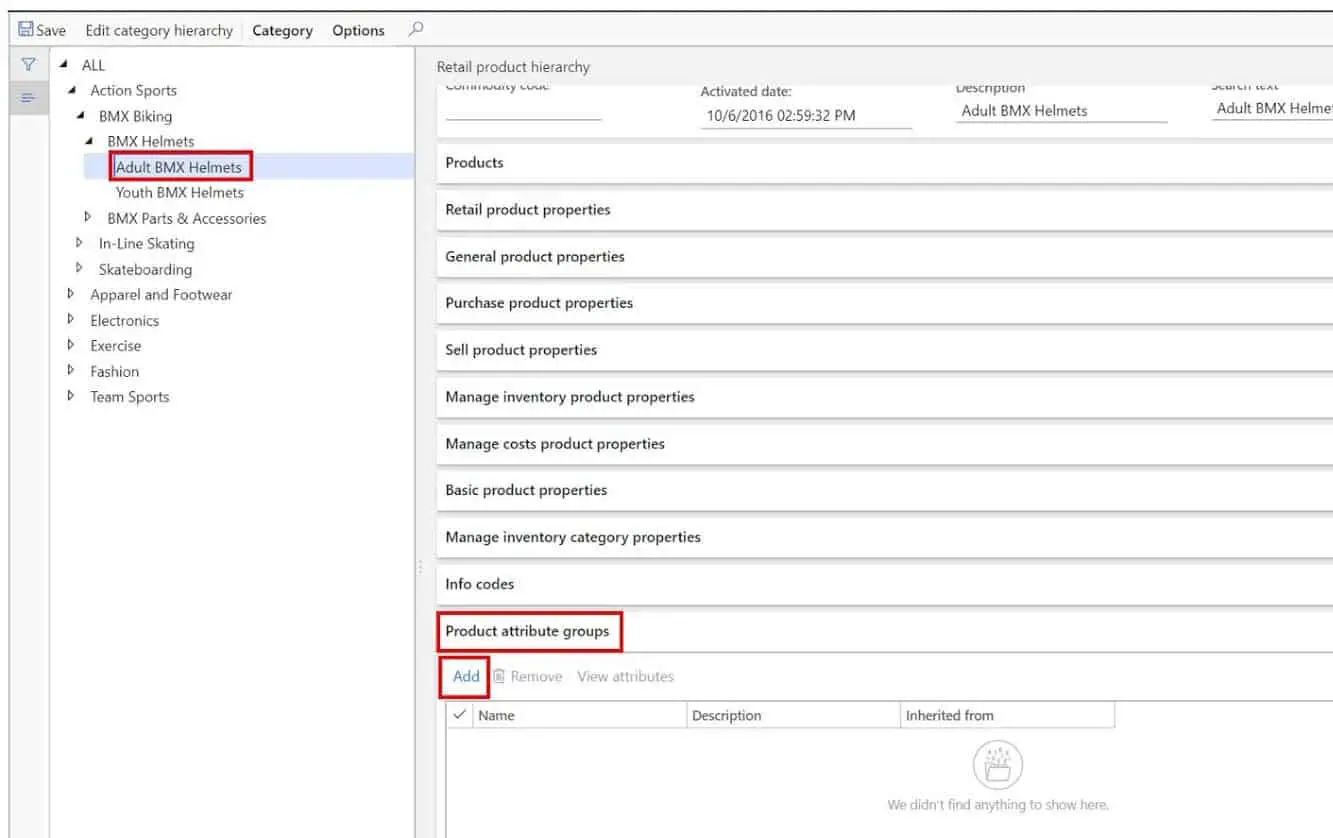
In the hierarchy you can click on the node where you want to add the attribute and click the “Add” button in the “Product attribute groups” fast tab.
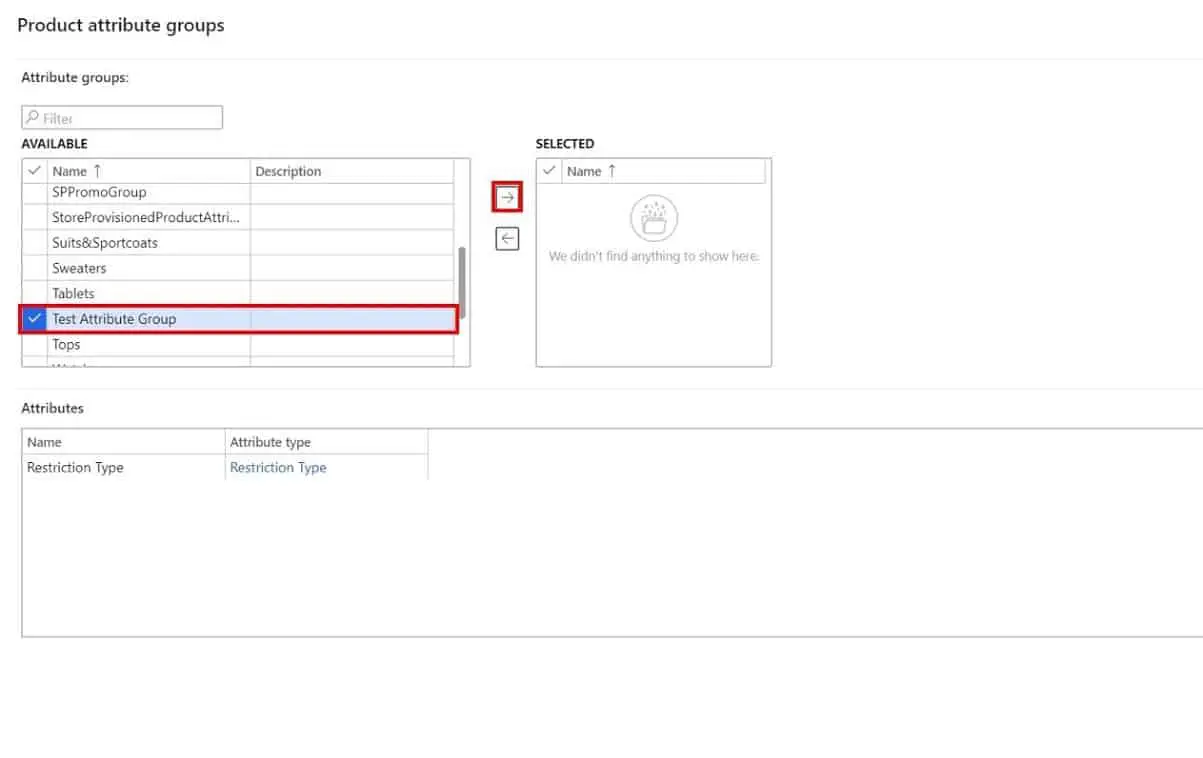
Here you will have the familiar section panes. Select the attribute group we created in the section above and click the right arrow to move it to the selected pane. Click the “Ok” button.
Now we have associated the attribute group which contains the attribute we created earlier to a node on the “Retail category hierarchy”.
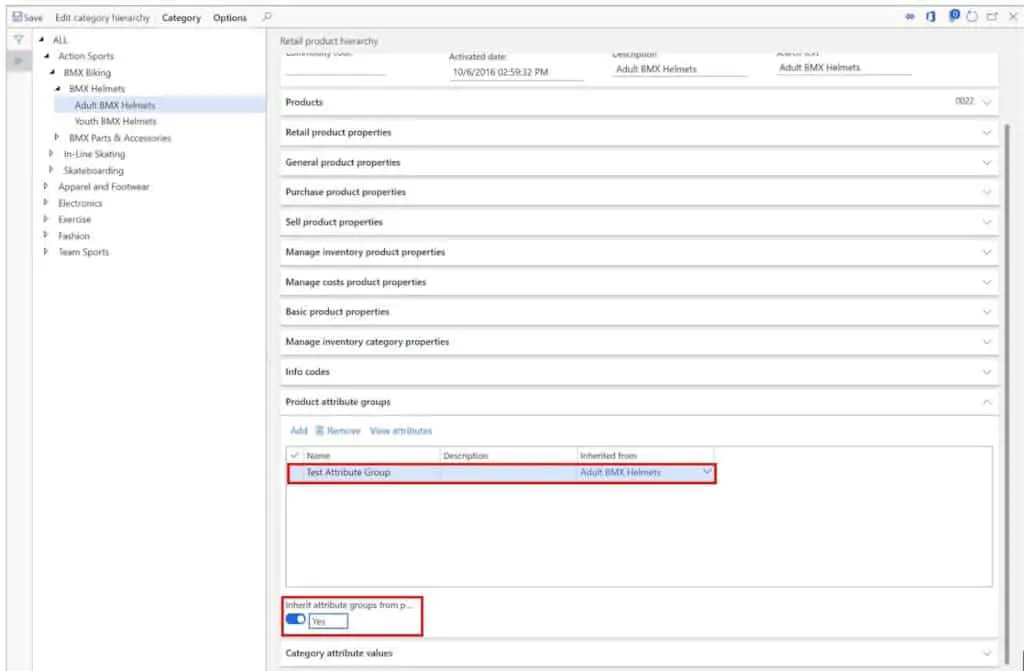
Note: You can associate an attribute group to a category node and then select the “Inherit attribute groups from parent nodes” option on sub-nodes and this will automatically inherit the attribute groups assigned to parent nodes.
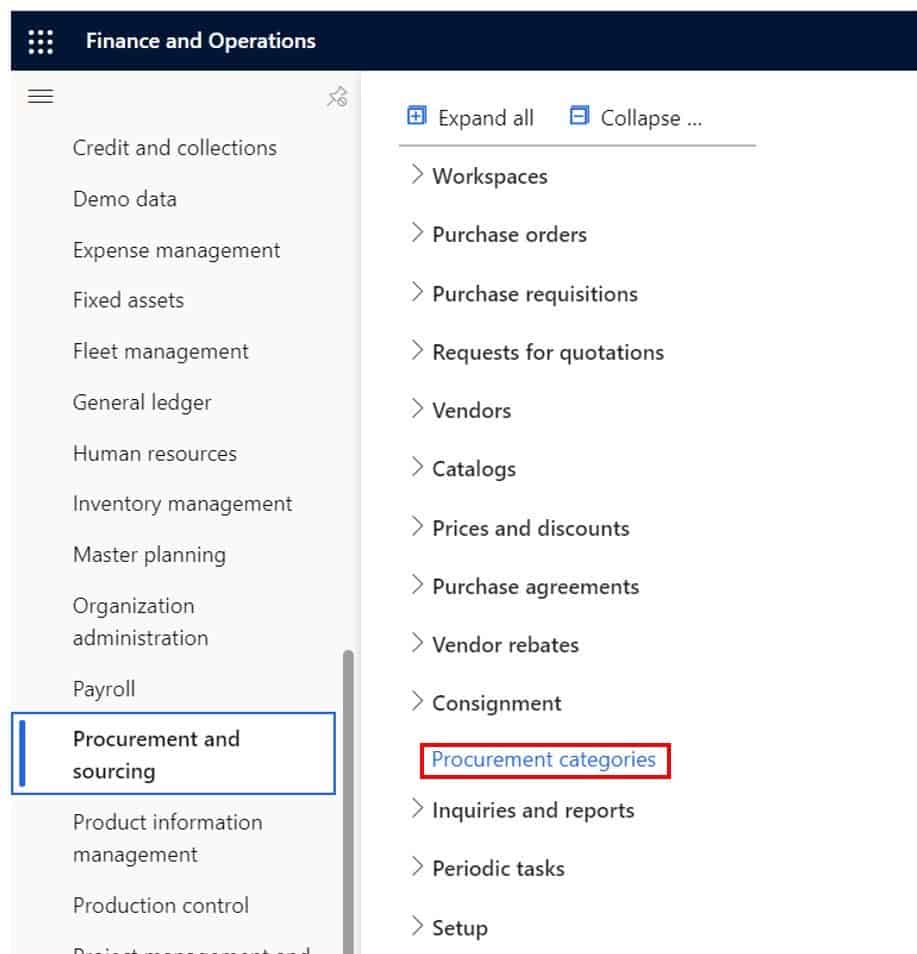
- If you are not using the retail module you can also use a procurement category hierarchy to associate an attribute. To do this navigate to Procurement and sourcing > Procurement categories.
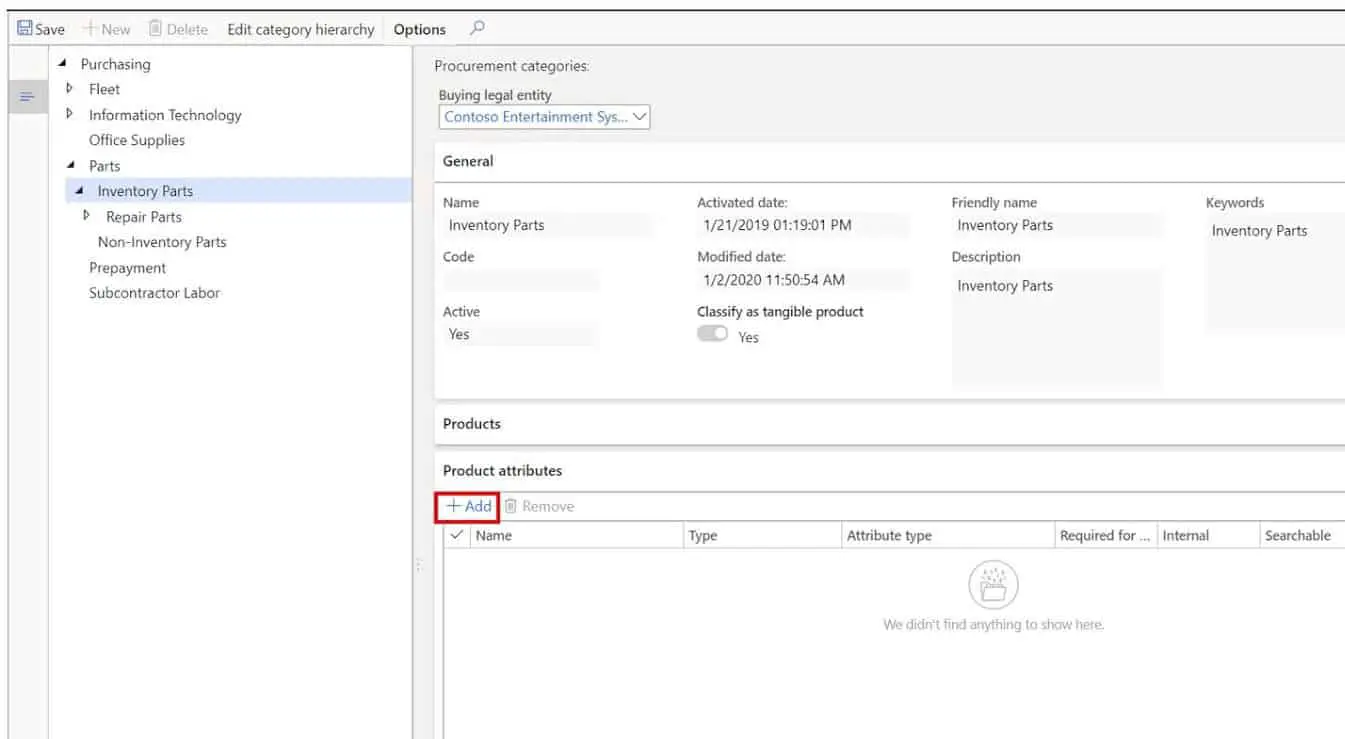
Select the category node you want to associate the attribute to and click the “Add” button in the “Product attribute” fast tab.
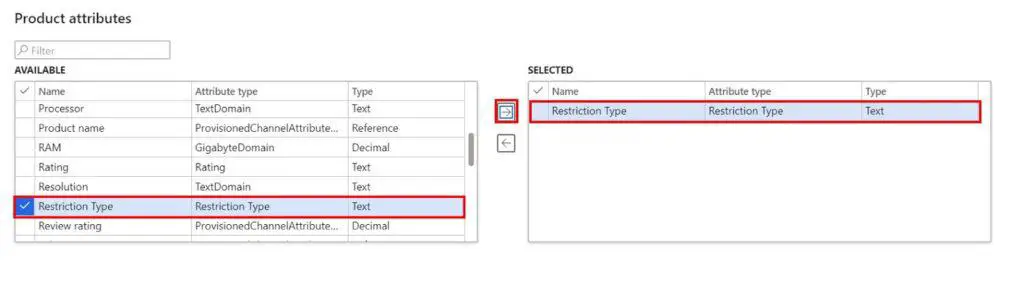
- Find the attribute and move it to the “Selected” pane.
- Click “Ok”.
Attribute Value Entry
Now that we have done the required setup and associated the attribute with the product category hierarchy we can navigate back to the item, associate the item with the category we assigned our attribute group to, and assign an attribute value to the product attribute.
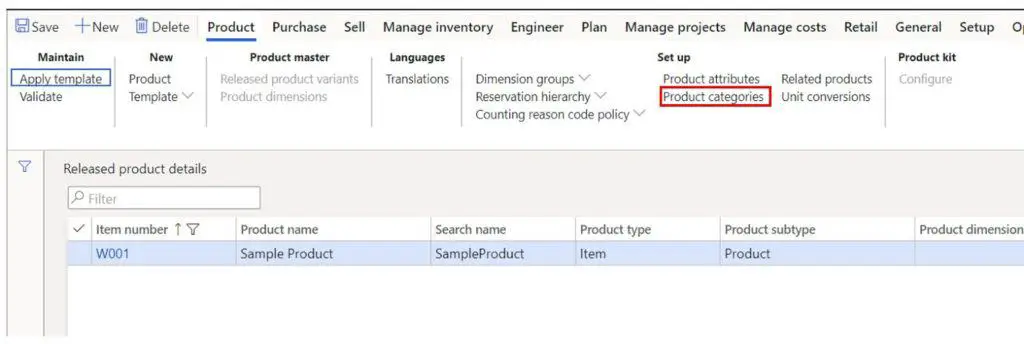
- Navigate back to the released product and click the “Product categories” button in the “Product” tab.
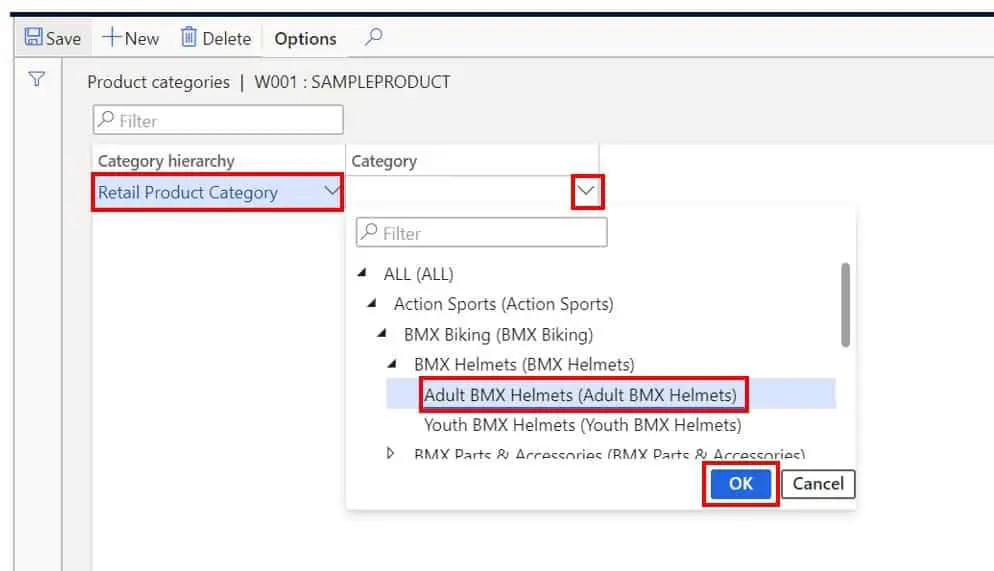
- In the “Category hierarchy” field select the category hierarchy and in the “Category” field select the category node you associated the attribute group (for retail product category hierarchy) or attribute to (for procurement category).
- Close the form.
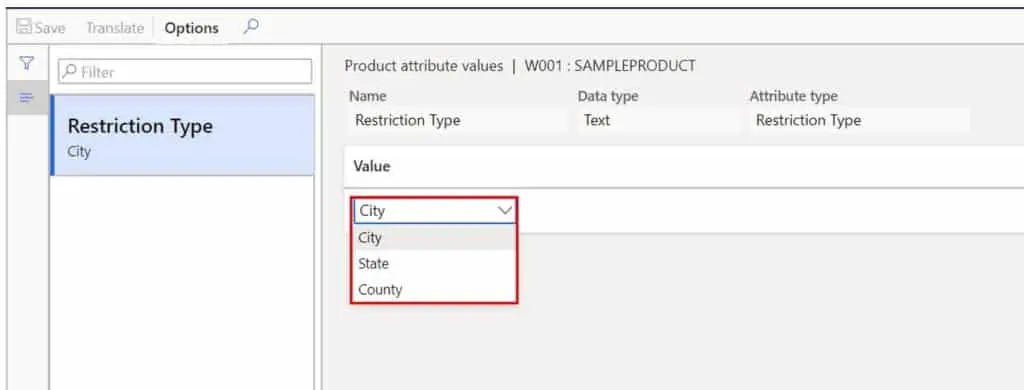
Click the “Product attribute” button and now you will see that we have our product attribute and we can select a predefined list of values that we specified earlier in the article.
Search Items By Attribute
It used to be very difficult to search items by a specific attribute but now with Dynamics 365 Finance and Operations it is much easier.
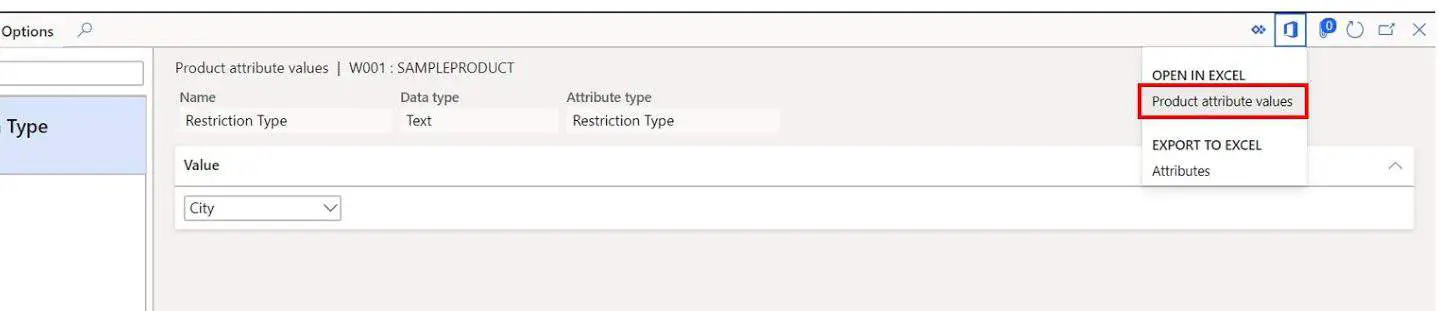
- In the item attribute form click the Office icon in the right corner.
- Select the “Product attribute values” option in the “Open in Excel” section.
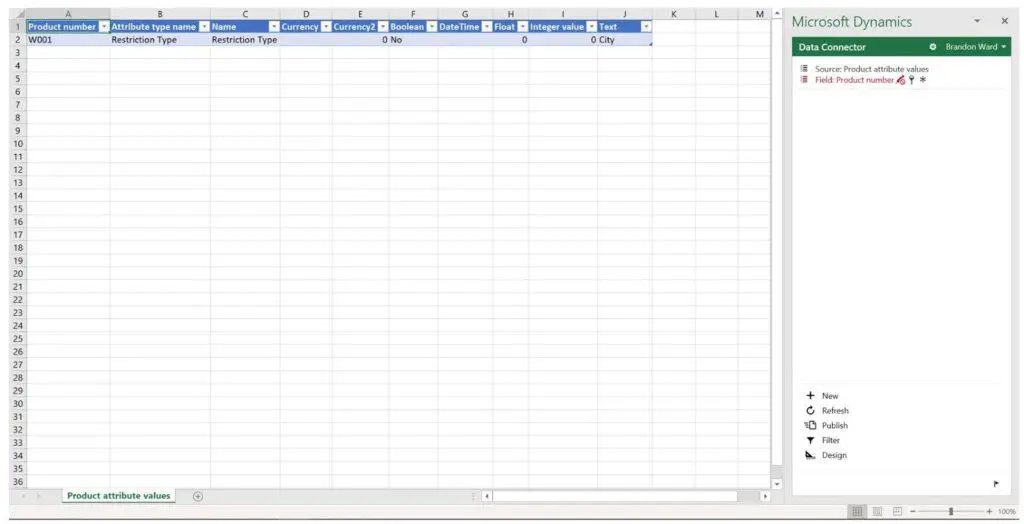
Remove the filter for the specific item and click the “Refresh” button. If you do not know how to remove a filter, check out my article How to Use Excel Add-In: Dynamics 365 Finance and Operations which is a step by step tutorial on how to use the Excel Add-In tool in Dynamics 365 Finance and Operations.
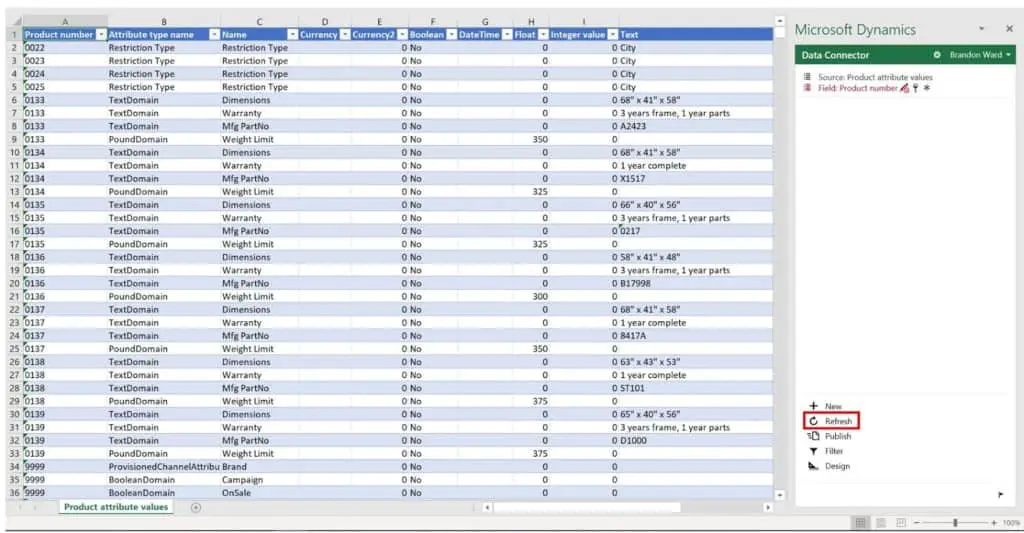
Now you can see that we have all the attribute values for all items in Excel for easy filtering, sorting and searching.
Takeaways
I hope this article helped to get you up and running with product attributes. This article showed how to enable product attributes using two different category hierarchy types.