During the course of business there may be cases where customers accidentally overpay or have an outstanding credit balance from returns and credit memos and request reimbursement.
Customer reimbursement functionality in Dynamics 365 Finance and Operations allows the user to automatically transfer outstanding credit balances from a customer to an associated vendor for payment through the standard vendor payment functionality in Dynamics 365 Finance and Operations.
This feature allows you to automate accounts receivable reimbursements in the system without having to post manual journal entries to move a credit balance from a customer to a vendor.
In this article we will go through the setup required to use the customer reimbursement feature, how to process the reimbursement, and look at the transactions that the system posts.
Customer Reimbursement Setup
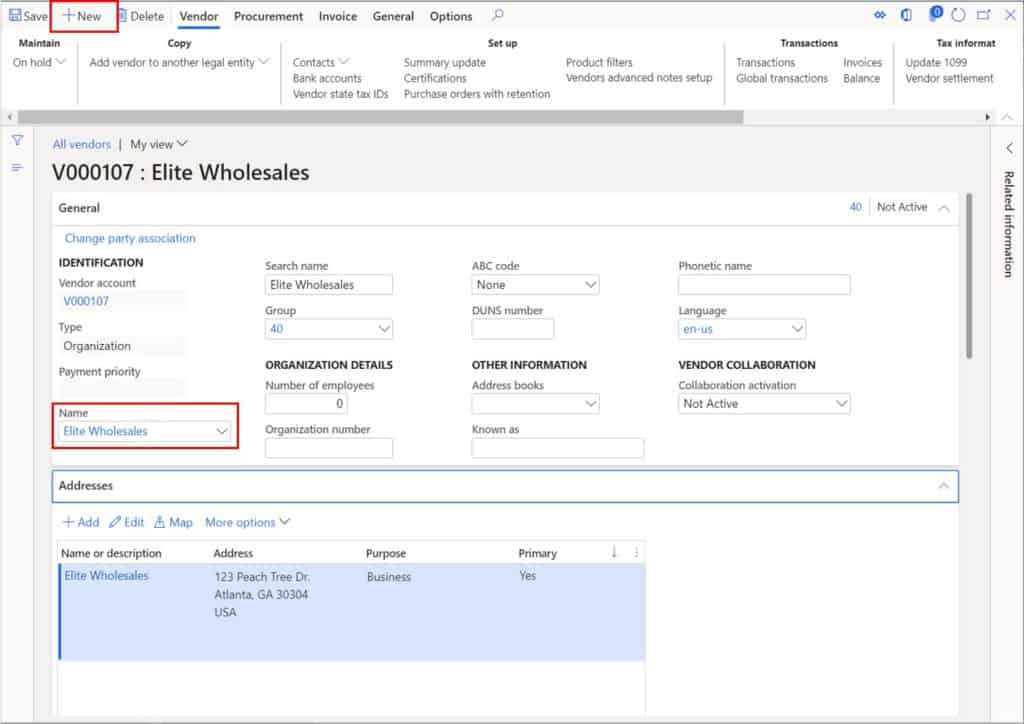
The only real setup required for customer reimbursement is to link the customer to a vendor account by setting the “Vendor” account in the “Remittance” field group in the “Miscellaneous details” fast tab of the customer form. The first step is to create the vendor for the customer. To do this navigate to Accounts payable > Vendors > All vendors.
- Click the “New” button.
- Give the Vendor a “Vendor group”.
- Give the Vendor a “Name”. Here you can just start typing the vendor name and just select the global address book record related to that customer so that the address will automatically default into the vendor record. For more detailed steps on how to create a vendor please refer to How To Create A Vendor: A Training Guide.
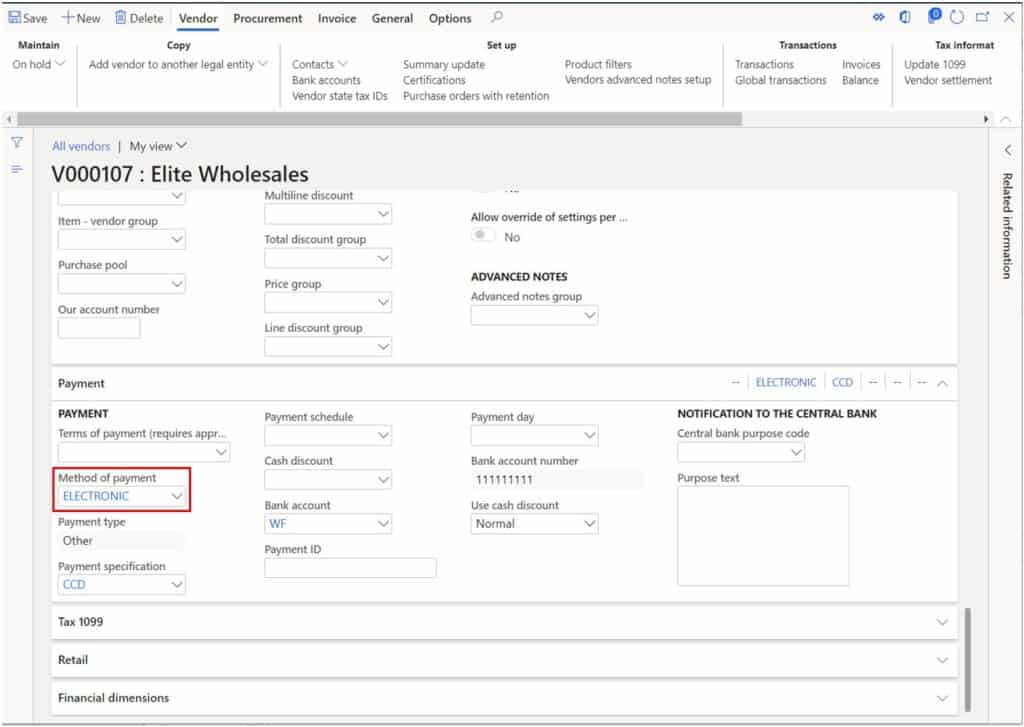
Next, we will need to set the method of payment we will be using to pay the vendor.
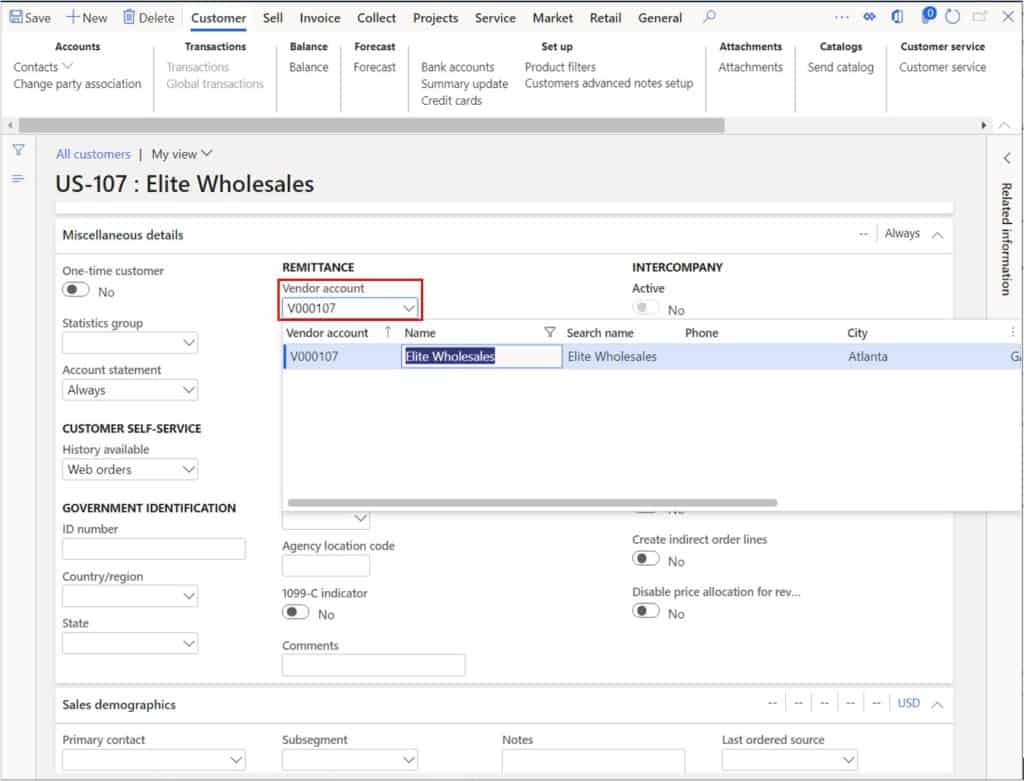
Now that we have created the vendor that will represent the customer, we will need to link that vendor to the customer record. Navigate to Accounts receivable > Customers > All customers. Open your customer record. In the “Miscellaneous details” fast tab click the dropdown in the “Vendor” field and select the vendor you just created that represents this customer.
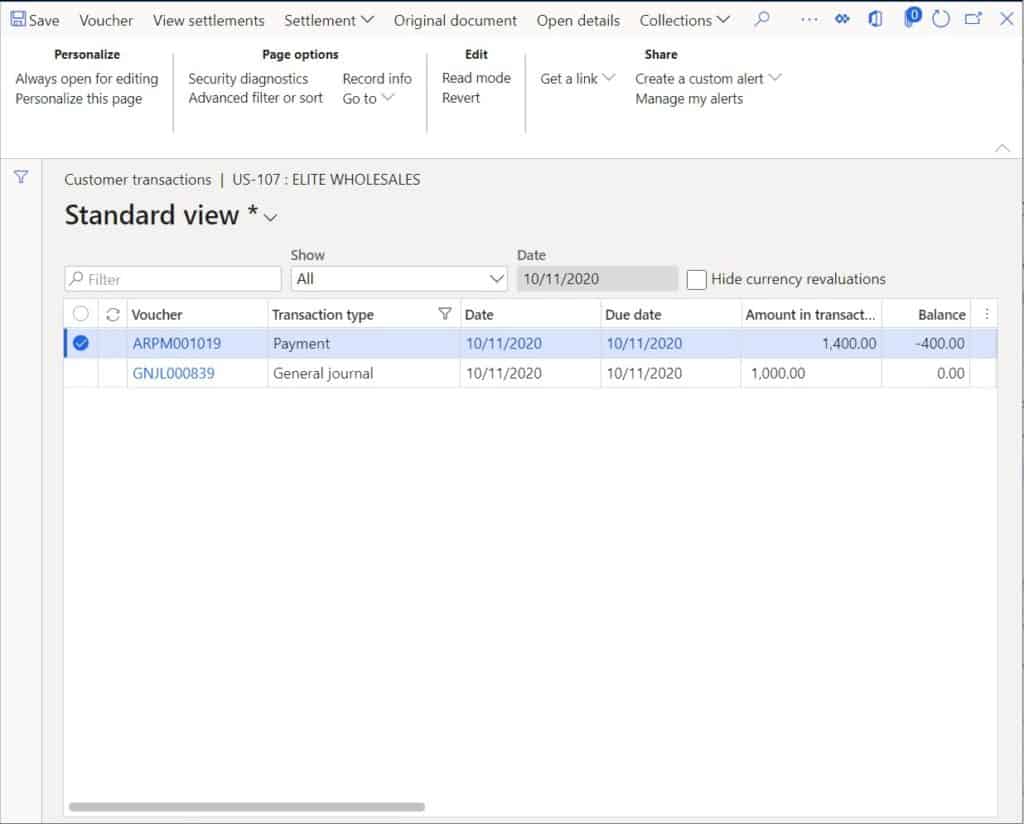
I have posted an invoice for $1,000.00 and a customer payment of $1,400.00 to represent an over payment of $400.00 which I will reimburse to the customer.
Process Customer Reimbursement
The customer reimbursement process is kicked off by running a batch job that will automatically transfer the credit balance from the customer to the vendor. The customer reimbursement job is located in Accounts receivable > Periodic > Reimbursement.
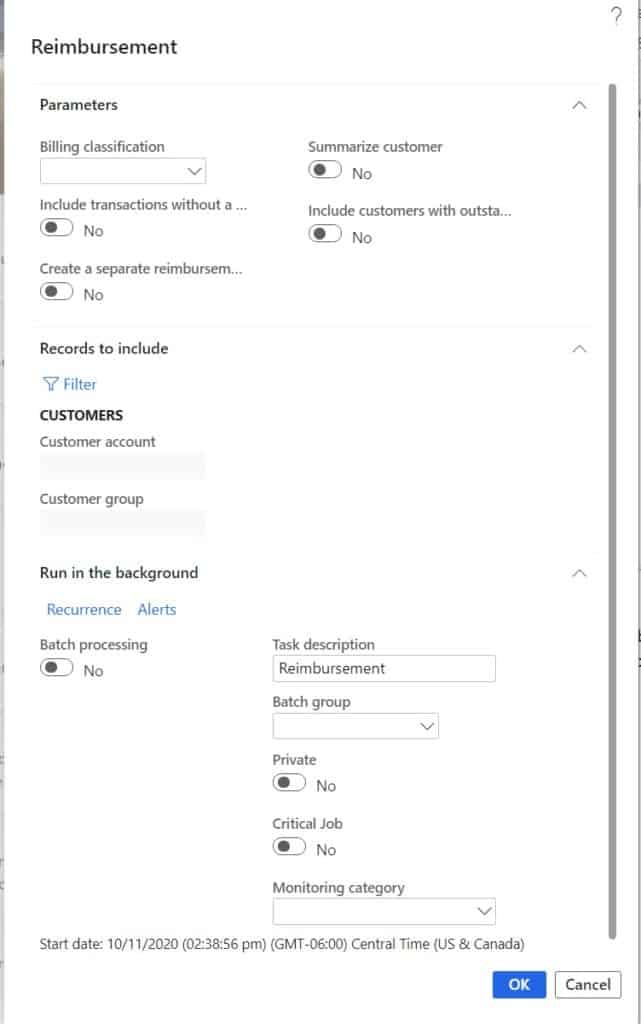
There are several parameters that can be run with this batch job.
- Billing classification – This allows you to run the reimbursement for only specific billing classifications.
- Summarize customer – This allows you to summarize the transactions if you would rather fewer transactions get created.
- Include transactions without a billing classification – This allows you to include transactions without a billing classification. If you are not using billing classifications, you will want to select this value.
- Include customers with outstanding debit transactions – If you select this, any debit transactions that the customer has against the account are not deducted from the amount to be reimbursed. Typically, this is set to “No”.
- Create a separate reimbursement for each billing classification – If you are using billing classifications and select this option, you will get separate reimbursement transactions for each unique billing classification found with a credit.
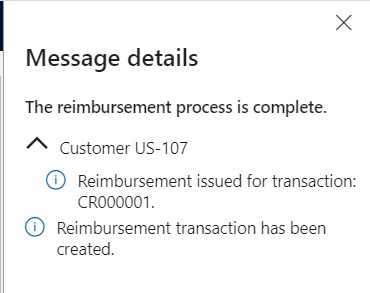
In the “Records to include” section of the form you can filter down for a specific customer or a group of customers that the reimbursement process should run for. Once you have set the parameters click the “Ok” button to process the reimbursement. You will receive an info log telling you the reimbursement process is complete.
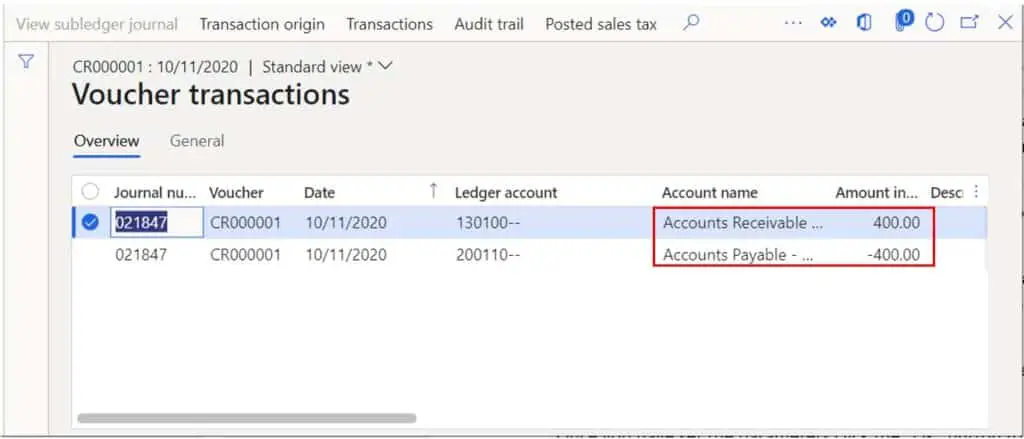
Now let’s go see what the system did. If we go to our customer transactions form, we can see that a debit transaction was posted for $400.00. Now if we click the “Voucher” button we can see the ledger postings.
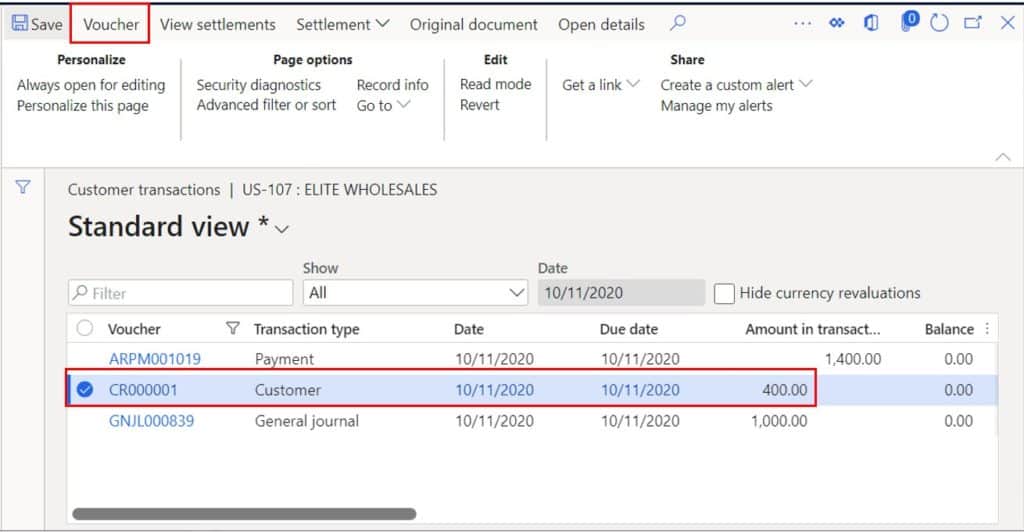
On the voucher we can see that the accounts receivable account was debited to relieve the customer balance and the accounts payable account was credited to create the vendor balance.
Pay The Customer
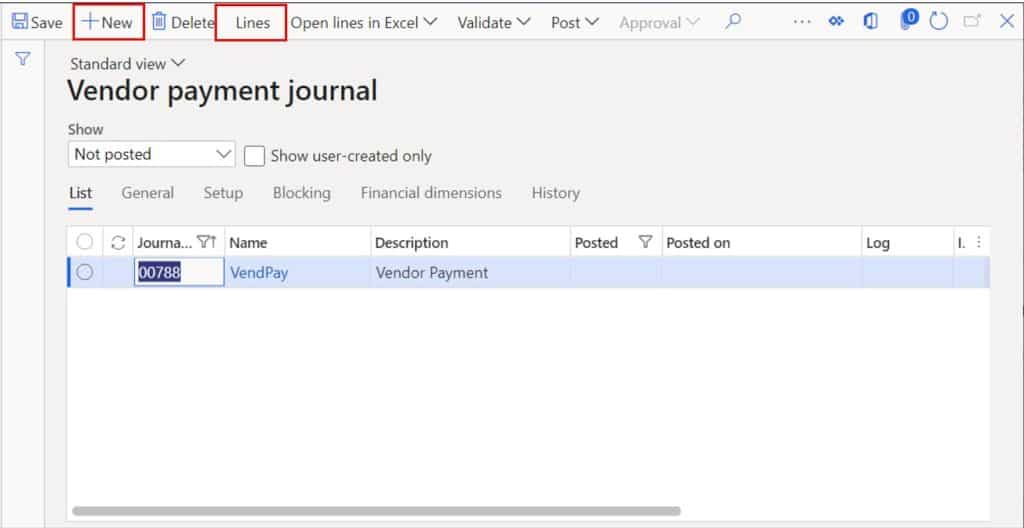
Now that we have created the vendor balance the last thing we need to do is pay the vendor (which we created as our customer). To do this navigate to Accounts payable > Payments > Vendor payment journal. Click the “New” button to create a new journal and select a journal “Name”. Click the “Lines” button to enter the journal lines.
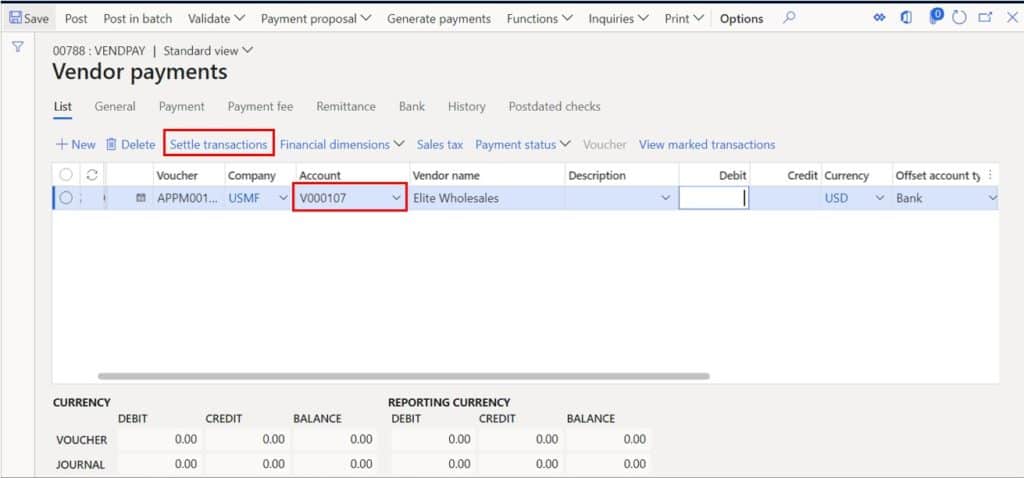
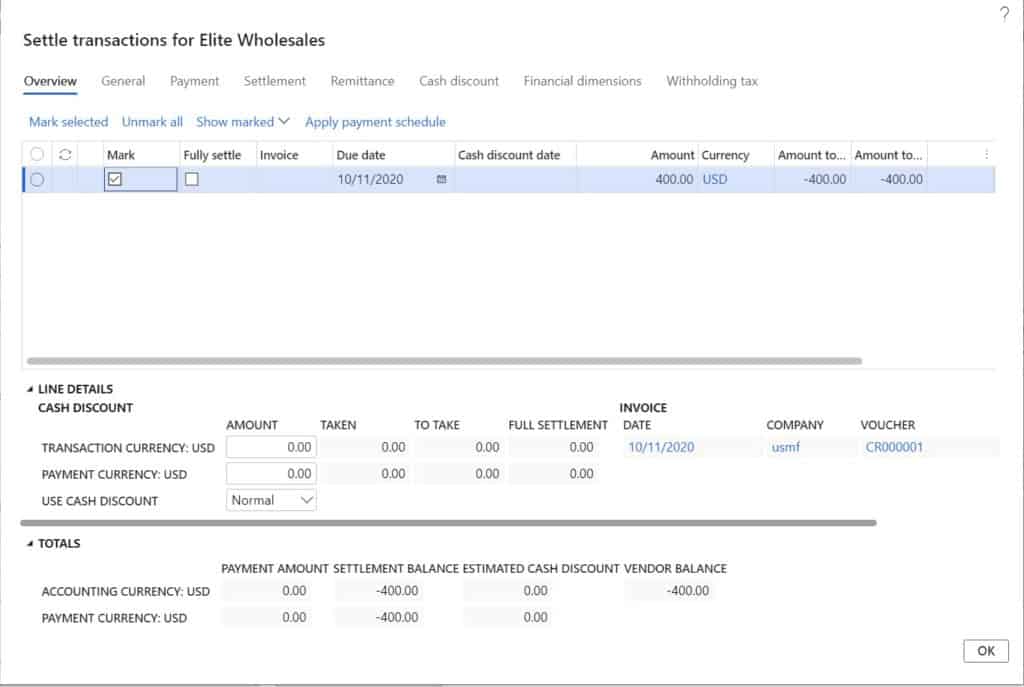
In the “Account” field select the vendor account you created for the customer. Click the “Settle transactions” button to see the open transactions for the vendor that are available for settlement.
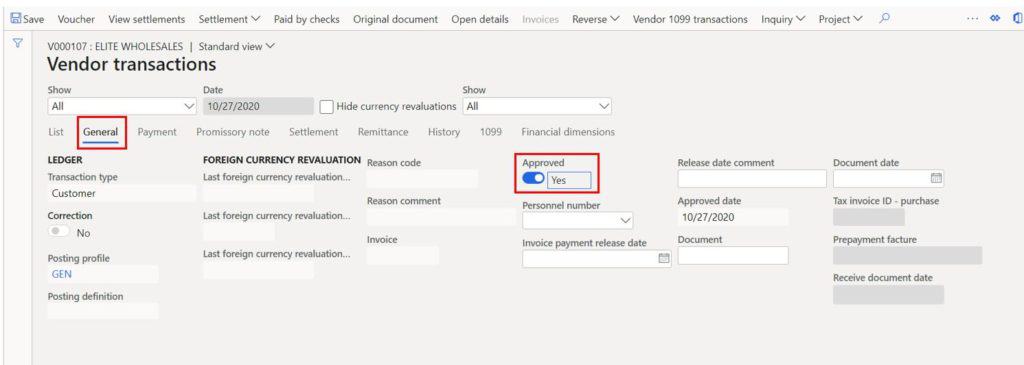
Note: If you are using the “Settle transactions” method to mark the transaction for payment instead of using the “Payment proposal” method for paying invoices, you will need to make sure the credit transaction posted to the vendor account has been approved.
To do this navigate to the vendor, click the “Transactions” button and on the “General” tab there is an “Approved” field that will need to be checked for it to be available for payment using the “Settle transactions” button. If you are using the payment proposal you will see it regardless.
Now we can mark the reimbursement transaction for payment and click the “Ok” button to pull the transaction into the vendor payment journal.
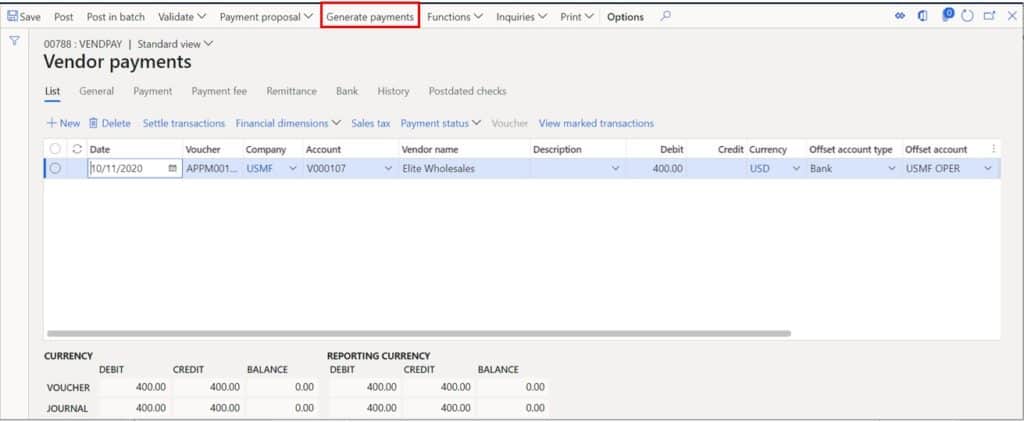
Now we need to generate the payment. If you are paying with check it will generate the check and if you are paying with ACH it will generate the ACH.
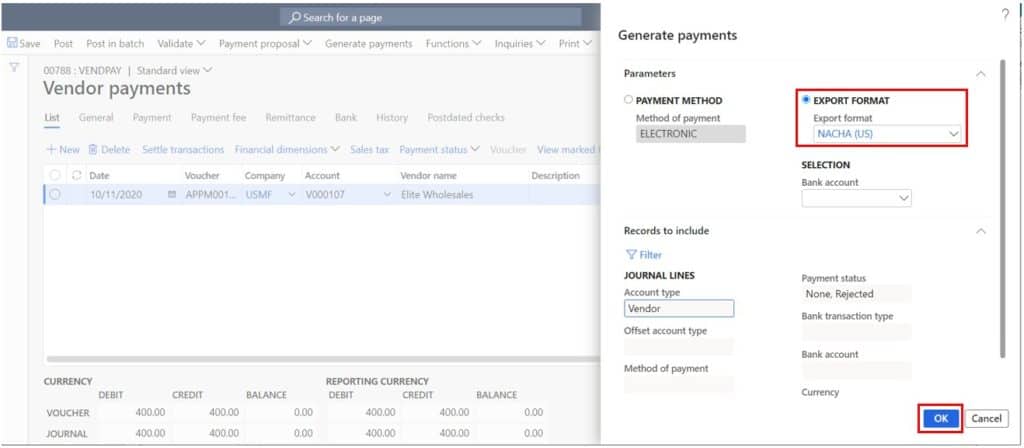
Select the export format and click “Ok”.
This will generate the ACH file in my case.
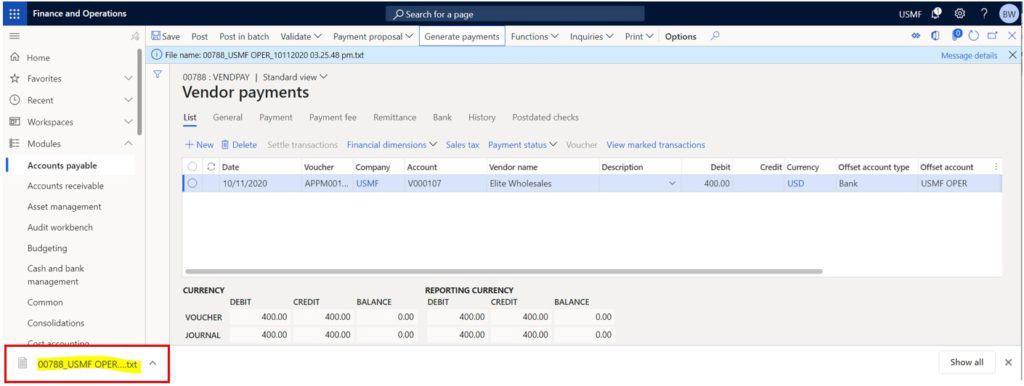
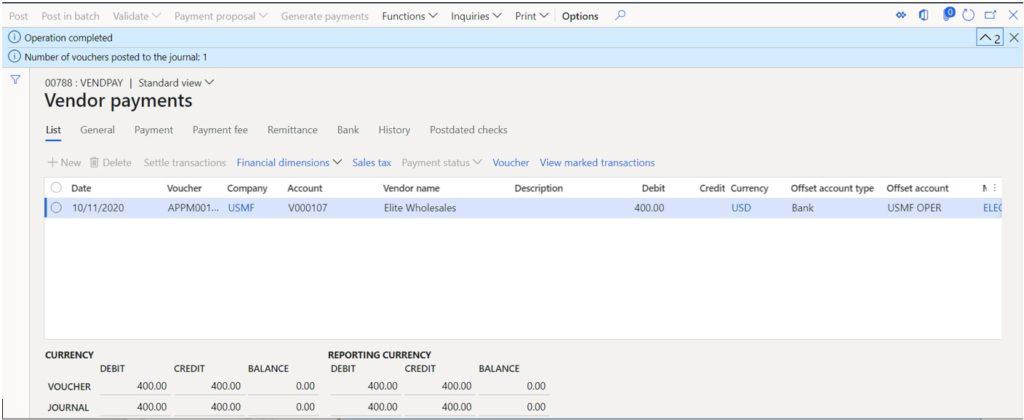
The last step is to click the “Post” button to post the vendor payment journal.
Takeaways
Customer reimbursement can be a very useful feature and a great way to eliminate some painful manual transactions that your accounting department or accounts receivable department makes throughout the month. I hope this example has given you all you need to use the feature confidently.

