

In Dynamics 365 Finance and Operations the purchase requisition is an internal document that allows users to create purchase requests for products, services and fixed assets for various purposes. An approved purchase requisition can then be converted to a purchase order automatically or manually depending on the purchasing policies setup for the company. The purchase order is then fulfilled by the vendor as a normal purchase order.
In this article, we’ll look at the associated setup to start working with purchase requisitions as well as how to process a purchase requisition from purchase requisition creation to purchase order.
Purchase Requisition Prerequisites
Before creating the purchase requisition, it is important to understand the pre-requisites to create a purchase requisition.
- Procurement category association with Item (mandatory if you are using item numbers on purchase requisitions).
- Approval workflow (mandatory).
- User association to and employee record (mandatory).
- Requester permission (optional).
Procurement Category Association with an Item
In order for an item to be available for selection in a purchase order the item needs to be associated with a procurement category and that procurement category must be associated with a published procurement catalogue.
To associate an item with a procurement category you can go to the procurement category and assign the item there or go directly to the item and assign the category from the item. In this example we will add the item from the procurement category. Navigate to Procurement and sourcing > Procurement categories.
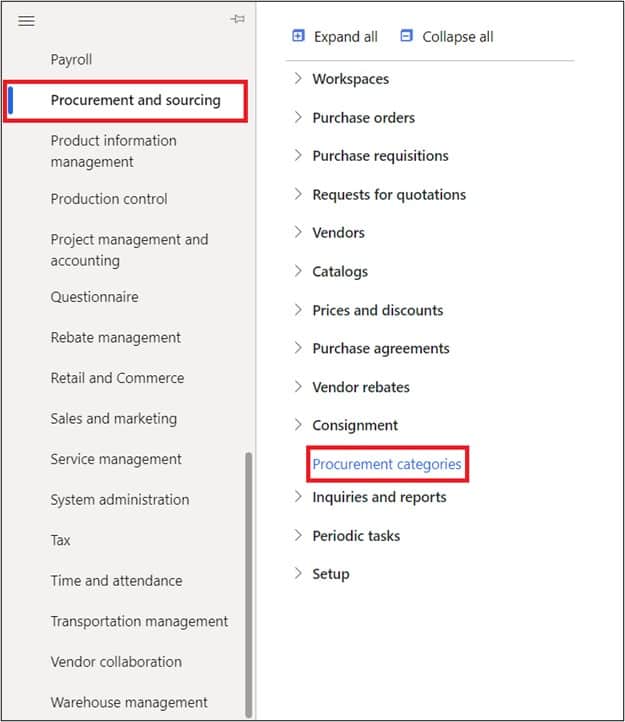
Click on the category you wish to add the product to and click the “Add” button and select the item.

Purchase Requisition Approval Workflow
In order to process a purchase requisition, you need to have a workflow in place. In this example we will show a very simple workflow setup but for more information on how to use the workflow editor please this post. To set up a workflow, navigate to Procurement and sourcing > Setup > Procurement and sourcing workflows.

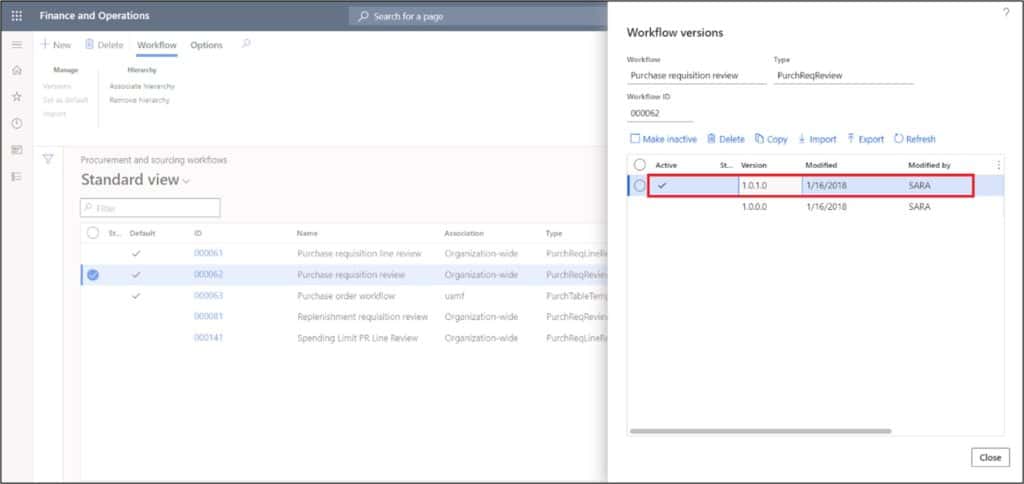
To see the active version of the purchase requisition workflow, select the workflow and click on versions.
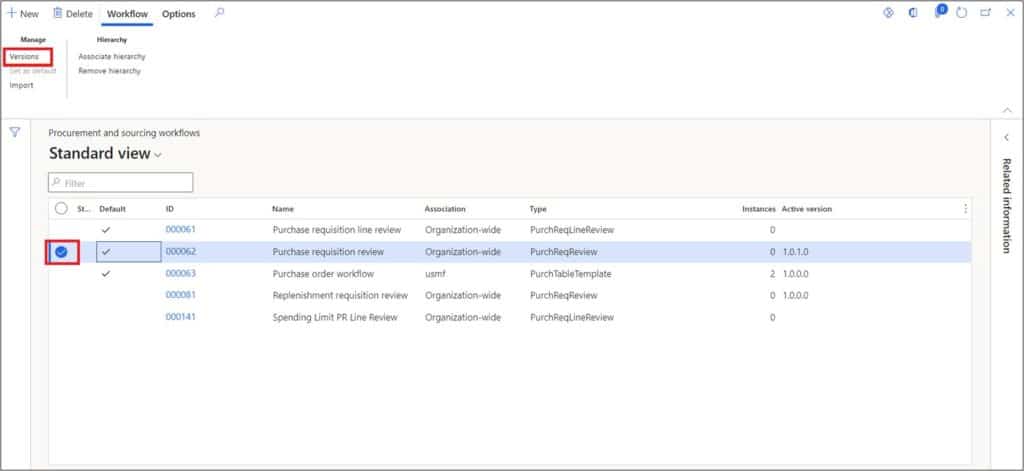
You can see the latest version of purchase requisition workflow is active.
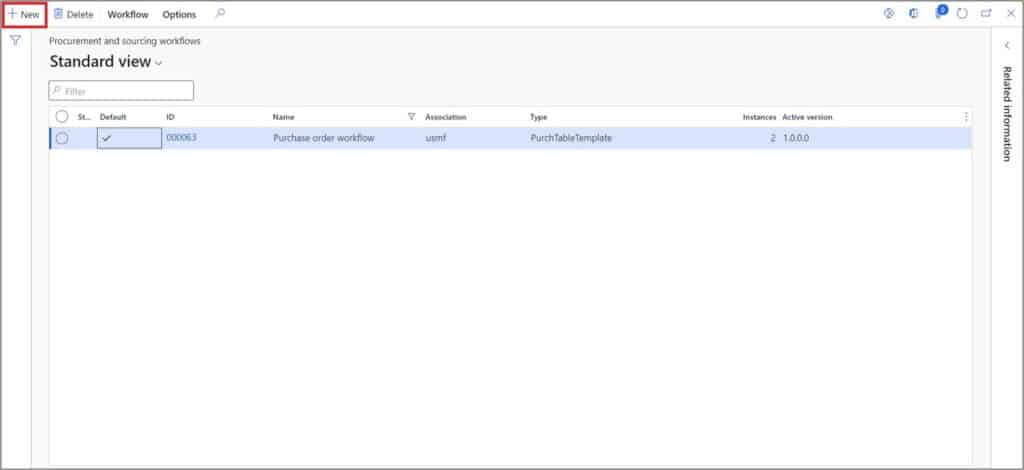
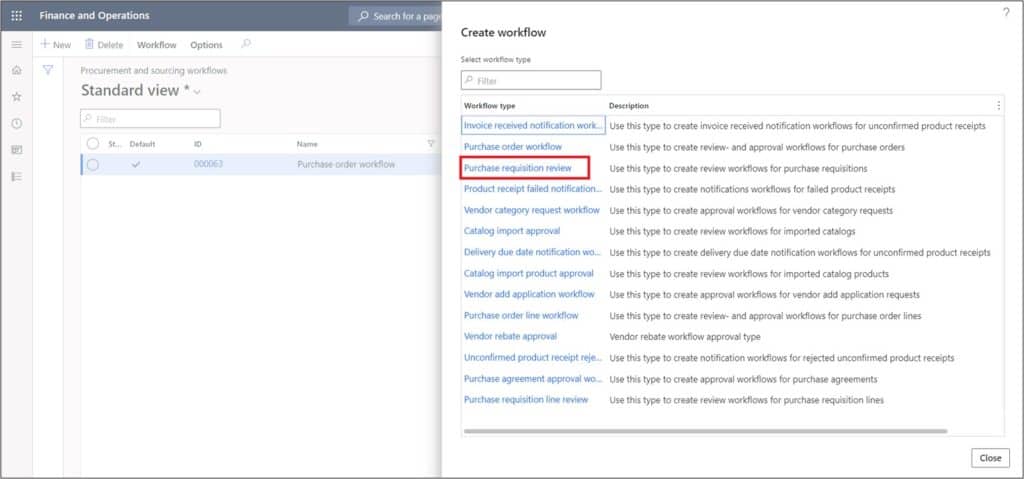
Here is how you can setup and activate the purchase requisition workflow in case you do not have the workflow already setup. We will setup a workflow that will be auto approved if the purchase requisition amount is less than $1,000. On the procurement and sourcing workflows page, click “New” button.
Select the “Purchase requisition review” option.
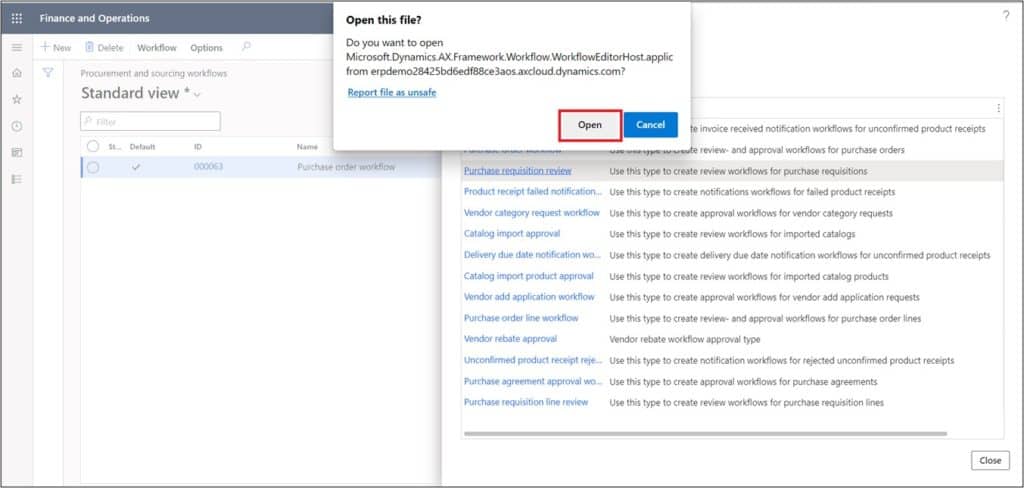
Click “Open” to open the workflow tool. Note: the workflow editor may not work in other browsers so if you have issues opening the editor try using Microsoft Edge.
Now sign into workflow tool using the credential of your Microsoft Dynamics 365 account.

After signing in, the workflow tool will open. Drag and drop the “Approve purchase requisition” workflow element to the workflow area.
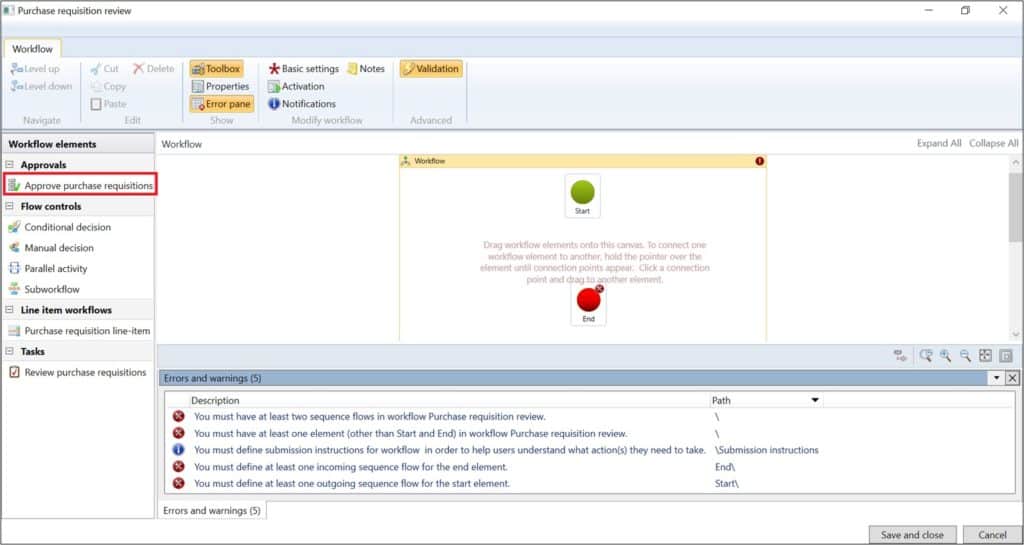
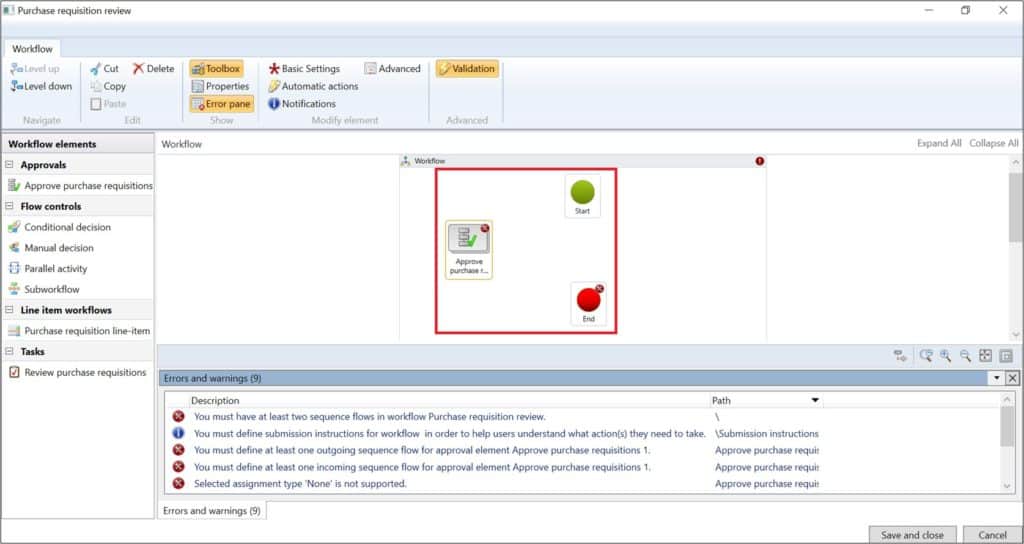
Connect the Start node to “Approve purchase requisition” workflow element and then connect the “Approve purchase requisition” workflow element node to the “End” node. With this setup, the purchase requisition workflow will start when the purchase requisition is submitted then it will move into the “Approve purchase requisition” workflow element and that will route the approval per the rules defined in the element and after processing, the workflow will end.
After connecting the nodes, click on “Workflow” and then click on “Basic settings”.
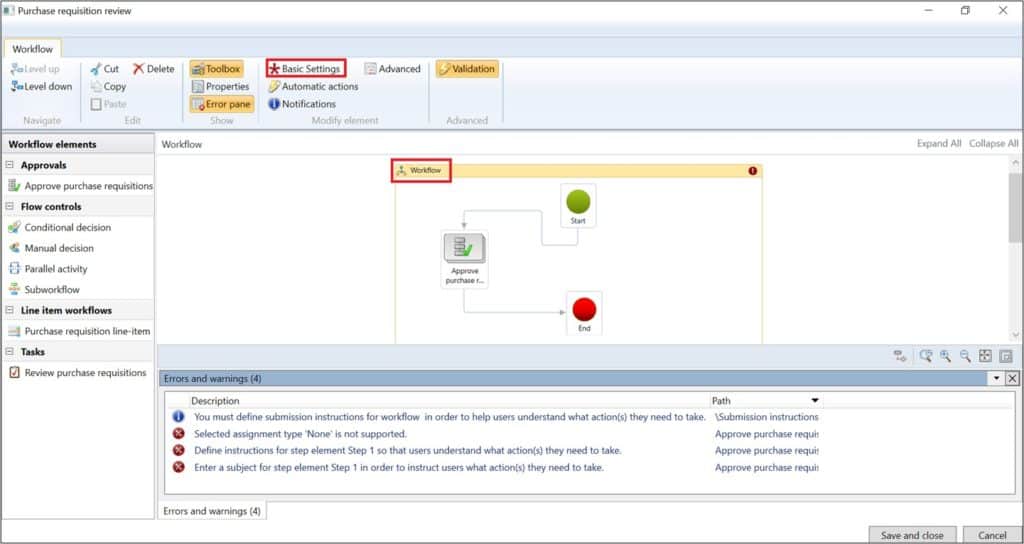
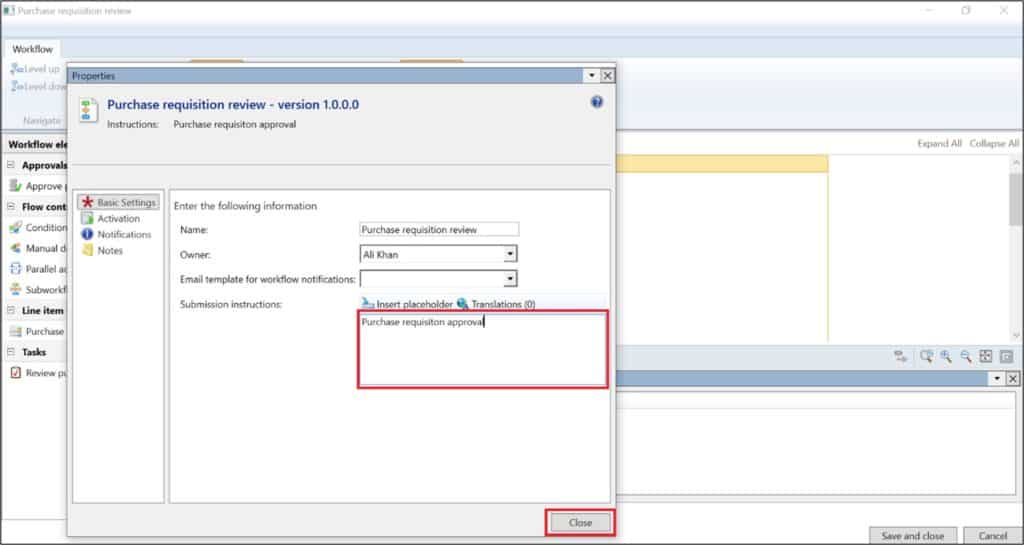
Enter the workflow submission instructions and click “Close” button.
Now double click on “Approve purchase requisition” workflow element.
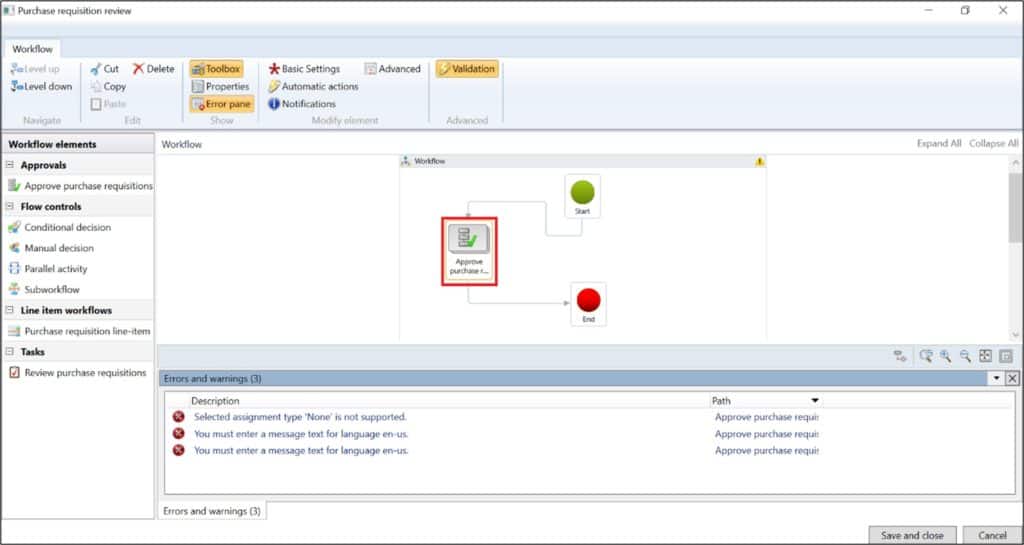
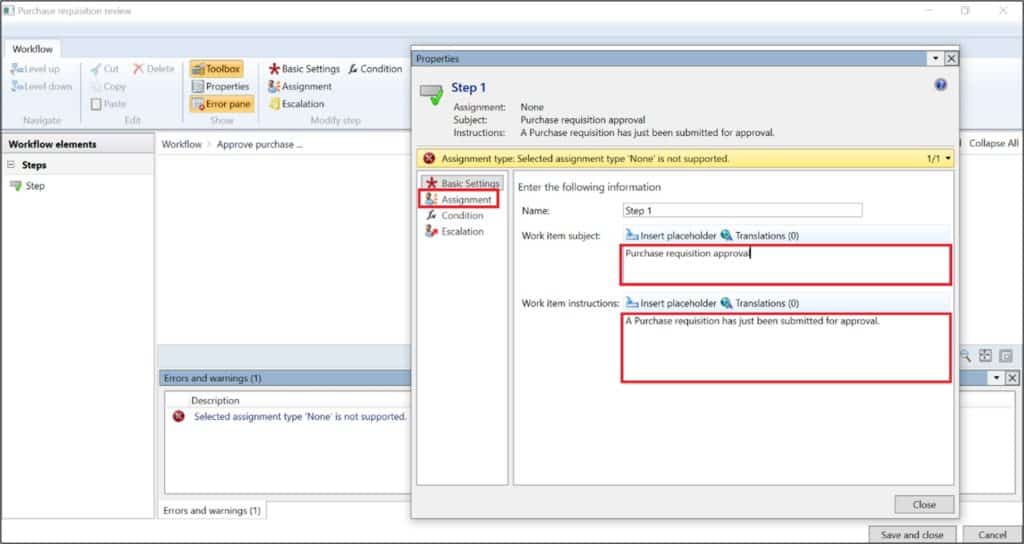
Now select the Step 1 and click on “Basic settings”.
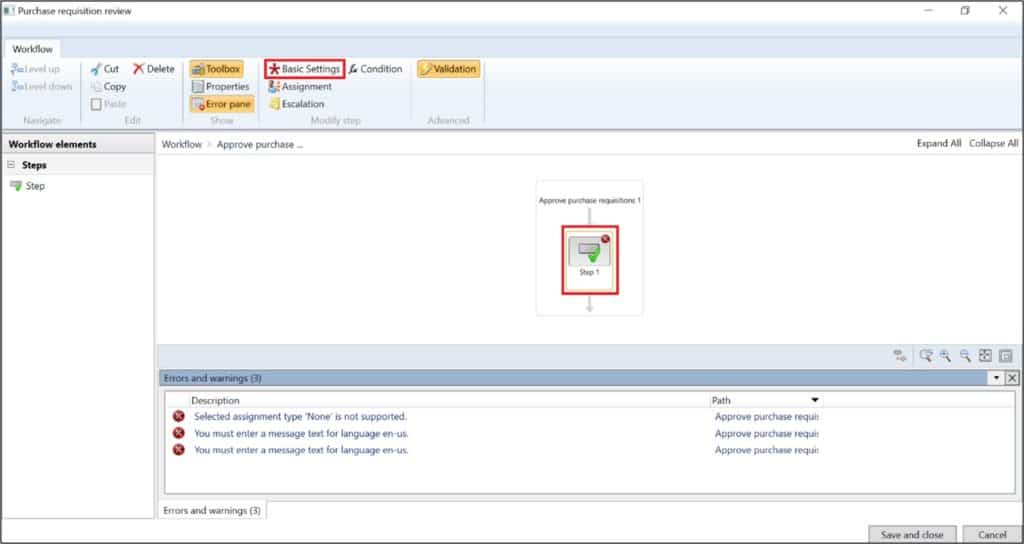
Enter the Work item subject and Work item instructions. Click the “Assignment” button to select the approver(s).
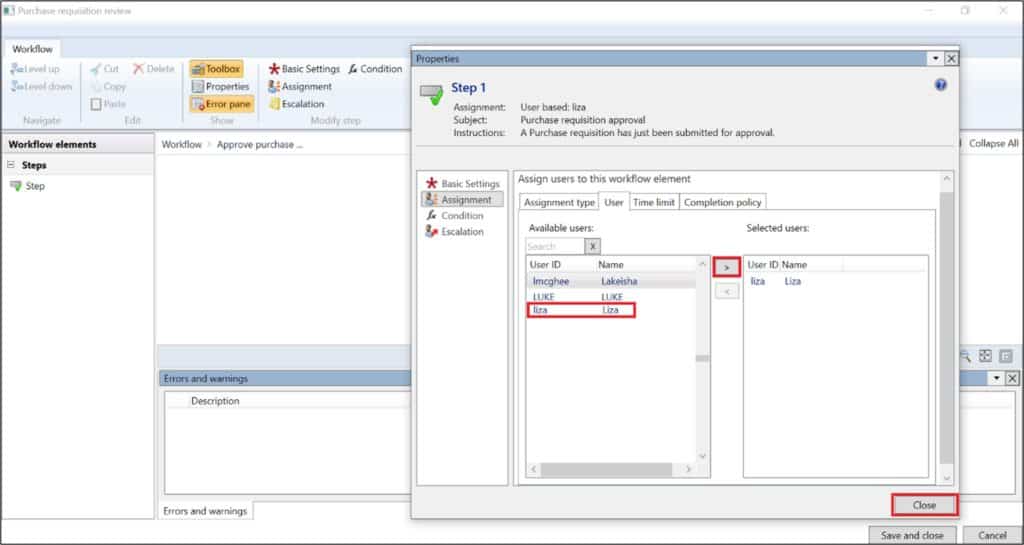
In the “Assignment” tab, click on “User”. After clicking on “User”, select the approver(s) of the purchase requisition.
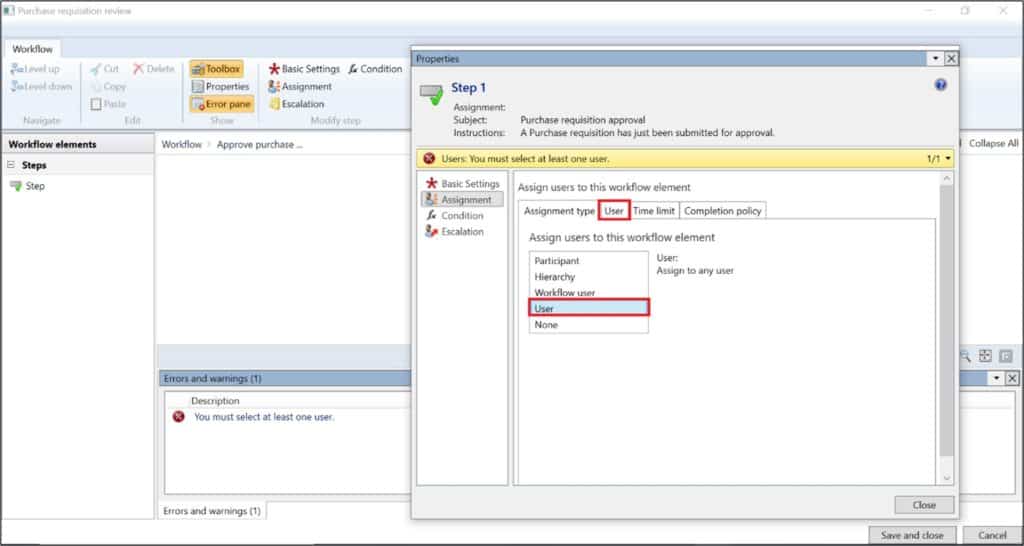
All the enabled users appear here. You can select the approver(s) of the purchase requisition. After selecting the approver(s), click “Close” button.
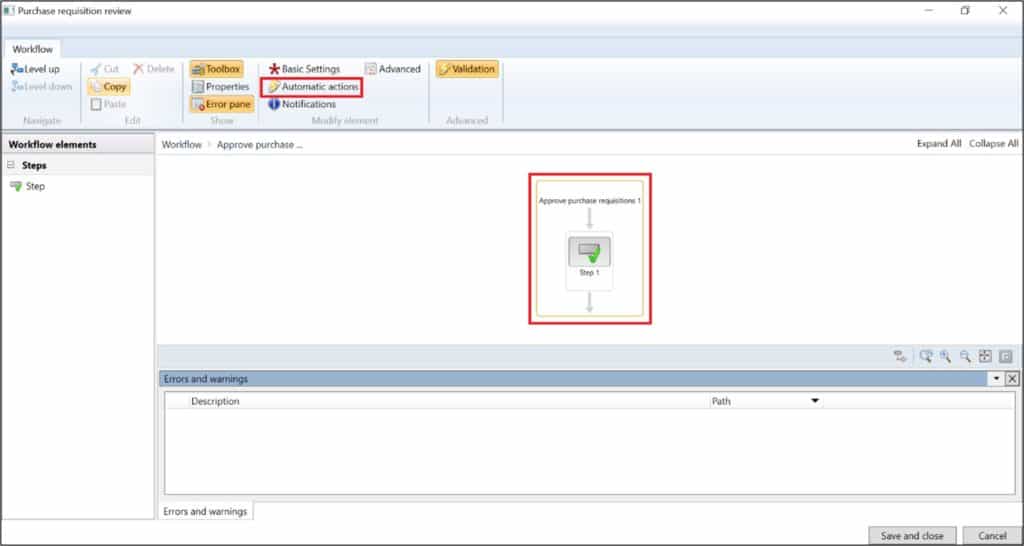
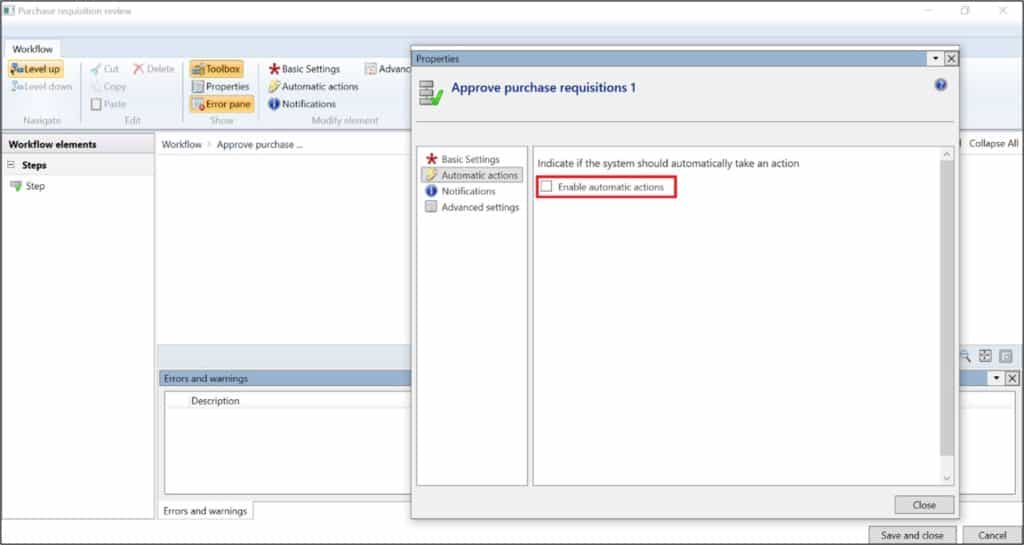
Now click on the open area of the Step 1 and click on the “Automatic actions” button to set the conditions of automatic approval.
Click on “Enable automatic actions”.
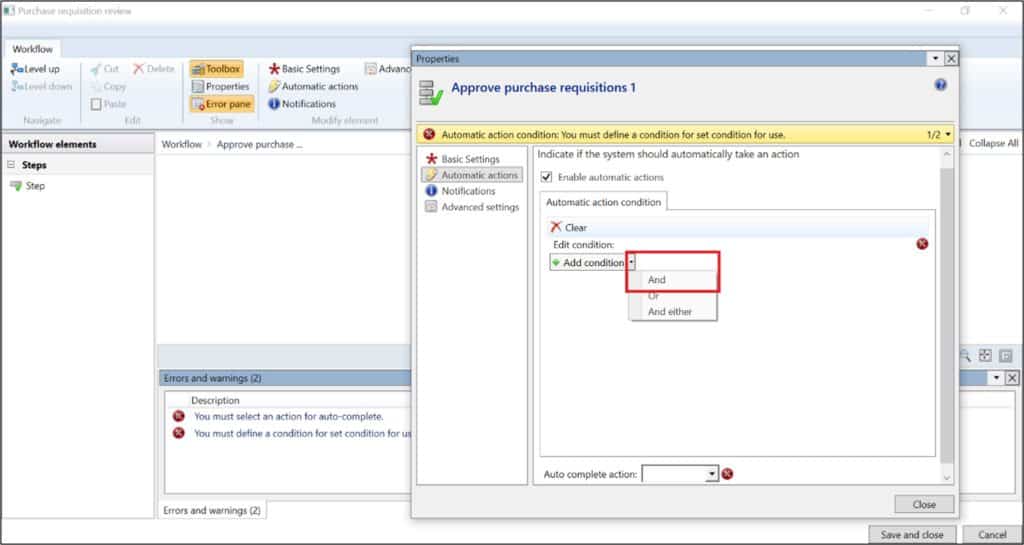
Click on Add condition and select “And”.
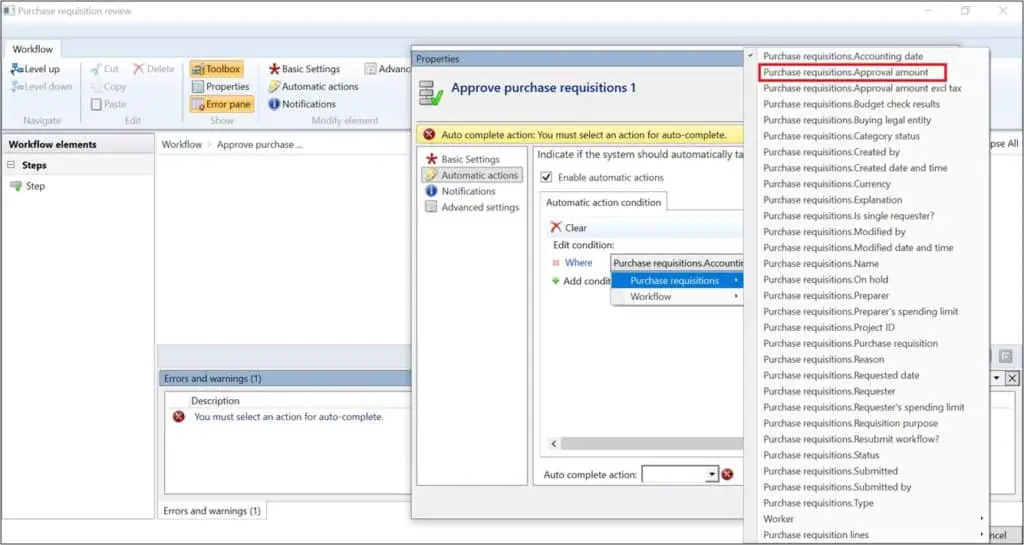
Select the “Purchase requisition.Approval amount” which means you have to set the condition on Purchase requisition approval amount.
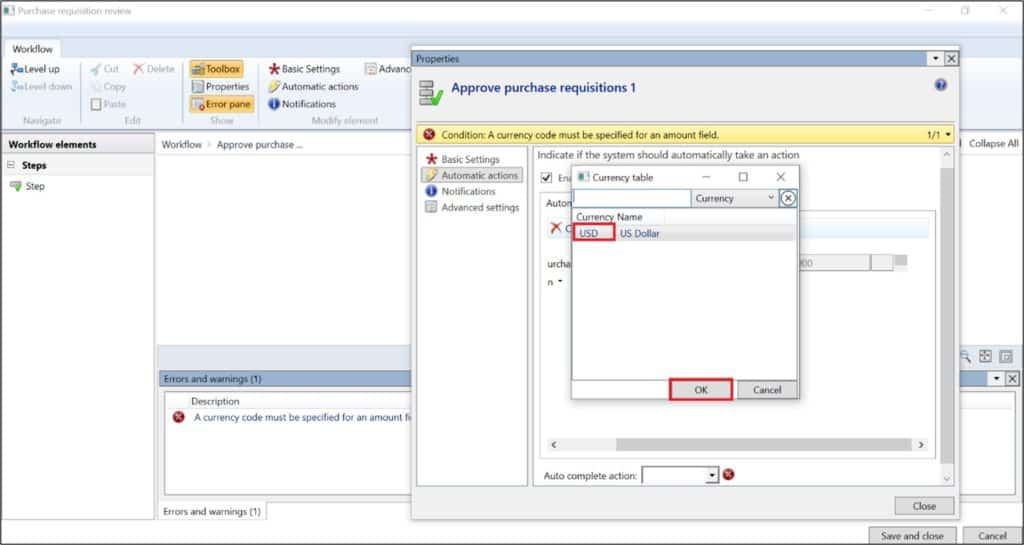
Now select the value identifier that is “<=” and enter the value which means if the purchase requisition approval amount is less than or equal to $1,000. Click on the double dot to select the currency.
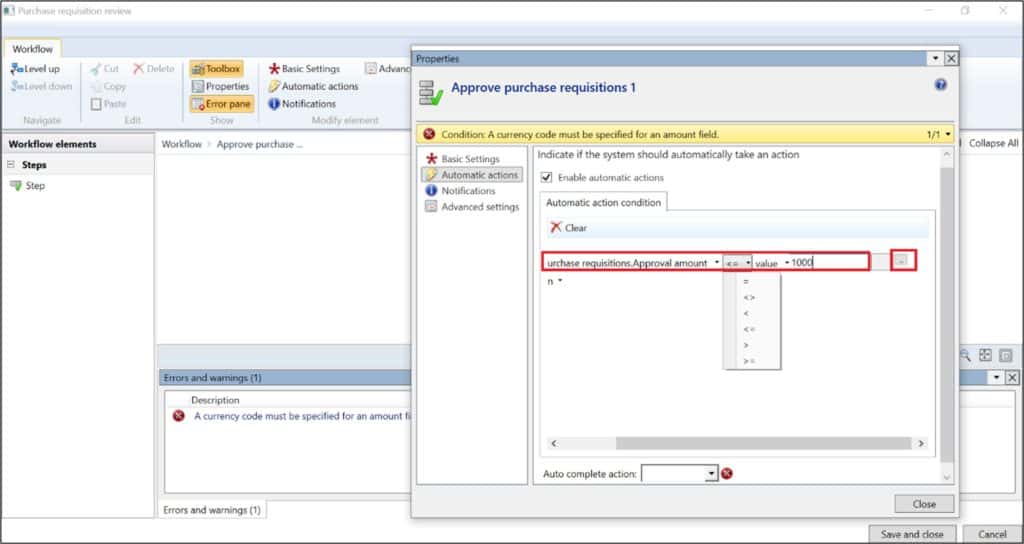
Select the currency and click Close button.
Now select the action to taken automatically by the Workflow and click the “Close” button.

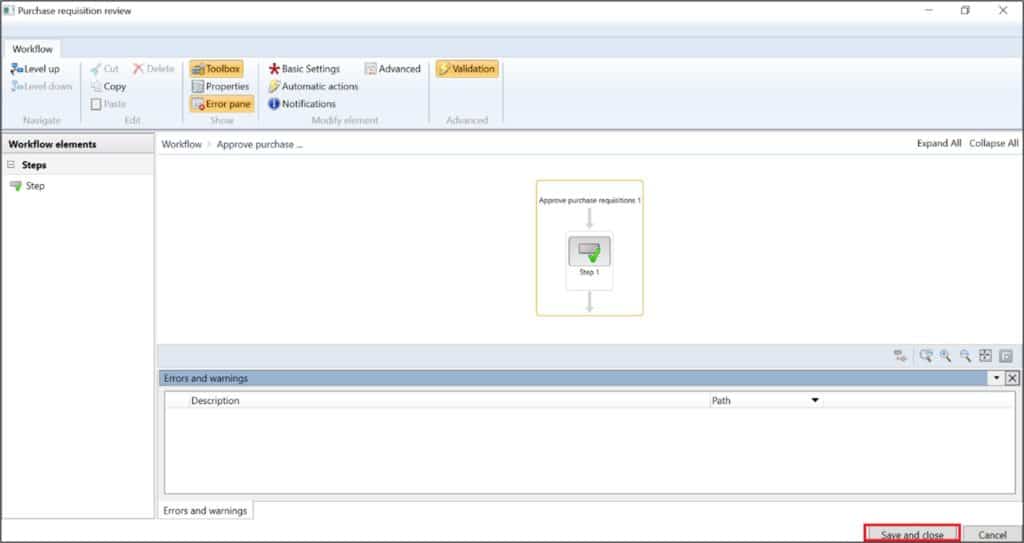
Now click the “Save and close” button.
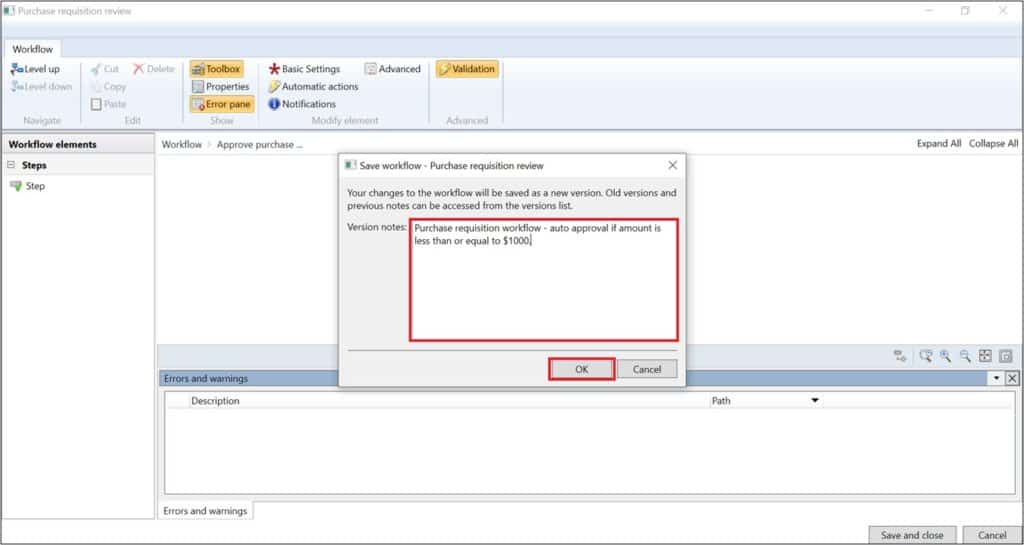
Enter the version notes for the purchase requisition workflow and click the “Ok” button.
Now select “Activate the new version” which will activate this version of the purchase requisition workflow.
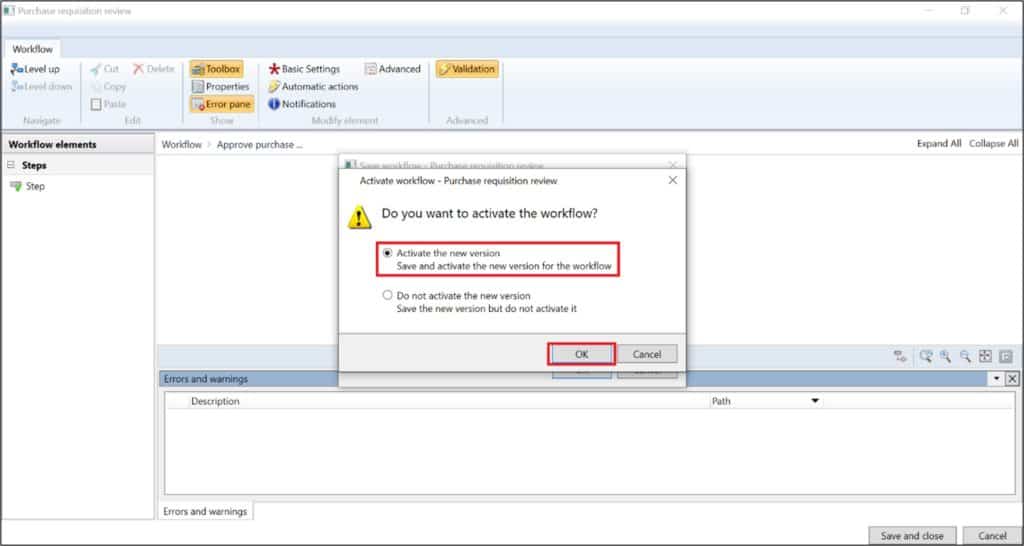
The Purchase requisition workflow is activated. Now the purchase requisition can be submitted for approval.
Note: You can optionally setup the workflow for Purchase requisition lines which will require the approval of each purchase requisition line.
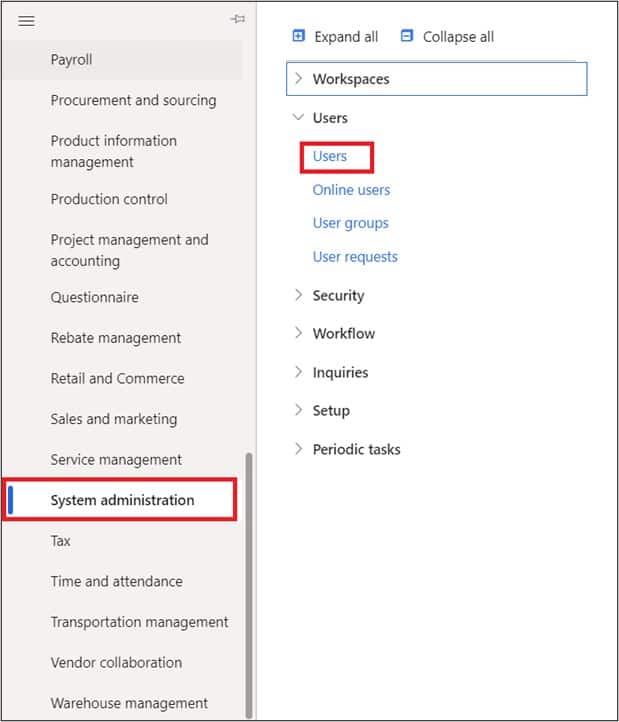
User Association to an Employee
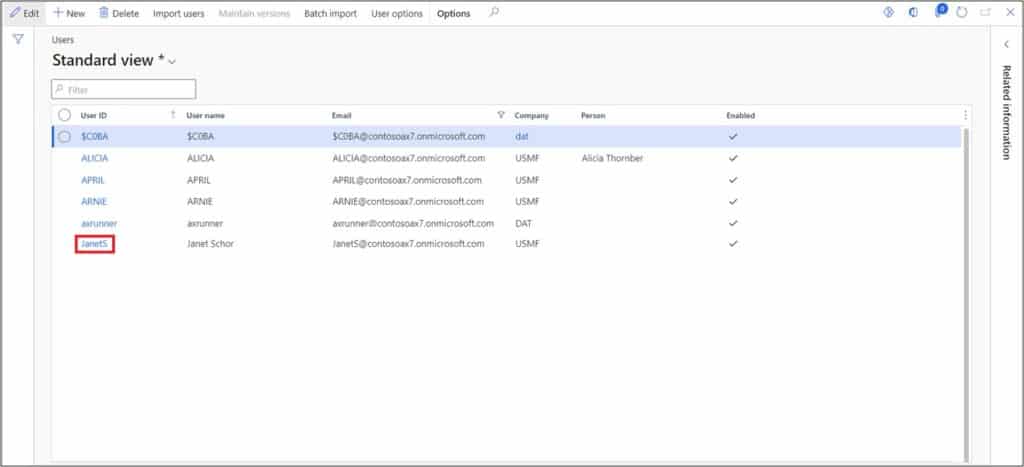
Because of the functionality inherent in purchase requisitions, users who need to create purchase requisitions need to be associated to an employee record. To associate a user with an employee record, navigate System administration > Users > Users.
Click on the “User ID” to open the user record.
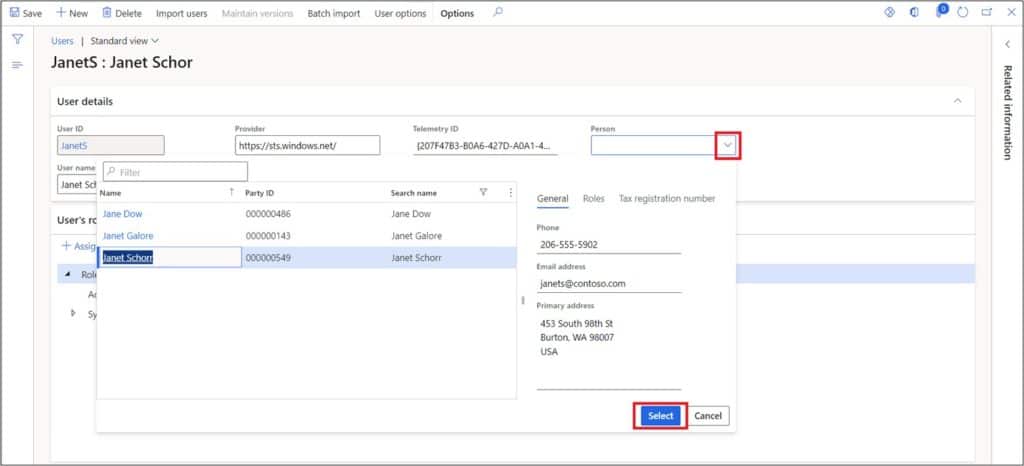
Click on “Person” dropdown column. Search for the relevant employee record, select it and click the “Select” button. Then click “Save”.
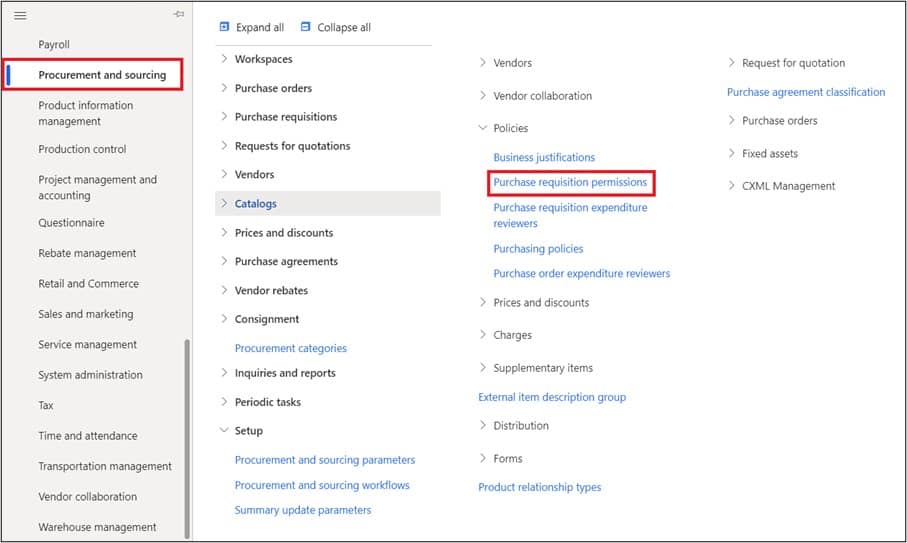
Purchase Requisition Permissions
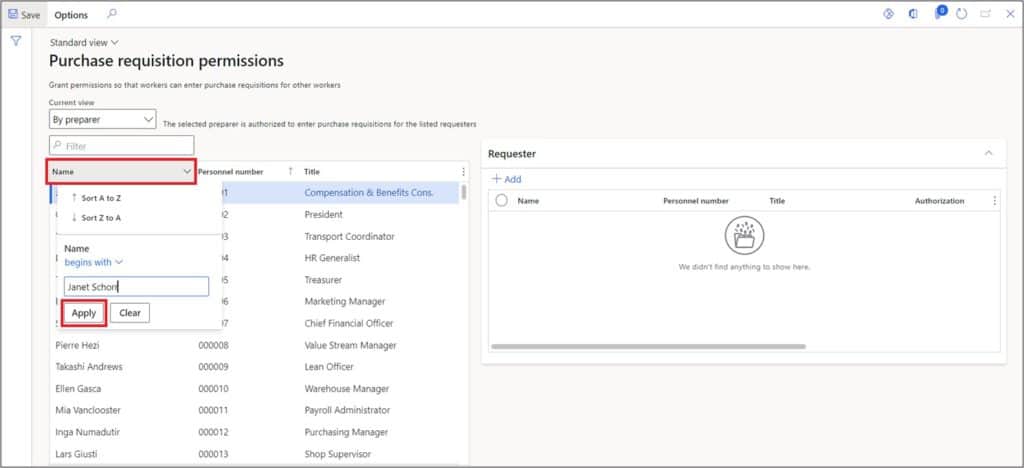
The requester is an employee that is associated to purchase requisition preparer which means the preparer can prepare a purchase requisition on behalf of that person. Navigate to Procurement and sourcing > Setup > Policies > Purchase requisition permissions.
Click on the name column to filter your own employee record and select it.
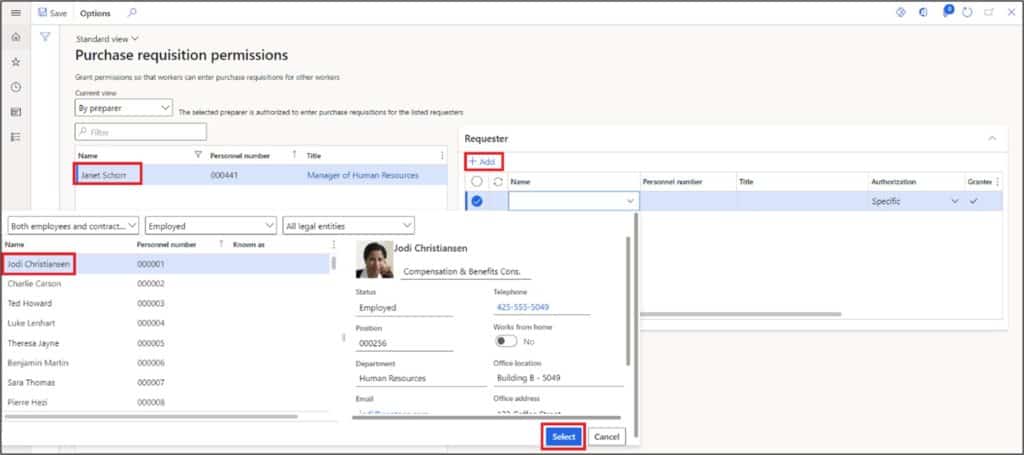
After selecting your own employee, click on the “Add” button. Select the requester’s employee and click the “Select” button.
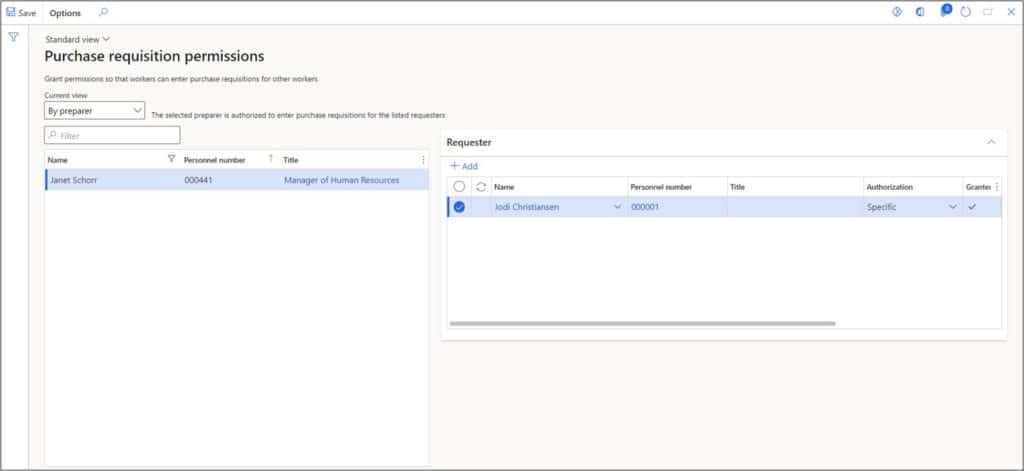
The requestors have been associated with the employee which means you can now prepare a purchase requisition on behalf of other requestors.
Process the Purchase Requisition
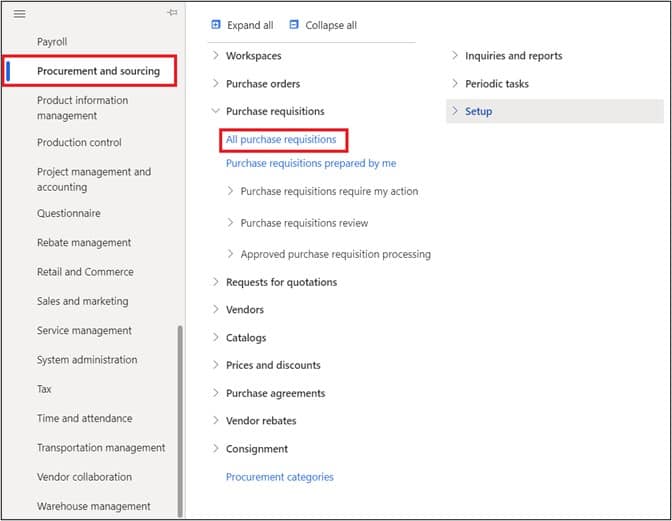
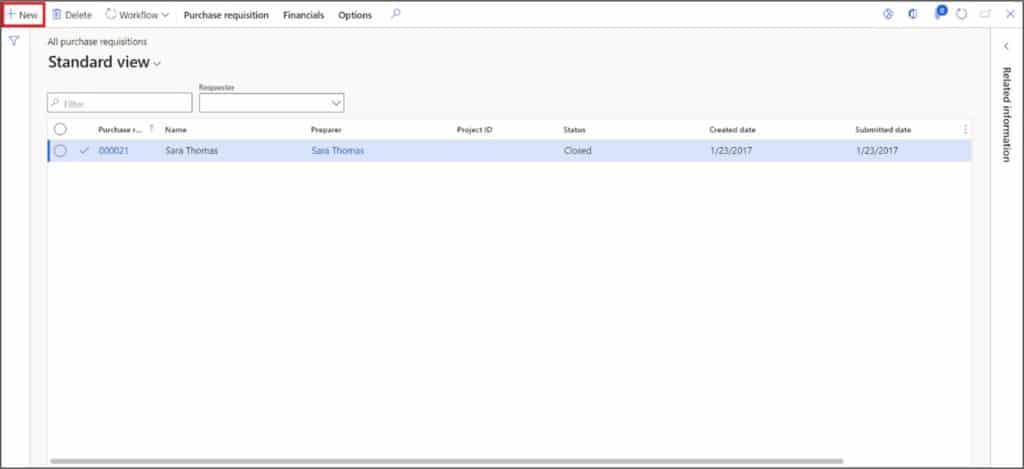
Now that we have the prerequisites completed, we can move into processing the purchase requisition. Navigate to Procurement and sourcing > Purchase requisitions > All Purchase requisitions.
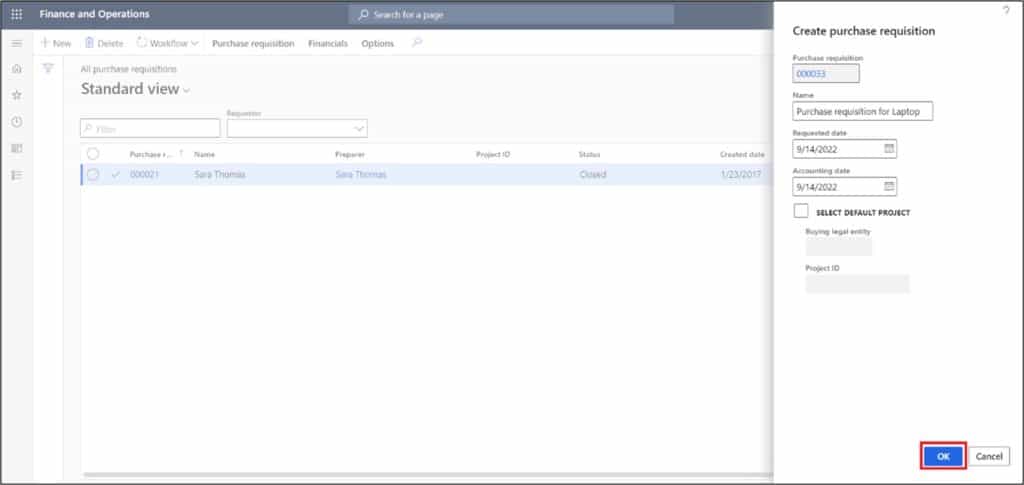
On the purchase requisition page, click the “New” button.
Enter the “Name” for the purchase requisition, select the “Requested date”, select the “Accounting date” and click the “Ok” button.
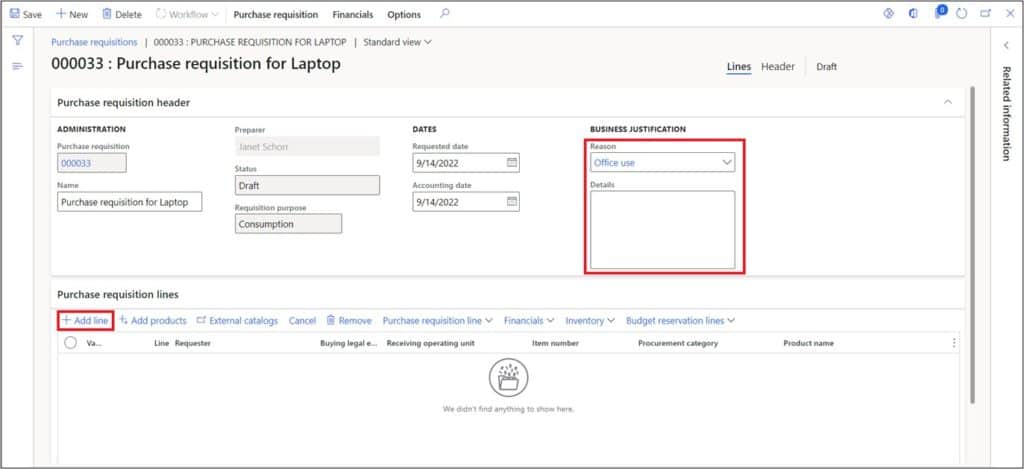
Select the reason and enter the details of the purchase requisition under business justification, then click the “Add line” button.
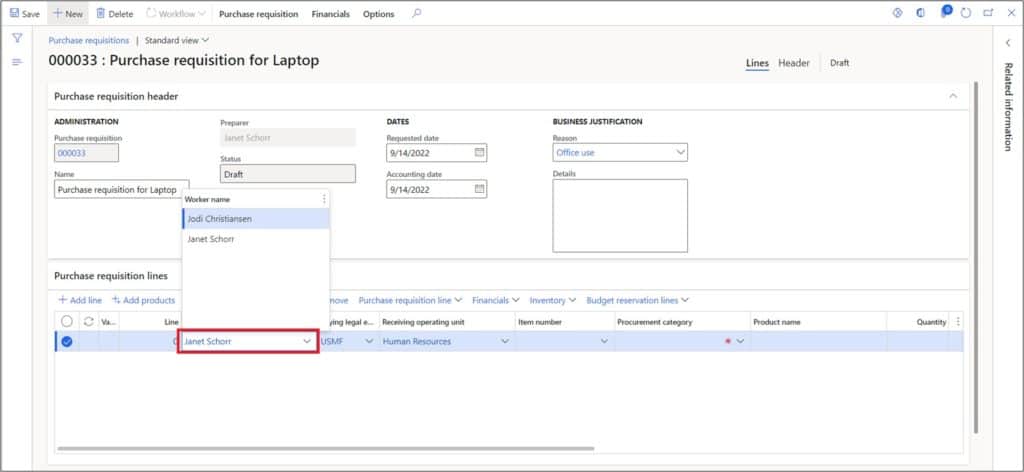
Select the requestor who has requested to raise the purchase requisition. You can see only those requestors that you are permitted to raise purchase requisitions on behalf of. The legal entity of the requestors is fetched automatically. The purchase order for the purchase requisition line will be created in the legal entity that is shown in buying legal entity.
Now select the item. The items in the dropdown are shown from the procurement catalogues. The Procurement catalogues are associated with the Catalogue policy rules under the company’s Purchasing policies. This means you can select only the items that are allowed as per the Purchasing policies.
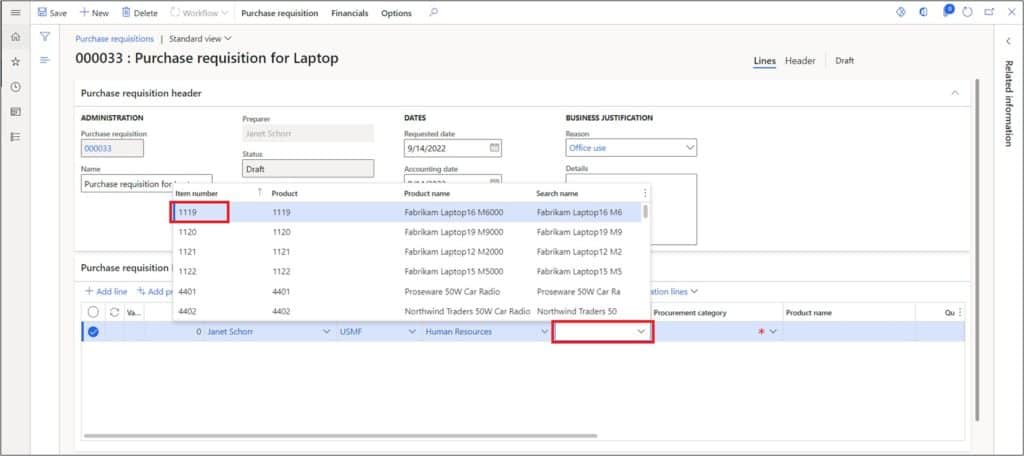
After selecting the item, the default purchase unit, the purchase price set in the price column on released products page (or trade agreement) and the primary vendor will default.
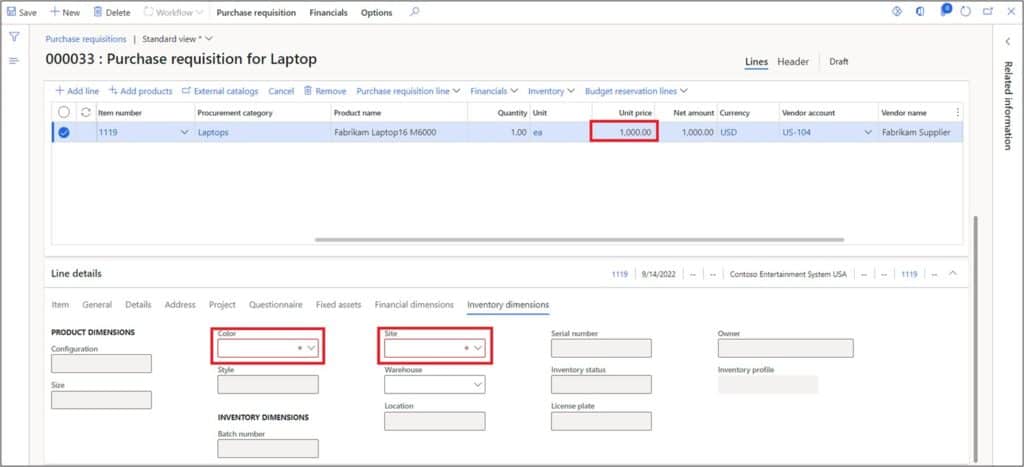
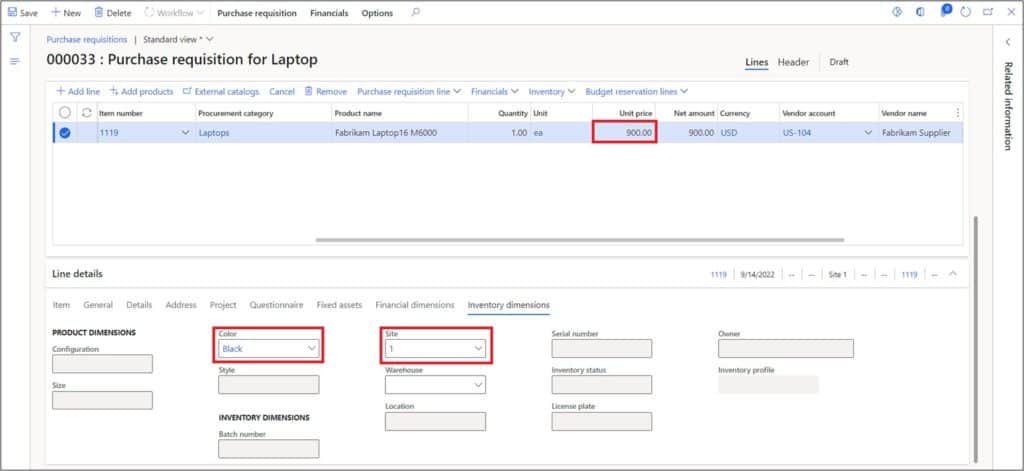
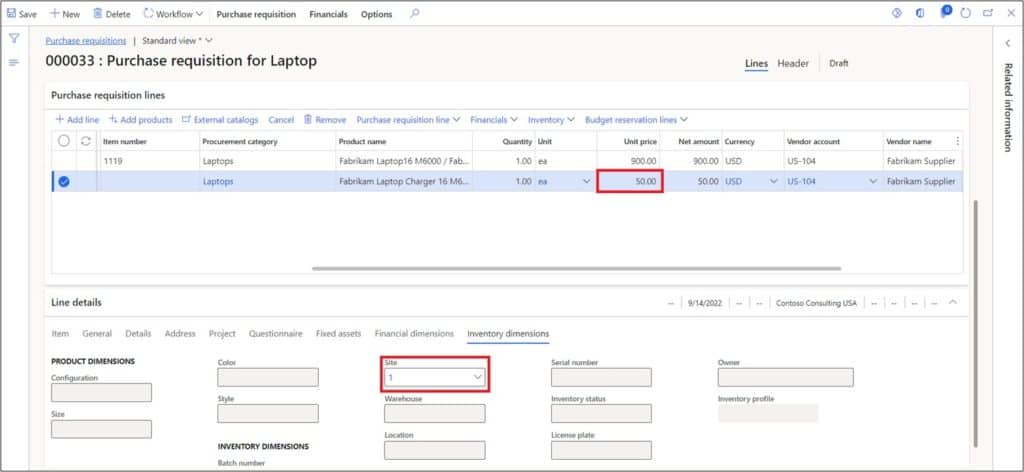
If your item has any product dimensions (size, color, style, configuration) you can select those as well as the Site.
Now let us add another Purchase requisition line and select the Procurement category instead of an item. Click the “Add line” button to add another line. Now select the procurement category.

After selecting the procurement category, the item number column will be disabled. Enter the product specification in the product name.
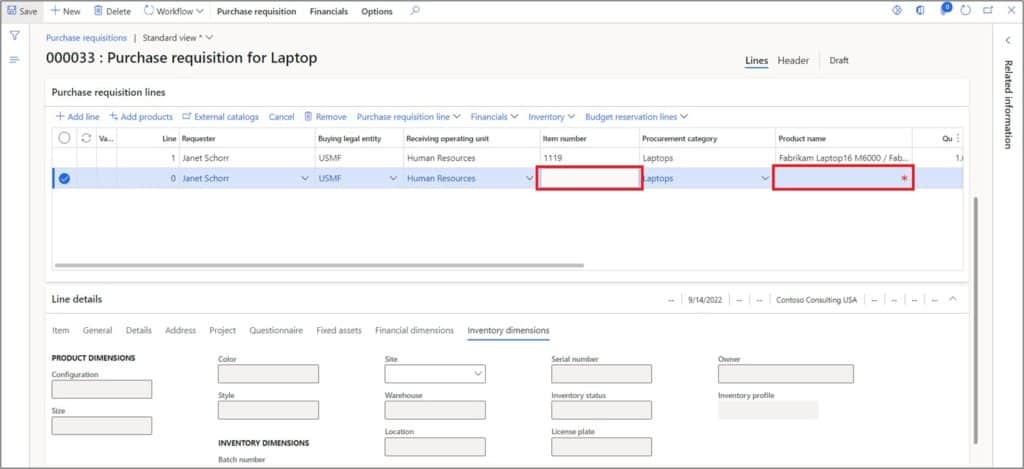
In this line, you can mention the expected price of this item per unit. Select the Site and click “Save” button.
The purchase requisition has been prepared in the “Draft” status and ready to be submitted for approval since the approval is mandatory for the purchase requisition. Click “Workflow” and then click the “Submit” button.
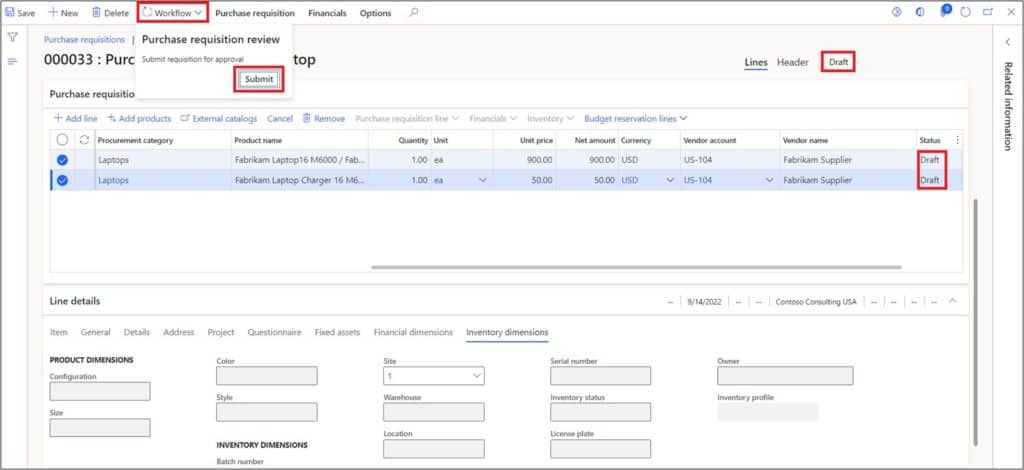
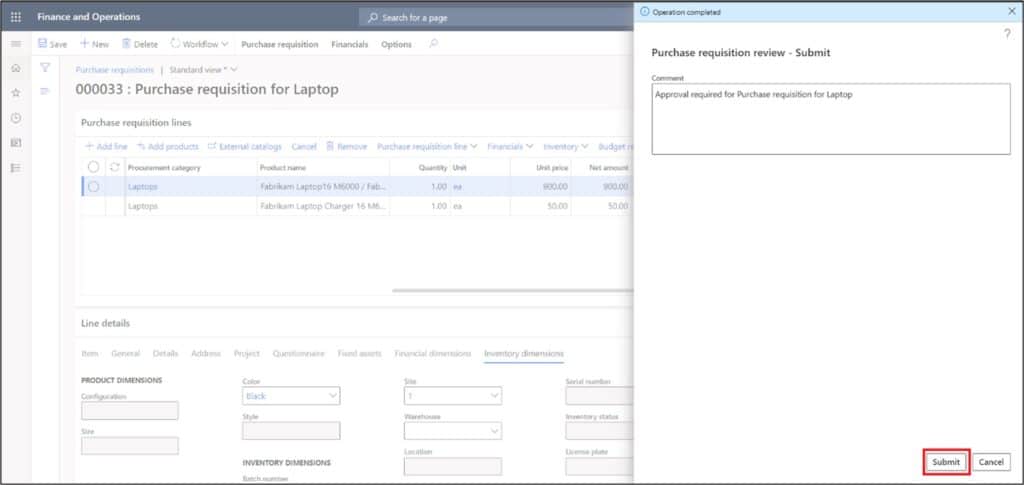
Purchase requisition performs the validation before submitting it for approval to check if all the provided data is correct. Enter the comments for the approver and click the “Submit” button.
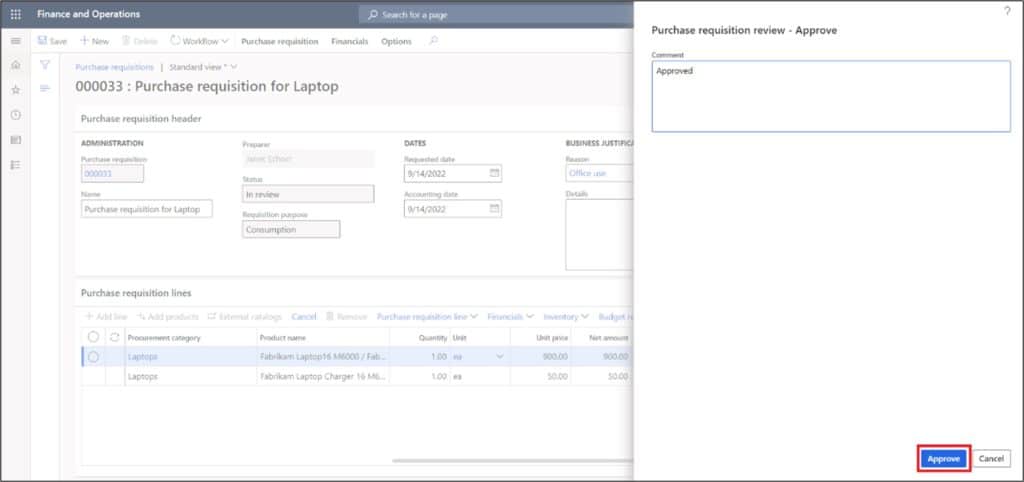
After submitting the Purchase requisition, the status of the Purchase requisition changes to “In review”. To approve the purchase requisition, click on “Workflow” button and then click on the “Approve” button. Note: it may take a minute depending on how frequently the workflow processor batch job is running.
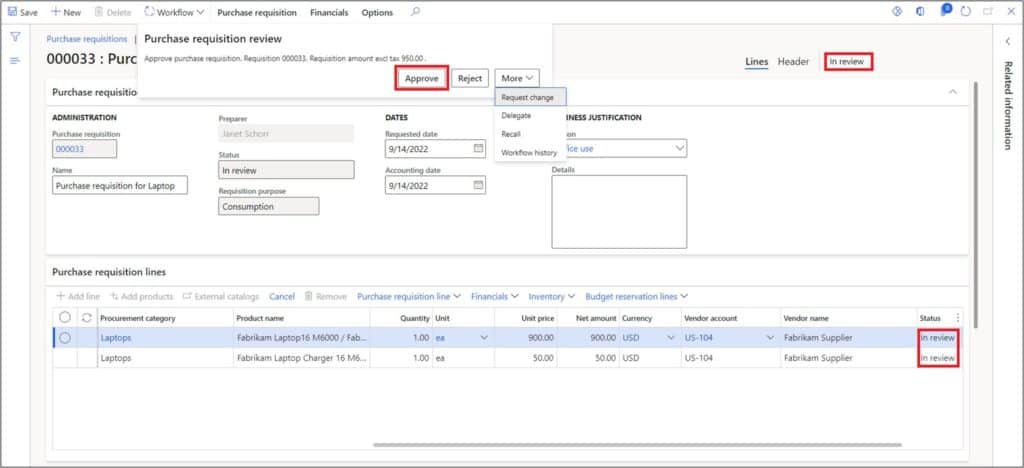
Enter the comments and click on “Approve” button.
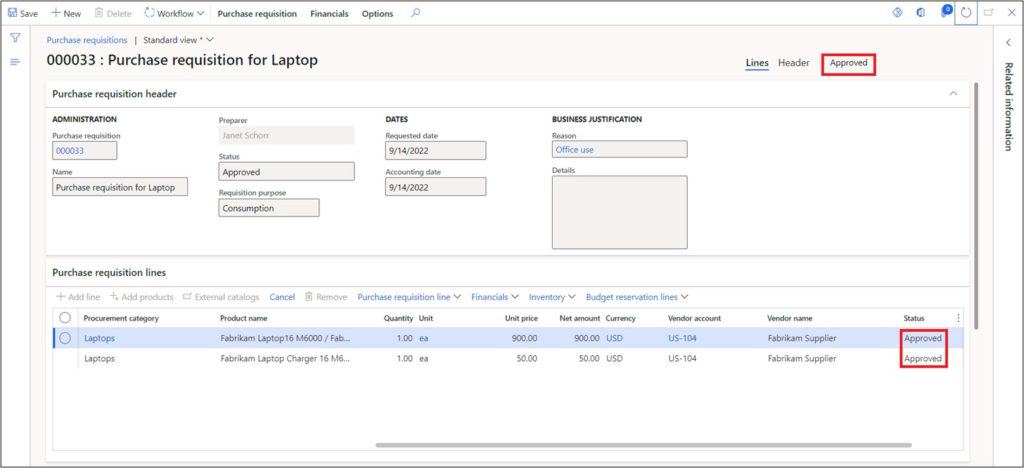
After approving the purchase requisition, the status will change to “Approved”.
Once the Purchase requisition is approved, there are the following possibilities.
- Perform the consolidation for the approved Purchase requisition lines.
- Create the Requirement for quotation and proceed with the bidding process
- Create the Purchase order automatically as per the Purchasing policies
- Create the Purchase order manually
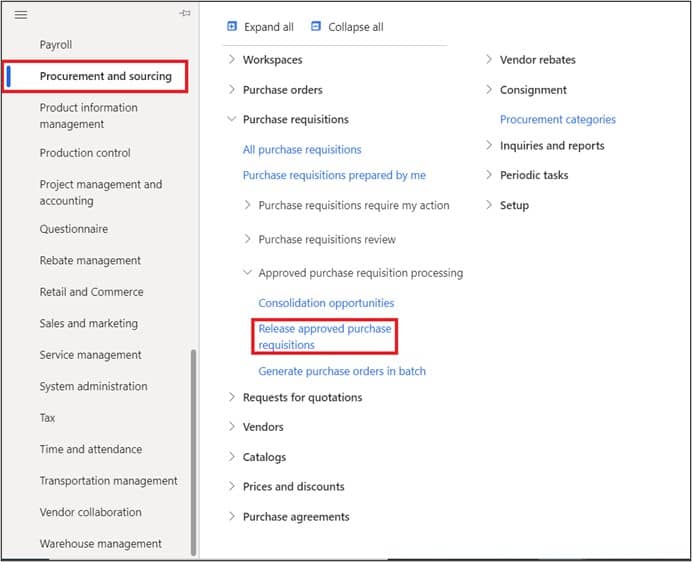
In this example we will process the approved purchase requisition and create the purchase order manually.
On the “Release approved purchase requisition” page, you can select the approved purchase requisition lines and create the purchase order. Navigate to Procurement and sourcing > Approved purchase requisition processing > Release approved purchase requisitions.
Select all the Purchase requisition lines that you want to convert to a purchase order and click on the new “Purchase order” button.
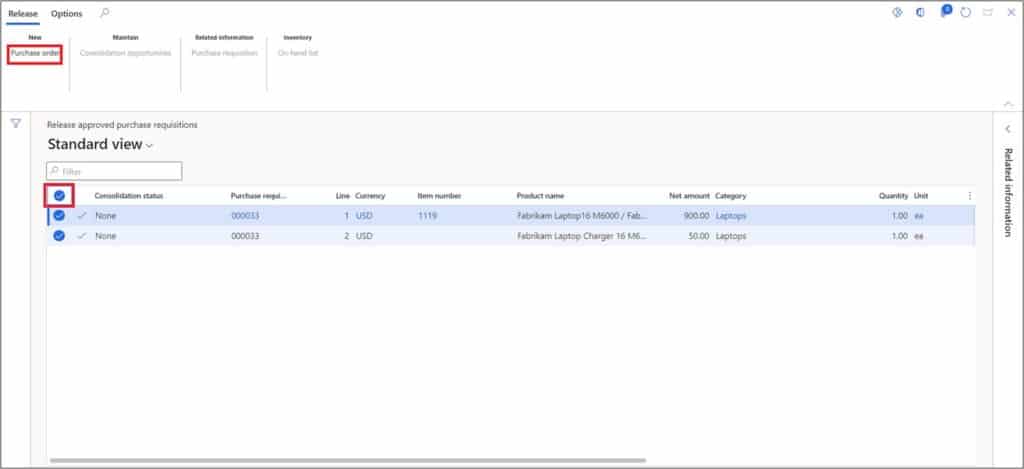
After clicking on the new purchase order button, the purchase order will be created.

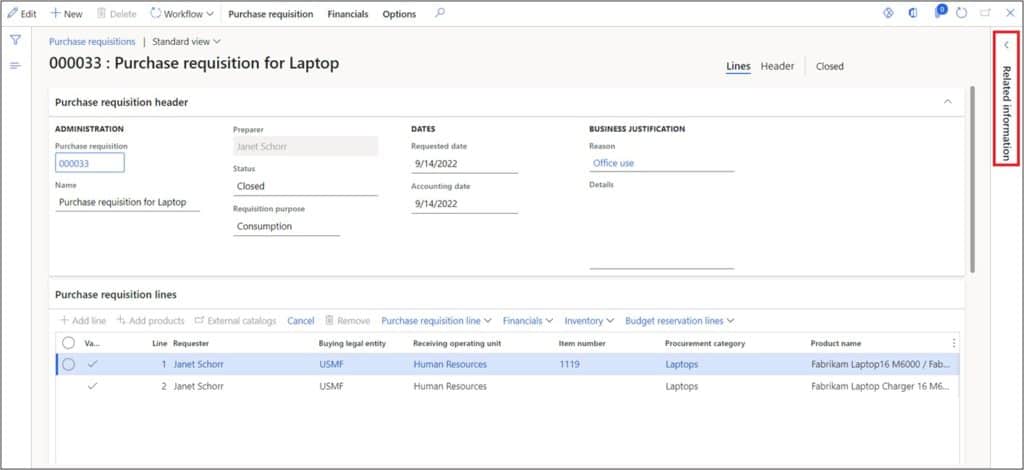
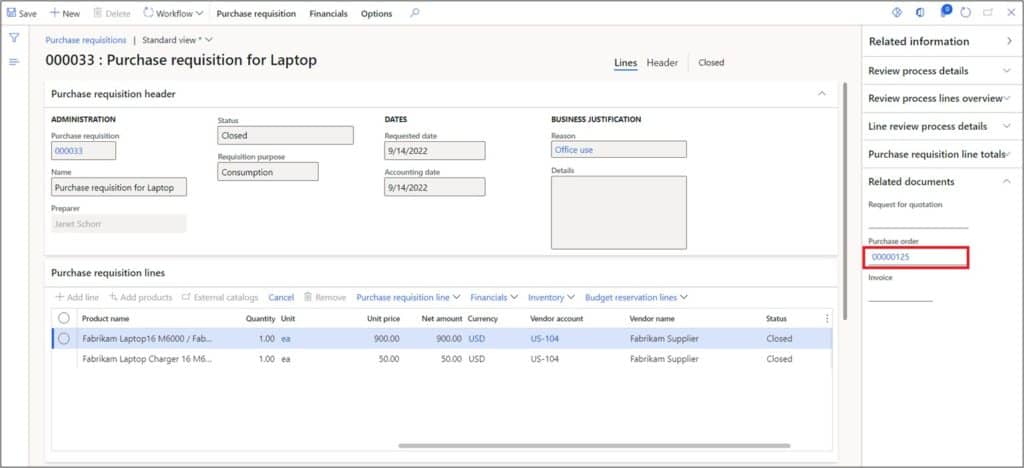
Now if we go back to the purchase requisition, we can see that the status of the purchase requisition has been changed to “Closed”. Click on the “Related information” fact box pane to see further details.
The purchase order number has been associated to the purchase requisition and can be seen in the related information tab.
Takeaways
The purchase requisition is an easy way to keep all purchasing flowing through D365 F&O. It allows you to control who purchases on behalf of who and can route the purchase requisition for approval based many different criteria including purchase amount. The purchase requisition has many controls that can be put in place to conform to company purchasing policies and rules. I hope this overview has given you the tools needed to create and process your own purchase requisition.