
The On-hand Inventory form in Dynamics 365 Finance and Operations is one of the most frequently used forms in the system because it shows a real-time view of on-hand inventory at so many levels of granularity. When users are first presented with the form though it is a very busy form and there are many fields, the meaning of which, may not seem readily apparent.
During implementations I tend to spend extra time with users ensuring they understand the form and what they are looking at because it is such so foundation not only in terms of its basic functions but the vocabulary that must be learned to understand it. In this article I will be going through the On-Hand Inventory form in its entirety and explaining each field and button on the form to give you a working understanding of how to read and understand on-hand inventory in Dynamics 365 Finance and Operations.
Introduction
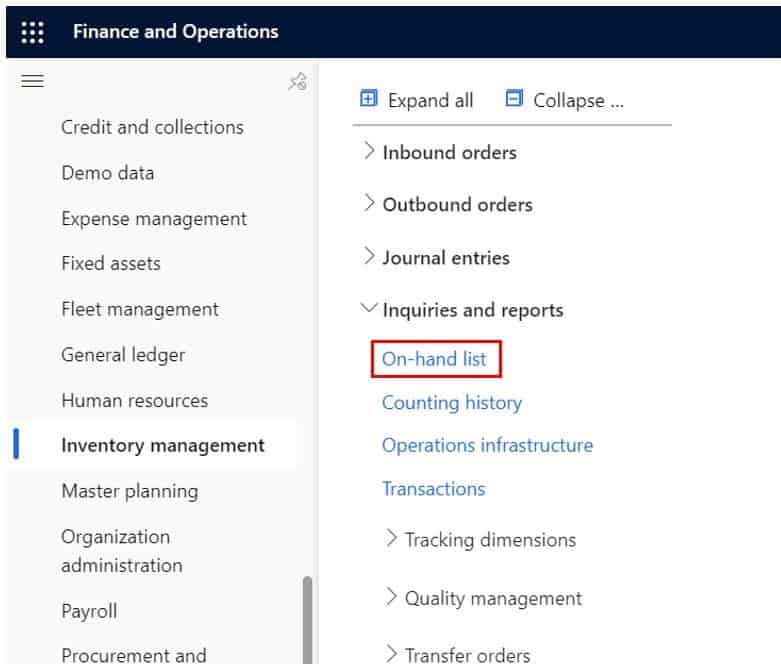
This will open the on-hand inventory inquiry form. If it is your first time to the form, it will open blank. On the left side of the screen you will see a filter panel where you can either apply a blank filter to bring in all items or filter for a specific item. In this case I want to remove some of the clutter and focus on a single item, so I am going to filter for a single item and click “Apply”.
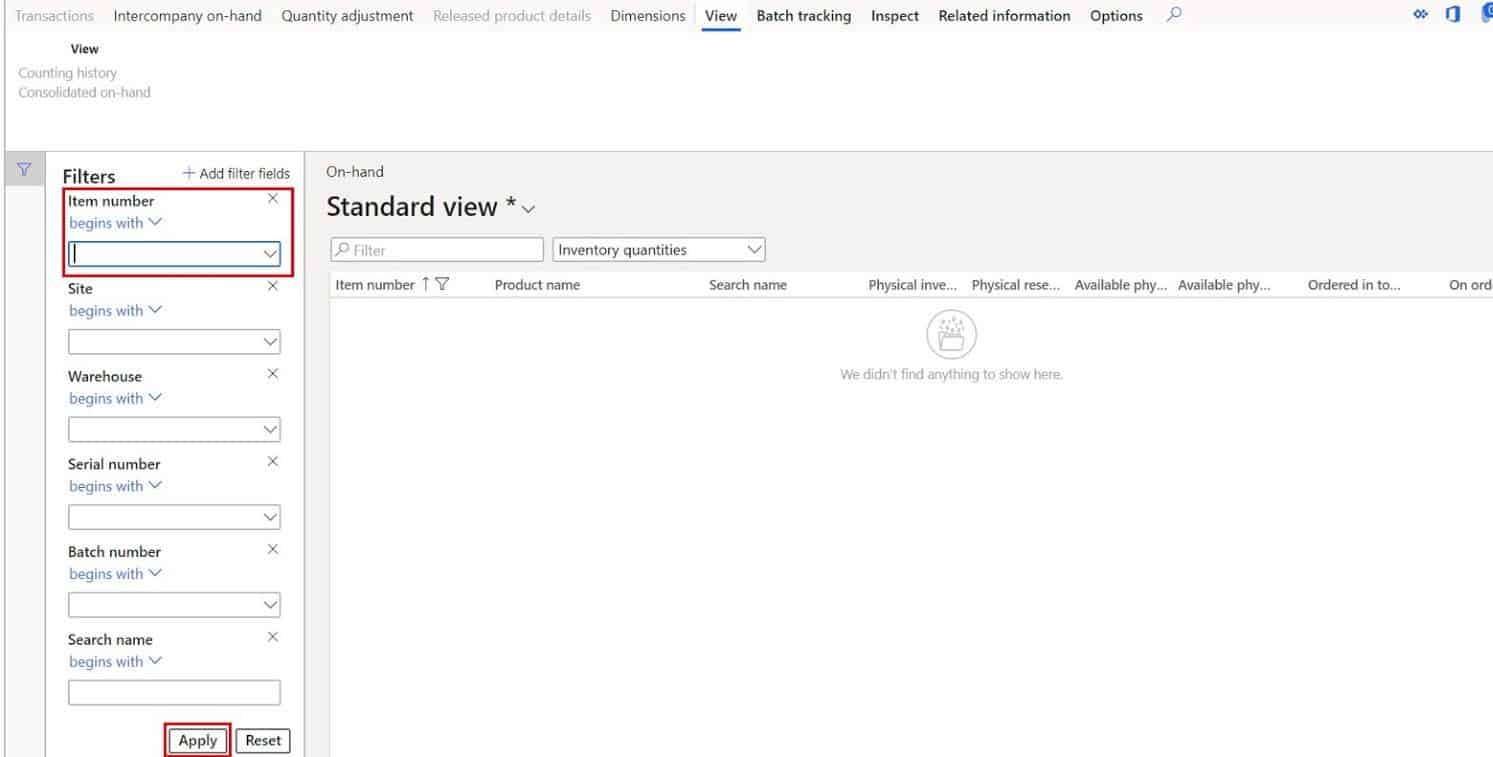
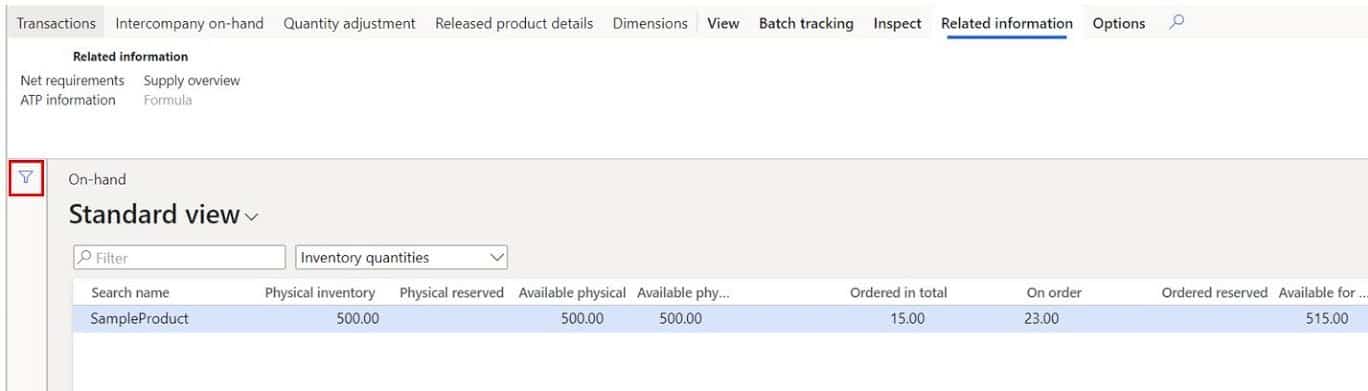
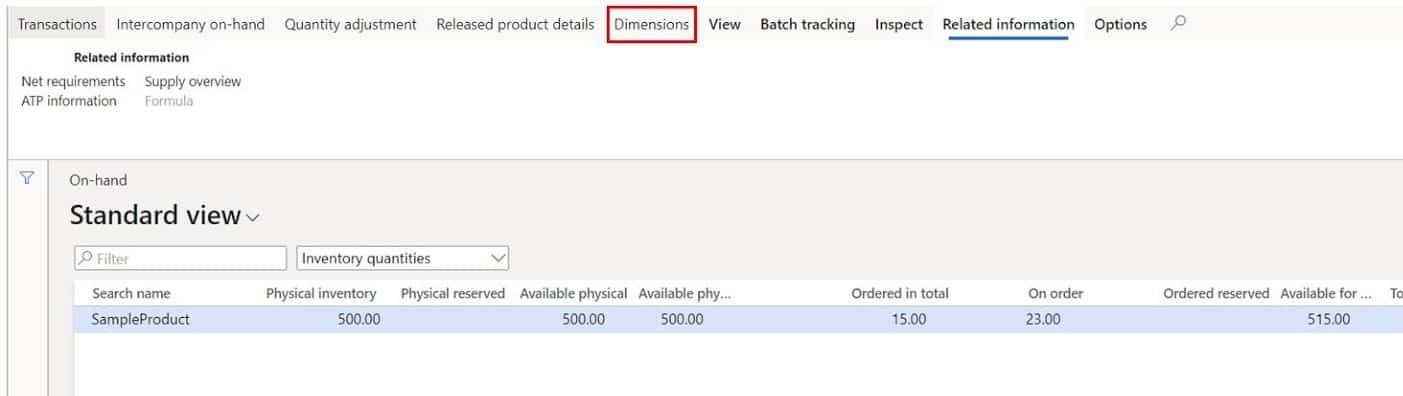
You can collapse the filter pane by clicking the “Filter” button on the filter pane. As you can see, we now have a record in the on-hand inquiry. You can see that we have 500 physically on hand but what if we want to know what warehouse the inventory is in and exactly where that inventory is in the warehouse?
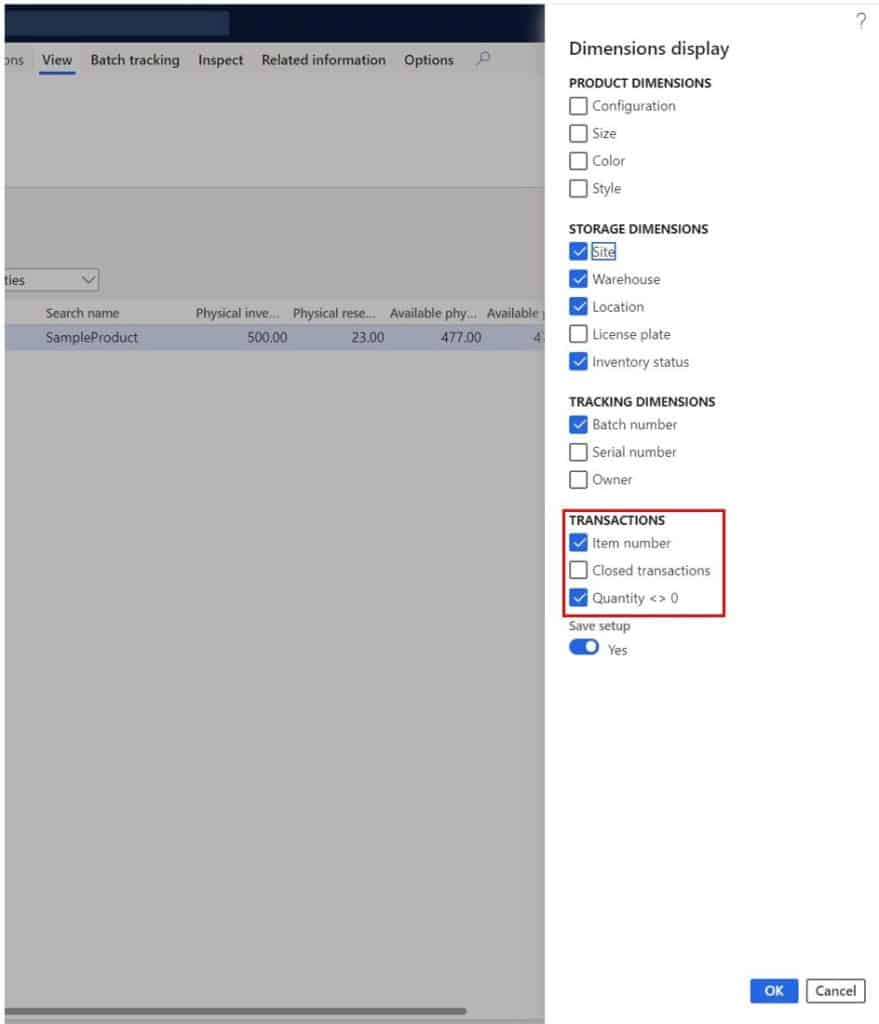
For this we can use the “Dimensions” button to allow us to see our inventory by several inventory dimensions.
In the top section we have “Product dimensions”. These are things like size, color, style, configuration. For example, I may have 100 cabinets on hand, but I need to know how many 24 inch, Navy, Rustic, Double etched cabinets I have. These are also known as product variants. If you are using product variants you will normally want to include these dimensions.
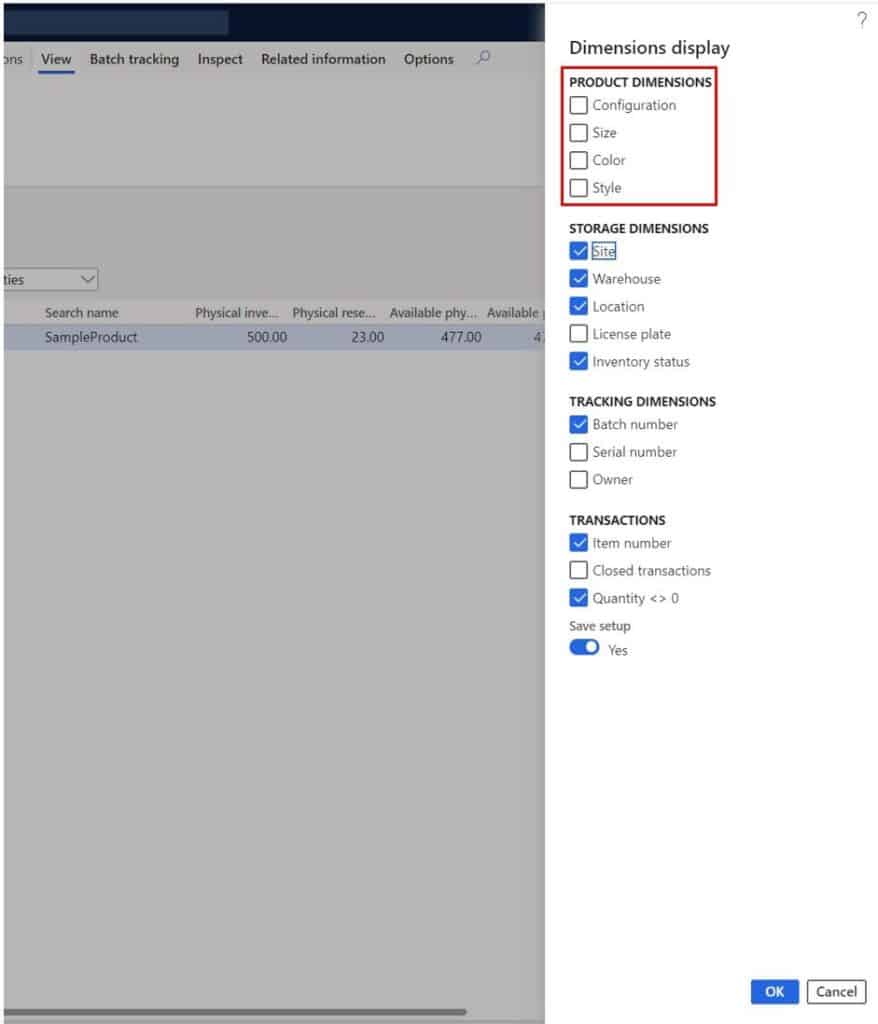
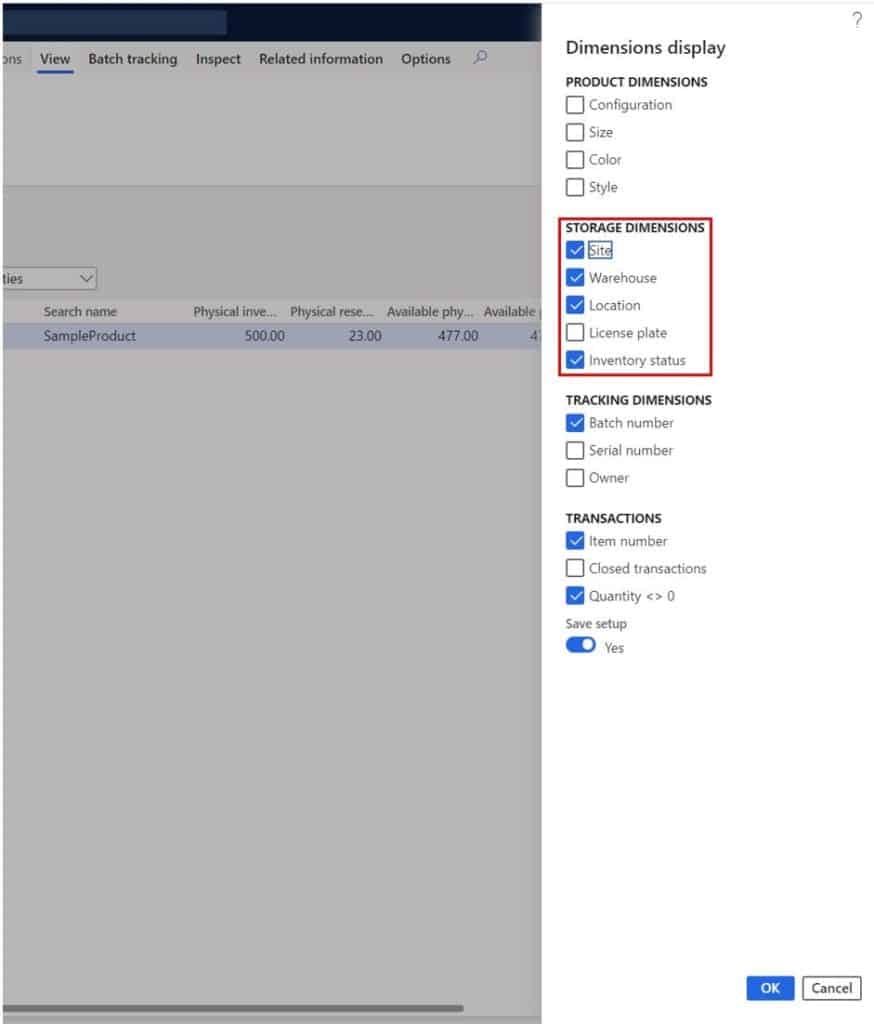
In the second section you have the “Storage Dimensions”. These are your core physical inventory dimensions.
- A “Site” typically a geographic area that incorporates one or many warehouses.
- A “Warehouse” represents a physical building that stores inventory.
- A “Location” is a specific location within a warehouse. The location itself typically will consist of aisle, rack, shelf, and position.
- A “License plate” is easiest to think of conceptually as a pallet but in reality, it is just a grouping of items.
An “Inventory status” is a way to define the purpose or current status of a set of items in inventory. For much more detail on inventory status and how it is used throughout Dynamics 365 Finance and Operations check out my article Inventory Status: Explained with Examples.
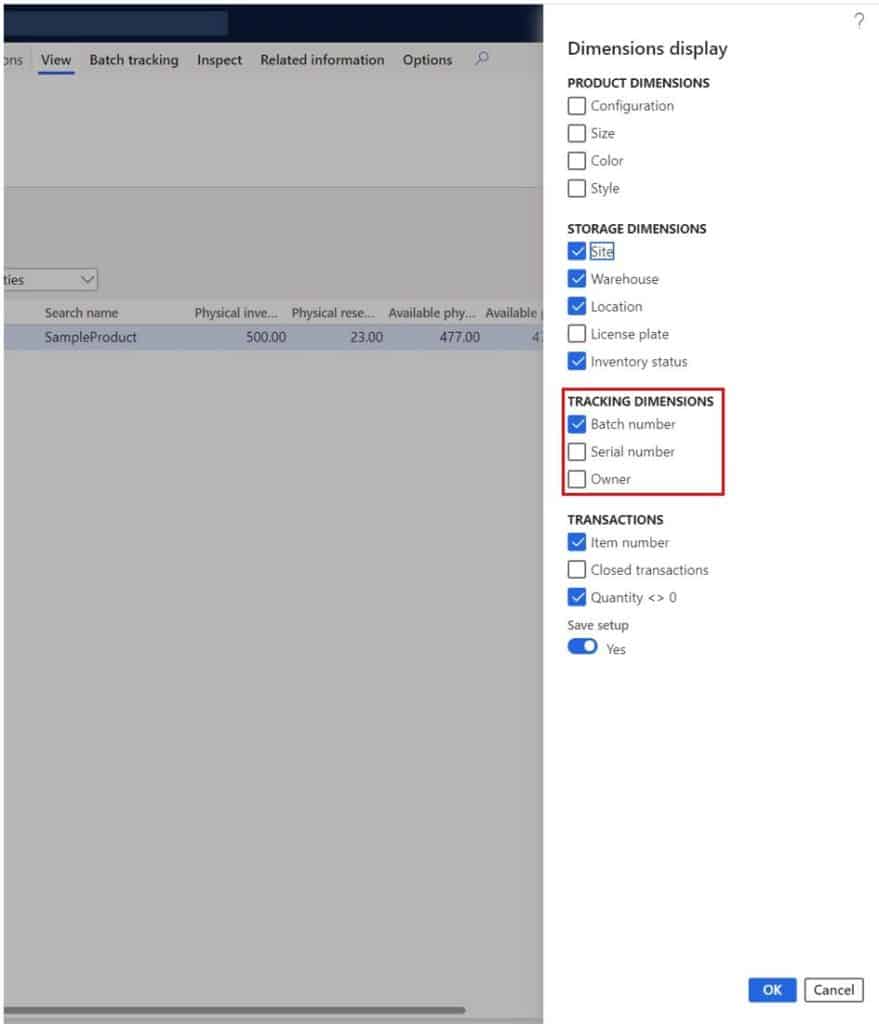
In the third section you have the “Tracking Dimensions”. These are things like serial number and batch number and owner.
- A “Serial number” is a unique identification of a specific item. Typically, serial numbers are completely unique, and you will never (or should never) have more than a quantity of 1 of any given serial number in inventory at a given time.
- A “Batch number” also frequently called a “Lot number” is a unique identification of a grouping of items that came from a particular production or manufacturing run, although batches are also used in non-manufacturing industries.
- An “Owner” identifies the owner of inventory in cases where you have vendor owned or consignment inventory. The owner dimension will be the vendor account of the vendor that owns the inventory.
The last section is the “Transactions” section.
- If you select the “Item number” flag it will add the item number field to the on hand inventory inquiry.
- If you enable the “Closed transactions” flag the on hand inventory inquiry will include closed transactions when it calculates the totals.
- If you enable the “Quantity <> 0” flag the inquiry form the inquiry form will include records where the physical quantity is not equal to zero.
- Click the “Ok” button to show the selected dimensions.
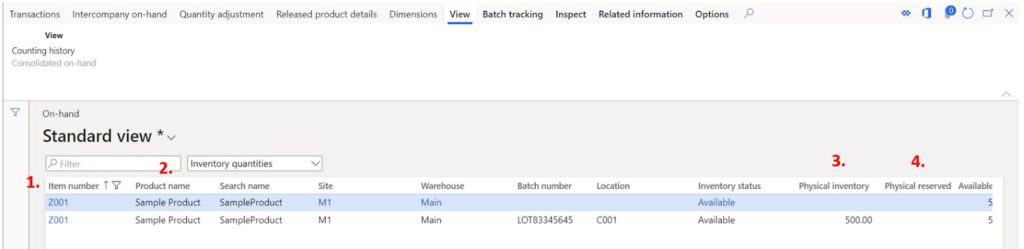
Now that we have enabled more dimensions, we have more granular level detail and a clearer picture of our on hand inventory.
Next let’s go through and understand what each field means so you are able to interpret the data you are seeing. We’ve already discussed the storage, product, and tracking dimensions so we will skip those.
- Item number – This is the unique item identification.
- Product name – This is the product name.
- Physical inventory – The physical inventory is the actual physical inventory sitting in the warehouse not including any reservations that might be sitting on the inventory.
- Physical reserved – This is the quantity against the dimensions specified in the record that inventory has been physically reserved against. We will come back to this later in the article.
- Available physical – Available physical is the remaining quantity available after physical reservation has been taken into account. Physical inventory – Physical reserved = Available physical. We will look at an example later in the article.
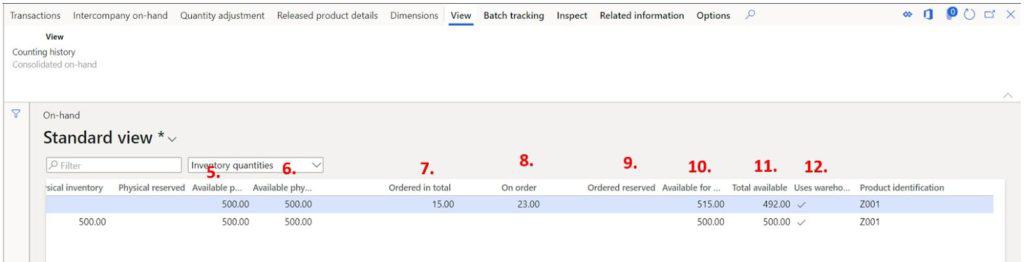
- Available physical on exact dimensions – This is the same thing as available physical except it is calculated based on the exact dimensions of the record. We will look at an example later in the article.
- Ordered in total – This is the total number of incoming receipts for the given dimension combination. For example, this could be un-received purchase orders or unfinished production orders.
- On order – This is the total number of outgoing issues for the given dimension combination.
- Ordered reserved – This is the total number of incoming receipts with reservations. This feature can be enabled in the Inventory management parameters.
- Available for reservation – This is the total quantity that is available for reservation. If you have the “Reserve ordered items” flag enabled this number will include the ordered quantity.
- Total available – This is the total available inventory after you take out reservations inventory on orders and include inventory on incoming orders. Physical inventory – Physical reserved + Ordered – On order – Ordered reserved.
- Uses warehouse management processes – This indicates whether or not the item enabled for advanced warehouse processes.
Transactions Detail
The on hand inventory form is a form that shows aggregated inventory transactions. Each record shows the total quantities for each inventory dimension combination. If you need to see what transactions make up that balance you can use the “Transactions” button to view the underlying transactions that make up the balance.
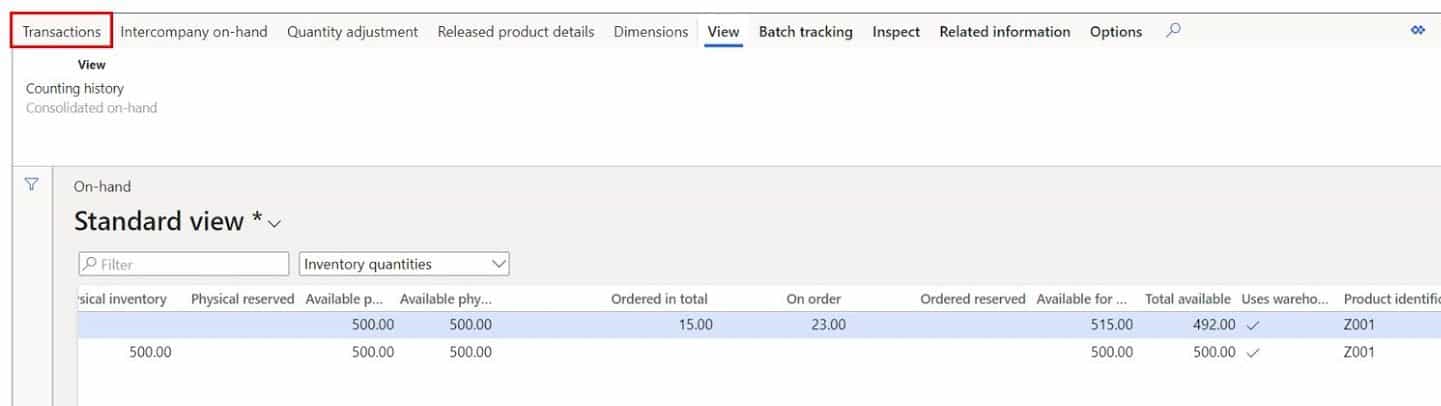
In this example I want to see where the “On order” and “Ordered in total” balances come from so I can click the “Transactions” button to see the transactions. As you can see there is one sales order that makes up the balance of the “On order” quantity and one purchase order that makes up the “Ordered in total” balance.
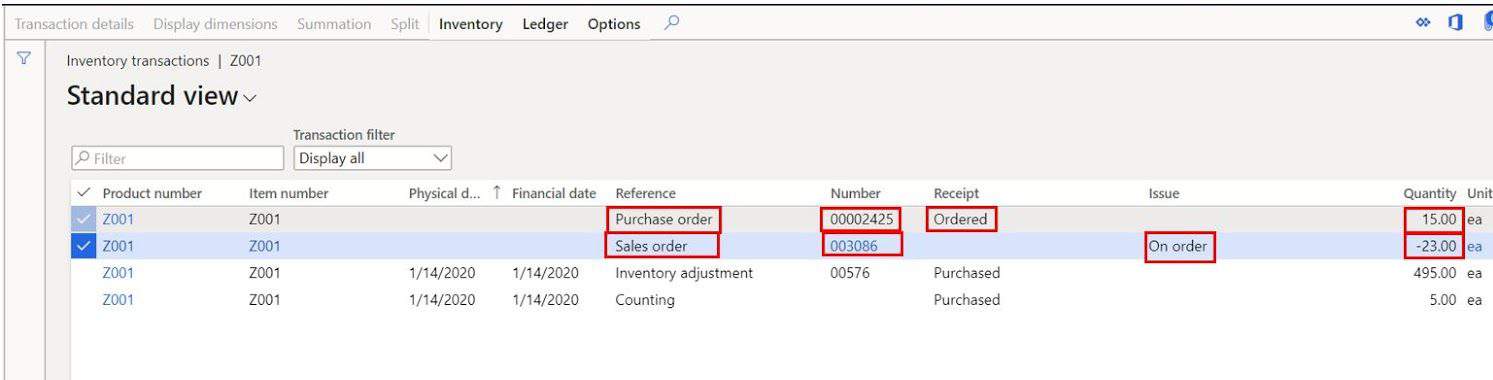
You can then drill into the order creating the transaction by clicking the order number in the “Number” column. So let’s go to the sales order.
Reservations
Now that we are in the sales order let’s create a reservation and see the result in the on hand inquiry form.
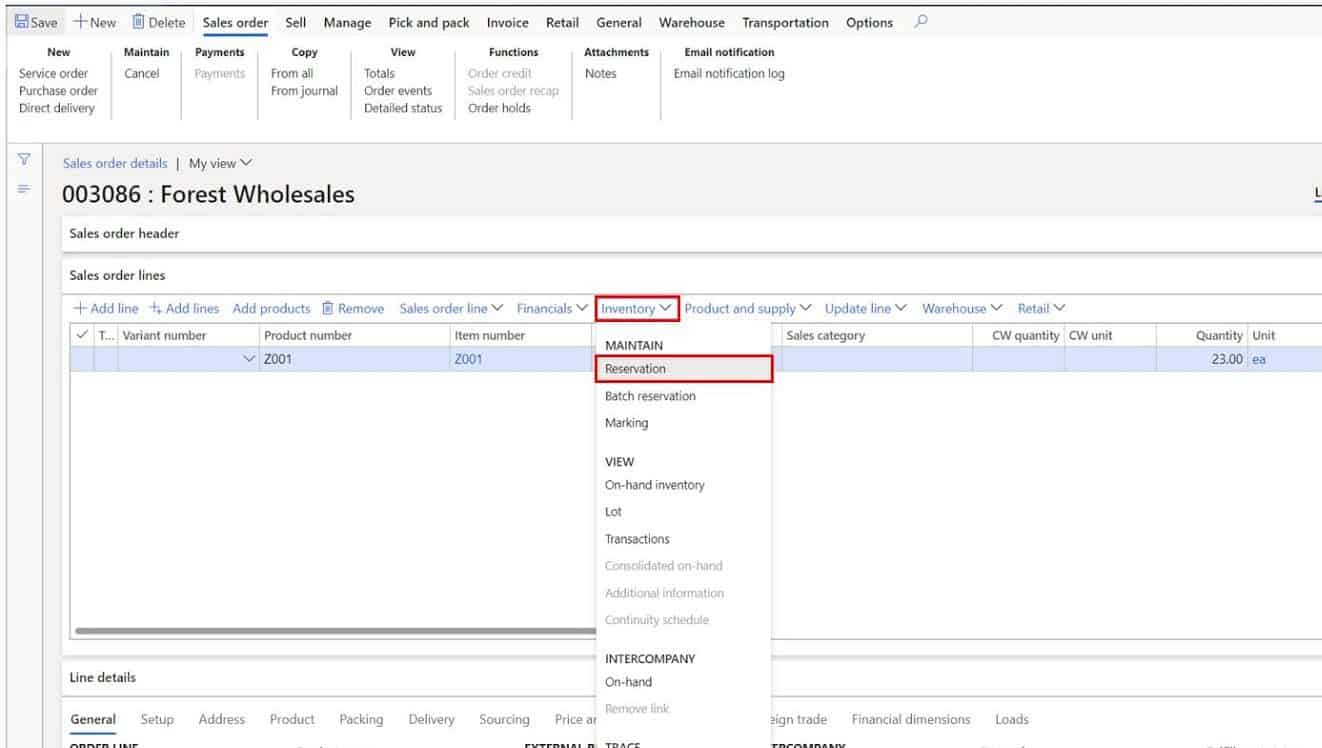
- In the sales order click the “Inventory” button and click the “Reservation” button.
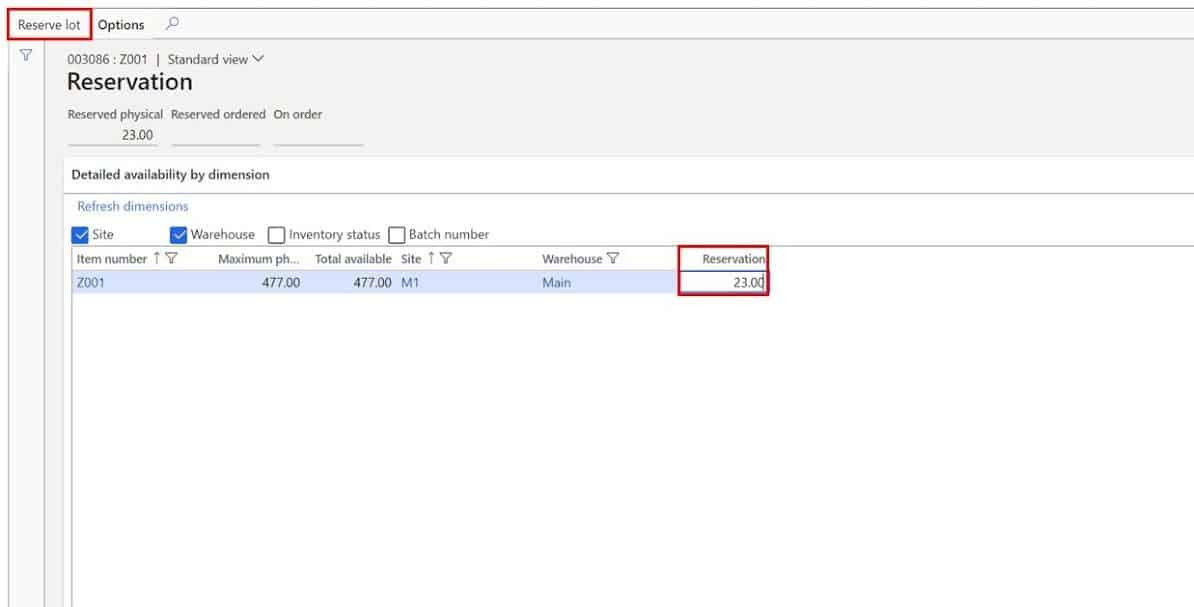
In the reservation form click the “Reserve lot” button.
- Close the form and navigate back to the on hand inventory form.
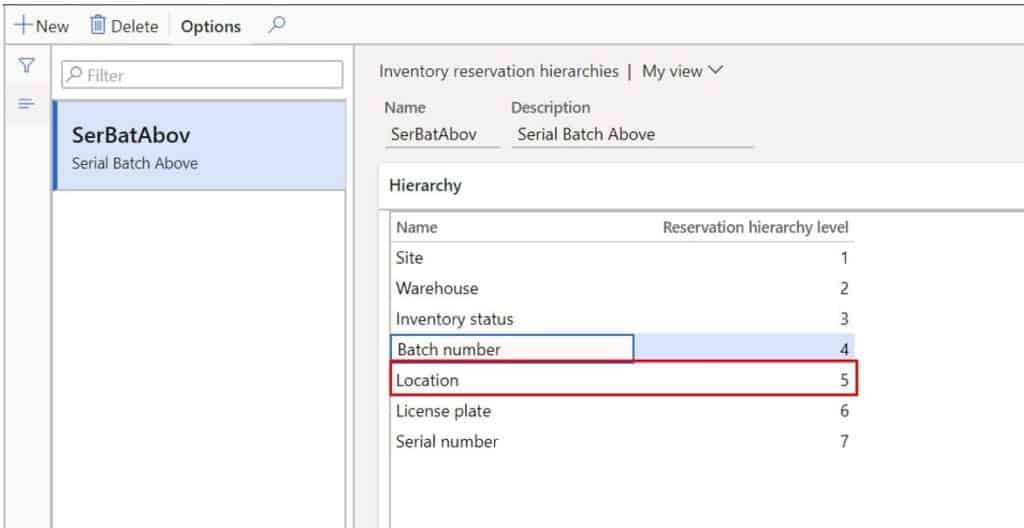
You can now see that there is a balance in the “Physical reserved” column. Also notice that the physical reserved quantity is on the first two rows and not on the third row which has the location dimension. This is because of the reservation hierarchy and because the item is advanced warehouse enabled.
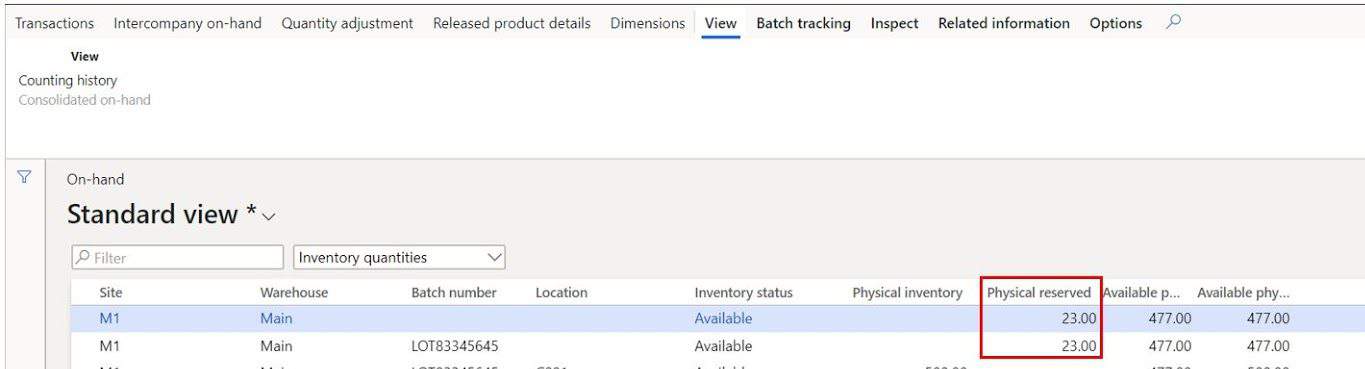
In the reservation hierarchy setup, any dimension at or below the location dimension will only be reserved at time of work creation. In this case the batch number dimension is above the location which is why there is a balance in the second row of the on hand inquiry form and why there is no physical reservation on the third row which contains the location dimension.
Buttons And Related Information
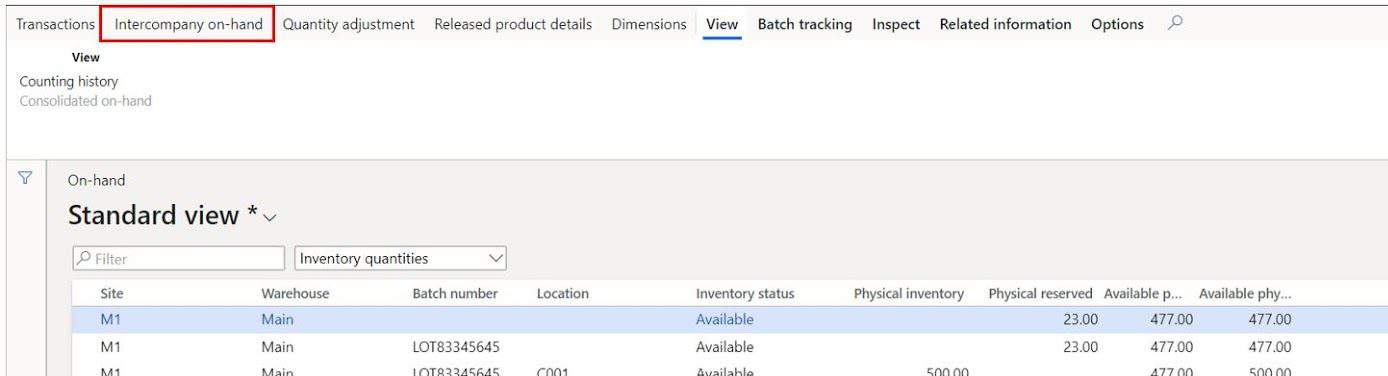
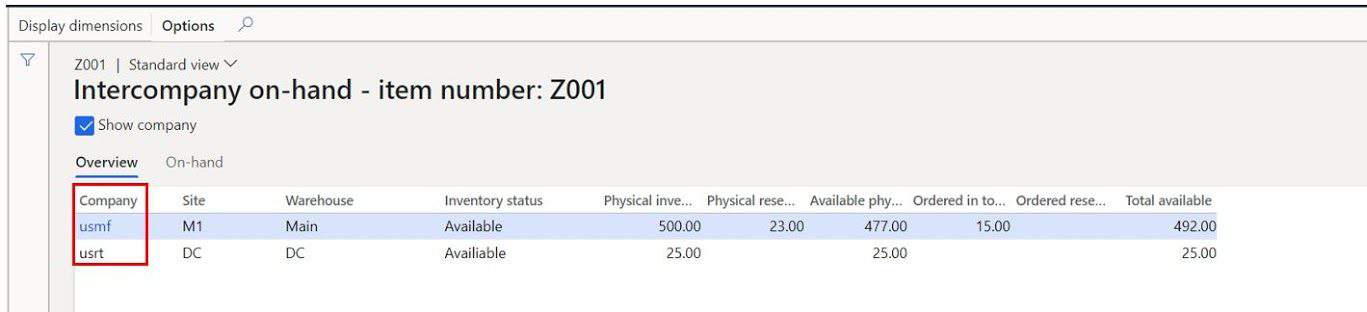
We have already discussed the “Transaction” button so we will start with the “Intercompany on-hand” button. Intercompany on-hand – This button allows you to view the on hand inventory balances for the same item across different companies. This is useful for companies that utilize a centralized procurement strategy and distribute inventory to child legal entities through intercompany planning.
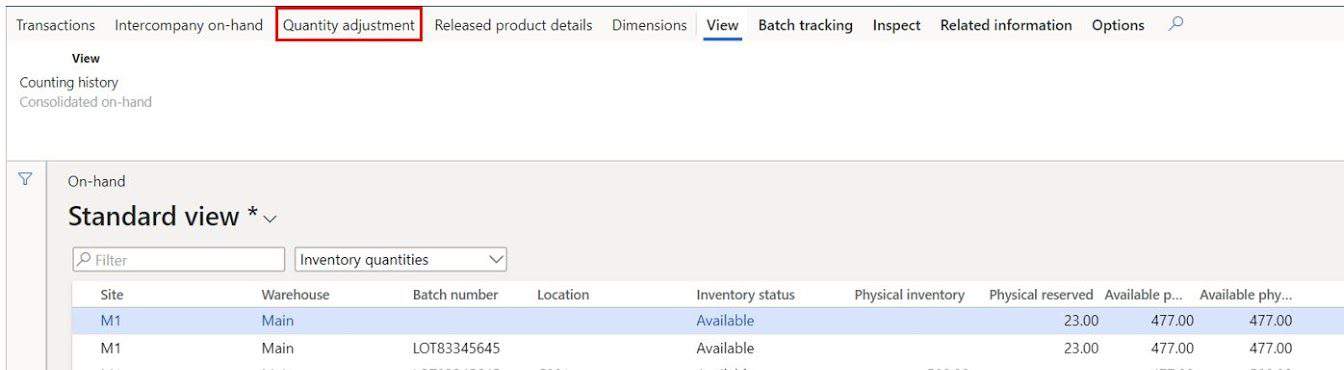
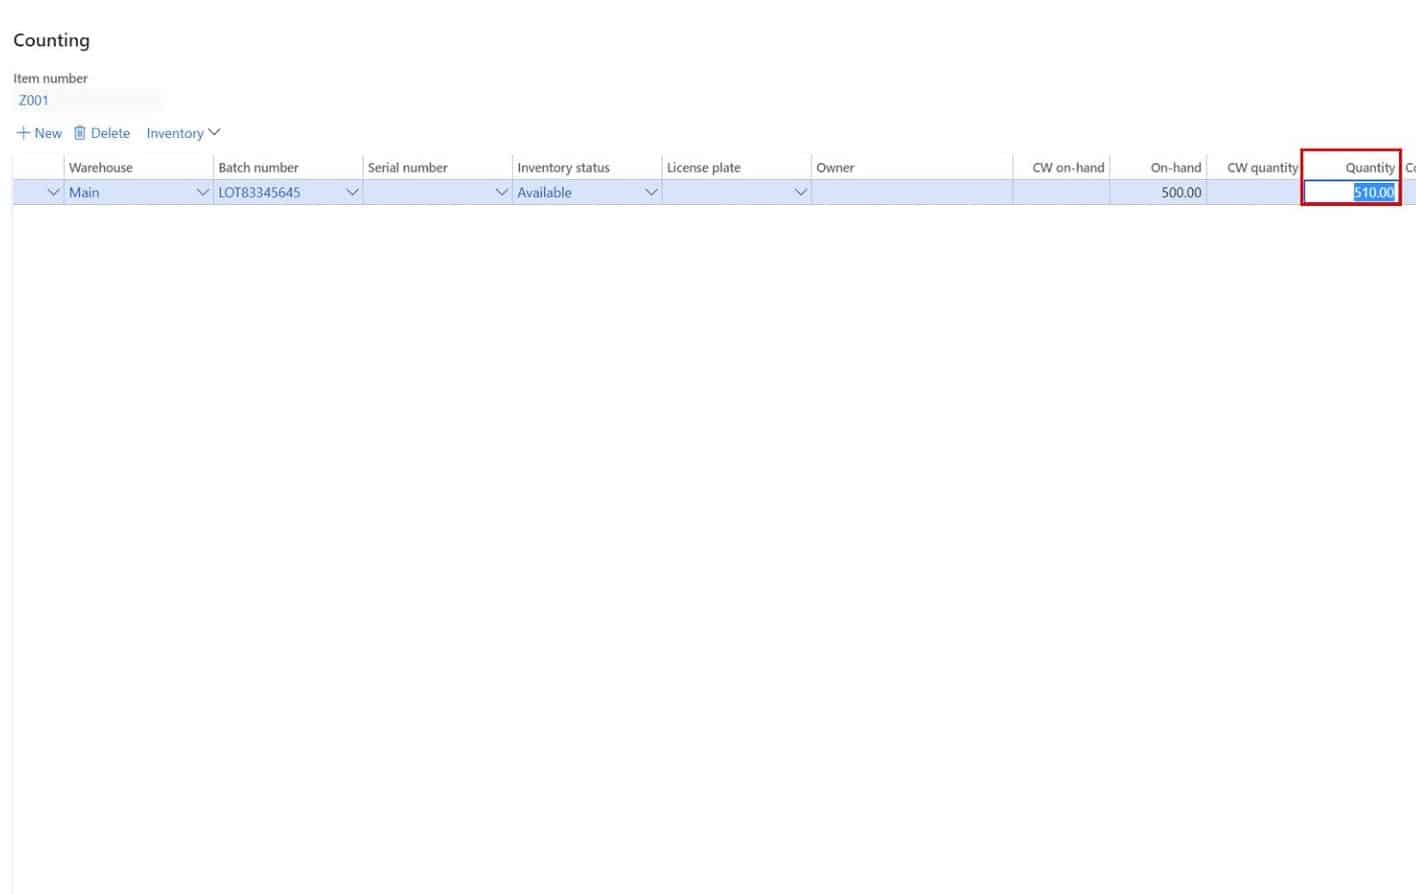
Quantity adjustment – This button allows you do post a counting adjustment directly on the dimensions in the selected record. This functionality is typically restricted from users in a production system because there is not a counting journal posted, only inventory transactions, and financial postings.
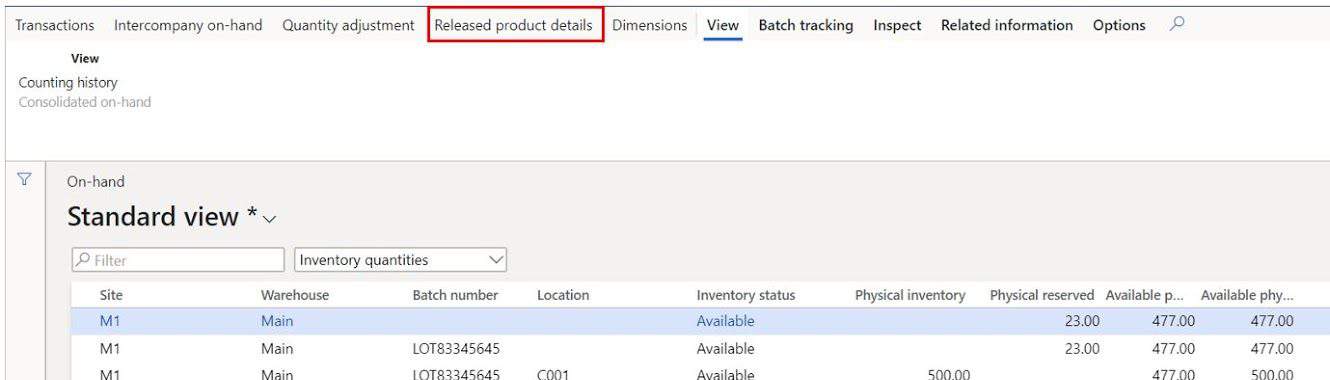
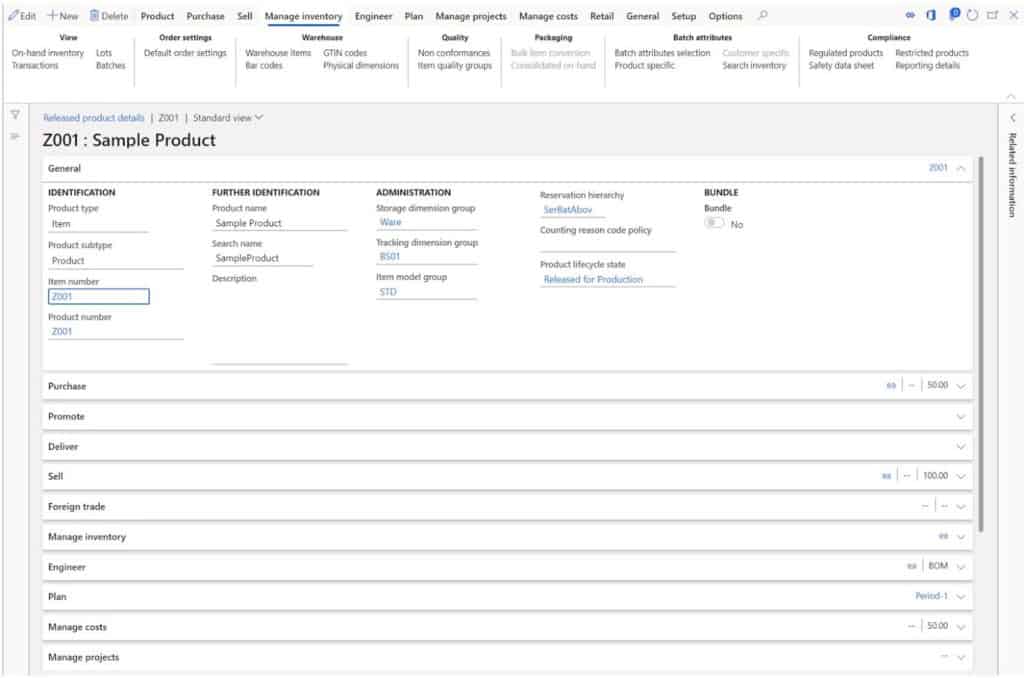
Released product details – This button takes you directly to the released product form and allows you to view various setup information.
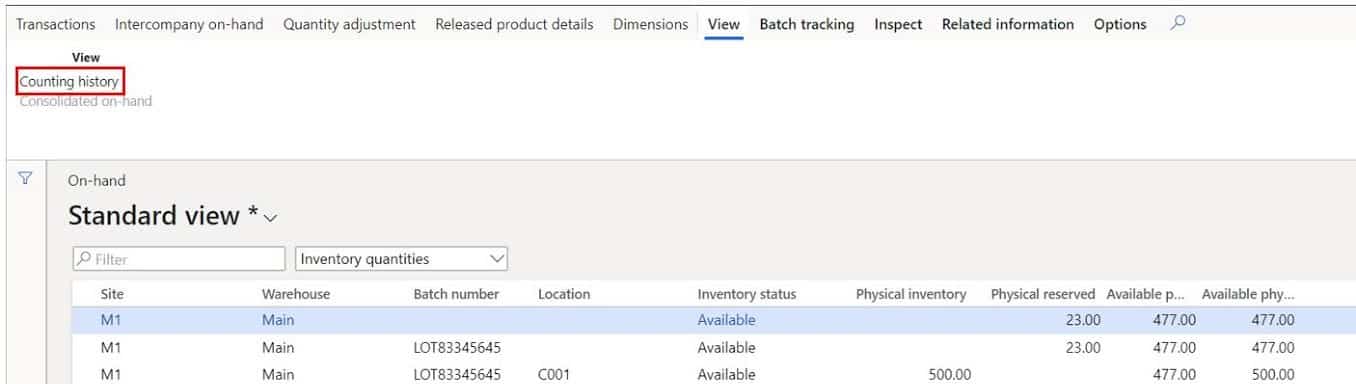
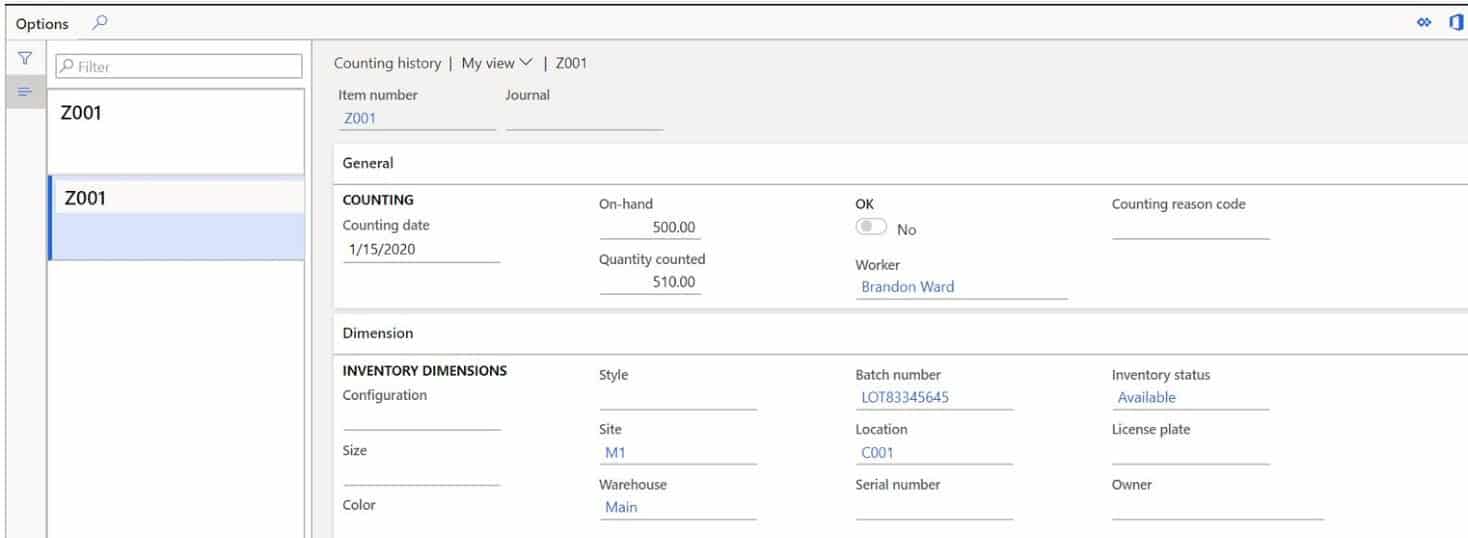
Counting history – The counting history button shows you a counting history of the item. It shows the date of the count the counted amount and the on hand amount among other things. Each time a counting journal is posted against the item a record is created in this form.
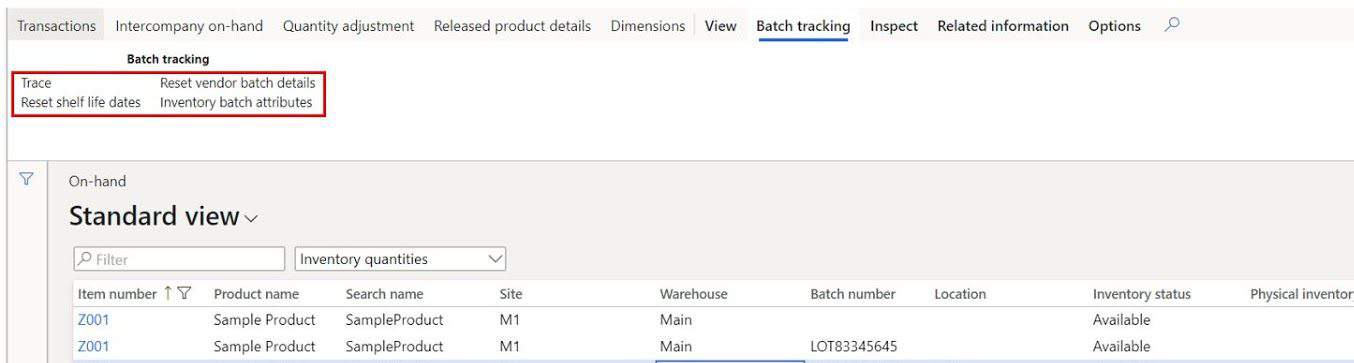
Trace – The trace functionality enabled you to trace specific tracking dimensions back or forward through inventory transactions.
Reset shelf life dates – This allows you to reset the shelf life dates assigned to the batch number. In cases where a batch is expiring and is re-certified for an extended shelf life you can use this to extend the shelf life dates.
Reset vendor batch details – The vendor batch details consist of things like the vendor manufacturing date, the vendor expiration date and country of origin.Inventory batch attributes – This button will show you any batch attributes associated with the currently selected batch.
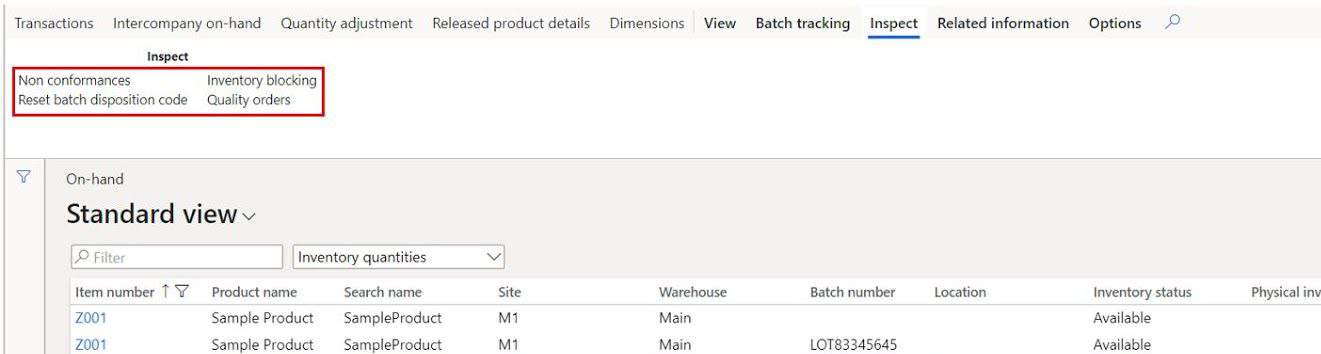
Non conformances – This button will show you any non-conformances that have been raised against the item and batch.
Reset batch disposition code – This button lets you change the currently assigned batch disposition code for the batch. The batch disposition code is similar to the inventory status except at the batch level.
Inventory blocking – This button shows you any inventory blocking records that have been created as a result of a quality order, blocking inventory status, or manually created blocking record. Quality orders – This button will show you any quality orders associated with the item.
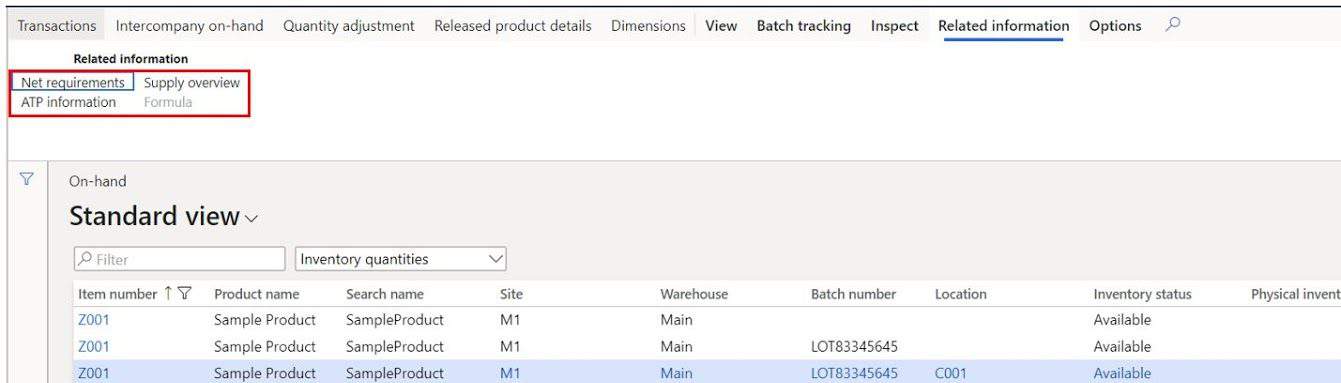
Net requirements – This button will open the Net requirements form which shows a running total of issues and receipts and other associated planning data.
ATP information – This button will show you available to promise data related to the item. This data is dependent on the ATP configuration set up in the Accounts receivable parameters or at the item.
Supply overview – This button opens the supply overview form which brings together several sets of data that shows you supply, demand, lead times, and availability.
Takeaways
The on hand inventory form is an extremely important form and I hope this article has helped to demystify and clarify some common questions users have when they first interact with the form. If you can understand the on hand inventory form, you will be able to manage your inventory and understand the snapshot of activity that the form provides.