

I came across this issue on a Dynamics 365 Finance and Operations implementation project several months ago where I was trying to upload a general journal using the “Open in Excel” feature where my general journal entry contained a dimension.
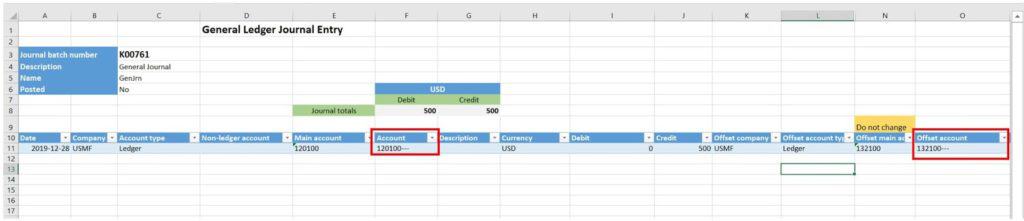
When you first open the journal the default field you get is the “Main account” field, which one would assume is the field where you would enter the account, including the financial dimensions, you wanted to post to. This turns out to be not the case. In fact, you can really ignore this field altogether, unless for whatever reason you will never be posting entries with financial dimensions (which is my experience is rarely the case).
If you are uploading a multi-line journal entry you will only need to add the “Account” field to the upload template. This field is the field where you will enter the account string similar to the one you see in the Dynamics 365 Finance and Operations UI. If you are specifying an offset account with dimensions you will also need to add “Offset account”. In this article I will take you through how to upload a general journal entry in Dynamics 365 Finance and Operations.
If you do not know how to add or remove columns in a data entity connected upload template, see my article How to Use Excel Add-In: Dynamics 365 Finance and Operations. This article will walk you through step by step on everything you need to know about using the “Open in Excel” functionality.
Upload Error
After I added the two fields just pasted in my account string in exactly the order I would have entered it in the general journal. I tried to publish the entry with the financial dimension and got this error message:
“Error: The number of dimension values specified in 132100-002-024 is different from the number set up in the active format for data entities.”
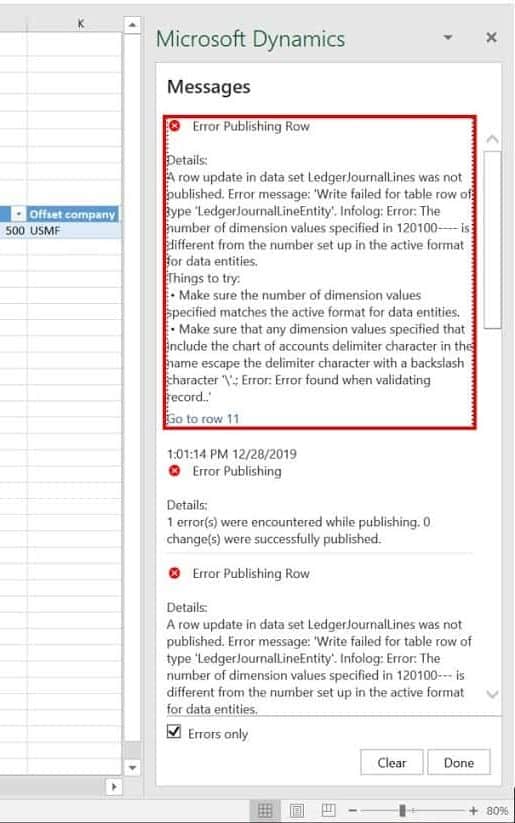
The error here is referring to the configuration required for this upload to work which is called “Financial dimension configuration for integrating applications”. In the next section I will go through how to fix.
How To Fix The Error
To configure this, navigate to General ledger > Chart of accounts > Dimensions > Financial dimension configuration for integrating applications.
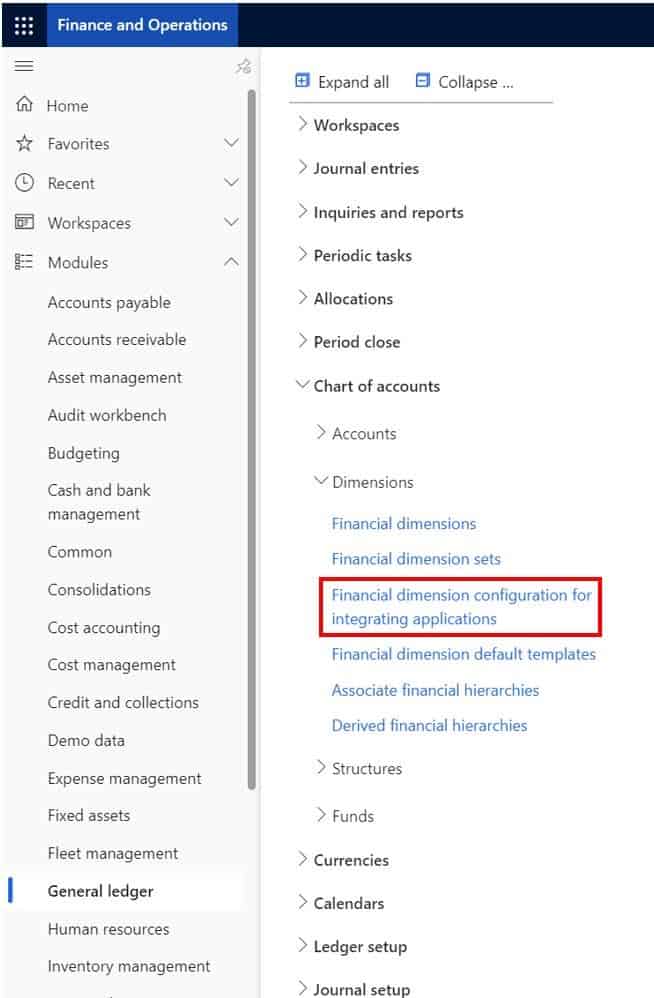
Here we need to configure the order that the financial dimensions should go in when we upload them from a data entity (which is what you are using when you upload data through the “Open in Excel” feature).
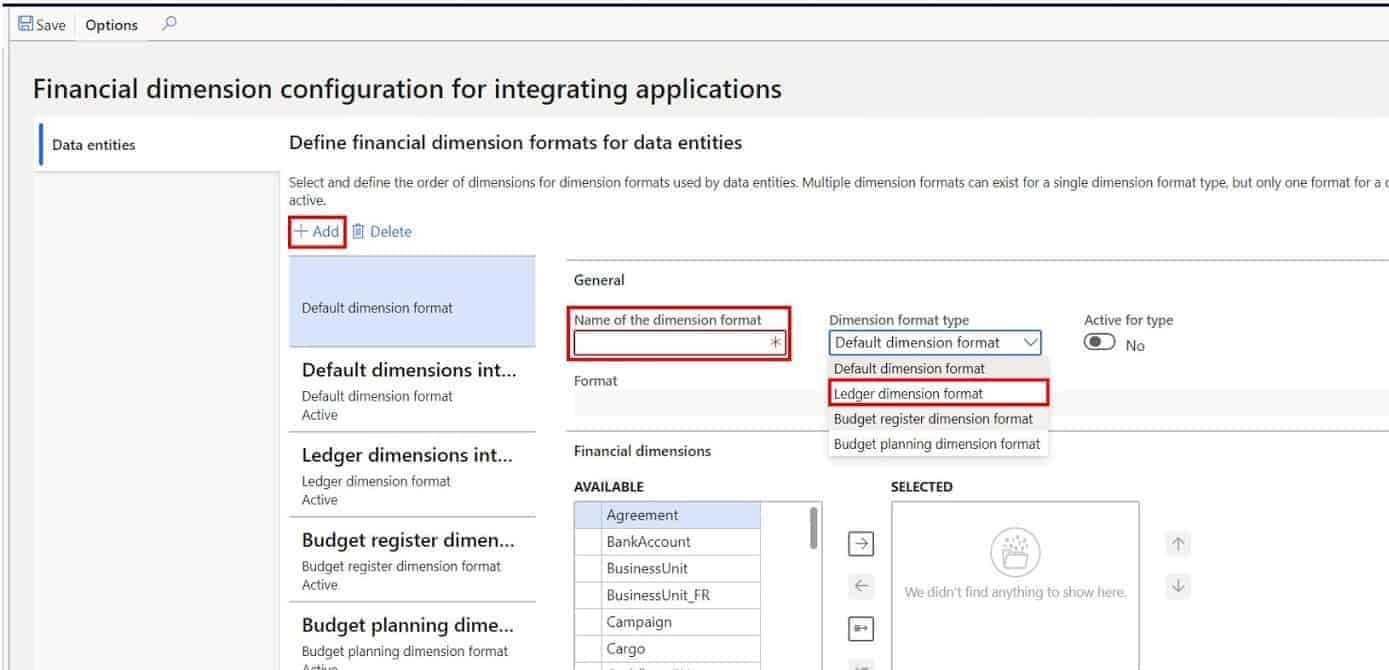
- To create a new record click “Add”. Give the record a name.
- In the “Dimension format type” field select the type “Ledger dimension format” this type refers to the account string type fields we are using in the general journal. The type “Default dimension format” refers to the default financial dimensions you would upload on a data entity for customers, vendors, or products.
- Click the “Save” button.
Once this is set up you should be good to go. All you need to do is enter the account string including the financial dimensions in the same sequence using the financial dimension delimiter set in the system parameters.
How To Upload
In order to upload a general journal entry we need to go and create the journal.
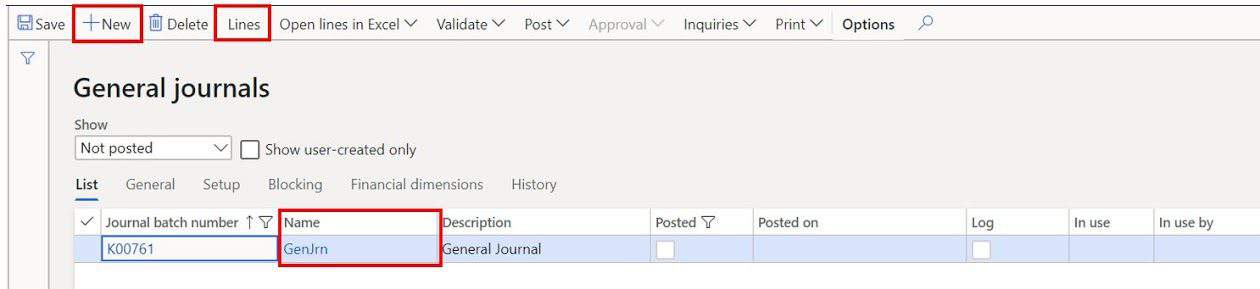
- Navigate to General journal > Journal entries > General journal.

- Click the “New” button to create a new journal.
- Select a journal name and click the “Lines” button.
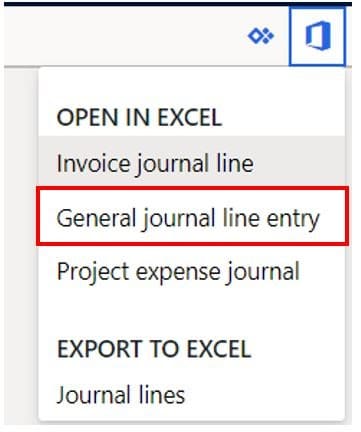
Click the Microsoft office icon and click the “General journal line entry” option.
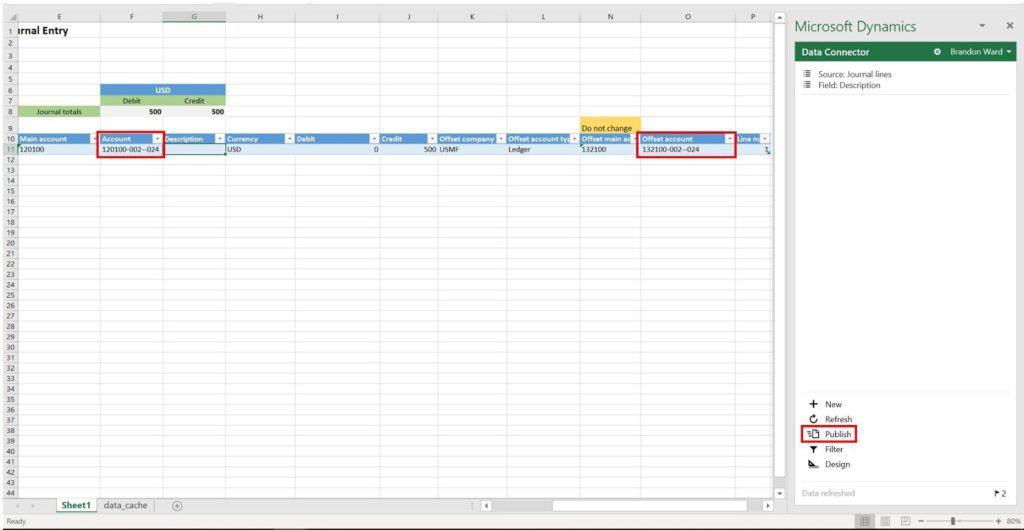
- Add the “Account” field and the “Offset account” fields to the template.
- In my example I set to ” MainAccount-BusinessUnit-CostCenter-Department” so when I paste the following string “132100-002–024” I am able to successfully upload the entry with the financial dimensions. Notice that because I wanted to leave the cost center blank, I just put a dash there with no space character. This indicates that the cost center dimension is blank. We cannot omit the dash “-“ character or else we will receive the same error mentioned above because it does not conform to our ledger dimension format, we configured in the Financial dimension configuration for integrating applications.
- Once you have the entry the way you want it you can click the “Publish” button.
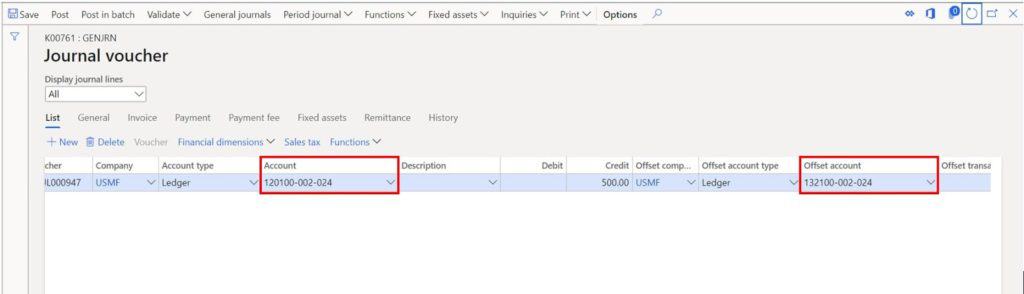
The changes will be published to Dynamics 365 Finance and Operations. If you go back to your journal entry and refresh the journal you will see the published changes. Pretty cool.
Takeaways
I hope this has helped to resolve a pretty common error people run into when they first start playing around with the general journal upload functionality. If you are new to the “Open in Excel” functionality and want a full walk-through tutorial on how to use it see my article How to Use Excel Add-In: Dynamics 365 Finance and Operations. There is a lot of detail in this article explaining all of the things you can do with this extremely powerful feature.