
The vendor return process is a lesser known process because at the time of writing this post it is not supported by advanced warehouse management processes. The vendor return process typically occurs after a defect or issue is found during the quality check of a product during the purchase order receipt process and the product needs to be returned to the vendor for credit.
In this post we will go through the standard business process in Dynamics 365 Finance and operations for processing a vendor return from start to finish.
Vendor Return Setup
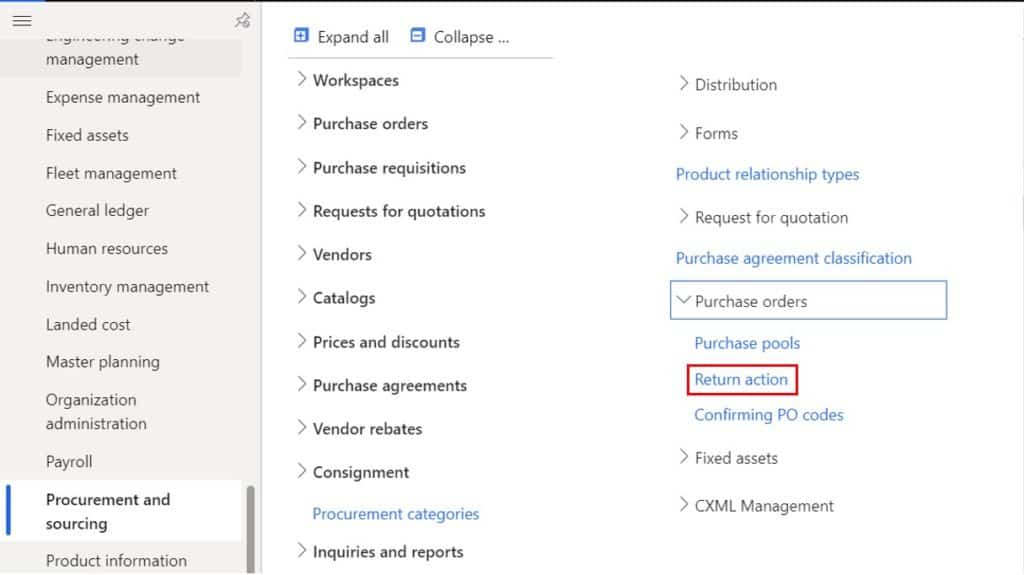
There is really only one setup that is required to process a vendor return and that is a “Return action”. The way the return action is typically used is to identify the reason for the return to vendor. To configure return actions, navigate to Procurement and sourcing > Setup > Purchase orders > Return action.
To create a new return action, click the “New” button. In the “Return action” field give the return action an ID and in the “Description” field give a descriptive name. If you do not care to give a return action for each return line on the return purchase order you can set a default return action on the procurement and sourcing parameters by navigating to Procurement and sourcing > Setup > Procurement and sourcing.
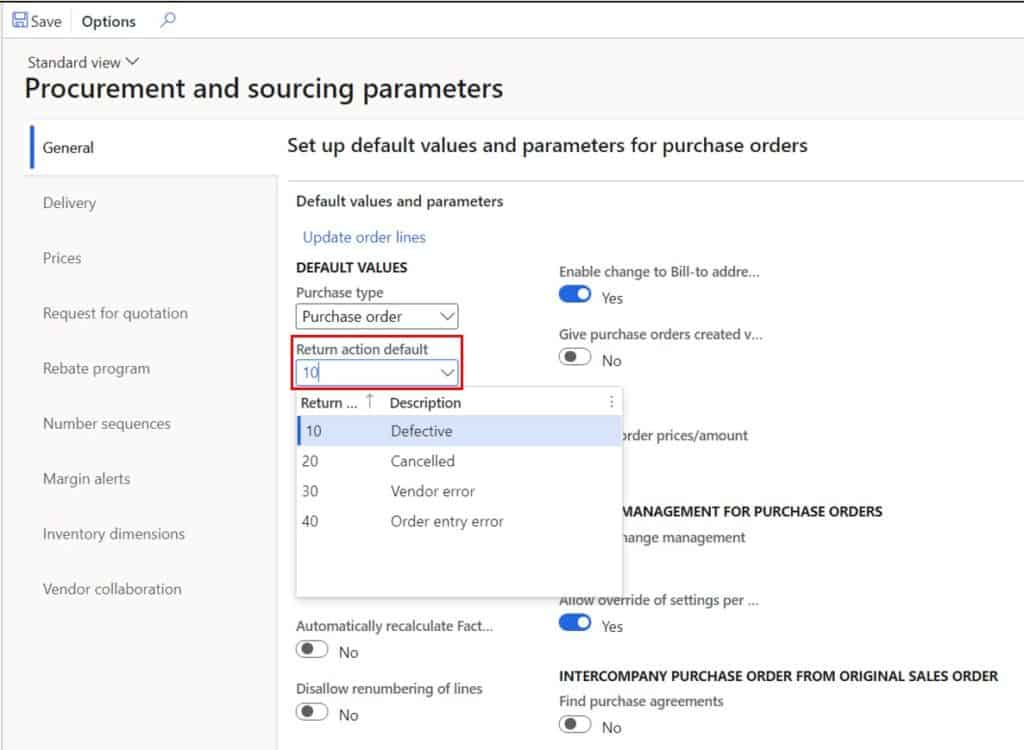
If you set this default return action, it will default to each line on the return purchase order. You can override the line if you want to select a different return action for specific lines.
Create a Return Purchase Order (RMA)
The means by which we return product to a vendor is through a return purchase order. This will allow us to enter a vendor provided RMA number. The return purchase order behaves the same way as a normal purchase order except when you perform a product receipt it is actually an issue from inventory because the quantity on the return purchase order line will be negative.
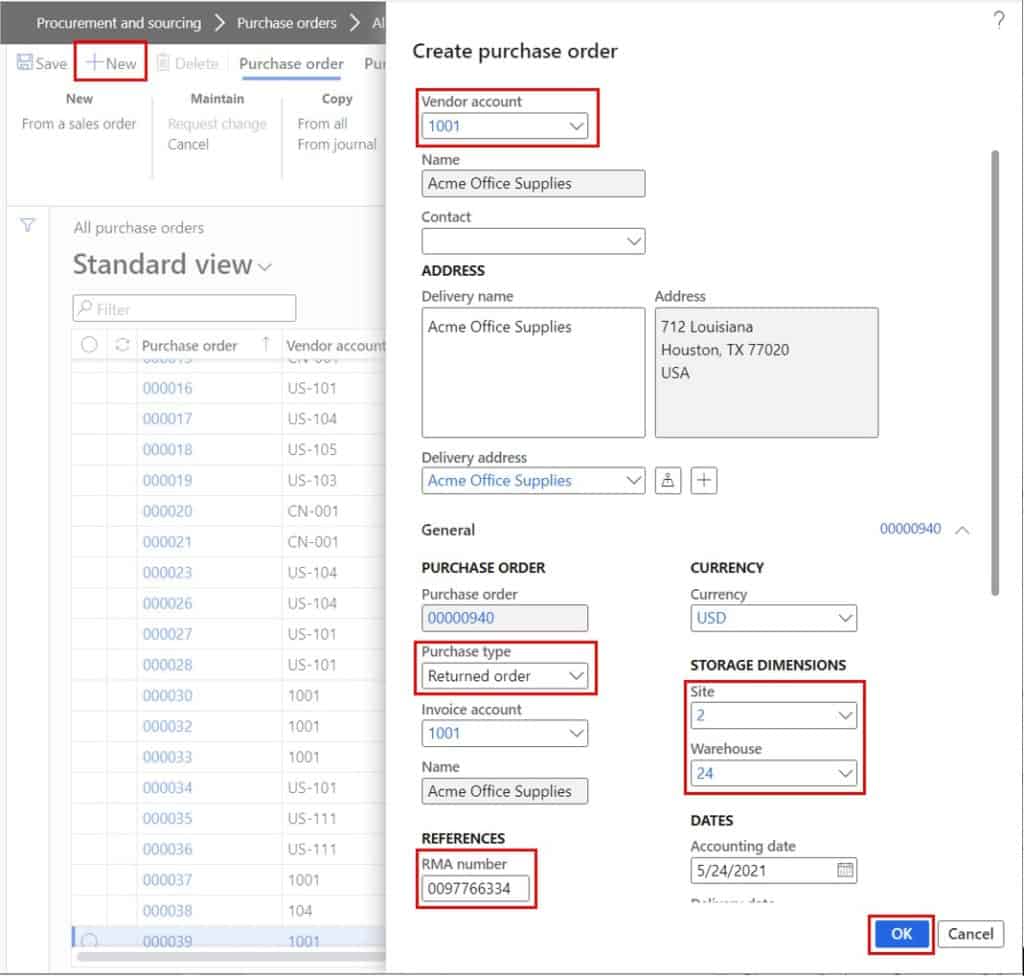
To create a return purchase order, navigate to Procurement and sourcing > Purchase orders > All purchase orders. Click the “New” button and select a vendor account. Then make sure you change the “Purchase type” from “Purchase order” to “Returned order”. This will enable the “RMA number” field which is where you can enter the RMA number that the vendor gives you for the return. Then select the site and warehouse where your return product is physically on-hand and click the “Ok” button.
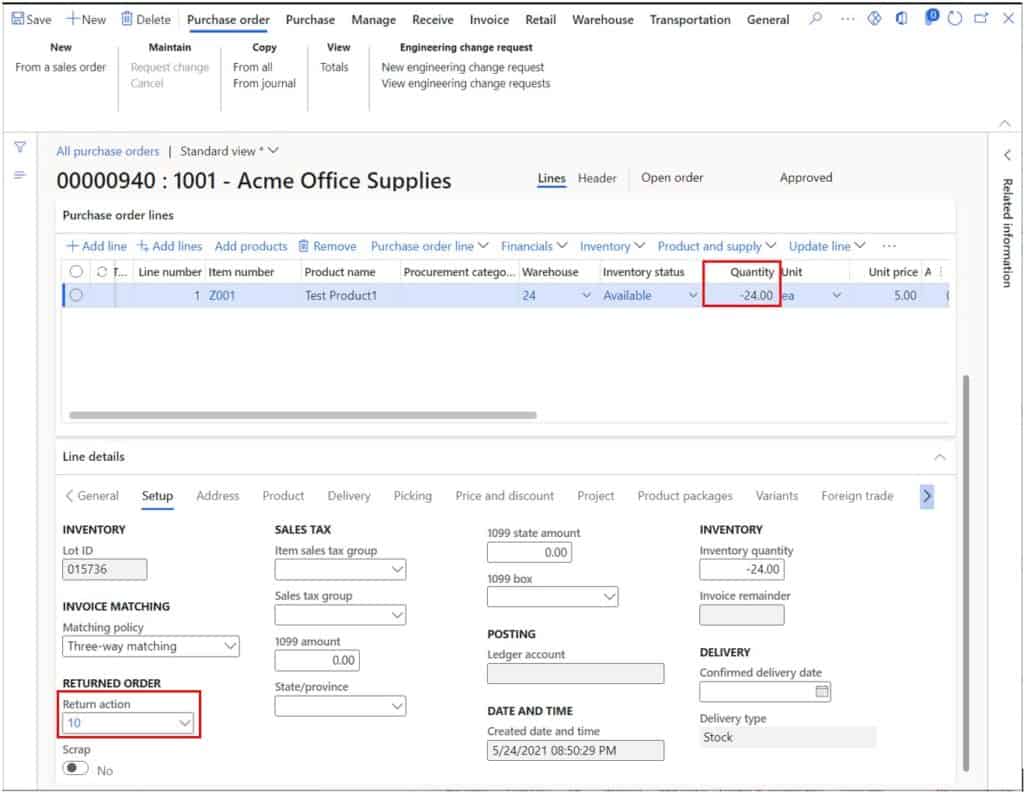
Now we can enter the product we are going to return to the vendor. To create a new line, click the “Add line” button and in the “Item number” field select the product. Then enter the quantity that should be returned but make sure you enter it as a negative quantity. If you enter a positive quantity, you will get this error message: “Quantity of returned items orders must be negative”.
You can also change the return action on each line if the reason for the return is different. The “Return action” field is in the “Setup” tab of the “Line details” fast tab. Once you have the return purchase order created you can confirm the purchase order the same way you would confirm a standard purchase order. If you are not sure how to do this see this post on how to process a purchase order.
Now that we have our return purchase order entered and confirmed, we can pick and ship out the return.
Pick Return Product
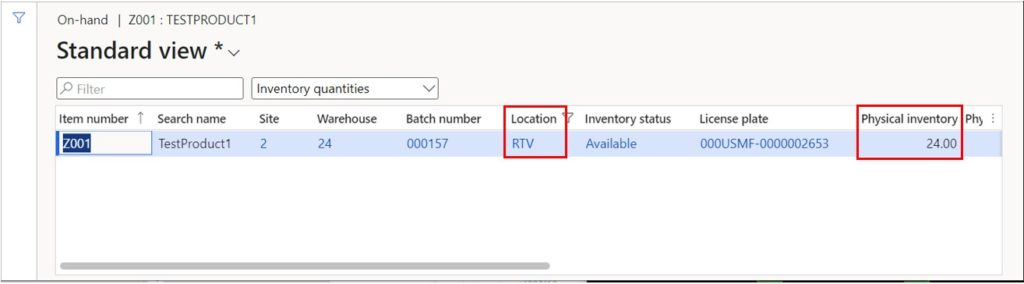
Typically, in a return to vendor scenario if product fails a quality check, they will be moved to a return to vendor location and be set to a “Quarantine” or “RTV” status to indicate that the product is not usable or that it needs to be returned to the vendor. In this example I have 24 units of product sitting in an RTV location and I need to register a pick against the purchase order and then post the product receipt which is equivalent to a packing slip posting since we are shipping the product back to the vendor.
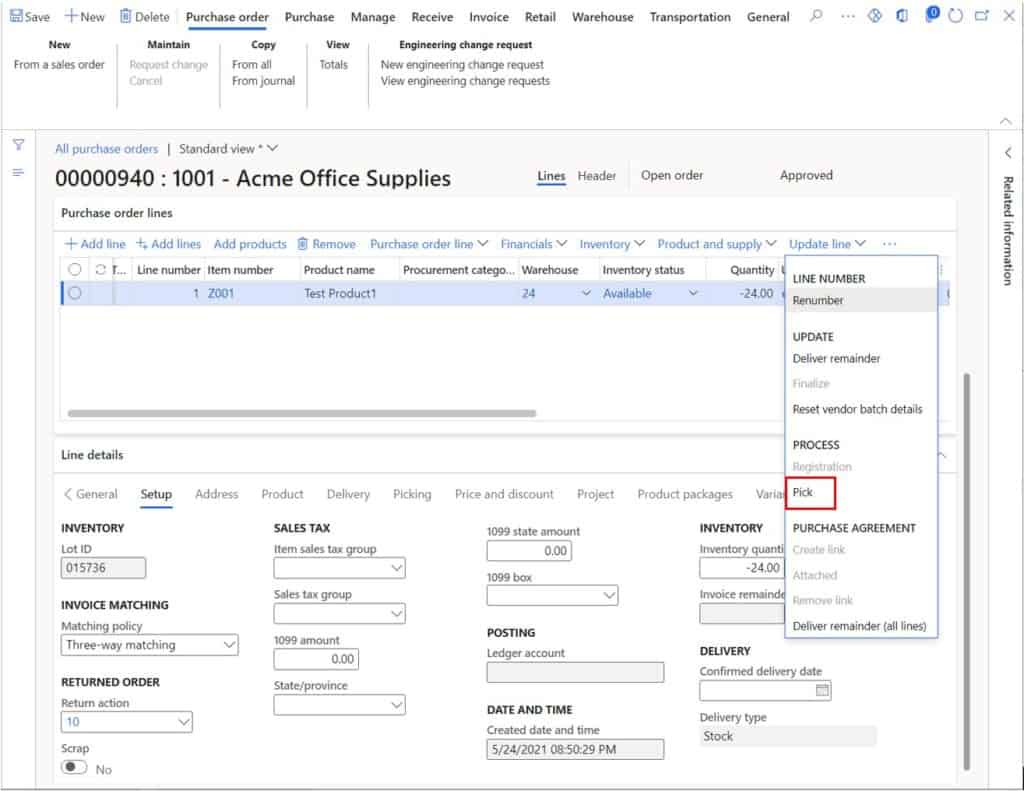
In order to ship the product back to the vendor we must first pick the product. To do this click the “Update line” button in the sales order line and click the “Pick” button.
Click the “Add picking line” button. This will create a line at the bottom in the “Picking lines” form.
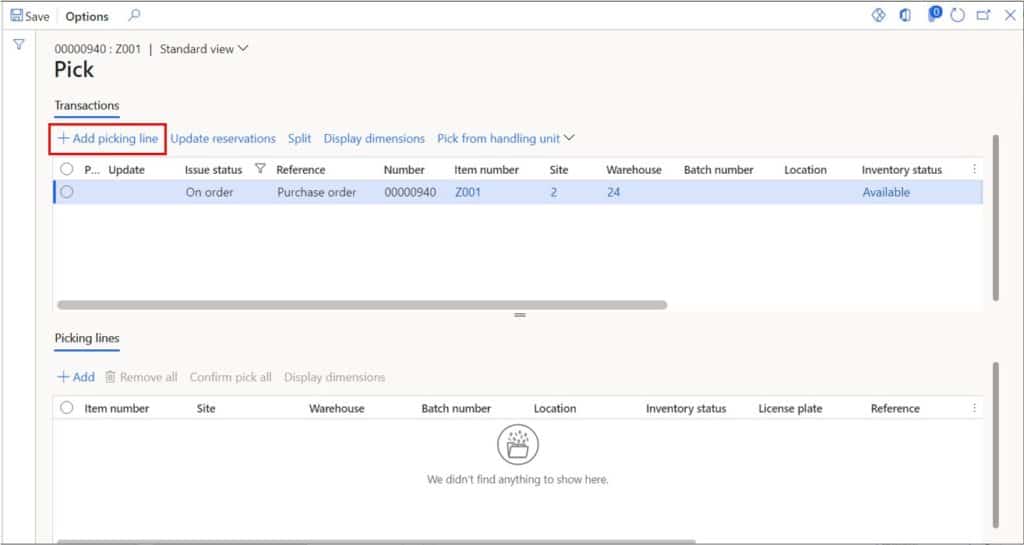
If the product you are returning is batch number tracked, you will need to fill in the batch number being returned as well as the other applicable inventory dimensions shown below. Then click the “Confirm pick all” button to confirm the pick.
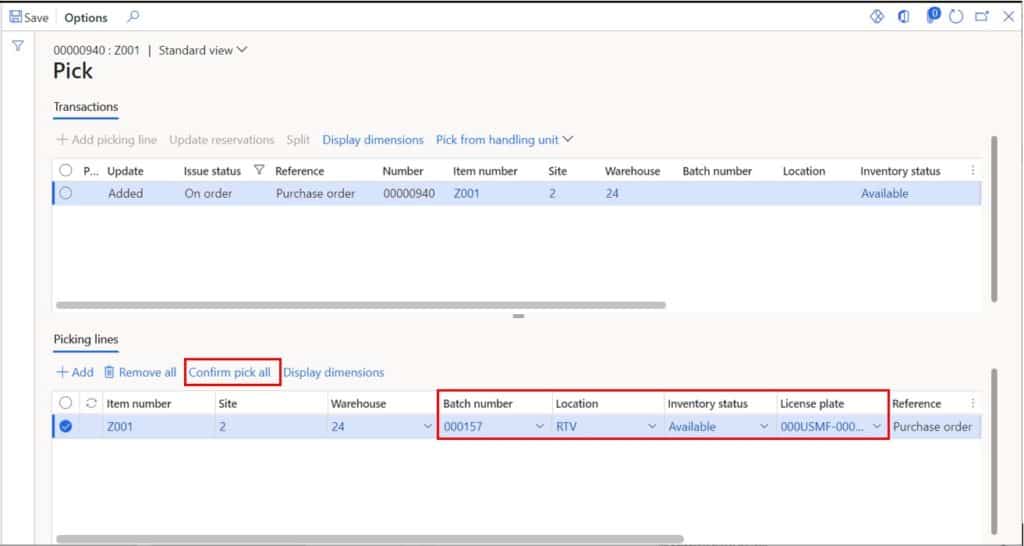
This will change the “Issue status” of the return line to “Picked”. Next close the pick form and we are now ready to post the product receipt.
Post Product Receipt
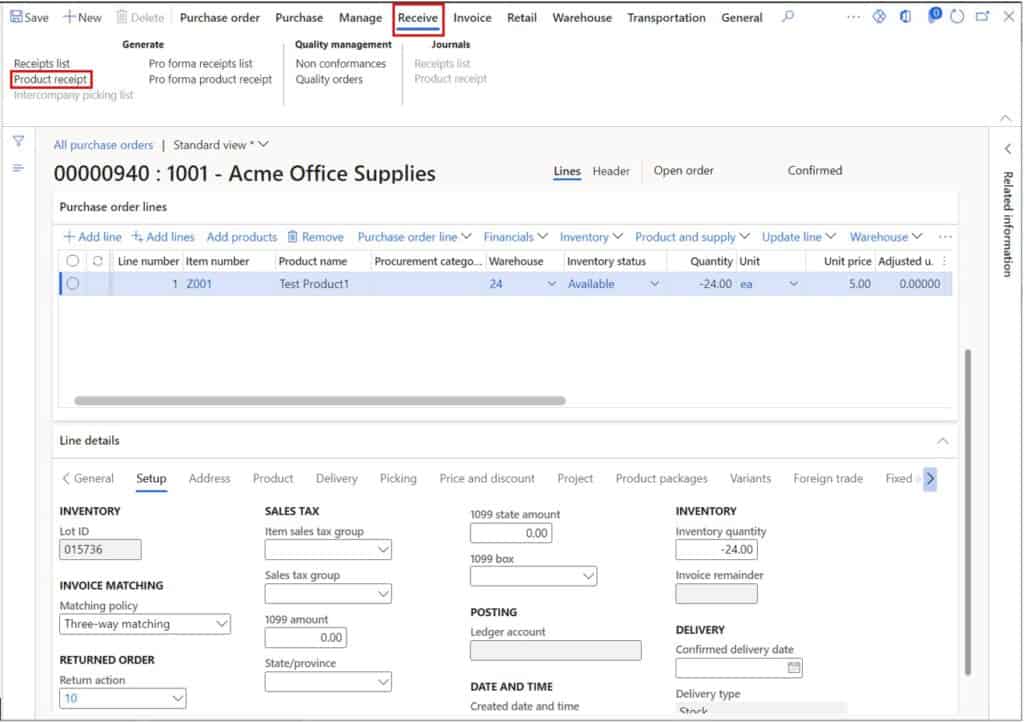
The product receipt in the case of a return purchase order, as previously mentioned, is more like a packing slip because we are shipping the product back to the vendor to receive credit. To post a product receipt click the “Receive” tab in the ribbon and click the “Product receipt” button.
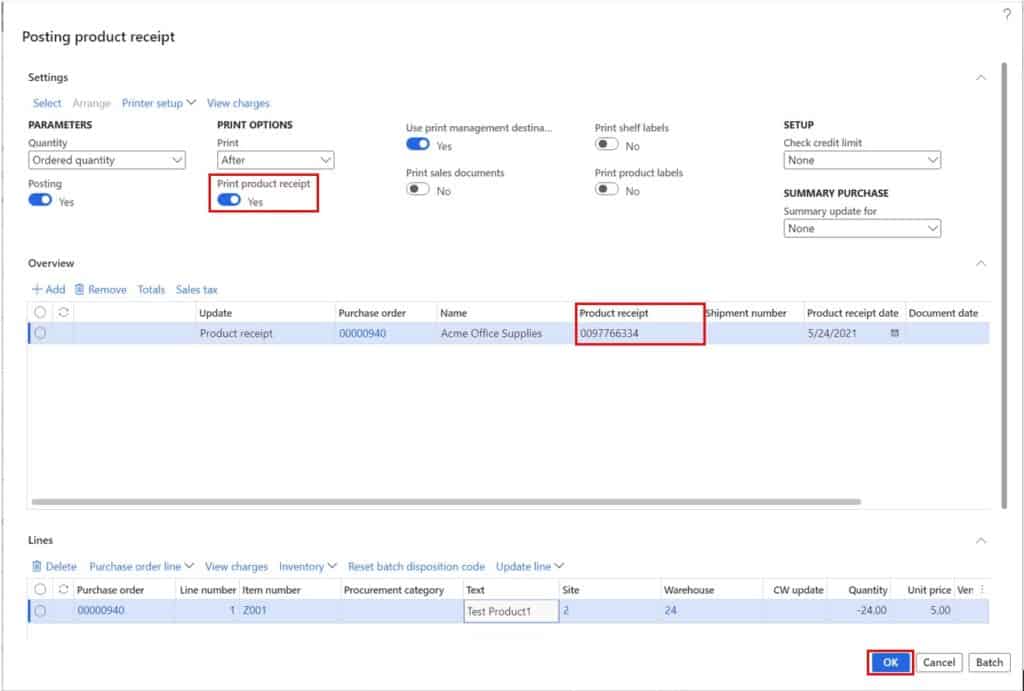
On the product receipt posting form make sure you select the “Print” button if you want to print a packing slip and enter the RMA number in the “Product receipt” field and click “Ok”.
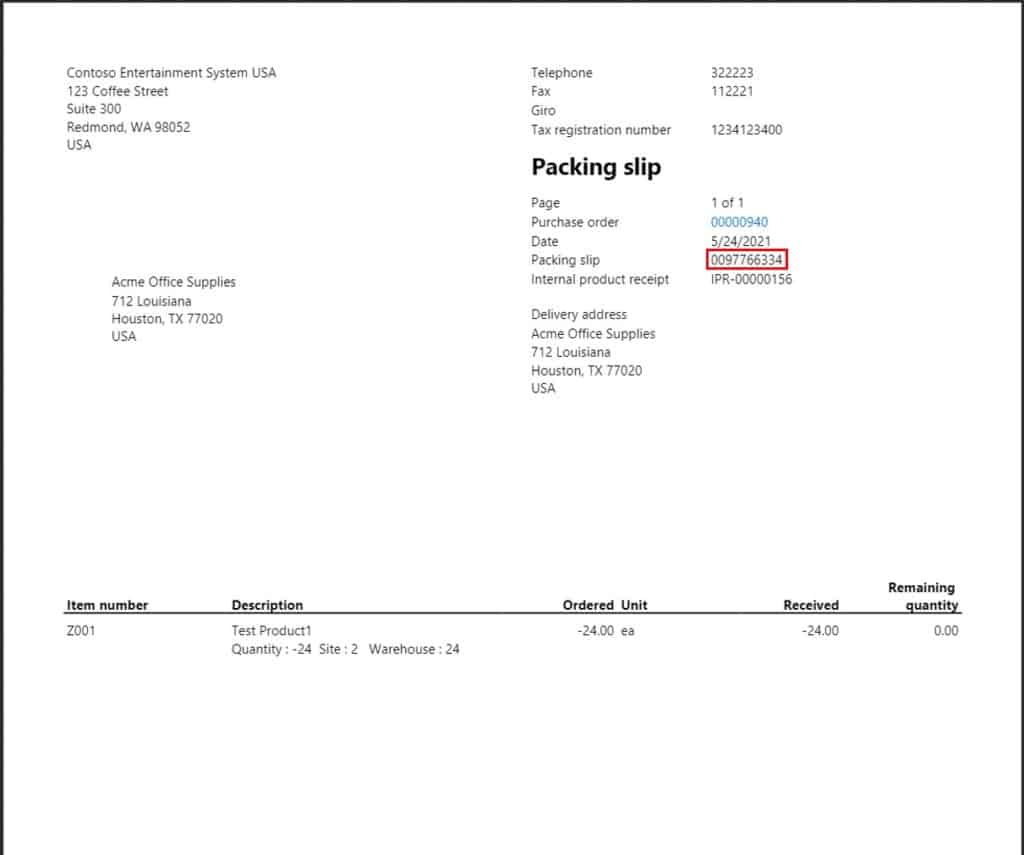
This will print out a packing slip that looks like the one below.
Post Debit Note
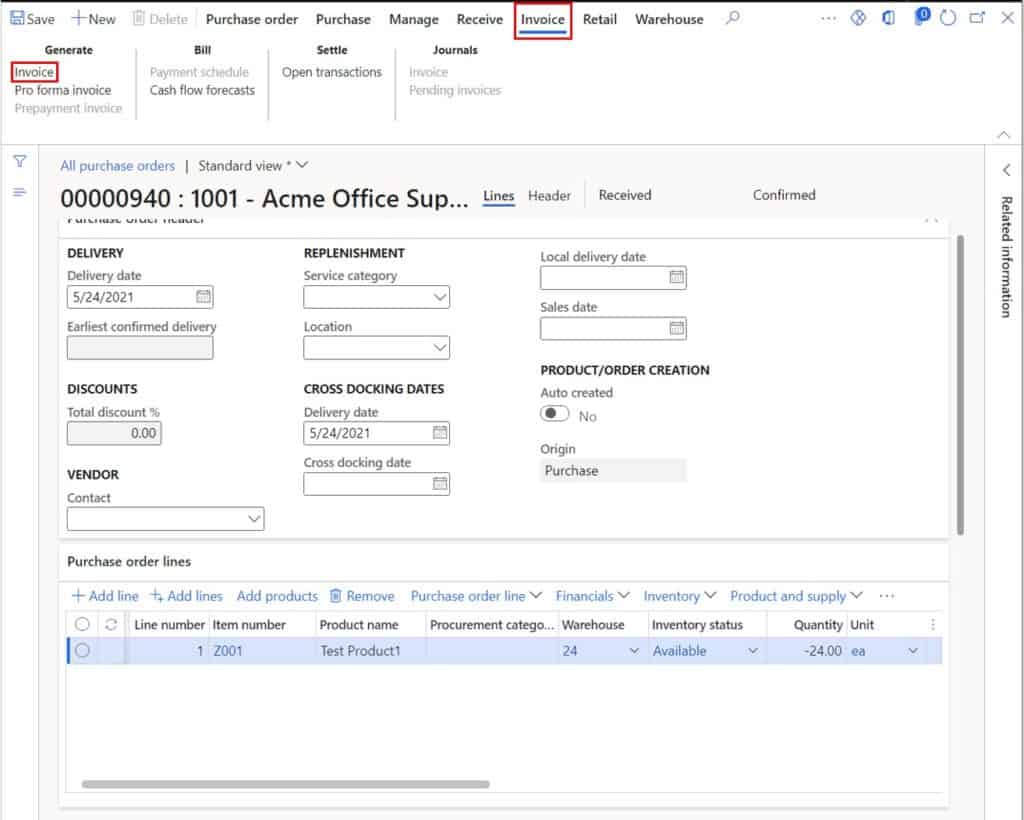
The last step in this process is to post the invoice against the return purchase order which will debit the vendor account. To do this click the “Invoice” tab in the ribbon and click the “Invoice” button.
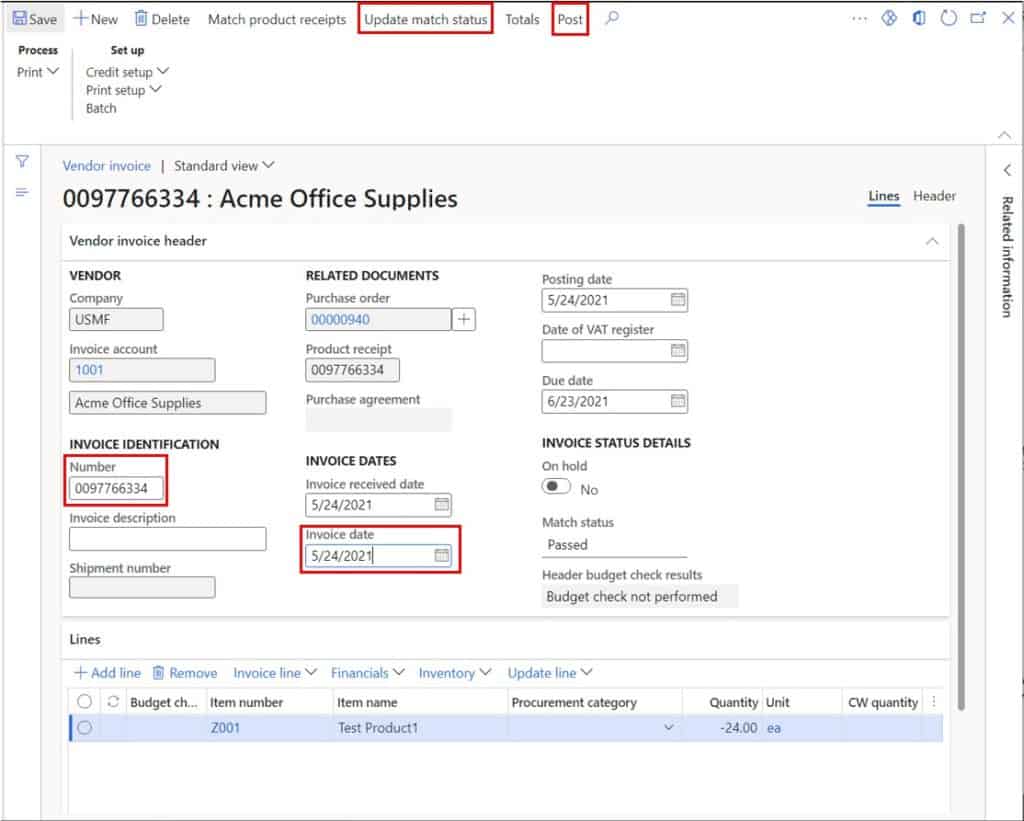
In the “Number” field enter the invoice identifier. In this case it could just be the RMA number that the vendor provided. Then select the “Invoice date” and click the “Update match status” button. Now click the “Post” button to post the debit note.
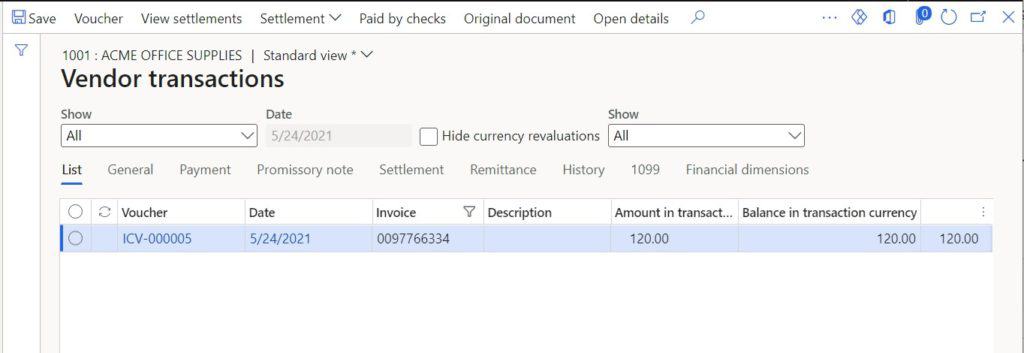
Now if we look at the vendor transactions, we can see that there is a debit transaction posted against the vendor account.
Takeaways
The obvious downside to processing vendor returns in Dynamics 365 Finance and Operations is that we cannot use advanced warehousing (AWMS) processes to pick the products prior to posting the product receipt (packing slip). However, if your return volume is low, doing the picks from the D365 user interface should not be that big of a deal. I will update this post if Microsoft ever adds vendor returns to the advanced warehouse processes. For now, I hope this has given you everything you need to go and process a vendor return for yourself.