

Finding data in any ERP system can be challenging but D365 Finance and Operations tries to make that easy by allowing users to filter and sort on almost any column in a list page or grid, using search keywords like “Begins with”, “Contains”, “Is one of”, “Is exactly” etc.
These are great and will be sufficient for the majority of user queries in the system, but there may be cases where a user has a more complex query that need to use data from another related tables. In these cases, the advanced filter functionality in D365 can be used to craft a complex query to find the data you are looking for.
The advanced filter functionality allows users to join multiple related tables together that are not natively accessible from the standard form. The user can also use advanced syntax and combine different criteria across multiple fields.
Despite the utility of this tool I find that most users are intimidated by the advanced filter form. In this article you will learn how to use the advanced filter functionality in Dynamics 365 Finance and Operations and some tips and tricks to help you avoid some headaches.
Understanding The Advanced Filter Form
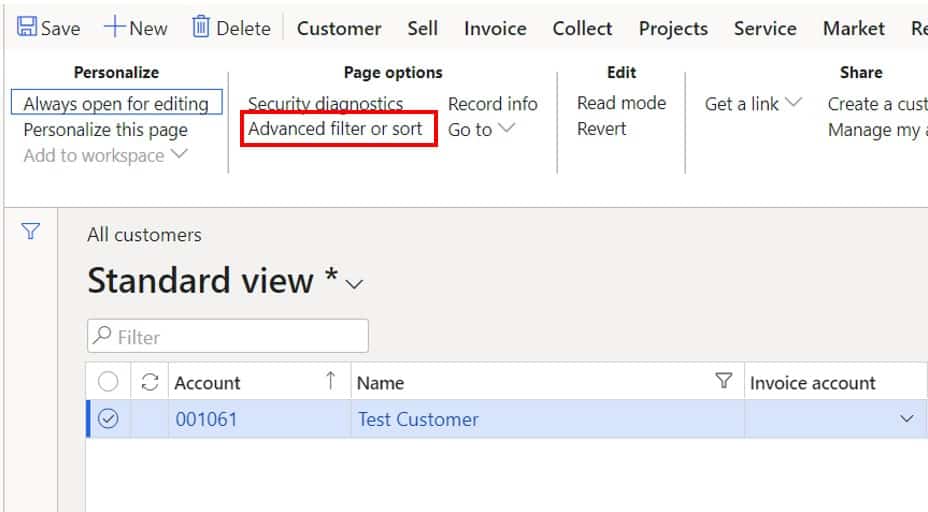
The advanced filter feature is available on every form in the D365 Finance and Operations application. To open the advanced filter form, click the “Options” tab in the ribbon and click the “Advanced filter or sort” button.
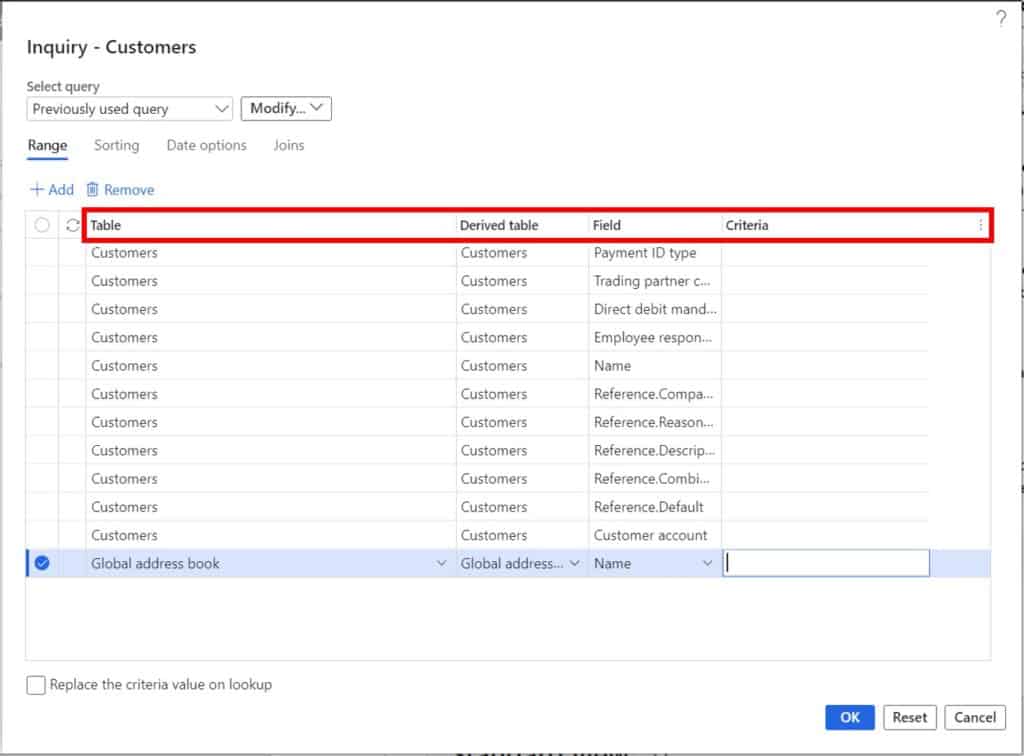
There are four fields in the advanced filter form. You will use these four fields to construct your query.
- Table – This identifies the table where the field you want to use in your filter criteria will come from.
- Derived table – This will be set automatically when you select the “Table”.
- Field – This is where you select the field you want to specify filter criteria against.
- Criteria – This is where you put your filter criteria for the field you have selected.
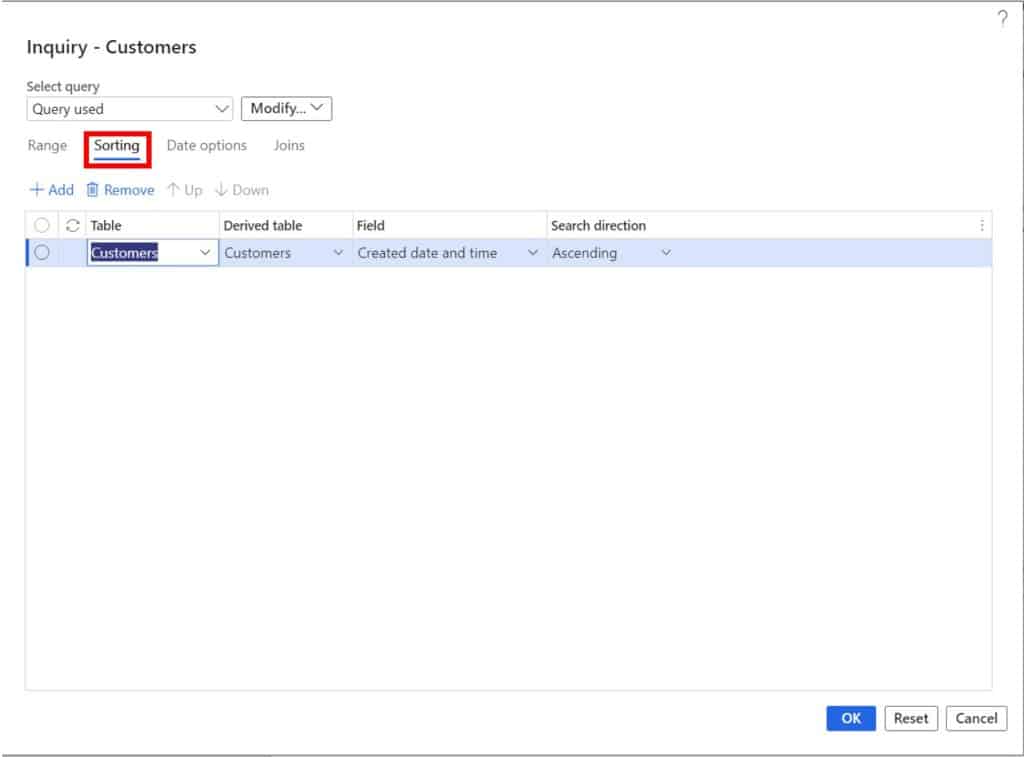
There are four tabs at the top of the form that are also used to help you construct your query. The “Sorting” tab allows you set one or multiple sorts to your query. Simply select the table and field that you would like to sort and select the “Search” direction to sort the data ascending or descending.
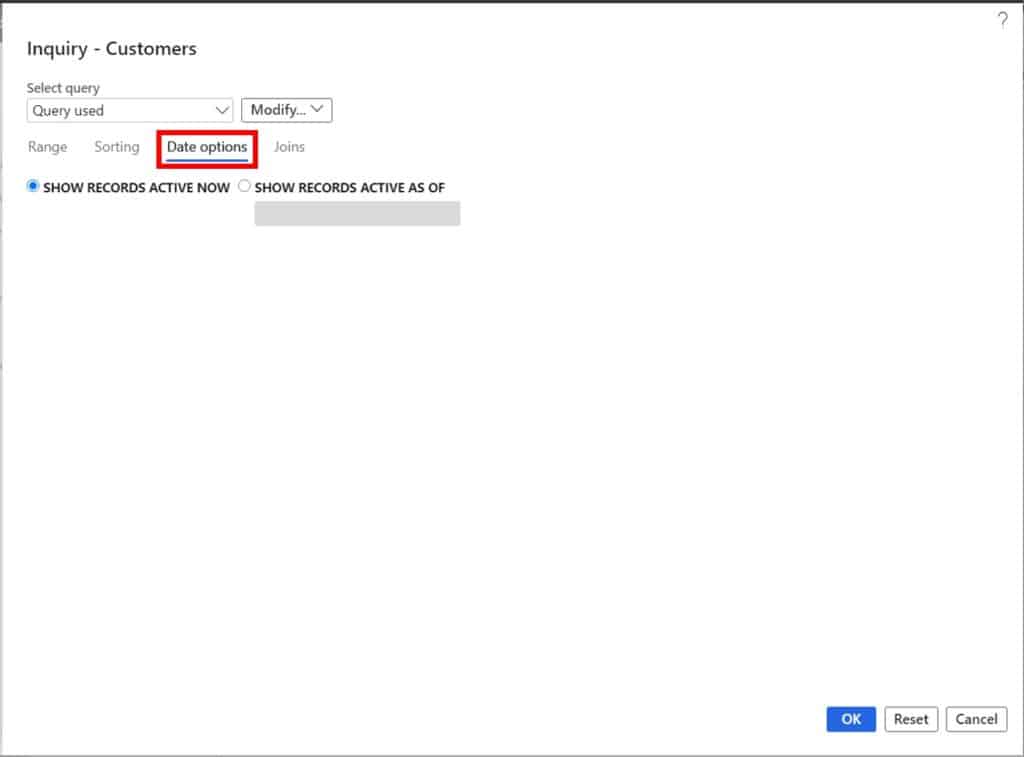
The third tab on the advanced filter form is the “Date options” tab and allows you to select if you only want to see active records or records that were active as of a certain date.
In Dynamics 365 Finance and Operations there are certain sets of data that have validity dates like addresses or organizational hierarchies, and this feature helps with querying those types of data. If you are not querying data that have validity dates you don’t need to worry about this tab.
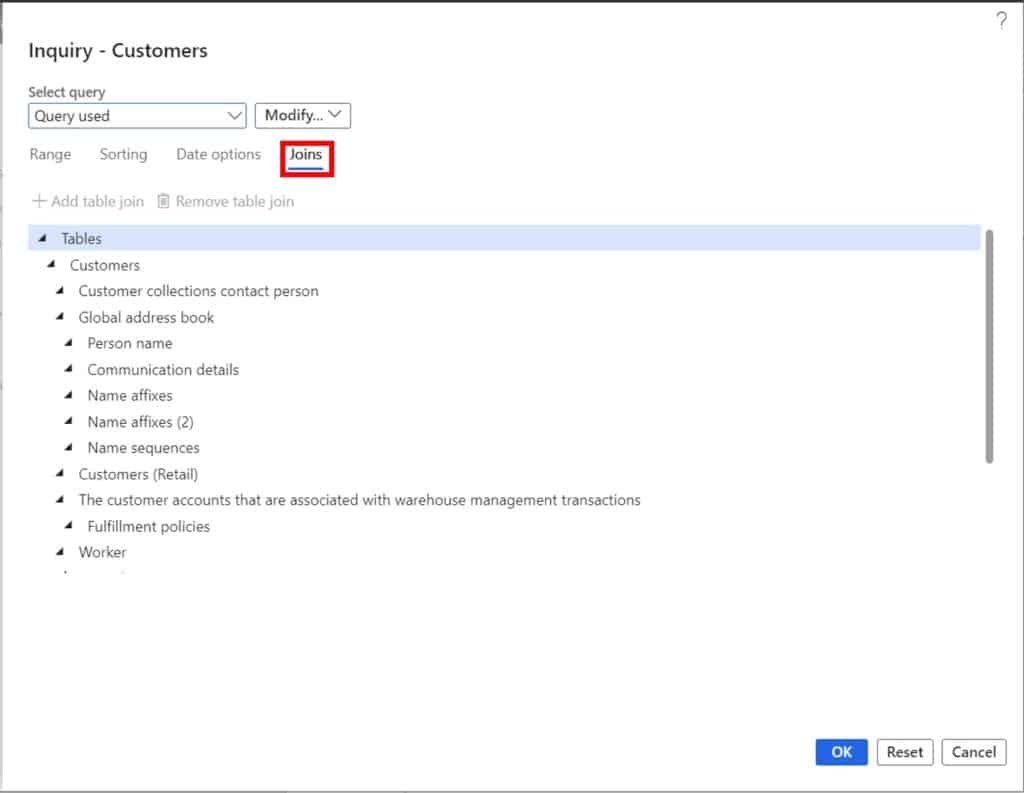
The fourth tab is the “Joins” tab. This tab will show you all of the related tables that are available for you to add to your query. By default, you will see all of the tables that make up the list page or inquiry you are currently on. Later in this article we will look at how you can add additional tables to make a more complex query.
Construct A Simple Query
Now that we have a better understanding of the components of the advanced filter form let’s look at how we can create a simple query using some of the simple query syntax.
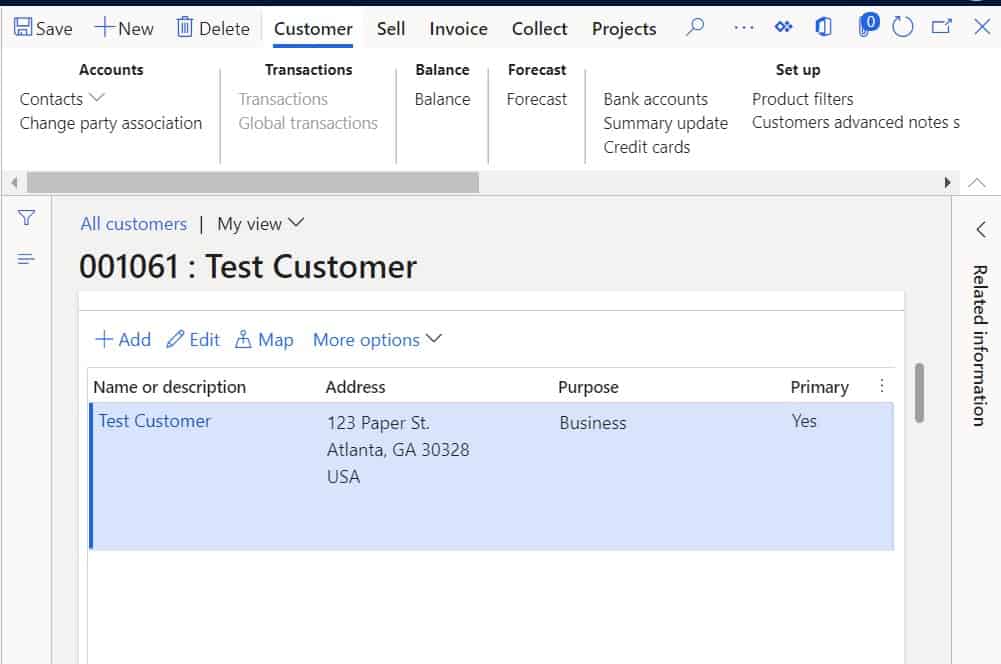
For the first example let’s filter for a customer that ends with the word “Customer”. To do this we can simply select the table “Global address book” and select the field “Name”, and in the “Criteria” field we can type in “* Customer” the asterisk “*” is a wildcard symbol.
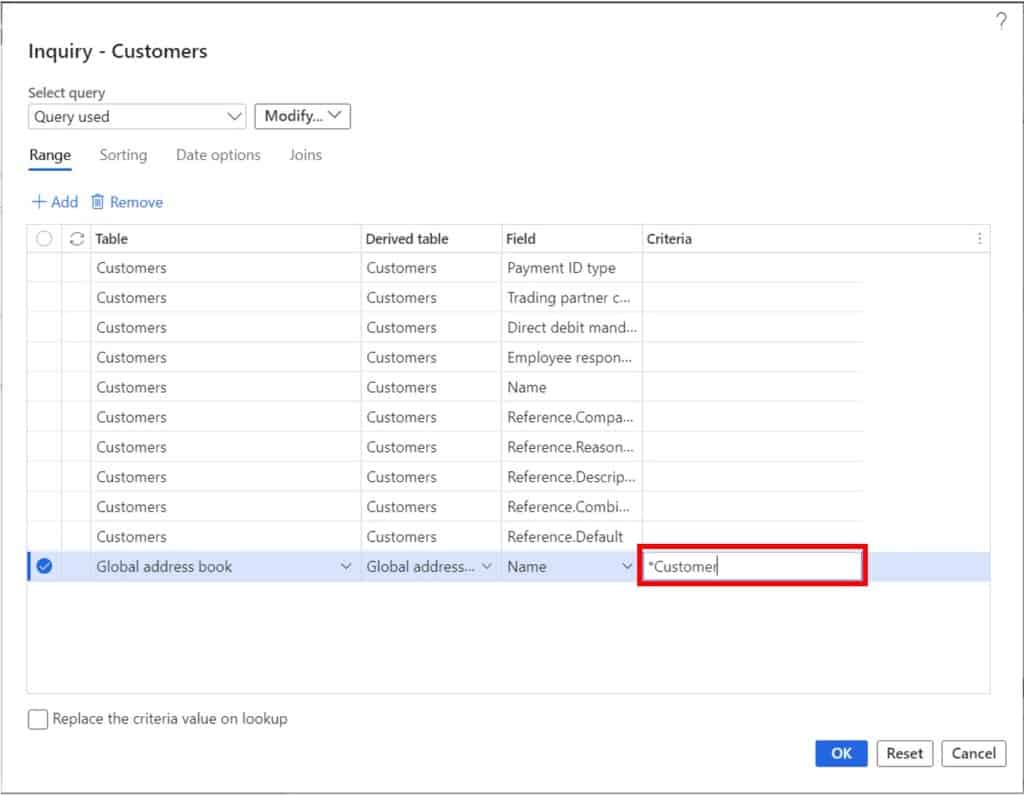
The result of the query is the test customer.

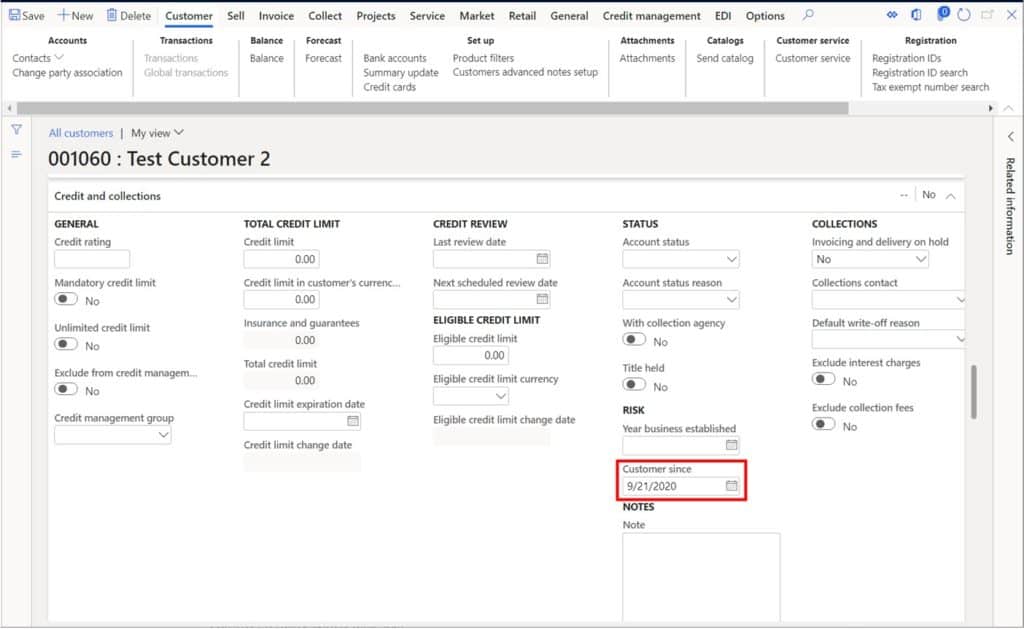
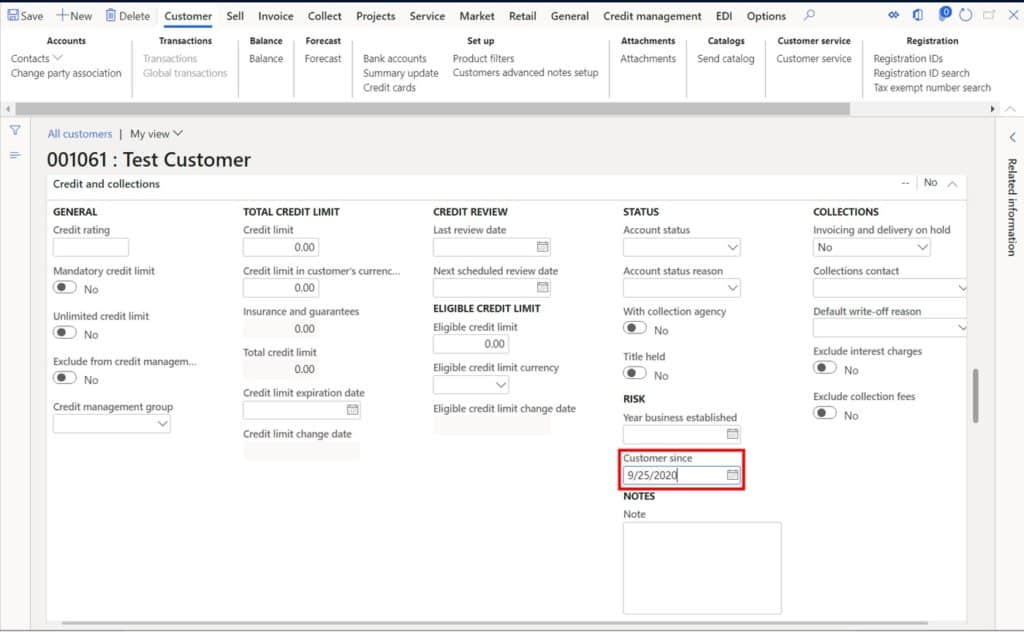
Now I have created another customer called “Test Customer 2”. I set the “Customer since” date to “9/21/2020” and I set the same field for “Test Customer” to “9/25/2020”.
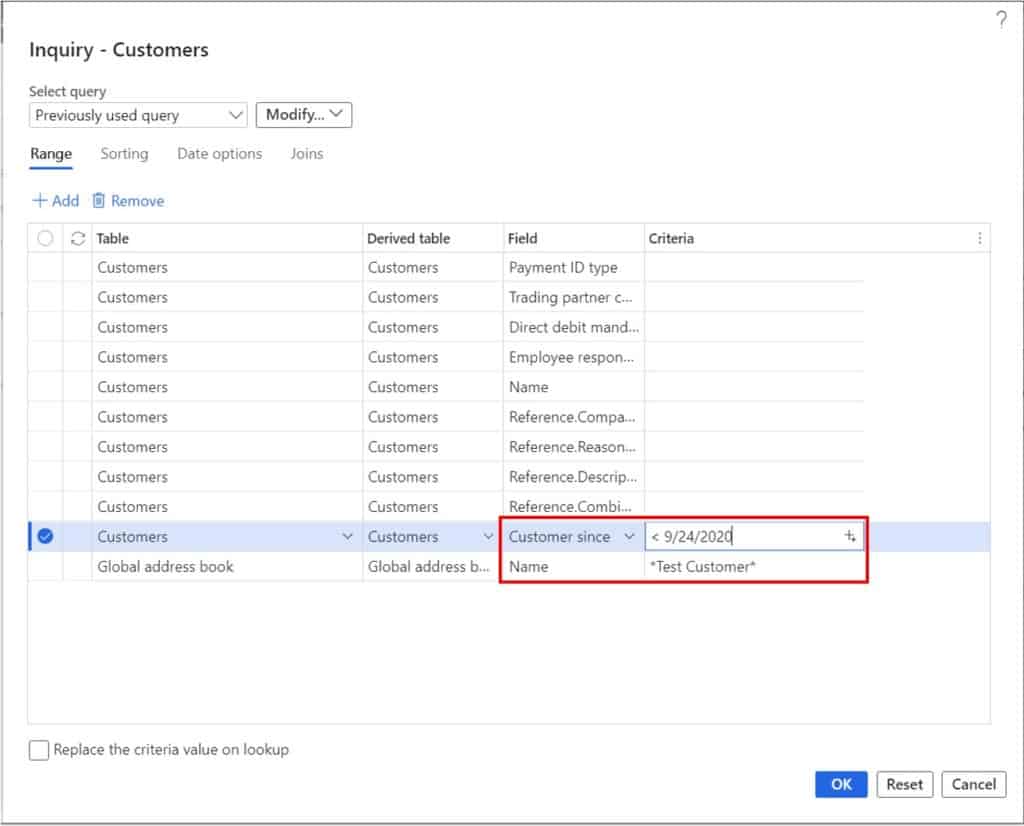
I want to search for customers that have the word “Test customer” in the name and have a “Customer since” date before “9/24/2020”.
Here is the query for that. I used the less than sign “<” to query for dates older than the selected date.
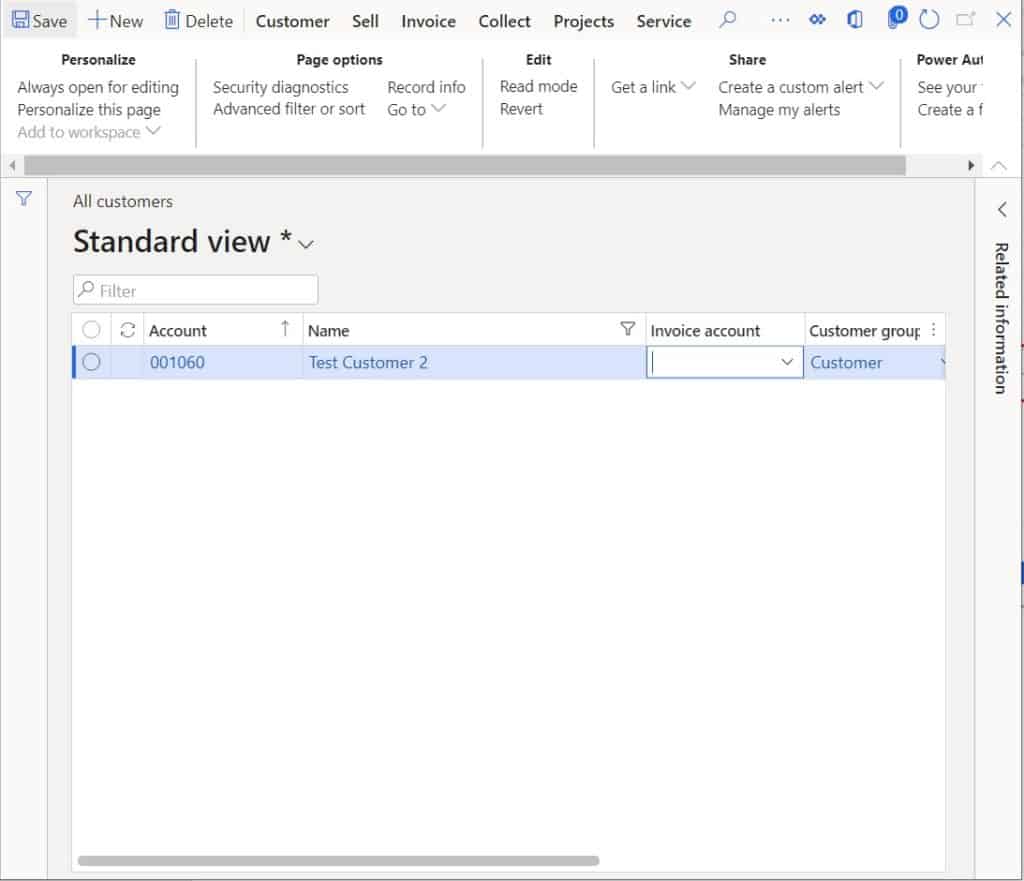
You can see now that the record that is returned is “Test Customer 2”.
What if I want to search for multiple values in a query? Simply separate the values by a comma. I’ll search for customer account numbers “001060” and “001061”.
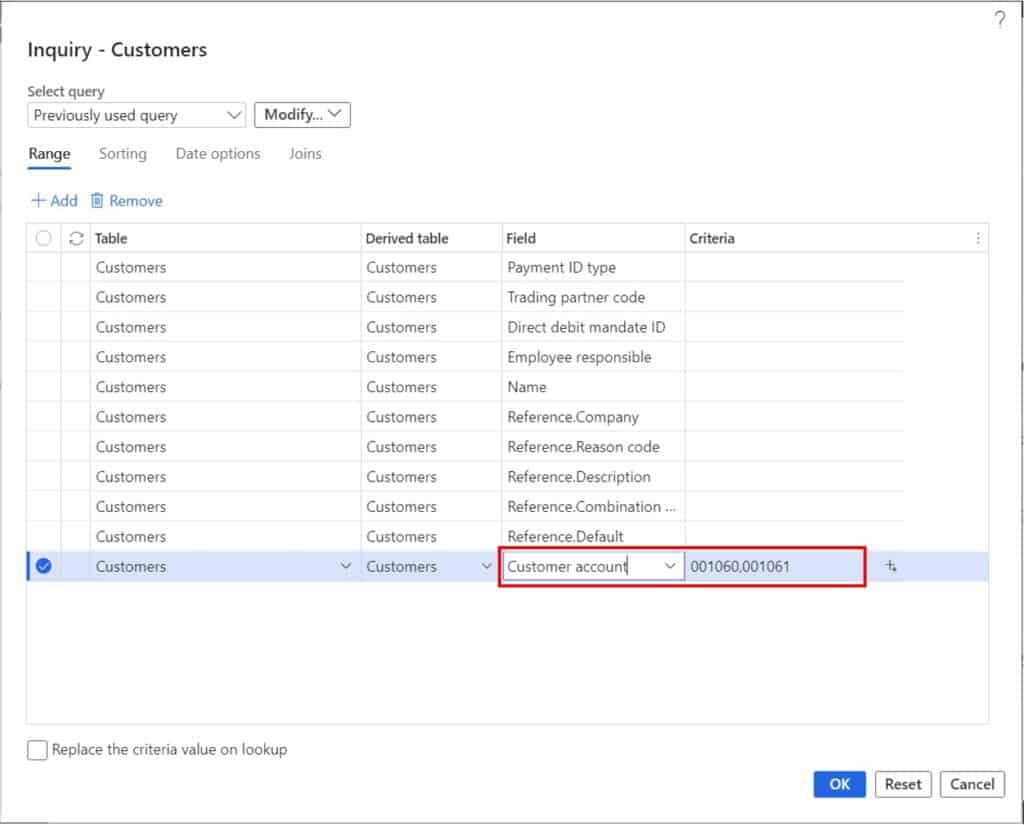
The result is both of these accounts are returned in the query.

Some other notable simple query syntax is the range syntax which is just two periods “..”. This represents a range between two values. For example, in a date field you could use it query for customers that have a customer since date between “9/21/2020” and “9/25/2020”.
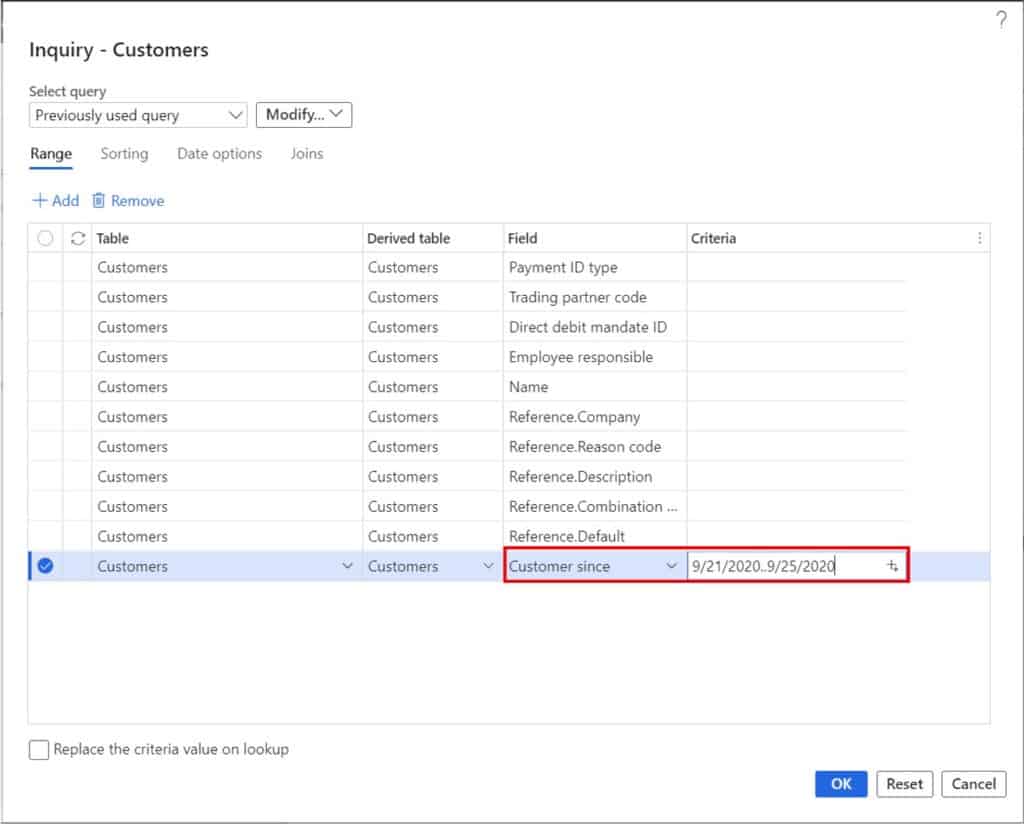
The query returns the two test customers.
Construct A Query With A Table Join
There may be cases where you want to filter for some piece of data related to the customer table but not directly part of the data source for the form. In these cases, you can use the “Joins” tab in the advanced filter form to add the table or tables that you need to be able to reach the field you want to use in your query.
Let’s take the example of an address query. The address table in D365 Finance and Operations is linked to the customer table but not directly, there are a few tables in between. So, if I wanted to search customers by address, I would need to add some table joins.
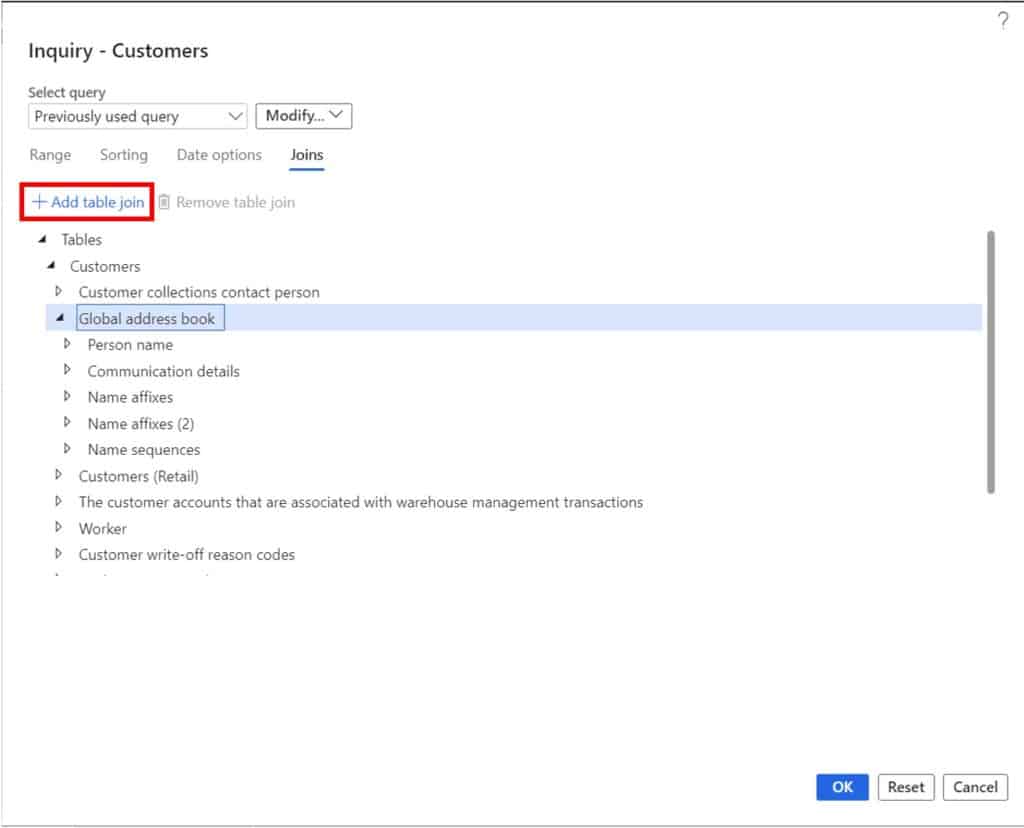
One of my test customers has an address where the city is “Atlanta”, so I want to search for all customers that have a customer name “Test Customer” and have an address where the city is “Atlanta”. To do this I can click the “Joins” tab in the advanced filter form and click on the table I want to join to.
To know which table, you need to join to requires a bit of knowledge about D365 Finance and Operations, but most are pretty obvious. In this case I will click on the “Global address book” table and click “Add table join”.
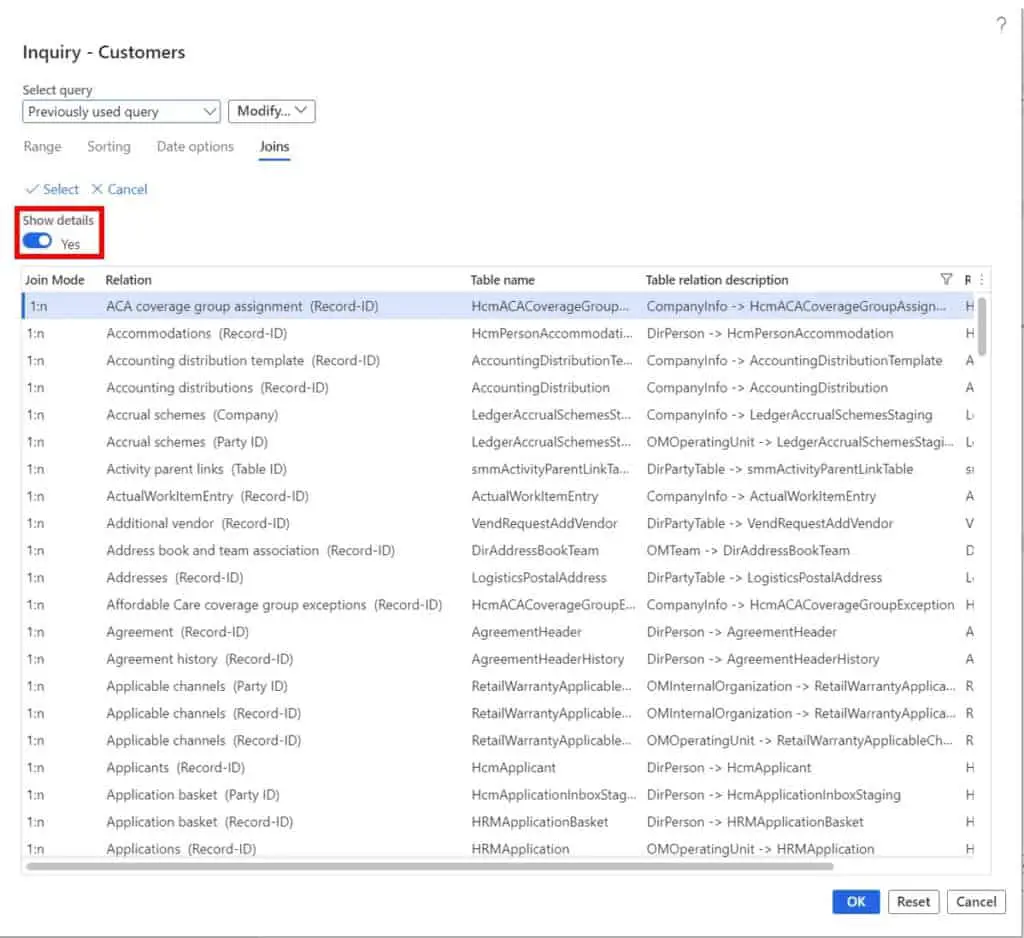
This will display a list of tables that are available to join. I usually like to enable the “Show details” slider so that I can see the system table names. Now I will filter for the “Locations” table which is the first table I need to join to.
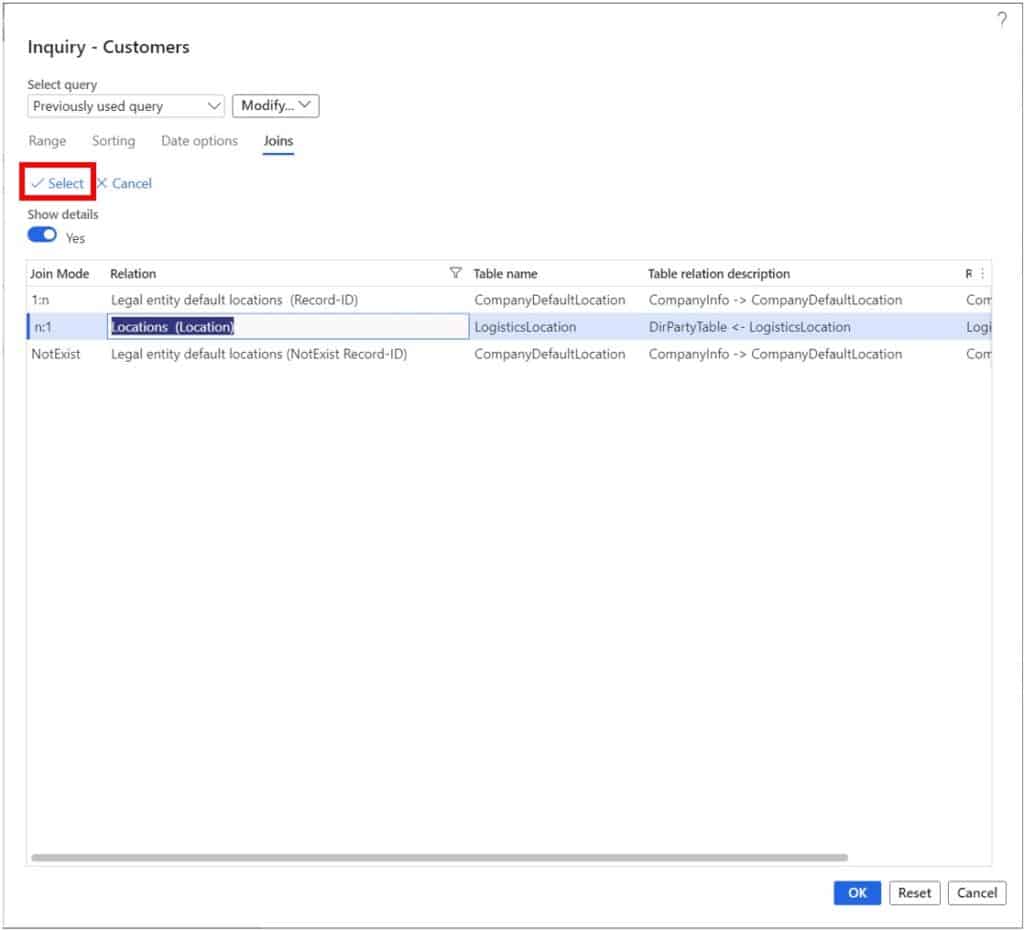
Once I find the table I can click on the table and then click on the “Select” button to add the table join.
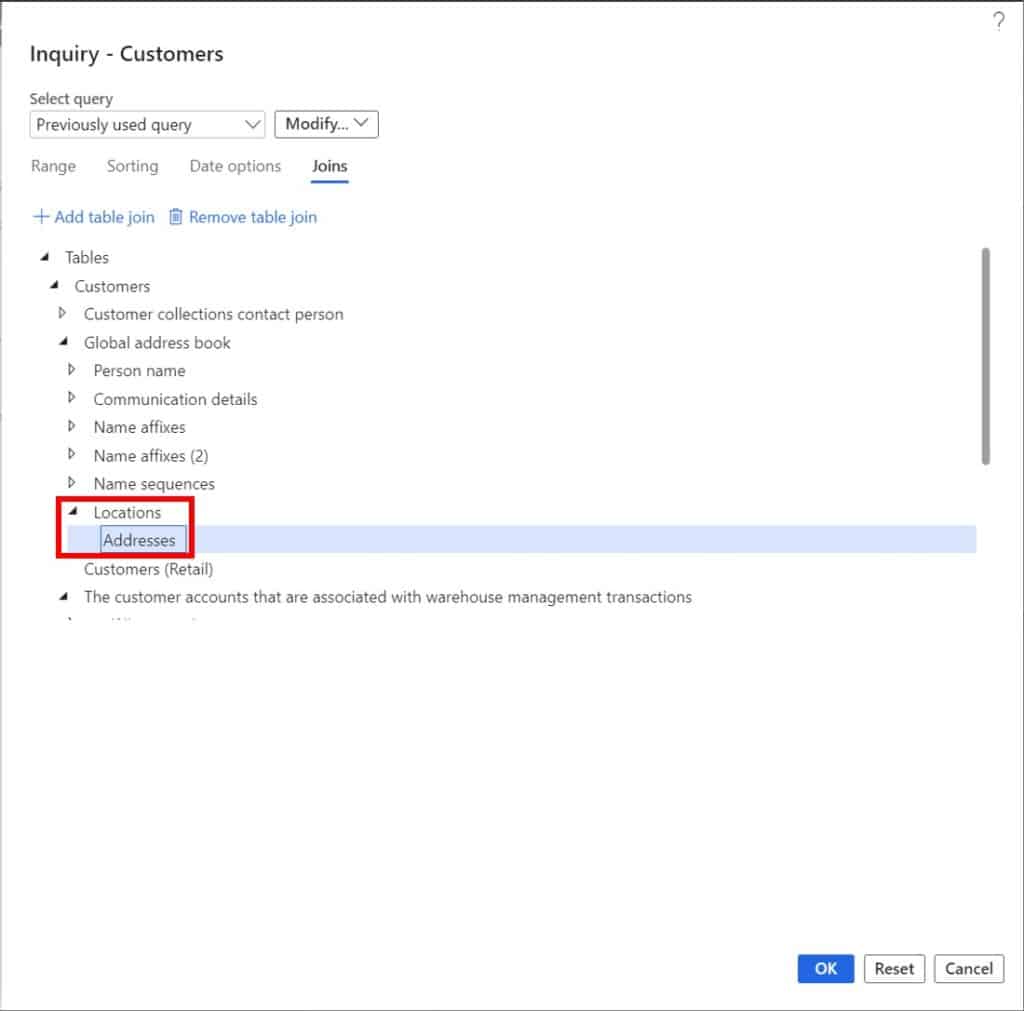
This will take me back to the “Joins” tab where I can see that my table join has been added. I need to join the “Address” table to the “Locations” table so I will click the “Add table Join” button again and to the same thing except I will now add the “Addresses” table.
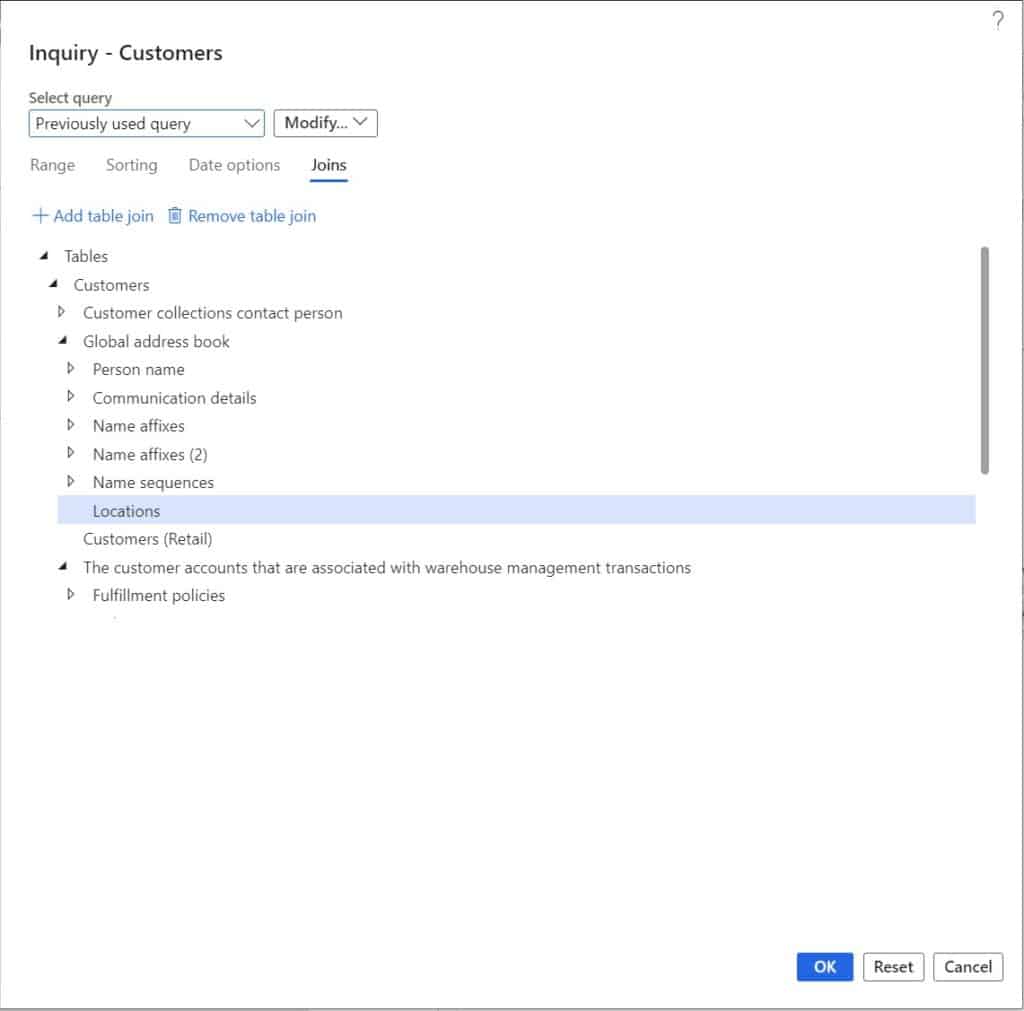
Now I have both of the tables joined that I need for my query.
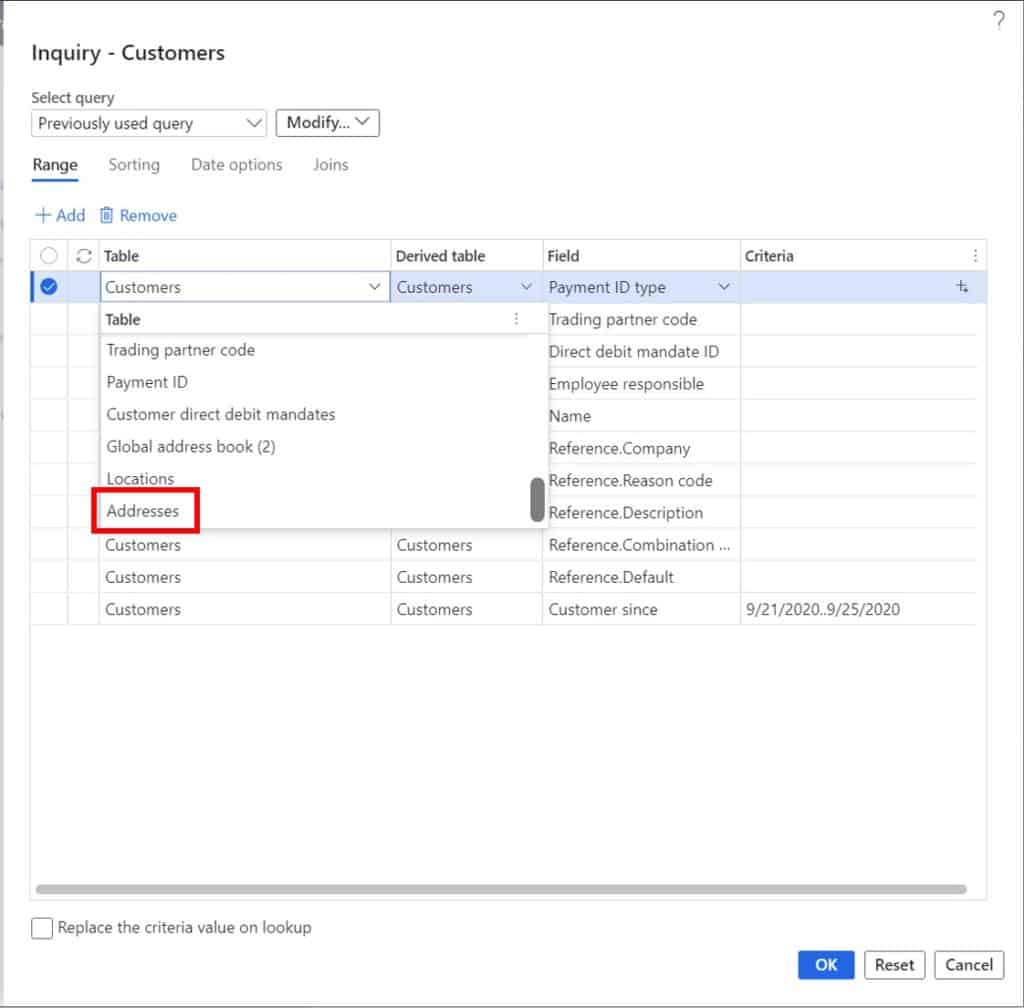
Now if I click on the “Range” tab of the advanced filter form I can see when I click the table dropdown, I now have the “Addresses” table available to me.
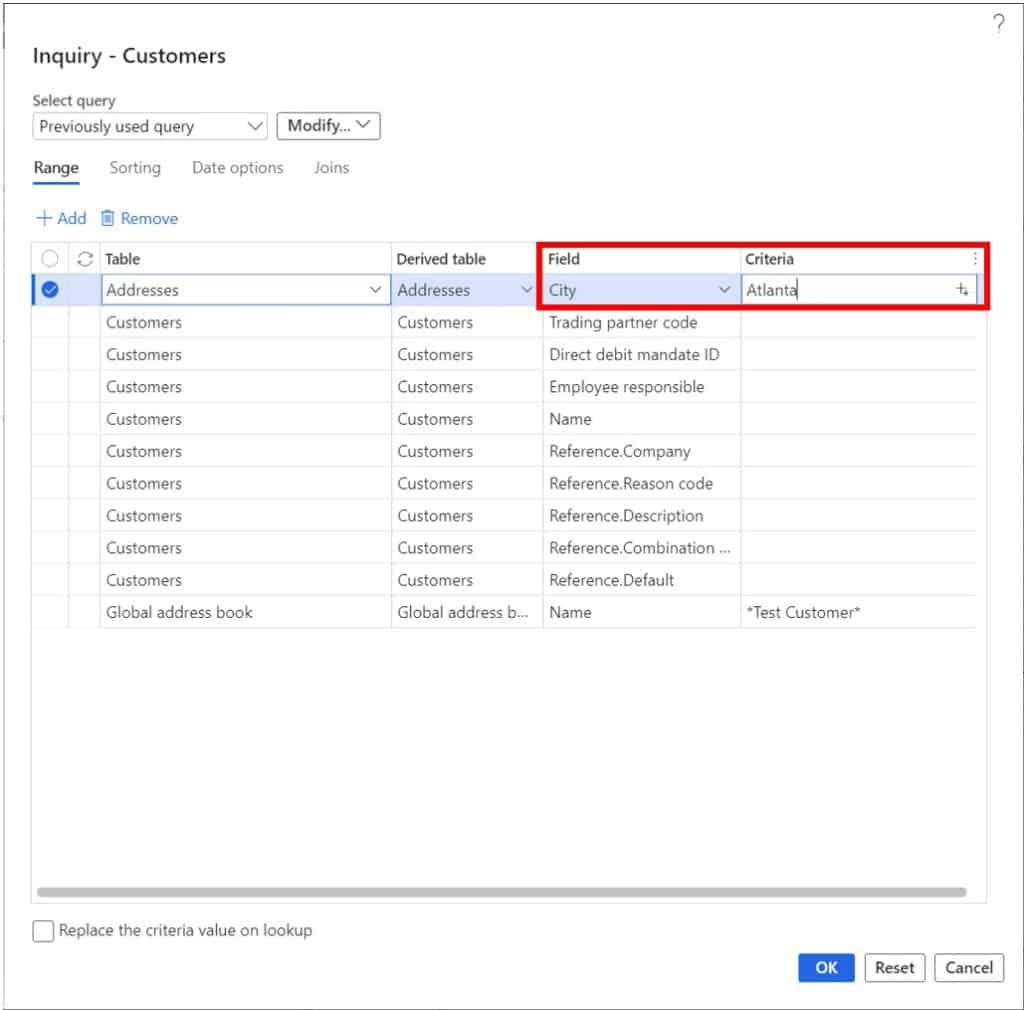
I can now select the “City” field and query for an address that has “Atlanta” in the address.
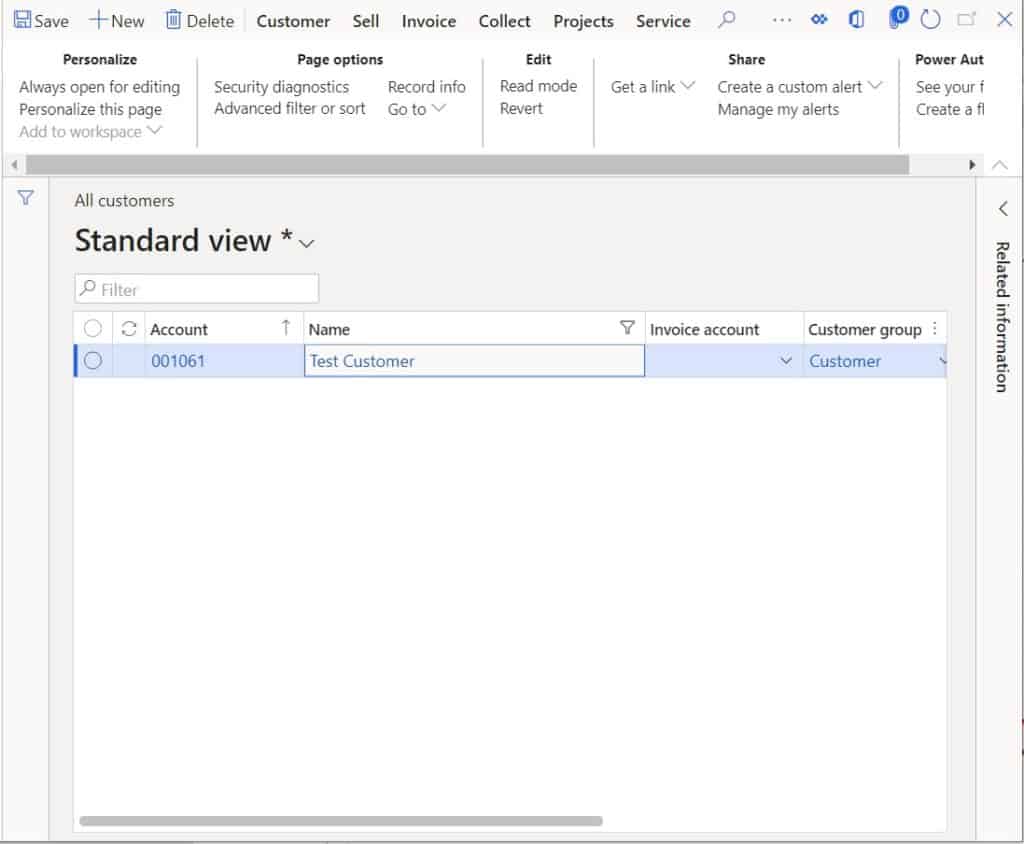
The query returns the customer with the address where the city is “Atlanta”.
Construct A Query With Advanced Query Syntax
The advanced filter form also allows for advanced query syntax to be used to create dynamic queries that do not use static values.
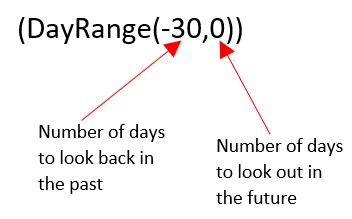
For example if I wanted a query to show me all customers that had a “Customer since” date set in the last 30 days but I didn’t want to have to change the dates each day I could use an advanced query syntax for a dynamic day range. The syntax has the following structure:
So, let’s construct our query. I will put the day range value for 30 days in the past where the customer name contains “Test Customer”.
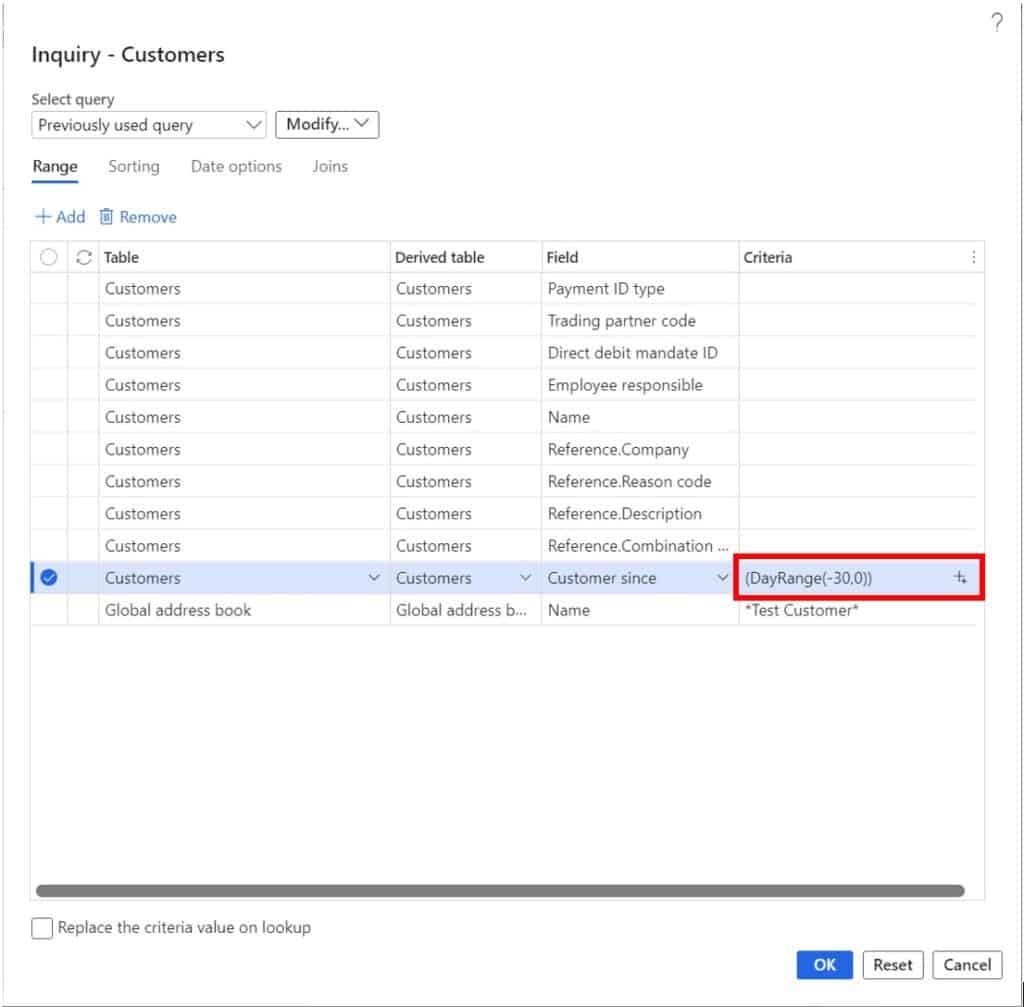
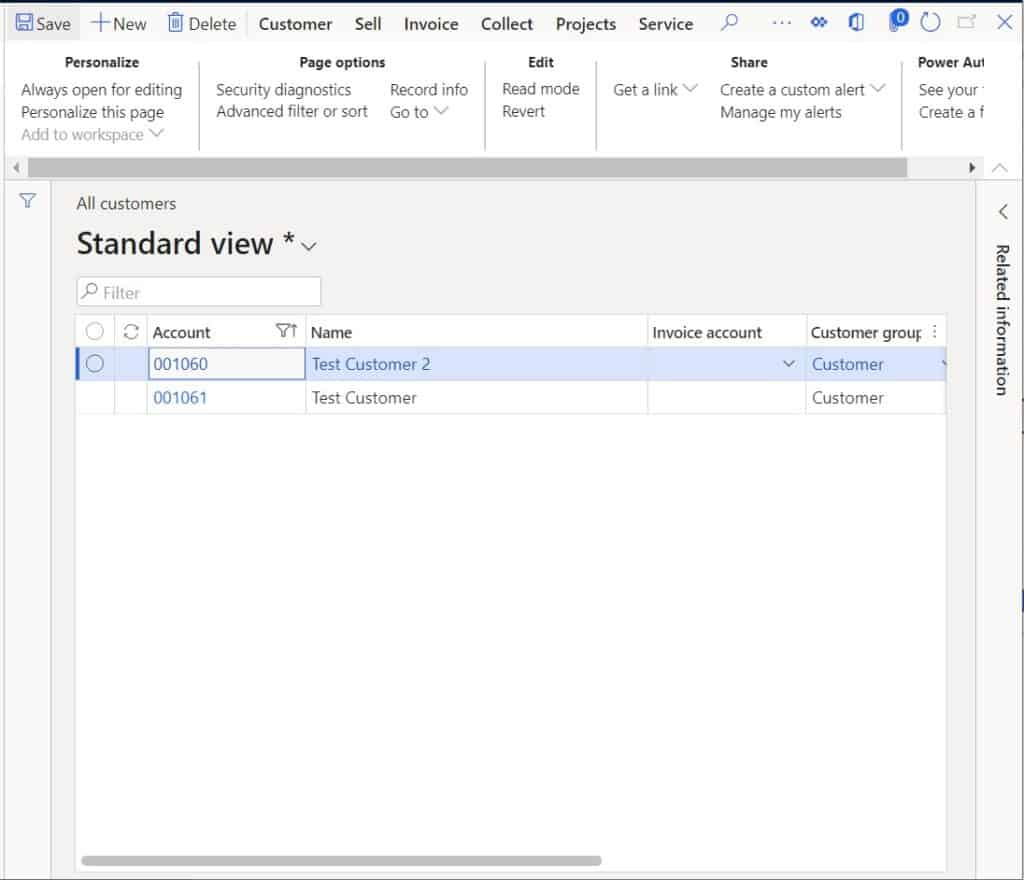
This query returns both customers because the “Customer since” date for both customers was within the last 30 days.
With this dynamic query you could save this as a view, or a workspace tile and have the system dynamically update the query so that each time it executes it always runs for the last 30 days from the current day.
To see how to save a query as a view check out this article about saved views. To save a query as a tile on a workspace check out this article about workspaces.
Some other notable advanced query statements and syntax are:
- Previous two months – (MonthRange(-2,0)).
- Next three months – (MonthRange(0,3))
- Last 30 days – (DayRange(-30,0)).
- Previous 30 days and next 30 days – (DayRange(-30,30)).
- Not or Exclude – ! (Exclamation mark)
- Greater than – >
- Less than – <
- Wildcard – * (Asterisk)
- Unknown character – ? (Example Jo?? Smith)
- Blank value – “” (Double quotes)
Takeaways
The advanced filter feature is a very powerful feature and can be extremely useful for constructing complex queries to find obscure data sets. Users that can master the advanced filtering capability in D365 Finance and Operations will be self-sufficient for their data and reporting needs.