

Print management is the framework in Dynamics 365 Finance and Operations that allows users to configure print settings for various business documents, including sending emails and archiving. Print management setups are typically separated by module and include nodes for all business documents that are available to be printed.
In this post we will go through how to use print management, some features and functionality, and how you can add conditions to achieve the business outcomes you are looking for.
Select a Print Destination
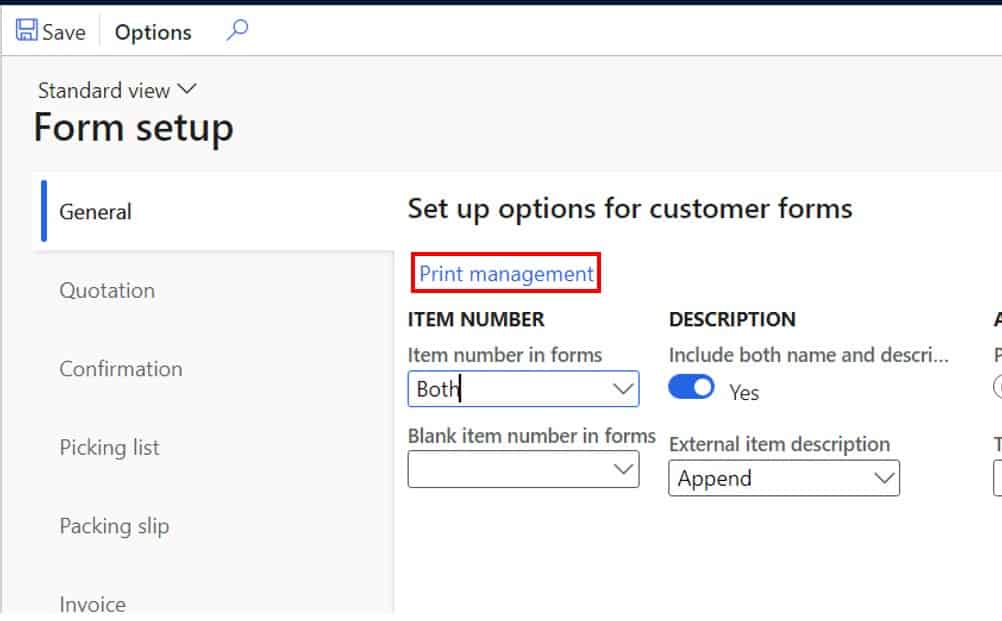
The print management page can be a little difficult to find if you don’t know where to look. The print management form is accessible in most cases from the “Form setup” form or as a tab directly on the module parameters form. For example, the print management form for the order to cash related documents can be accessed through Accounts receivable > Setup > Forms > Form setup > Print management.
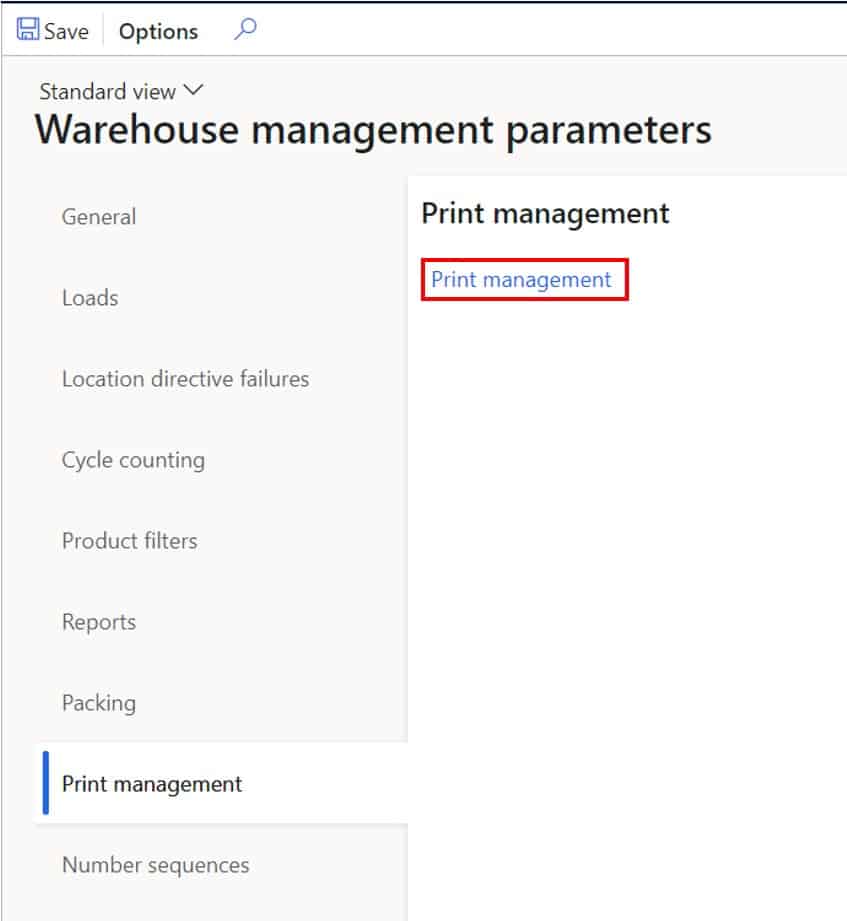
There are some modules, like Warehouse management, where the print management form is only accessible from the parameters form.
You can change the print destination for any business document by opening the print management form, clicking on the lowest applicable node, clicking the triangle icon next to the “Destination” field, and clicking “Printer setup”.
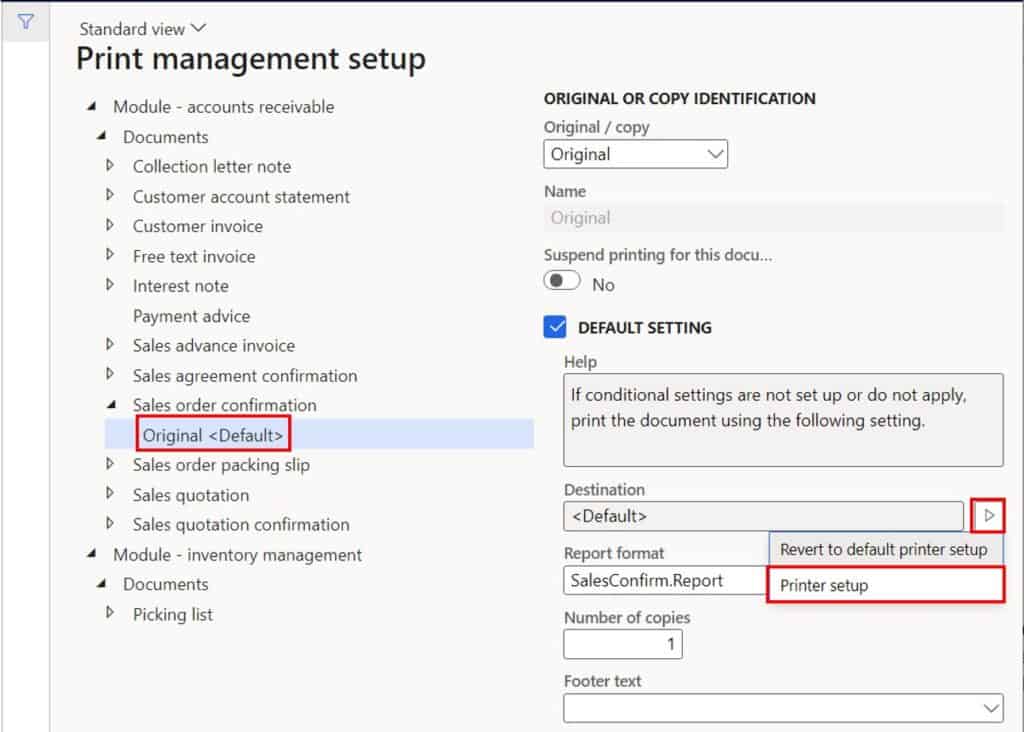
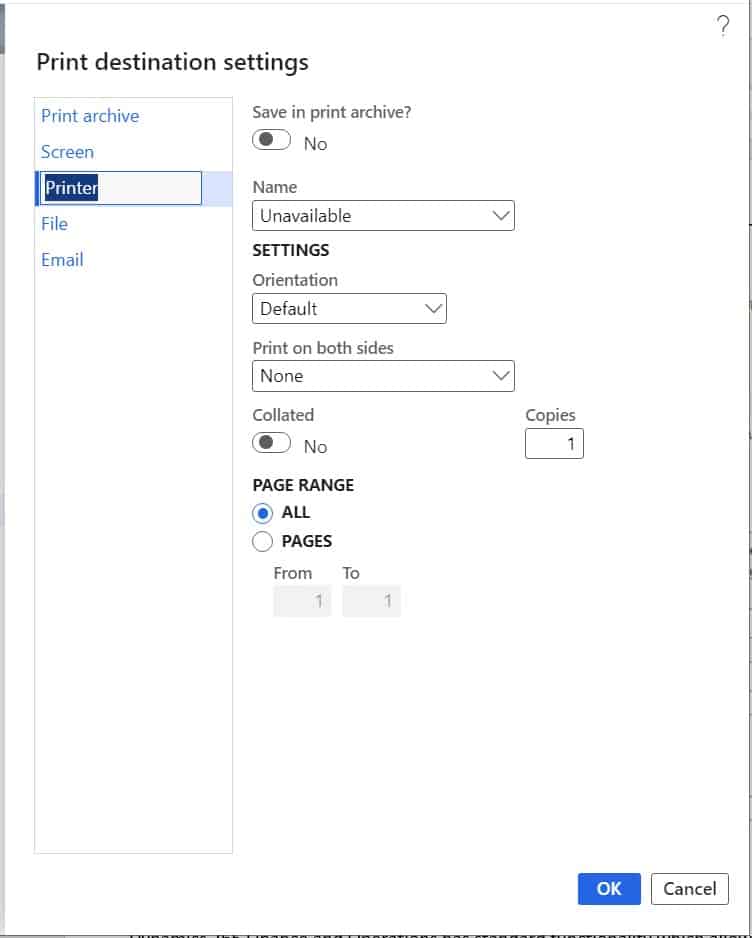
Here you can select one of five choices.
- Print archive – This option will save the document in the D365 print archive which documents the date, time, origin and other relevant metadata related to the time the document was generated. It also allows you to retrieve the original document that was produced.
- Screen – This option will just print the document to the screen and then the user is able to look it over before using the on screen functions to either print it to a printer or save it as a file.
- Printer – This selection will print directly to a network printer that has been registered using the document routing agent. The document routing agent is essentially a program which routes print commands from Azure to a print server.
- File – This option will download the document directly to the browser in whatever file type the user selected.
- Email – This option allows you to automatically send the document as an email attachment. The email is triggered at the time the business document is posted. We will discuss how you can set this up in the next section.
Email a Business Document
Dynamics 365 Finance and Operations has standard functionality which allows you email business documents automatically upon certain posting events. We can configure this using print management. In this example we will set up a sales order confirmation to automatically be emailed to the customer’s designated invoice email address as soon as the confirmation is posted.
To do this navigate to Accounts receivable > Setup > Forms > Form setup > Print management. Expand the “Sales order confirmation” node and click on the “Original <Default>” node.
Note: If you don’t see the “Original <Default>” node just right click on the “Sales order confirmation” node and click “New”. Once you have the “Original <Default>” node highlighted click the triangle icon next to the “Destination” field on the right and click the “Printer setup” option.

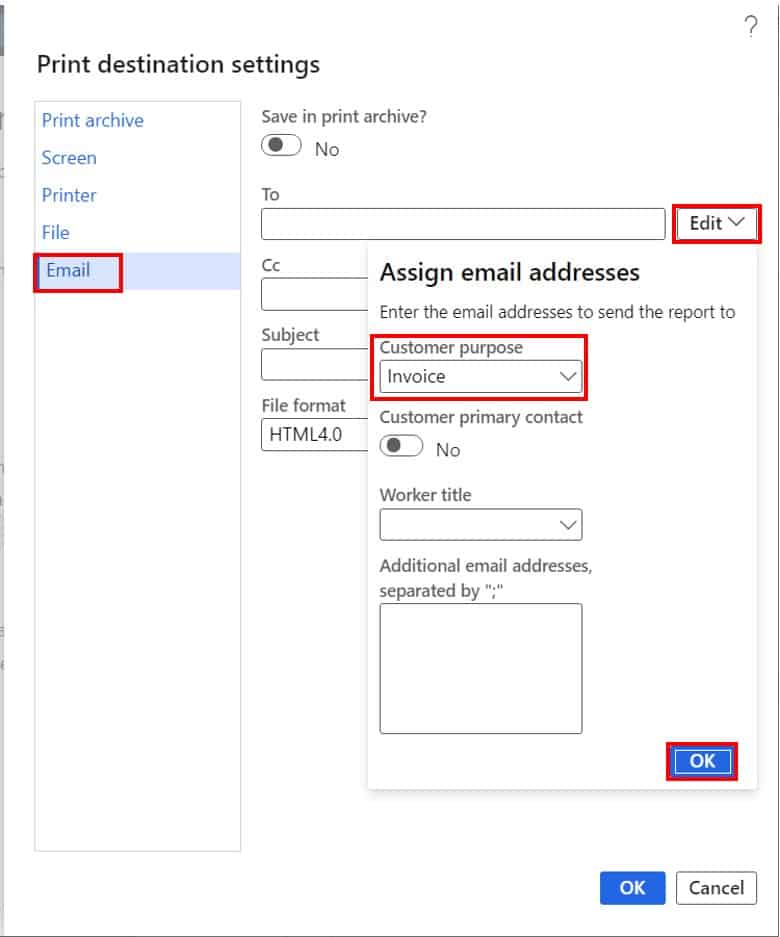
In the “Print destination settings” pop out, select the “Email” option and click the “Edit” option to the right of the “To” field. Here we can insert a purpose which acts as a variable. So, when the system goes to send the email it will look for the email address associated with the customer with the “Invoice” purpose associated with the email address. We will see this setup later in this post. Next click the “Ok” button to insert the purpose placeholder.
Note: You can also hard code an email address if all emails will be sent to one email address.
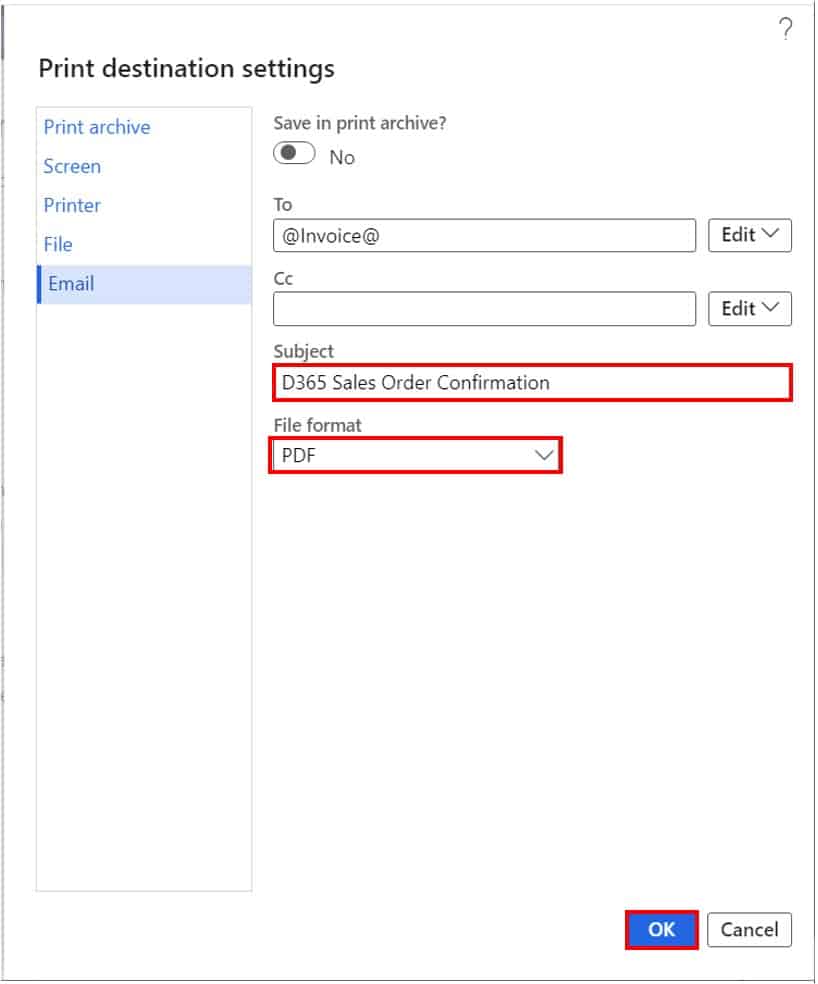
Next, we can set what the subject of the email should be by filling in the “Subject” field. We can also select the file format that the document attached to the email should be in. Once these are set, click the “Ok” button.
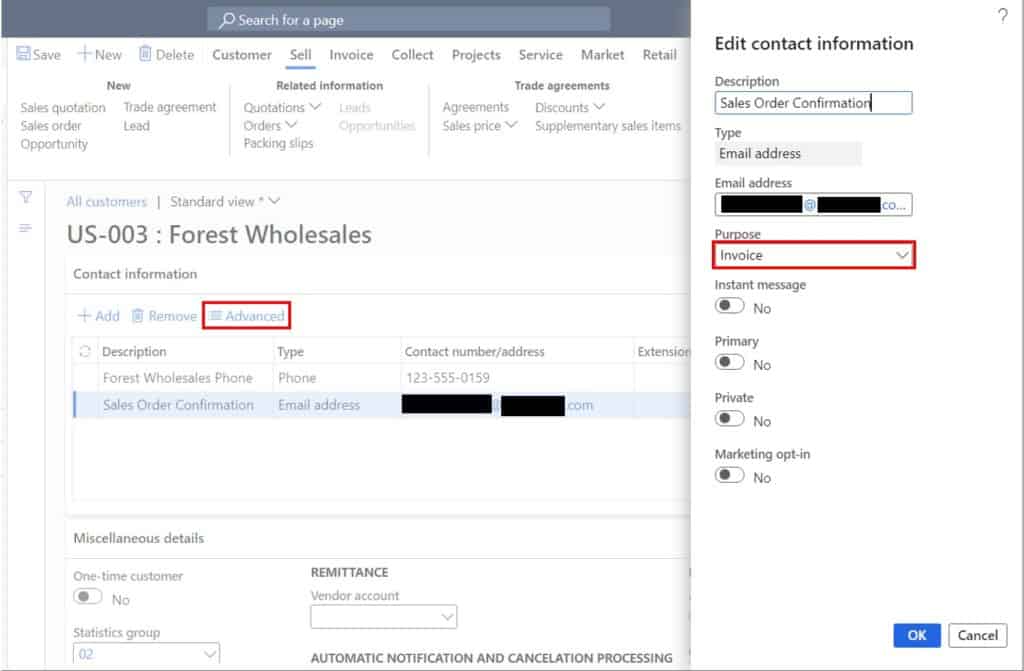
Now on the customer account we will enter an email address that has the purpose of “Invoice” which will be the email used when we print the sales order confirmation. After you enter the email address you can click the “Advanced” button and in the “Purpose” field you can select the “Invoice” purpose.
Now let’s process a sales order confirmation. Create a sales order and click the “Confirm sales order” button.
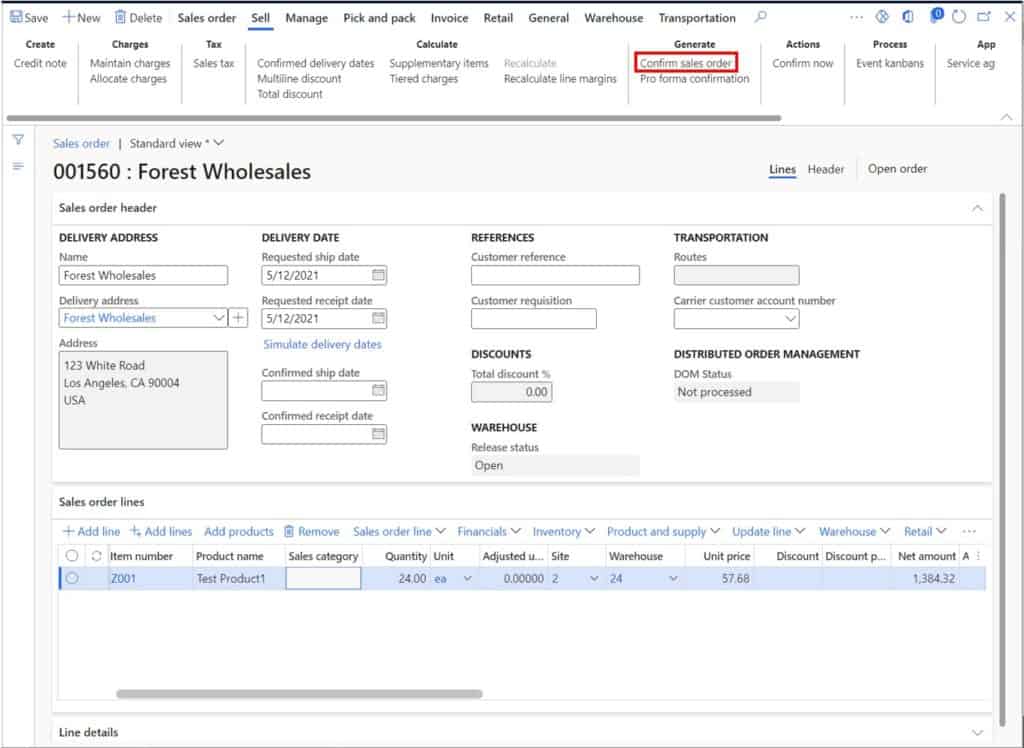
Enable the “Print confirmation” option, enable “Use print management destination” option, and click “Ok”.
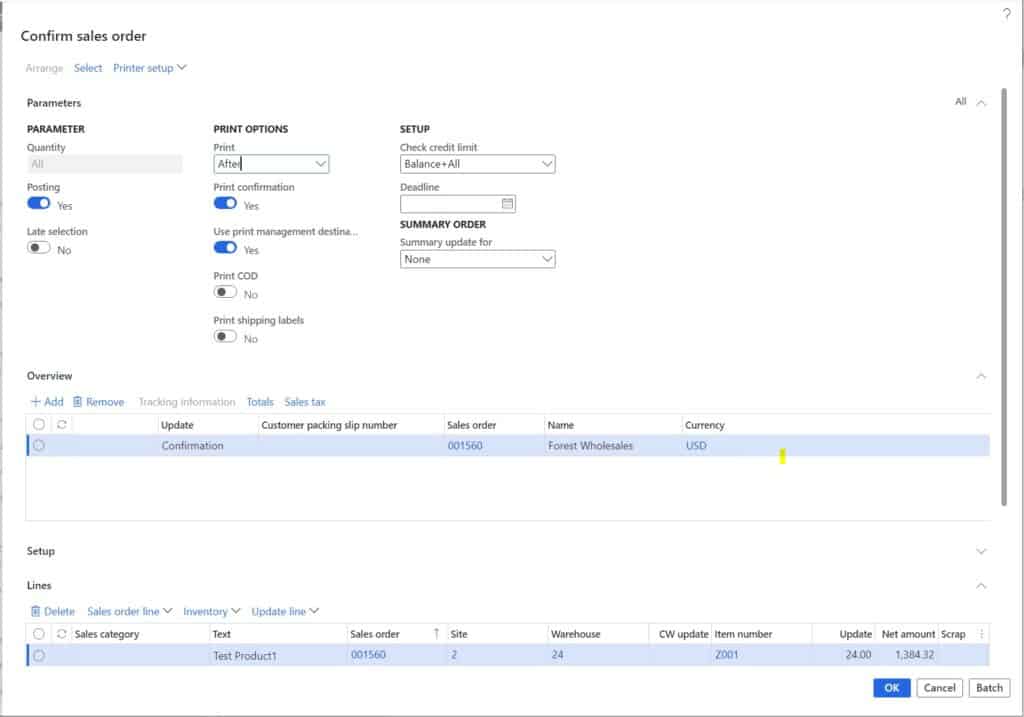
You will get a confirmation message saying the report has been successfully sent as an attachment to an email.

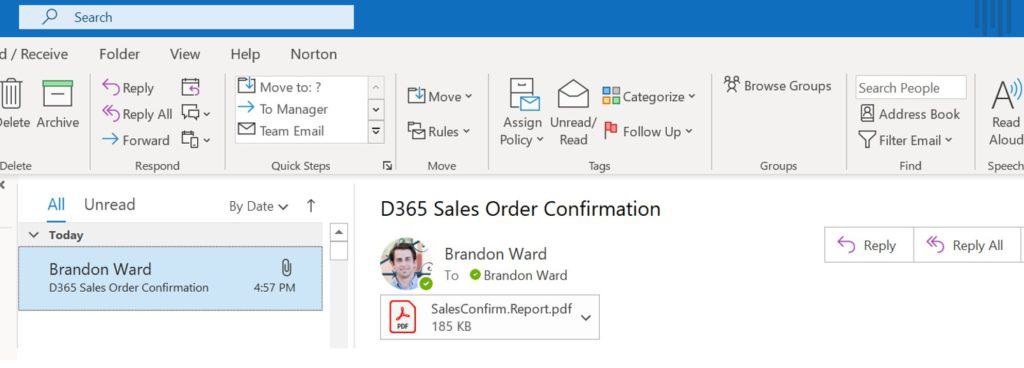
Now I fi check my inbox we can see that there is an email with the sales order confirmation as an attachment in PDF format. You will notice that there is not email body. This is a shortcoming in my opinion that unfortunately cannot be solved without custom development or a 3rd part ISV solution.
Use Print Management to Print Different Business Documents
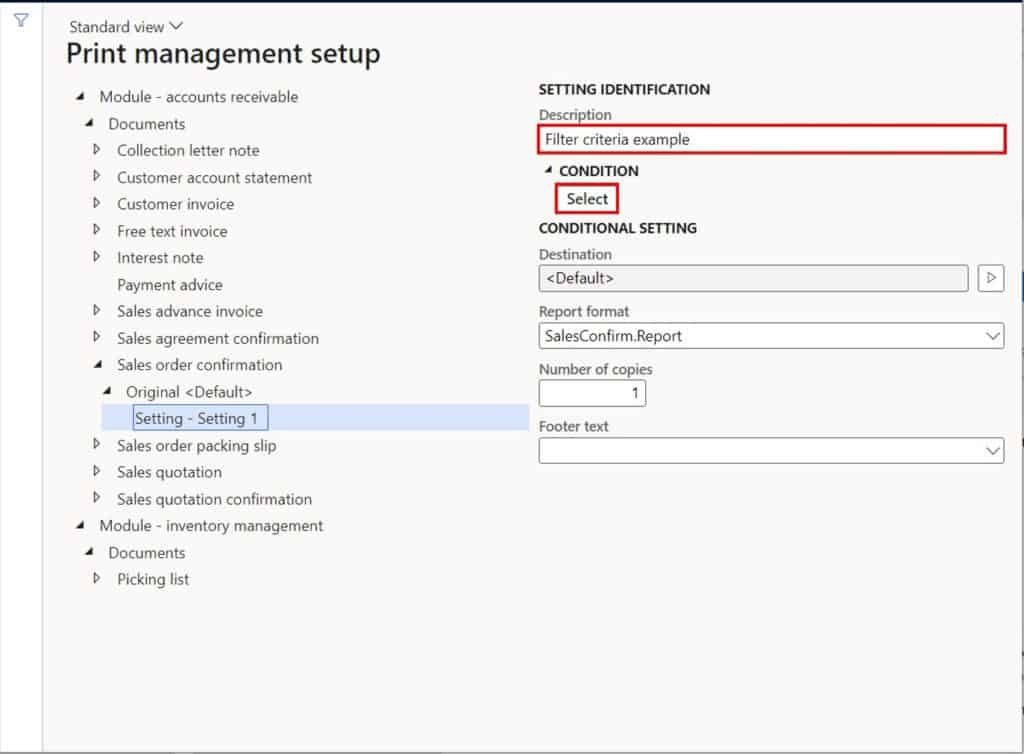
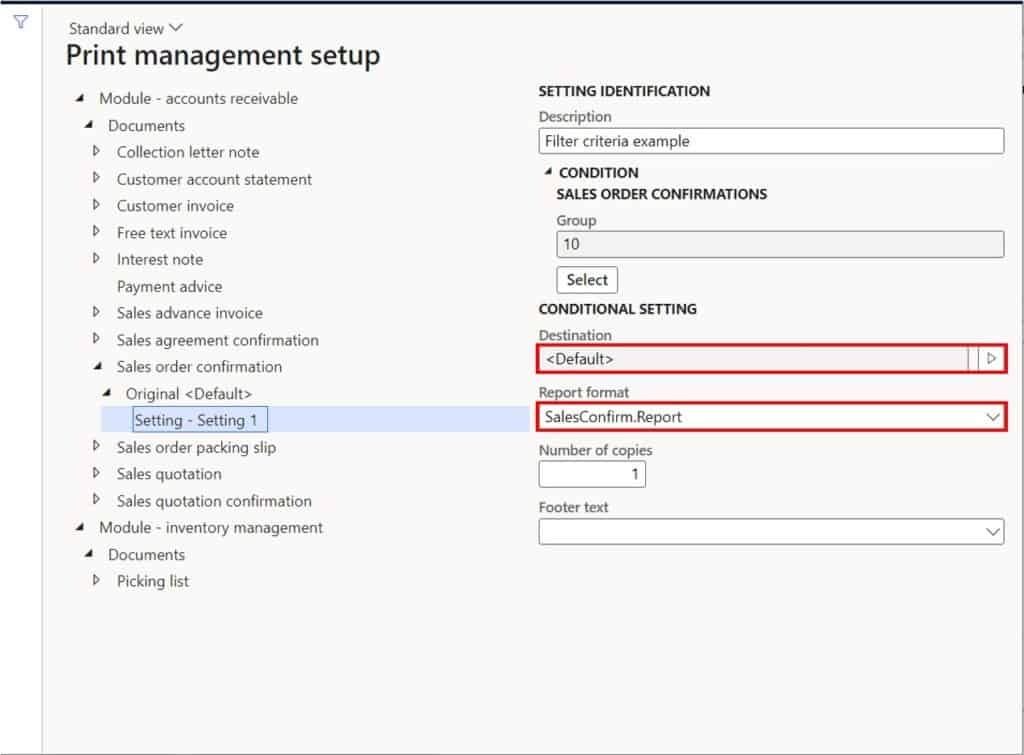
Print management can be used to create filter criteria for when different document templates or print destinations should be used. For example, maybe for one group of customers you need to send a sales confirmation with one format and for the other group of customers you need to send a completely different template by email.
To create filter criteria in print management you can right click on the “Original <Default>” node and click “New” this will create a new node. In the “Description” field give the new node a name. Then click the “Select” button.
Now I can use the advanced filter form to create my desired filter criteria. For more information on how to use the advanced filter criteria see this post.
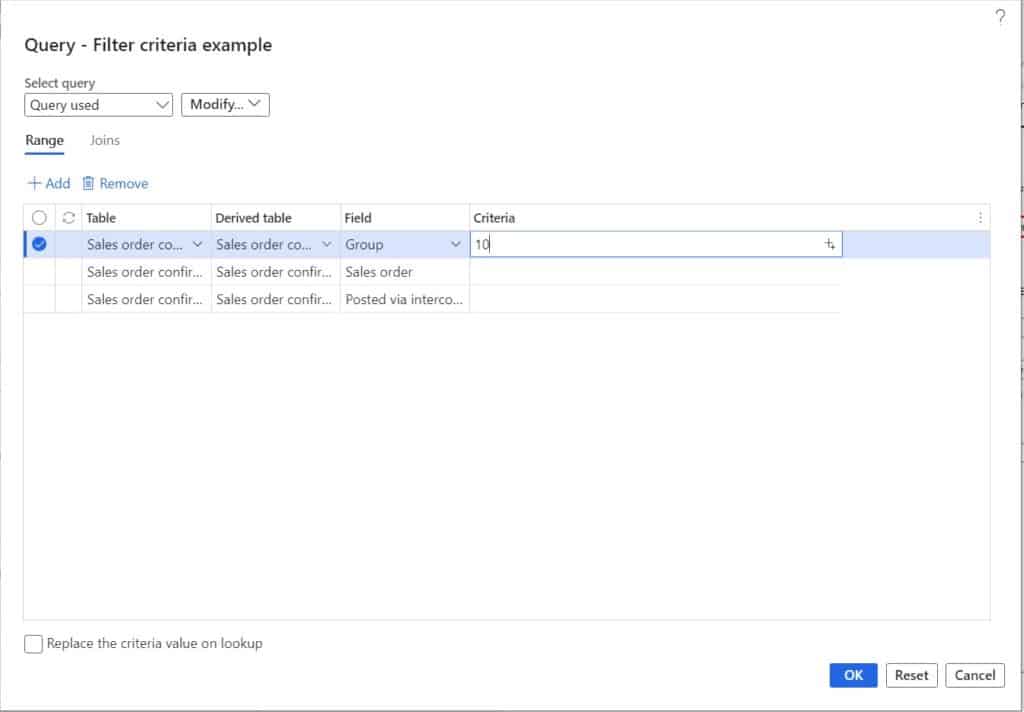
Now that the filter criteria is set, you can select the desired print destination and report format. Note: you will only have multiple report formats if you have developed a custom format or if you have created alternative configurable business document templates.
Import Print Management Settings
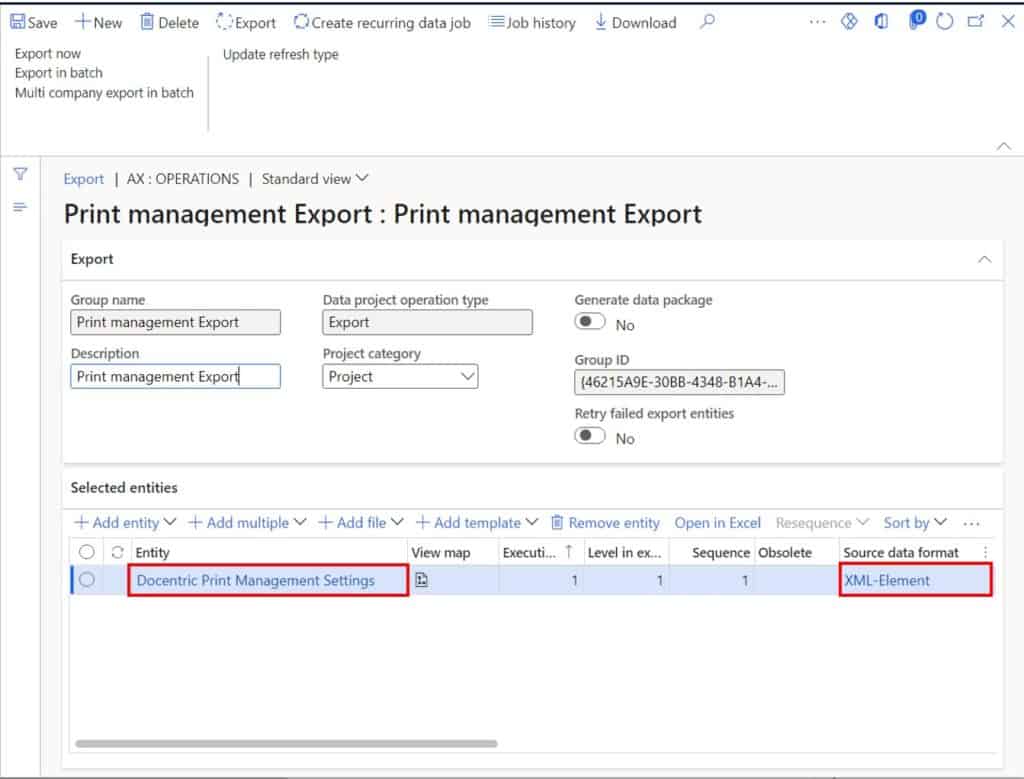
During an implementation of Dynamics 365 Finance and Operations you might notice that when an environment is refreshed with data from another environment, the print management settings do not carry over and the print management settings have to be reconfigured. Unfortunately Microsoft does not have a standard data entity to export and import the data but there is a 3rd party ISV solution called Docentic that offers a free version of their software that does come with a data entity that can be used to export print management settings in one environment and import them into another.
Using the data management framework, you can select the “Docentric Print Management Settings” entity in an export project and select “XML-Element” as the “Source data format”. Then export the data and download the zip file. Extract the zip file and save the XML file containing the print management settings. Then you can import this XML file into an environment using the same entity inside an import data project in the target environment. This will load the print management settings into the target environment. For more information on how to import data into Dynamics 365 Finance and Operations see this post.
There is no print management setting found for report
The error message: “There is no print management setting found for report” is a common one after a refresh of an environment. If there is not a “Original <Default>” node created in print management for the document, you are trying to print you will receive the error. If you create the “Original <Default>” node by right clicking on the document node in print management (as discussed above) this will resolve the error.

Takeaways
Print management in Dynamics 365 Finance and Operations is extremely flexible and allows for many different business print, email, or archiving scenarios. You can utilize a combination of the features and functionality discussed in this article to achieve 80% – 90% of business requirements. If you have more complex printing or emailing requirements you may need to look at a 3rd party ISV solution. If you have any more than the default print management setups, I recommend installing the free version of Docentric to give you the ability to export and import print management settings from one environment to another. This will save you tons of time in re-work.