

Procurement category hierarchies are used to classify products for reporting and analysis purposes as well as represent categories for purchasing. A category hierarchy consists of a hierarchical structure of categories and subcategories. For example, procurement categories can be used to organize physical products as well as non-inventory expensed products. Procurement categories can be used to purchase non-inventory expense items which eliminates the need to create an item in the system for things that you purchase that you do not stock in inventory.
In this post we will go through the setup and functionality of procurement categories and illustrate some of the most useful features. We will also go through how to use procurement categories to purchase expensed items on a purchase order as well as the how to set up the ledger postings.
Category Hierarchy Setup
Before the categories and subcategories can be assigned to any hierarchy, we must first set up the category hierarchy and associate a hierarchy type which indicates what type of hierarchy we are working with.
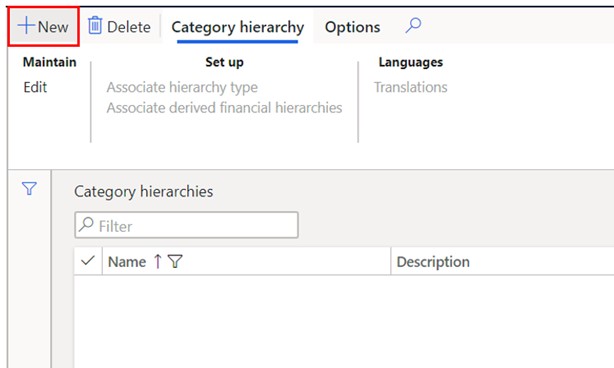
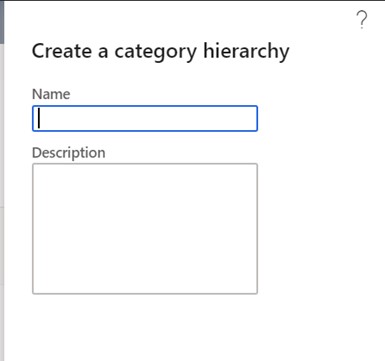
To create a category hierarchy, navigate to Product information management > Setup > Category hierarchies. Click the “New” button and give the hierarchy a meaningful name, description, and click “Create”.
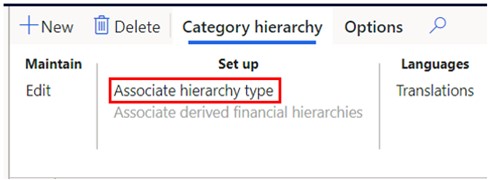
Click the “Associate hierarchy type” button.
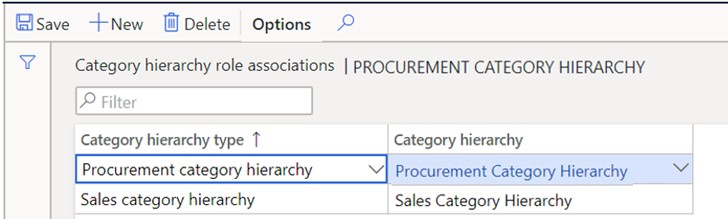
- Category hierarchy type – Select the hierarchy type for which this category hierarchy is intended.
- Category hierarchy – Select the category hierarchy, that you created in the step above, which will associate the hierarchy with the type.
Procurement Categories Setup
The procurement category hierarchy is used for reporting and organizing procured products into a hierarchical structure. However, it also has other procurement related functionality like specifying preferred and approved vendors as well as creating vendor evaluation criteria. Unlike the sales category hierarchy, the procurement category hierarchy can be used to define product attributes that are associated with each category node which enables the selection of attribute values on the product setup. Keep in mind, most of the setup we review below is optional.
To setup the procurement category hierarchy, navigate to Procurement and sourcing > Procurement categories.
Initially the form displays the following sections and after you click the “Edit category hierarchy” button you will see some different fast tab. We will go through both.
To create a category node, click the “Edit category hierarchy” button and click the “New category node button”.

- Name – This is the name for the category node.
- Code – This is a shorter unique code that represents the category node.
- Description – This is a long description that allows the user to give more detail about this specific category node.
- Friendly name – This friendly name appears in parenthesis next to the “Name” when the user interacts with the category selection in most forms. The intent of this field is to give the user a more user friendly or meaningful name.
- Keywords – This is used to enhance the search feature during category selection on forms like the purchase order lines or released product form where the user can select a procurement category.
- Display order – This defines the display order that the category node will appear the lowest number will appear first.
In the “Products” fast tab you can select all the products that should be assigned to this specific category node. You can also do this directly from the released product form.
Note: Best practice is to assign products to the lowest level category node possible.
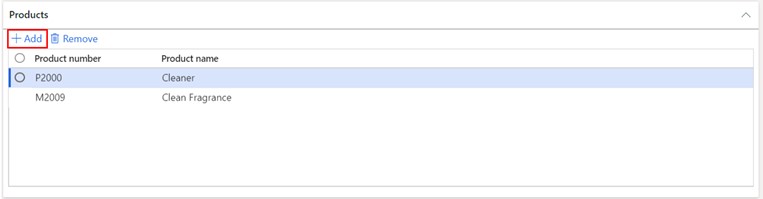
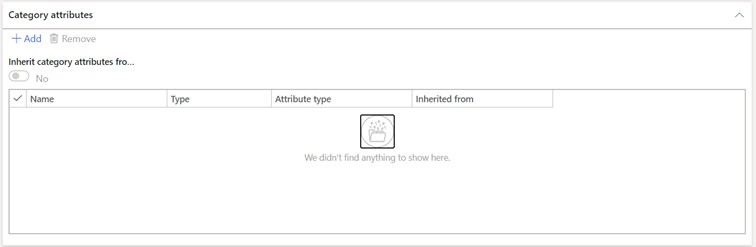
To add products to the currently selected category node click the “Add” button. This will open a product selection form where you can multi-select products and move them over from the “Available” section to the “Selected” section. In the “Category attributes” fast tab you can select attributes related to the selected category node.
So instead of attributes specific to the product, category attributes are attributes set at the category level. After you select a category attribute for the node and take the hierarchy out of edit mode you can select an attribute value for the attribute.
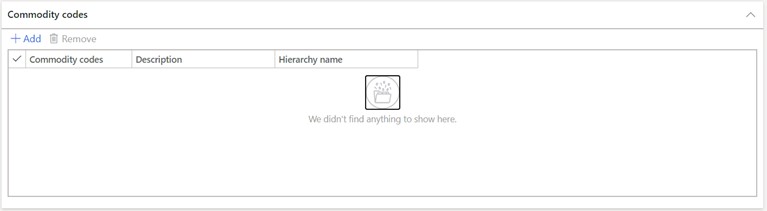
In the “Commodity codes” fast tab you can associate industry defined commodity codes to the selected category node. Commodity codes can be used for cross-industry reporting and there are some standard Dynamics 365 Finance and Operations reports that used commodity codes.
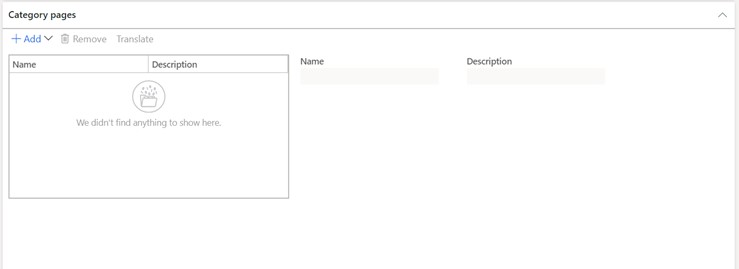
In the “Category pages” fast tab, for the selected node, you can additional information about the category including rich text and images. This can be used to make announcements about sales or discounts for the category.
In the “Assign project categories” fast tab you can associate a project category that should be associated to the selected procurement category. This will default the project category to the purchase order line for any product associated with the category. If you are not planning on using projects, you can ignore this section.

Once you have your parent category node defined, you can either create another parent category node or you can create a child node. The context of the node you have currently selected when you click the “New category node” will determine the level where the category node will sit. For example, if you want to create a child category of the node you just created, click the node you just created and click the “New category node” this will create a subcategory node. If instead you want to create another parent category node, click the root node and click the “New category node” button. Continue this until you have your desired category hierarchy structure.
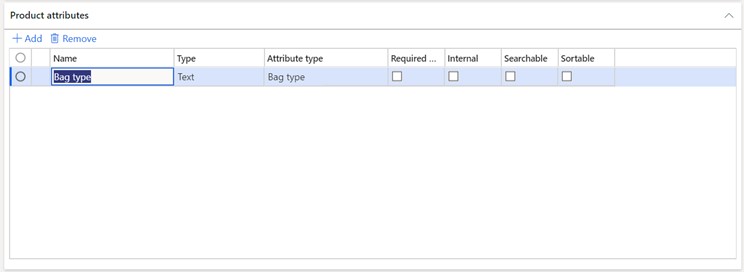
Once you have finished your procurement hierarchy structure there are a few more features related to procurement categories that can be configured when the procurement categories are out of “Edit mode”. Close and re-open the form and you will see some additional sections (Fast tabs). In the “Product attributes” fast tab you can specify which product attributes should default to products that are associated with this procurement category node. This will enable you to enter a product attribute on the released products form by using the “Product attributes” button. For more information on this check out this post on how to enable product attributes.
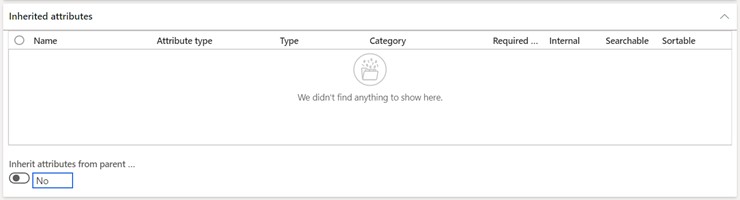
In the “Inherited attributes” fast tab you can inherit product attributes from a parent node by enabling the “Inherit attributes from parent category” flag. This is a helpful feature that quickly assigns parent attributes to the child category node.
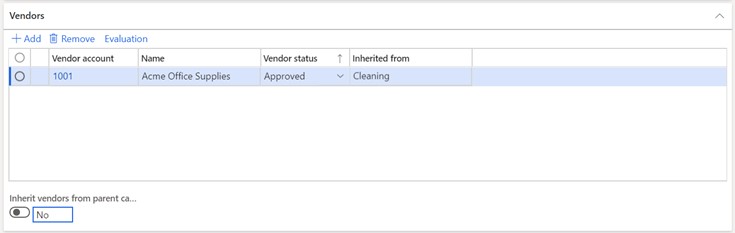
In the “Vendors” section you can associate specific vendors that are either approved or preferred for this category. This feature can be used to auto-add vendors to a request for quotation. Selecting preferred or approved vendor is also a required step for the vendor evaluation functionality.
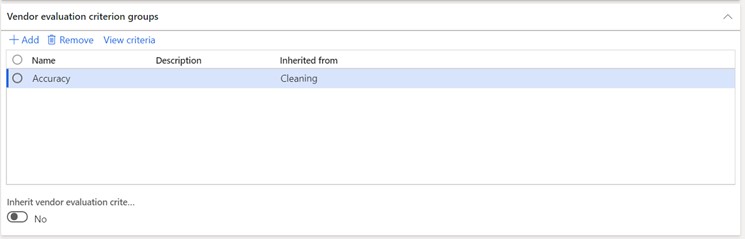
In the “Vendor evaluation criterion groups” fast tab, you can use the vendor evaluation criterion form to create a group for similar or related vendor rating criteria. For example, you can create a vendor evaluation criterion group named “Base criterion”, and then create rating criteria such as quality, price, and delivery time that buyers can use to rate all vendors in the specified procurement category.
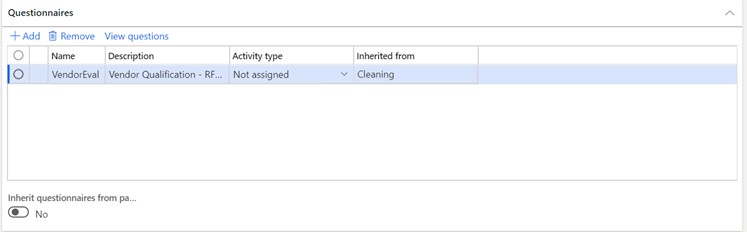
In the “Questionnaires” fast tab Questionnaires can be added to a procurement category. When a vendor requests to do business in a procurement category, the vendor must complete the questionnaire for that category. Questionnaires can be used in the request for quotation process to ensure the vendor meets certain qualifications.
In the “Item sales tax groups” fast tab you can select a default item sales tax group that should be applied for certain categories or items that fall into that category.

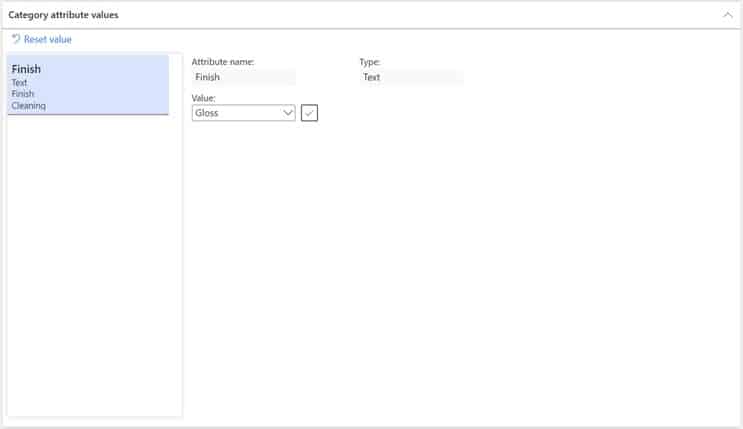
In the “Category attribute values” you can assign category attributes to a category. Similar to product attributes, you can also assign attributes at the category level. You can use attributes to define an unlimited amount of additional information about a category. After the attributes are created, you can associate them to categories. Several types of attributes can be setup in the system.
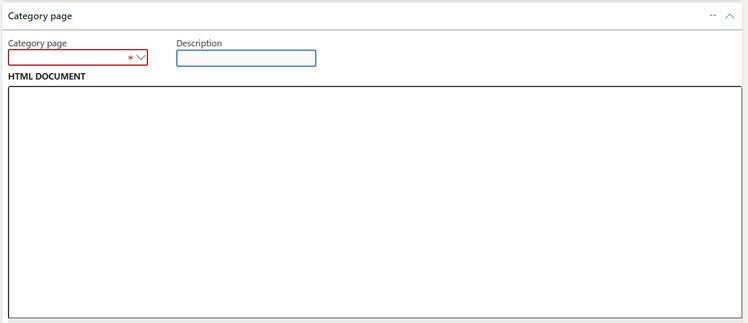
In the “Category page” fast tab you can create a page that contains information about a category, such as announcements and guidelines. You can display the category page in an internal procurement catalog on your employee self-service portal and on a purchase requisition line.
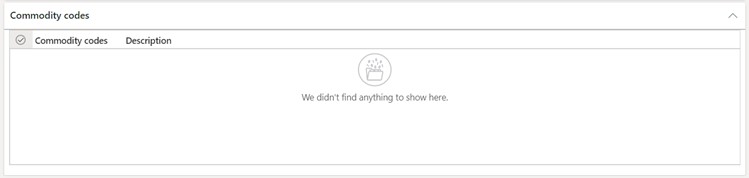
In the “Commodity codes” fast tab you can assign commodity codes to the category. A commodity code is any alphanumeric system designed to identify particular products. There are different types of commodity codes that are associated with government and some that are associated with the private sector. All commodity codes are used to classify items and services so that they can be better identified.
Using a Procurement Category on a Purchase Order
Procurement categories can be used to purchase non-inventory expensed products in cases where you may not want to go through the trouble of creating an item but nonetheless still need to cut a purchase order and buy the product or service. Once you have your procurement categories configured you can now use these categories on purchase orders and purchase requisitions. In this example I will show how to use procurement categories on a purchase order, but the same steps can be applied to using them on a purchase requisition.
Note: Accessing procurement category on a purchase requisition can depend on how you have your category access policy configured.
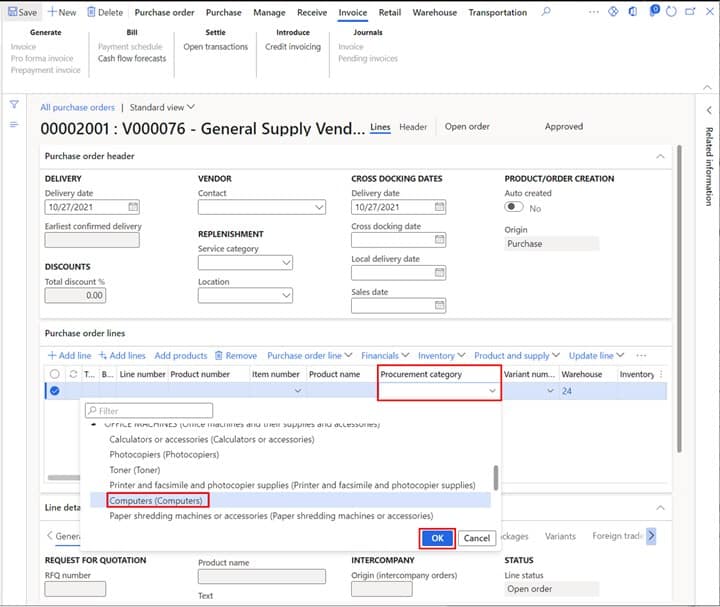
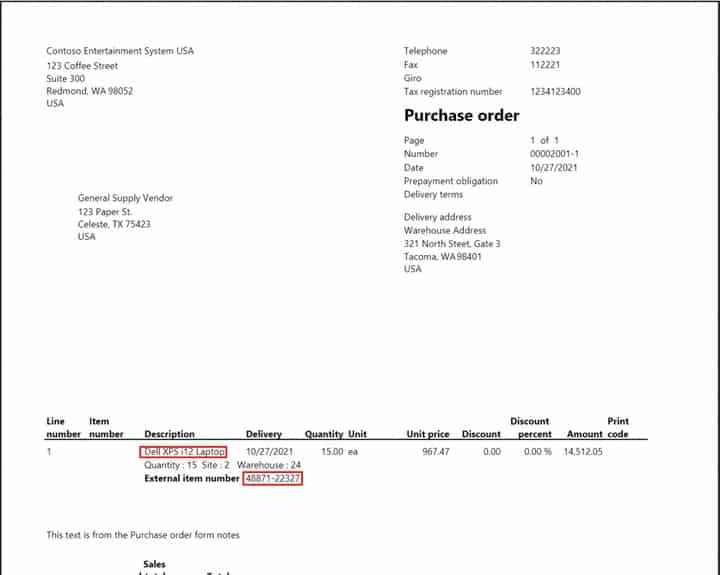
Frist create a purchase order. If you are not sure how to do that, please refer to this post on how to process a purchase order. Next in the purchase order lines, instead of selecting an item click the “Procurement categories” dropdown and select the appropriate node. Best practice is to select the lowest level applicable node on the category hierarchy.
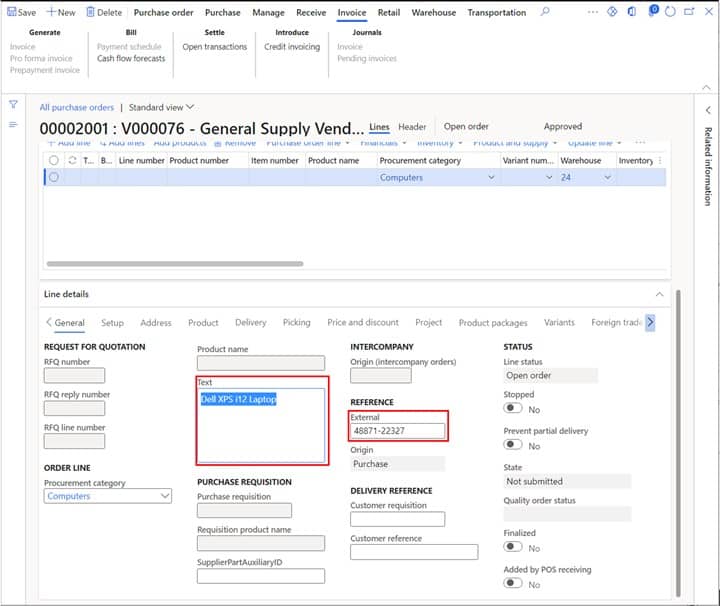
Once you have selected the category you can optionally replace the default text with a product description of the actual product you are buying. You can also specify the vendor’s part number in the “External” field which will display on the purchase order printout.
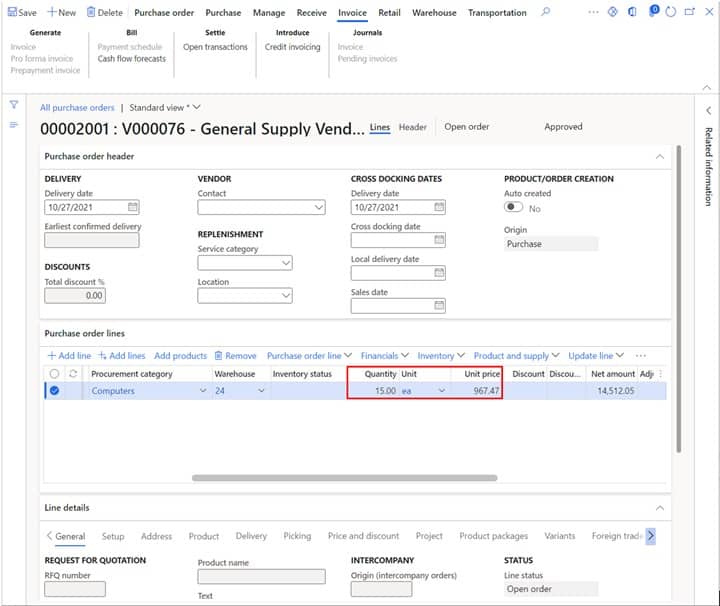
Next enter the purchase order quantity and unit price for the purchase order line.
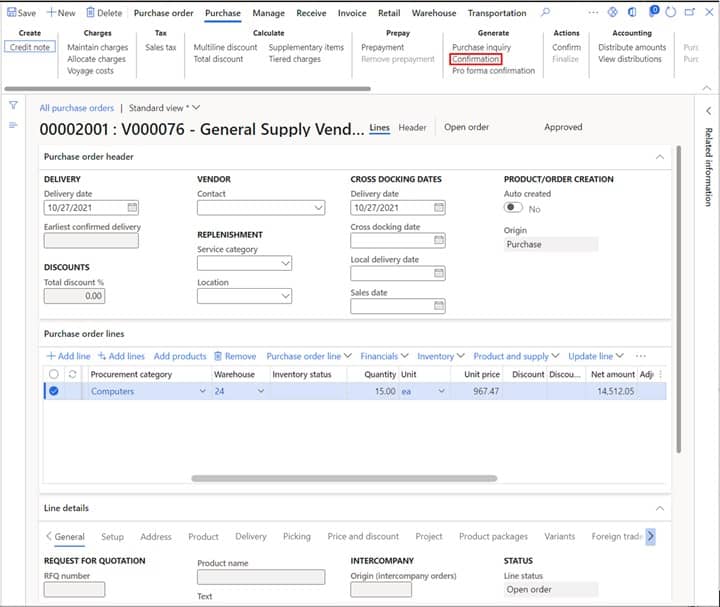
Next you can print the purchase order and send it off to the vendor by clicking the “Confirmation” in the “Purchase” tab in the ribbon. Then make sure you click the “Print purchase order” flag on the popup window.
Procurement Category Posting
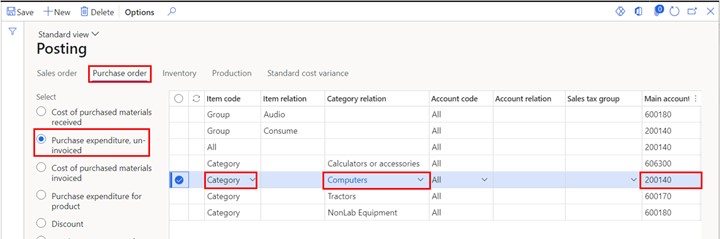
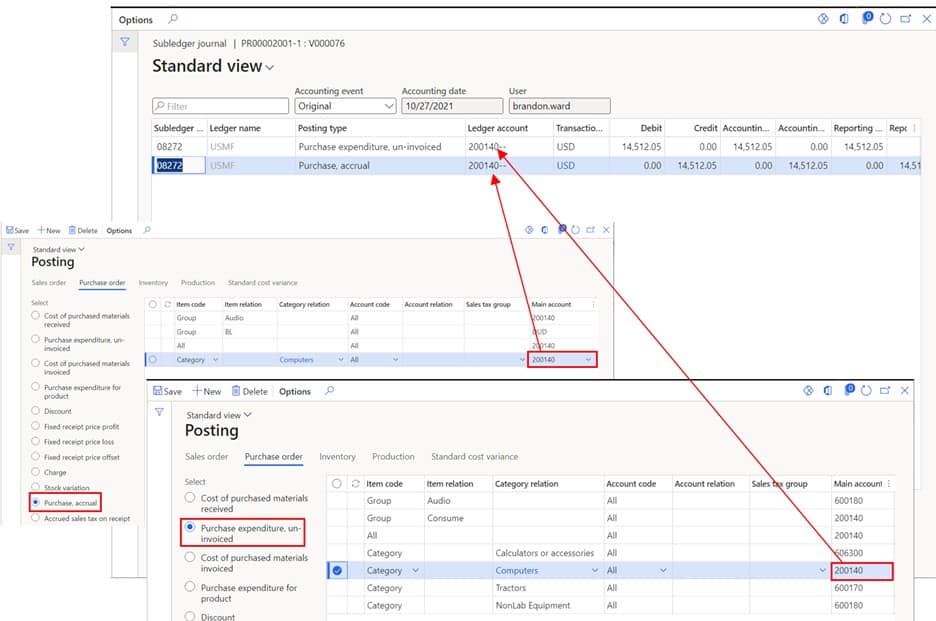
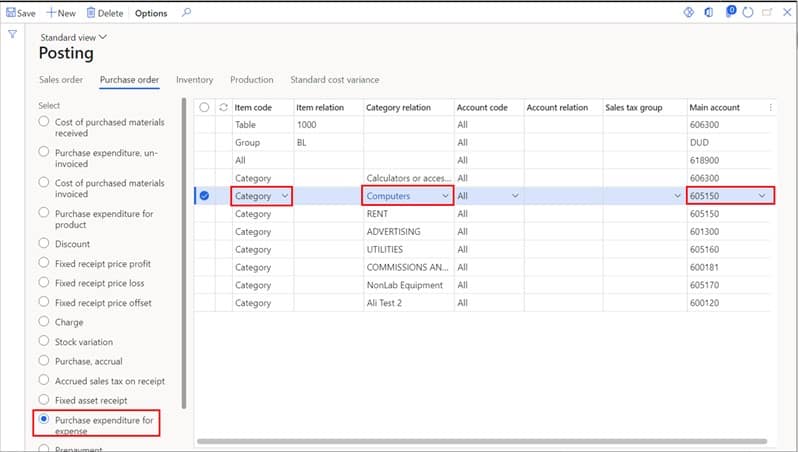
Now that we have a purchase order, how to we direct the procurement categories to post to the correct general ledger account when we receive and invoice the purchase order? We can do this by navigating to Inventory management > Posting > Posting.
Now click on the “Purchase order” tab. Click on the “Purchase expenditure, un-invoiced” radio dial. Next, we can specify down to the category where each category should post. To do this click the “New” button and change the “Item code” to “Category” and in the “Category relation” field select the category. Then in the “Main account” field you can select the main account where the debit should hit on purchase receipt.
In this example I am using the “Computers” category, so I am going to set this category to post to account “200140”.
Next click the on the “Purchase, accrual” radio dial and set up the purchase accrual the same way.
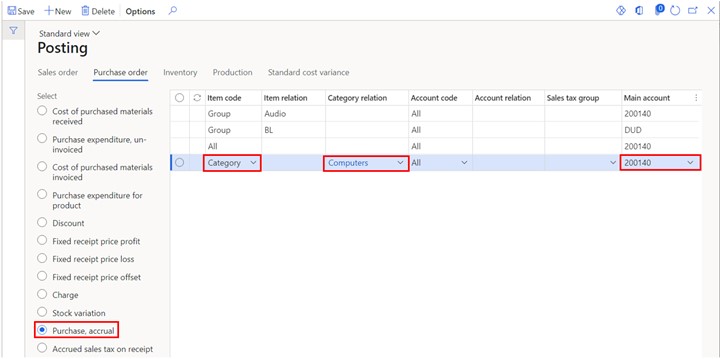
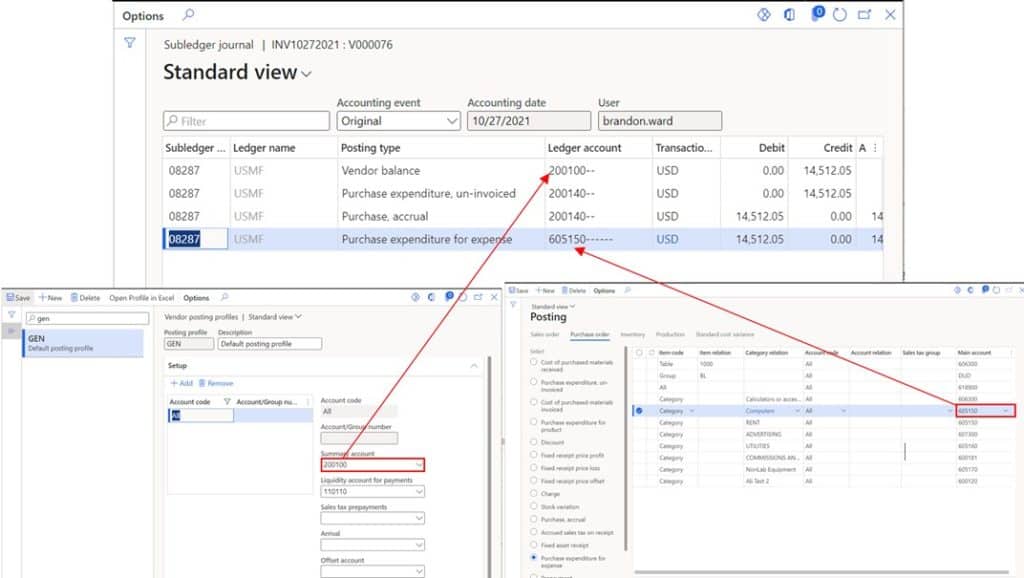
Once the purchase order is received you will get a debit posted to the “Purchase expenditure, un-invoiced” account and a credit posted to the “Purchase, accrual” account.
Next, we need to set the expense account that will be debited when the purchase order is invoiced. First click the “Purchase expenditure for expense” radio dial and add the posting record the same way as before. This time I will set the main account to the expense account “605150”.
Once the purchase order is invoiced, the purchase accrual is reversed and there is a credit to the accounts payable summary account based on the vendor posting profile and debit to “Purchase expenditure for expense” account we just set up.
Takeaways
Procurement categories can be very useful for procuring non-inventory expensed products and services as well as categorizing your inventoried products in a logical structured way for reporting and attribute assignment. I hope this post has shown you how procurement categories can be used in your implementation of D365.